


Hugh Wiedman
Without doing major surgery up front and moving the board to the front and moving the battery back you may have to add weight. If you go to rotometals.com they sell lead wire in about any diameter you want ie: 1/8 or 1/4. They sell it by the foot with no minimum. You could add this at the very end of the exhaust tube and never see it and get the biggest bang for your buck. Sucks having to add weight but you have to do what you have to do sometimes.
Good Luck!!
Anthony


 out there. I was concerned that I might be tail heavy after installing a twin afterburner, adding several coats of paint and urethane, adding the heavier 3D cockpit (although that's nose weight) and installing 10 pounds of graphics, but it seems that it is just the reverse. I put a Roaring Top 6250 ( which is actually 24g lighter than the Admiral 6000) and even with the battery all the way back hitting the circuit boards, it's still nose heavy! Makes no sense to me but it is. I tried to balanced it at the book 88 mm from the leading edge wing root and with the battery as far back as possible, it's at 83 mm. To get it to 88 mm, I'll need to add 3 ounces of lead to the tail, that's 12 1/4 ounce squares of lead, which is something I definitely do not want to do. I hate to add more weight to any plane as I think it's heavy enough with all the paint/graphics/AB/etc. And adding that much weight to the tail seems sacrilegious.


 I must say that this definitely was the most time consuming build/repaint I have ever done, took 3 weeks to do the cockpit and another 3 weeks to finish the plane. If I wasn't in lock-down, I'm not sure I would have had the patience to do it, but now that's it's done, I'm very happy with it. I calculated that in order to get as much flight time on it as I have in build time, I will need to accomplish 3,250 three minute flights.
  Definitely something to be said for unbox, assemble and immediately go fly. Thankfully I didn't live in Michigan
  or I would not been allowed to go to Home Depot and get the paint, Rustoleum Gloss Spray Strawberry Fields, almost a perfect match for Callie's graphics. Added a twin LED afterburner as well and a few other minor modifications. The last thing left is setting up the D/R and final balancing, which is usually no problem, but the cockpit ended up weighing 190 grams (vs the 53 grams of the plain stock cockpit) making it very nose heavy. I moved the "blue box" back as far as possible (so I could move the battery further back) and will be adding about 3 ounces of lead to the tail in the elevator servo bays (I'll post some photos when that's completed).
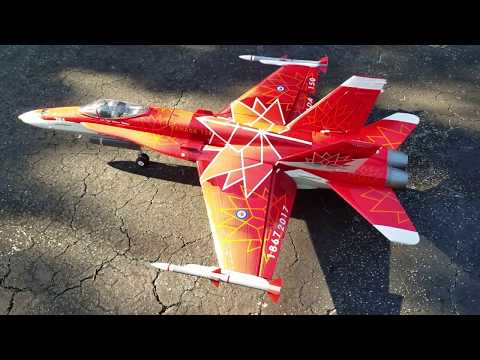


Comment