


Originally posted by janmb
View Post
-
The EF has a very light wing loading, which means it can cruise around happily at low throttle settings (at least, mine can). Not so with my Gripen. -
The Gripen is the most power hungry EDF I own both on 8S and 6S.
Weight is definitely part of it. Mine also seems to like to fly around with its nose in the air, except at high speed.Comment
-
It is.Originally posted by janmb View Post
Or, more precisely, the 80mm 8S Jetfan setup (9 blades) with 1865kv motor (installed in the Gripen) is more power-hungry than a 90mm 8S 5-6 blades EDF (either Wemo or RCLander) with a 1600kv HET motor installed in the Euro.
Certainly the JAS ducting is much less 'efficient' (very thin ducts) than that of the Euro, and 90mm EDFs in general work better than smaller diameters in my experience.
Of course, regardless of the ducts, we are comparing 1865kv on 9 blades vs 1600kv on 5-6 blades, so there's probably the big difference.
Still one would hope that a smaller-diameter EDF should compensate for lack of cross section with higher rpms and more or less maintain power but nope.
90mm works best, what can I say?
It'd be interesting to test a 6 blade rotor on the 1865kv motor, but not feeling like doing that ATM.
That contributes but I don't think that's quite it. The 're-maiden' flight where I crashed with the Jetfan installed was mostly cruising around on low throttle. It just draws a hell lot of amps even at mid power settings.Originally posted by kallend View Post
And the jet still takes a lot of time to accelerate compared to others, which again, I'd atribute to the ducting and to the fan being 80mm.Comment
-
Last edited by Mtpisgah99; Jan 31, 2021, 04:31 AM. Reason: https://www.youtube.com/watch?v=zsSB42_56NYComment
-
While probably technically true, I'm not sure it is all that relevant. At least not in the case of Jandro and myself. We both fly the EF in a fairly power demanding way.Originally posted by kallend View PostFreewing A-10 turbine conversion: http://fb.me/FreewingA10TurbineConversionComment
-
Looking forward to see how that particular aspect turns out in my turbine setupOriginally posted by Airguardian View Post
Freewing A-10 turbine conversion: http://fb.me/FreewingA10TurbineConversionComment
-
-
It's amazing how long a cockpit can take with all the fiddly details- lots of compromises with scale too but here it is. It was hard to find good photos of the rear deck equipment so it's very much an approximation but I guess the main aim is to maker it believable.
The pilot is a JHH 1/10 figure (not sure if they're still in business) and the canopy frame was made with "lightweight foam clay" from Michaels. Weight gain over stock is 35 grams- not so bad but of course this jet doesn't need more weight in the nose.
Just a couple of rear view mirrors to add and I'll call it done and glue the canopy back on.
TomAttached FilesComment
-
-
Well finally had a to hot landing, don’t know why I didn’t go around, but I didn’t. Well it bent the strut like others so I need to pull her out and bend it back. I’ll most likely order a spare.
GravyComment
-
You should be much better served with a kero engine in there :)Originally posted by janmb View PostComment
-
I should not of doubted Motion RC Europe. I was a bit concerned with ordering from Europe ( I live in the UK) with all this Brexit crap. Order the Gripen on Thursday and Motion RC did not let me down. It arrived to day. ( Monday 4 days) No proplem 👍Comment
-
At least from medium speed upward. From slow flight, not so much. Static thrust at slow relative airspeed is pretty trash to be honest. On the upside, the relative thrust stays impressive as speed increases, whereas an EDF goes down the drain pretty fast.Originally posted by Airguardian View PostFreewing A-10 turbine conversion: http://fb.me/FreewingA10TurbineConversionComment
-
One for " EVAN D " or anyone else that can advise me on these settings .Just want to make sure I have set up my Gripen right before I fly it .I have decided to use the canards only on pitch not on roll ,I have the elevator set at 17mm ,21mm,and 25 mm .To get the canards right at for pitch 20 mm low 25 mm mid and 30 mm high .that makes the canards on pitch 74% on the mix .Is that right or should I have the canards at 100% on the mix like Motion RC recommend Bit confusing ?????Comment
-
Sounds close to what I have. I have two canard rates for pitch, 60 and 70%. I fly more, and like the feel of, the 60% more but I also fly full time with TVs.Comment
-
Thanks EVAN D .you have help me out a lot .Never flown a model with canards before .Now all I need is for this lockdown restriction to be lifted so we can go flying again and I can maiden her
Thanks againComment
-
It’s a special plane...Comment
-
Did anyone have to put lead in the tail of the Gripin to get the right c of g or is it just me. I am using the Admiral Pro 6s 4000 battery?Comment
-
Just about everyone has had to add lead to the tail. Doesn't matter from 4000's on up, all require lead to get a good CG, even one on the marks in most cases.Originally posted by Captain Moron View PostComment
-
Yep. Really thinking Freewing should have installed ther EDF further aft to begin with. The amount of nose heaviness of the stock jet is quite ridiculous.Comment
-
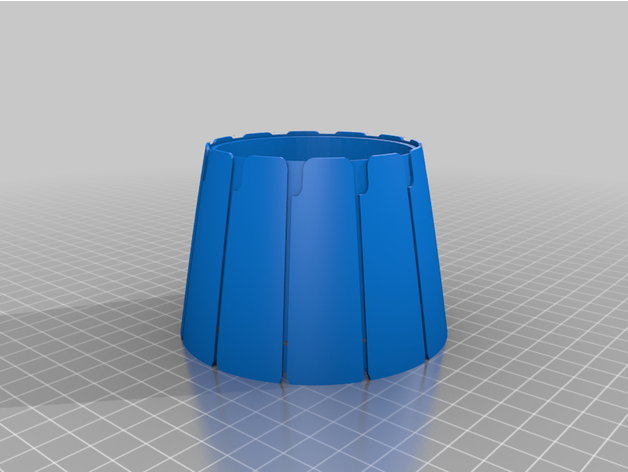
My 3D printed heavy nozzle can help with the CG. The one I posted can add up to an additional 60 to 120g of weight back there.Originally posted by Captain Moron View Post
(This has been discussed extensively in this thread - see https://www.hobbysquawk.com/forum/rc...348#post285348 ).Comment


Comment