.png)


Originally posted by sailing1
View Post
-
Yes the UBEC power lead is marked throttle as well. I am using a Spektrum AR636 and am plugging the UBEC in the first (bind) port., you could also add a “Y” connector and double up at another port as well. -
Mine arrived today. Everything looked good in box, but when I just opened the bag containing the starboard wing, it was severely gatored.
Comment
-
Thanks James, that explains it very well. Above is a question about the throttle setup and BEC connection that may need your special picture tutorial also.
Mine is getting a repaint to Desert Storm VMO2 so ill get pics posted once done. Doing my own vinyl also.
Comment
-
That NM sun is really brutal to affect it while still in the boxOriginally posted by Gilatrout View Post . Hope MRC can do you right with another wing maybe.
Comment
-
Yes it can be, but I met the driver and it went immediately into garage. It was never in the sun.Originally posted by sam51401 View Post
If you look closely you can see that the part only gatored were the packaging support wasn't protecting the part.
No other parts were gatored.Comment
-
I want this bird so bad! Just started flying RC planes after flying helos for a few years and love it so much more so far. This will be my "big" plane purchase soon.Comment
-
Well, the throttle is pre y'd on the center wing since it comes from both ESC's in the booms. So that y is what plugs into the throttle port. Then the ubec lead is attached to the ubec, so that is what will give you receiver power and should be plugged into any open port on the receiver.Originally posted by sam51401 View Post
So I have 1 of the Broncos bound to a 6 channel stability plus gyro, where the bind port can also serve as a 7th channel after binding. So to bind it I didn't plug in flaps, plugged the ubec into the aux1 channel with the bind plug in the bind/aux 2 channel. Once bound, unplug and swap the ubec lead into the bind/aux 2 port and put your flaps back into aux 1.
So looking at the spare parts, the lead coming from this ubec should NOT go into your throttle port.
Comment
-
Someone at the factory should tell that worker to NOT put a "throttle" label on that lead. It only serves to confound those who don't know what to do with a lead that emanates from a UBEC. I've see posts from lots of people who ask, "What do I do with this?"Originally posted by Mr D View Post
WOW! If that can happen under the factory ceiling lights before the box is closed, imagine what the whole plane will look like after only a few flights in the sun.Originally posted by Gilatrout View PostComment
-
Anyone know which Blue Box port the 2 wire light connector from the center wing harness should be plugged into?
Comment
-
Most Freewing planes come with an insert inside the manual. Didn't you get one? The legend tells you what each set of pins do. Your blue box should look like the one in this post:Originally posted by Dkurtzid View Post

On that box, there are only 8 sets of pins that are "2 pins". Those are for the lights, which are almost always 2 pins. Each set of pins does something different with the light that's plugged into it. Take your pick of what you want yours to do.Comment
-
Success! First two flights in the book. All expectations met. Thanks to all the advice. No surprises, but do reverse the elevator mix on flaps to Nose down.Comment
-
Well, I am waiting for my batteries so that I can balance my OV-10. The only issues I had were with electronics connections and placement of my Eagle A3S3 gyro and receiver. I know that many would look on disdain with my using a gyro but I find the gyro helps make my flying more enjoyable and less stressful. For the gyro I first checked to see that the "platform" below the opening for the main center wing wires and cables was reasonably level with the battery platform. I placed small levels on the battery platform and the platform and leveled it. I then coated a 1/4 inch piece of balsa wood with tongue oil. After it dried, I glued it onto the platform under the center wing for my gyro. I can tell you it was a chore to get all of the wires, the gyro, and the receiver into that small space. I hope that James also completes a video for the wiring of the "blue box." The instructions were not clear as to which light input to use for the light wire coming from the main center wing section and there were several choices to choose from. It was also not clear that the elevator was to be connected directly to the receiver or in my case, the rudder output on my gyro instead of the "blue box." And, finally, I wasn't sure if the ribbon cables were supposed to go into specific slots on the "blue box." Fortunately, MotionRC technical support was able to clearly guide me through the electrical connections. I can hardly wait for my batteries to arrive so I can take this plane out.Comment
-
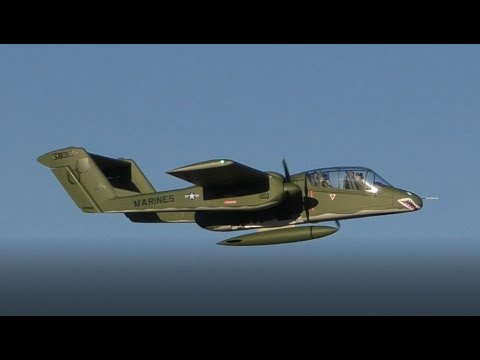
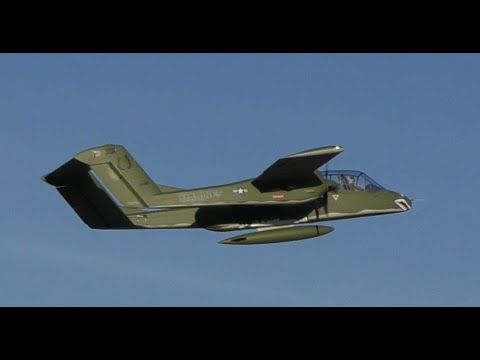
Received the OV-10 yesterday, and just got back from test flying, did three long flights total. I have to say that the plane went together quickly and was very well made, and looked great when finished. The wiring was somewhat confusing, but no big deal. They need to label the one wire throttle and the other power, instead of two throttle. And mention unplugging the .third wire on flaps and using the three way harness. Also mention that the elevator plugs directly into rx. There is really no need for a delay on retracts since no gear doors, so I'm probably going to plug the gear directly into rx also, again, no big deal. I did have a problem with one of the prop spinners breaking at the screw hold down before flying, so flew it with just the one spinner. I'm hoping Motion will help me out on this if I ask nicely.
I used two 3700mah 45C 4S which fit in easily, I have them moved most of the way forward which seemed to work out well. Take off and flying was easy enough, did not need a lot of trim. I'll have to go back and look at my tx, but I believe it was setup with 100% aileron, 85% elevator and rudder with 15% expo for initial flights. I did mix in 15% rudder with ailerons to get a little better roll rate. Also 10% down elevator with flaps. Plane is not overpowered by any means, but does fine on 3/4 to full throttle. Setup is obviously very efficient, and I believe you could easily get 10 to 15 minute flights.
I is really fun doing touch and goes with about 45 degrees of flaps, no bad habits of any kind that I could find. All in all, a very good looking plane, flys very solid. I had to laugh, barely got it in my SUV in one piece, but could not get it out without removing one wing, which is very easy by the way. Will wring it out more tomorrow and report back.
Attached FilesRon - AMA 1025Comment
-
-
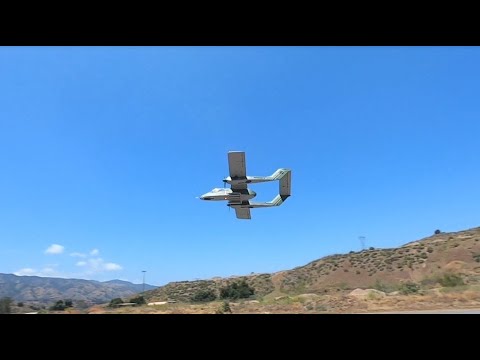
Maidened the OV-10A Bronco this morning. A few things. I didnt remove the paint before gluing on the rocket sponsons so they fell off taking it out of the car. The flap elevator mix in the book is backwards. On the 2nd flight, I reversed it and had a beautiful scale takeoff and landing. Very nice flying plane!!
Comment
-
Coming in hot!
Comment
-
Papa here.....first the instruction manual is a little lacking. Please watch the assembly video that Motion has on their sight. The problems, the manual says nothing about when or how to attach all leads to the blue box. Second, is the flap Y- harness provided, Again Motion has provided instructions on how to install. That common sense thing, did not help me. I must be dump as a stump. Whoever wrote this manual sucks! Sorry Motion, but the Boozers always say we will tell the true. Manual need to be re-written or addendum page added to solve both problems of assembly of this plane. Also, take the throttle sticker of the BEC power lead. Great plane, only took five hours to complete. I am give out!Comment
-
Maidened the Bronco this morning without the rocket sponsons. I forgot to remove the paint before I glued. This is the 2nd flight. Ill post the maiden next.
Comment
-
Here's the maiden. The manual is backwards on flap elevator mix..fixed it for that 2nd flight.Comment
-
-
Paging Mr Grossman, paging Mr Grossman............Originally posted by Papa Boozer/Dots View Post
Team Gross!Comment


Comment