You must Sign-in or Register to post messages in the Hobby Squawk community
Registration is FREE and only takes a few moments

Register now

Announcement

Collapse
No announcement yet.

Official FlightLine RC 1600mm Spitfire Mk. IX Thread

Collapse
X
Collapse
First Prev Next Last
 
  • Filter
  • Time
  • Show
Clear All
new posts

  • Just to clarify, when the plane is on the bench, I can fire it up and slowly draw the elevator stick back, it will raise the elevator to a point and stop even though I'm still easing the stick back, then, all of a sudden, it will input all of the change in angle that it should have been increasing incrementally, all at once. Even when mixing the elevator with the flap, it will stop even though I continue to add deflection in 1% increments then it will add everything that it should have been adding, all at once.

    Grossman56
    Team Gross!

    Comment


    • sounds like you have a bad pot. the dielectric has come off or is just thin enough to not change the resistance in one section. in the old days we would clean it with a q-tip and alcohol then relegate it to throttle or non flite controls. now a days I file them in the circular file.

      Joe
      Platt: fw190d9 Dynaflite:PT-19 IMP:Macchi202 ESM:fw190 ESM:Tank, Hien Jackson:DH-2 BH:macchi200 Extr:fw190 Holman:me109F H9spit2 FL:F4u,spit 9 FW:me262 GP:us60, Stuka, cub, F4u PZ:me109, albi EF Hurri, T-28 FMS: 2x fw190, me109 Lone Star:Skat Kat RSCombat:2xfw190d9

      Comment


      • To Bogietrim:
        Thank You!!
        Turned the gyro off and it took off as it should. Handled better on the ground too. Very small rudder adjustments while rolling out. My only wish is to have recovery but without gyro, unfortunately that's not an option on the Admiral RX600SP. Once again, thank you very much. BTW, this is the second model I bought, the first was so heavily damaged I had to buy a new one (at $380. USD) it was getting expensive.

        Comment


        • Originally posted by Seal View Post
          To Bogietrim:
          Thank You!!
          Turned the gyro off and it took off as it should. Handled better on the ground too. Very small rudder adjustments while rolling out. My only wish is to have recovery but without gyro, unfortunately that's not an option on the Admiral RX600SP. Once again, thank you very much. BTW, this is the second model I bought, the first was so heavily damaged I had to buy a new one (at $380. USD) it was getting expensive.
          Sounds like maybe the gyro is reversed on one or some of your controls. There are several videos out there to help you confirm correct deflection. Turn the gyro back on and turn the gains all the way up. Tilt the plane to confirm correct control displacement. Once you have taken care of that, turn the gains all the way down and fly it that way and still have recovery. Double check with an expert on this theory, but I am fairly certain this will work as you want.

          Comment


          • To Bogietrim: Regarding my Gyro issue: I bench tested with gains all turned down and tried the recovery button. What I found is the input signal to the control surfaces goes through the gain controls when pressing the recovery button. The deflection of the control surfaces in recovery is directly controlled by gain. You can over ride recovery with direct stick inputs from the transmitter, so I will have to fly without gyro or recovery so as not to crash again on take off. My only other is to turn down aileron gain to zero but keep elevator and rudder at about 1/2 gain. I would then level the fuselage during recovery but have to adjust aileron with transmitter stick.

            I don't know if that is helping or adding confusion to recovery. Since I'm on my 2nd airplane, and it's a little beat up I'm afraid to try the last option mentioned. I have been looking for a receiver that will let me have no gyro and only recovery with no gain but I don't think one is made that way. However, I believe taking off with no gyro for the 1600 MM Spitfire is sound advice. I wish the flight review/build videos on YouTube would cover programming the transmitter/receiver in greater detail.

            Comment


            • Originally posted by Seal View Post
              1600 MM Spitfire with Admiral RX600SP set on combo "A" which is Gyro on all the time and recovery is controlled by the Bind Button switch "I" on my Srektrum 8E radio. I have an admiral 6000 battery installed. Question: When I try to take off, (low rate, 1/2 + throttle) the plane ascends about 5 feet and immediately dives hard left crashing upside down. It's not stalling, but the crash looks like a classic stall. Also, elevator is neutral until tail wheel comes up, then I apply up elevator at the low rate as mentioned. This was the fourth attempt at taking off with the same result. Any ideas as to why??? It appears immediately after take off I would have to add hard right aileron and that don't seem right. Watched many take off on YouTube and didn't see anything like that.
              I do not have the gyro in my Spitfire. But I had it going in my F35 at about 35% rate and in "mode C" with the switch to turn it on or off. I would recommend you check it again with someone experienced or watch the video on setup. I will attach my photos showing my RX setup
              Rich
              Click image for larger version

Name:	IMG_4206.jpg
Views:	947
Size:	69.9 KB
ID:	260041Click image for larger version

Name:	IMG_4208.jpg
Views:	919
Size:	63.9 KB
ID:	260042Click image for larger version

Name:	IMG_4209.jpg
Views:	944
Size:	76.1 KB
ID:	260043

              Comment


              • Originally posted by Seal View Post
                To Bogietrim: Regarding my Gyro issue: I bench tested with gains all turned down and tried the recovery button. What I found is the input signal to the control surfaces goes through the gain controls when pressing the recovery button. The deflection of the control surfaces in recovery is directly controlled by gain. You can over ride recovery with direct stick inputs from the transmitter, so I will have to fly without gyro or recovery so as not to crash again on take off. My only other is to turn down aileron gain to zero but keep elevator and rudder at about 1/2 gain. I would then level the fuselage during recovery but have to adjust aileron with transmitter stick.

                I don't know if that is helping or adding confusion to recovery. Since I'm on my 2nd airplane, and it's a little beat up I'm afraid to try the last option mentioned. I have been looking for a receiver that will let me have no gyro and only recovery with no gain but I don't think one is made that way. However, I believe taking off with no gyro for the 1600 MM Spitfire is sound advice. I wish the flight review/build videos on YouTube would cover programming the transmitter/receiver in greater detail.
                Have you verified the gyro direction is correct on all surfaces is correct?

                Comment


                • This Spitfire is definitely one of my favorite flying warbirds in the fleet, however, with that said, I always hated putting the wings together and taking them off and apart at the field. Virtually every one of my planes/jets I keep the wings apart and in wing bags, not only for storage in the hangar (gives me more room to buy more planes) but to fit in the truck because I usually take at least 4-5 "victims" out each time I go to the field.

                  With the Spitfire, instead of having the typical connector wires from the wings like the Corsair, B-24 and others, it has that stupid little blue control box, sitting between the wing split halves, and then individual servo wires you need to plug into one side of the wing controls and then the connections coming out of the blue box to plug into the 3 control surfaces (Ail/Flap/Gear/lights) leads coming from the fuselage. Plugging 1/2 the wires into that box to assemble and then plugging more servo connections leading into the fuselage every time I put it together (or took it apart) really started to get on my nerves. And with that constant plugging in and unplugging, it put undue stress on the connectors that undoubtedly would eventually lead to a bad connection.

                  So I ditched the blue box and got some 5 pin locking polarized connectors from Hansen Hobby and rewired the whole mess. Now I have one easy to plug/unplug connection that locks in place when I put the wing together and then only 1 connection of the same when I put the wing on the fuselage. Takes seconds to plug or unplug it with locking, good connections that don't get stressed out. It's now a breeze assembling/disassembling the Spitfire at the field and whenever I take out the prop warbirds, there's no question that this comes along. I did the same connections on my Stinger 90 that had 6 connections to make each time and reduced it to 2 easy to plug and unplug connections with these 5 pin connectors. If anyone else out there gets annoyed with the stock connections, give these connectors a try, you'll love it. It does take a bit of finesse making these connections, but it is absolutely worth it, IMO. I also just installed a .60 thick styrene plate separating the rudder/elevator servos from the mess of wires going into them when installing the wing and it worked out great. I also have the Mr.RC Sound card inside the fuselage on top of those wires so it was getting to be quite the "birds nest". Comes out easily if I need to replace a servo, but with the holes you can still adjust the linkage on either if you need to without removing it. One last thing, if you do rewire this and remove the blue box, don't forget that that blue box also must have in it a voltage reducer for the wing lights, cause if you wire the lights up direct to power off the receiver, burnt out LED's. I installed a light controller on the inside of the fuselage for the top beacon light and the wing lights.

                  Whenever anyone asked my what my best flying WWII prop warbird was, I always used to say the Spitfire, but what a pain to assemble at the field, so get the Corsair. Not anymore!

                  Click image for larger version

Name:	20200620_185415.jpg
Views:	996
Size:	156.2 KB
ID:	260828Click image for larger version

Name:	20200620_185545.jpg
Views:	907
Size:	145.1 KB
ID:	260829Click image for larger version

Name:	20200620_185241.jpg
Views:	913
Size:	134.2 KB
ID:	260830
                  Hugh "Wildman" Wiedman
                  Hangar: FL/FW: Mig 29 "Cobra", A-10 Arctic, F18 Canadian & Tiger Meet, F16 Wild Weasel, F4 Phantom & Blue Angel, 1600 Corsair & Spitfire, Olive B-24, Stinger 90, Red Avanti. Extreme Flight-FW-190 Red Tulip, Slick 60, 60" Extra 300 V2, 62" MXS Heavy Metal, MXS Green, & Demonstrator. FMS-1700mm P-51, Red Bull Corsair. E-Flite-70mm twin SU-30, Beast Bi-Plane 60", P2 Bi-Plane, P-51.

                  Comment


                  • Hugh Wiedman I have been looking to add this Spit to my hangar for some time now. I have heard mixed things in regards to the blue boxes. I am definitely curious how you did this setup. This may be a stupid question but with those 5 pin connectors, how did you then wire those connections back to the receiver? The receiver uses different connectors. I cannot tell by the pictures and I am trying to imagine how this would work for me as well. Anyways, great idea! That looks awesome. I am glad that it worked out for you.
                    Happy flying!

                    Comment


                    • Originally posted by Cchrissyv1 View Post
                      Hugh Wiedman I have been looking to add this Spit to my hangar for some time now. I have heard mixed things in regards to the blue boxes. I am definitely curious how you did this setup. This may be a stupid question but with those 5 pin connectors, how did you then wire those connections back to the receiver? The receiver uses different connectors. I cannot tell by the pictures and I am trying to imagine how this would work for me as well. Anyways, great idea! That looks awesome. I am glad that it worked out for you.
                      I just cut off the ends of the original servo connectors after coming off the receiver (so the female ends that go into the receiver are still there and the same). Then I only use 1 of the black and one of the red (from the 3 servo wires, use any one, just so a ground and power get the the wing servos) and the one "signal yellow" wire from each port output (ail/flap/gear). So in essence, you can take one 3 wire lead, say from the aileron, that has ground, power and aileron signal, cut the end off and that's 3 of your 5 pins. Then for the gear and flap, all you need is the yellow signal wire for each. Now your half way there (if I remember, I used the male end (with the sleeve that sort of looks like a "female" connector on that end). Now coming from the wings and bypassing the blue box, cut off the connector end and wire together all 3 black ground, then all 3 red power (that's 2 pins) and then one each of the yellow signal wires for the last 3 pins. This way, all servos get their unique signal plus power plus ground. On one of the wings, you'll need to also do sort of a y-connector, with a black wire soldered to the 3 blacks, a red wire soldered to the 3 power and 1 each for the signal, then leading to a 5 pin connector that plugs into and "piggy backs" the ground/power/signal wires going to the 1st wing. Just make sure to mark consistently what pin # is for what lead, as all 5 have to match up from each wing into the corresponding wires going to the receiver and you don't want to mix up the specific signal wires or especially pin a power wire to a ground wire (unless you like total meltdowns). Now, when you assemble the wing, next thing is to connect each wings wires to each other through that "y-connector" set up, then install the assembled wing and plug in the wires from the wing assembly to the wires leading to the receiver.

                      In the photo above, the wing on the right has that y-connector. The leads with the blue zip tie connects to the other wing on the left and the connector with the pink zip tie connects with 5 pin connector (in the far right picture with a pink zip tie) that leads directly to the receiver. I used different colored zip ties so it was "connect by color for dummies".

                      You'll still need to have either the blue box or a light controller (which I used) for the wing lights and top beacon light which does go through the existing blue box for proper voltage. I first hooked up mine directly to power coming off the receiver, and promptly burned out the beacon light and one wing light (but man, it was sure bright as hell for a few seconds).

                      I particularly like these polarized (whatever the heck that means) locking pins. They slide in easy and smooth (no wrenching servo connectors out like original equipment) and there is a small locking latch that pops in and secures it in place. To detach, just press the pin in and comes apart easy peazy. If you buy the same 5 pin connectors, get the gold pins plus plenty extra pins and housings along with their special crimping tool. Took me a few to practice with to get them right, but if crimped correctly, the pin slides in the housing nicely and locks in place. No soldering needed for making the actual connectors, only have to solder the 3 power and 3 ground wires together to a new wire that will at the other end have a pin crimped to it. I covered all connections of wires with individual and collective heat shrink, which is why it looks so bulky there, I'm sure you can do better, just didn't want any bare wire (especially power) coming in contact with any other bare wire solder point.

                      Hope this makes some sense, after reading it over I'm even confused, but don't have the brain power to say it concisely, sorry.
                      Hugh "Wildman" Wiedman
                      Hangar: FL/FW: Mig 29 "Cobra", A-10 Arctic, F18 Canadian & Tiger Meet, F16 Wild Weasel, F4 Phantom & Blue Angel, 1600 Corsair & Spitfire, Olive B-24, Stinger 90, Red Avanti. Extreme Flight-FW-190 Red Tulip, Slick 60, 60" Extra 300 V2, 62" MXS Heavy Metal, MXS Green, & Demonstrator. FMS-1700mm P-51, Red Bull Corsair. E-Flite-70mm twin SU-30, Beast Bi-Plane 60", P2 Bi-Plane, P-51.

                      Comment


                      • Hugh Wiedman no problem, my friend. Once I have it in my hands I am sure it will all come together easier. I honestly appreciate the time and effort you took to explain. I am a dummy sometimes so I don't understand something until I can actually see it. I will definitely keep this in my back pocket for when I eventually get this Spitfire (hopefully it is still available by the time I am able to make the purchase). Thanks again.

                        Cheers! 🍻
                        Happy flying!

                        Comment


                        • When I taxied out on my first flight today the steering was all over the place. When I landed I found the square end where it fits into the control arm broken. It's out of stock and wonder if anyone, maybe from a crash, has an extra.

                          Click image for larger version

Name:	flightline-1600mm-spitfire-tail-landing-gear-set-motion-rc-28774137881_1024x1024.jpg
Views:	848
Size:	82.4 KB
ID:	262784

                          Comment


                          • Originally posted by Cchrissyv1 View Post
                            Hugh Wiedman I have been looking to add this Spit to my hangar for some time now. I have heard mixed things in regards to the blue boxes. I am definitely curious how you did this setup. This may be a stupid question but with those 5 pin connectors, how did you then wire those connections back to the receiver? The receiver uses different connectors. I cannot tell by the pictures and I am trying to imagine how this would work for me as well. Anyways, great idea! That looks awesome. I am glad that it worked out for you.
                            The blue box has 3 normal connectors coming out of it that plug into your receiver's Aileron, Flap, and LG channels. The custom multi-pin plugs go between the wing and the blue box - you don't need to supply anything there. For what it's worth, I have a lot of Flightline and other models with a central connector box like this. I always use the connector box, and I have never had a problem. But I have had plain old Y cables stop working on 3 occasions. A signal wire became disconnected, presumably at the joint. So based on this (small) sample size, I never replace the box with Y cables. It is definitely messier, and I have no evidence that it is more reliable (and have some evidence that it is less reliable).

                            I guess it highly depends on the Y-cable, though. There are several ways of connecting two cables in a Y, and some of them are downright scary, such as "insulation displacement socket". At least with the blue box I know who made it, and I would guess they have better QA practices than a nameless faceless Y-cable vendor who has no brand and lives only by minimizing cost.

                            Comment


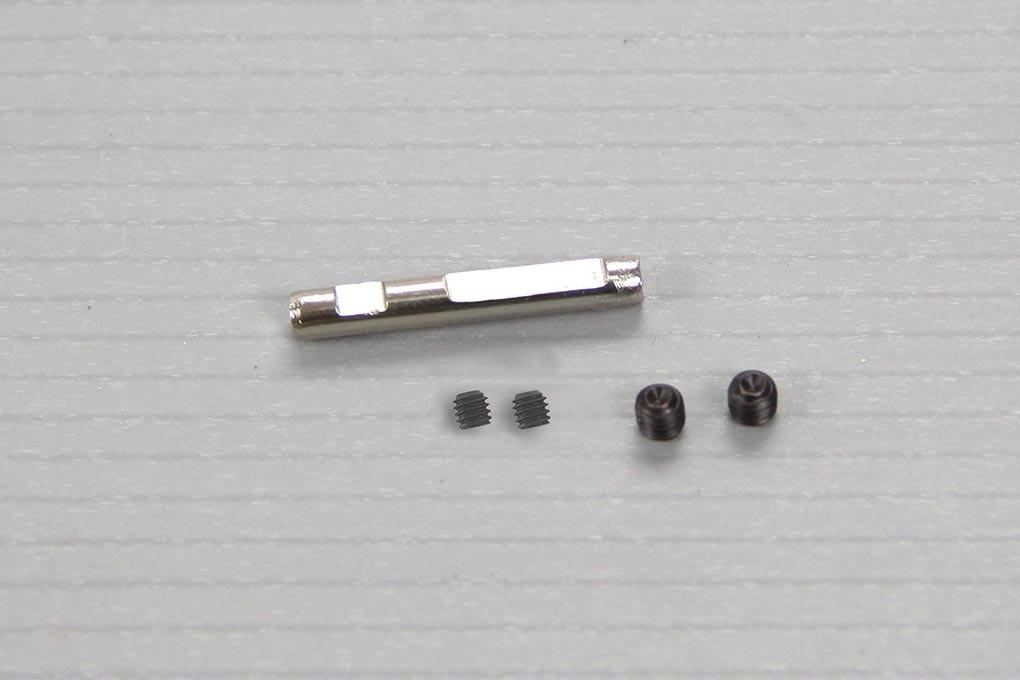
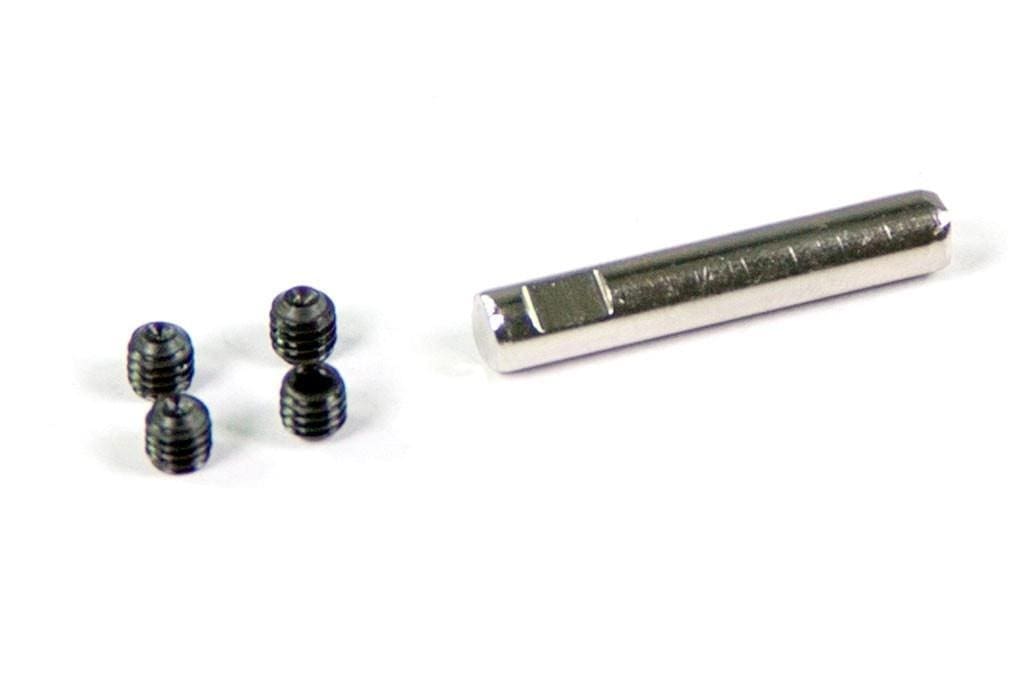
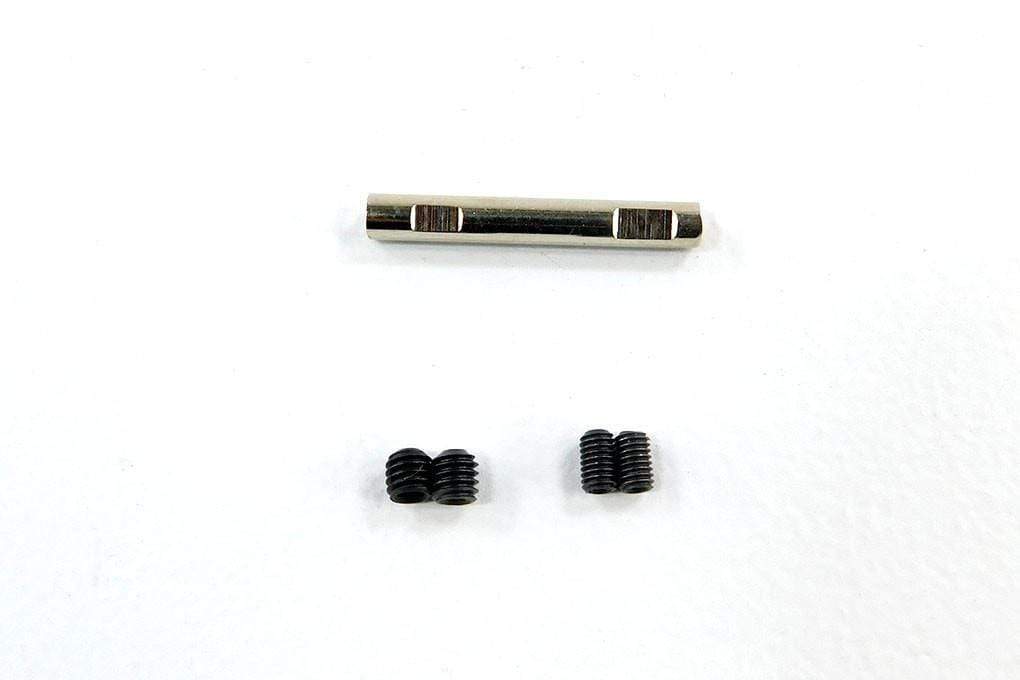
                            • hi
                              does anyone know where to buy the alloy pin that holds the retract leg to the main body mine snapped on landing 4.1 mm x 13mm

                              Comment


                              • I did a search on 4.1mm...

                                https://www.motionrc.com/products/fr...connecting-pin

                                Comment


                                • Originally posted by vinnie View Post
                                  hi
                                  does anyone know where to buy the alloy pin that holds the retract leg to the main body mine snapped on landing 4.1 mm x 13mm
                                  vinnie Hello Vinnie, your measure is not correct for the pin diameter, it is a 5.1mm pin used on the Spitty
                                  Here are three options that should get ya back in the game
                                  Freewing 80mm F-14 Main Landing Gear Connecting Pin - FJ308110813 Also used for the Freewing 2023 version 90mm Eurofighter.

                                  80/90mm EDF Main Landing Gear Connecting Pin from Freewing - FJ31111088 Fits the following aircraft: FlightLine F7F Tigercat (Fits the upgrade struts FLW30210882 and FLW30210883) Freewing 70mm AL37 Airliner Freewing F/A-18C Hornet 90mm Freewing F-22 Raptor 90mm Freewing A-10 80mm

                                  Freewing 90mm T-45 V2 Main Landing Gear Connecting Pin - FJ307110816U Note: Designed for planes purchased in or after September 2019.


                                  Best regards,
                                  Warbird Charlie
                                  HSD Skyraider FlightLine OV-10 FMS 1400: P-40B, P-51, F4U, F6F, T-28, P-40E, Pitts, 1700 F4U & F7F, FOX glider Freewing A-6, T-33, P-51 Dynam ME-262, Waco TF Giant P-47; ESM F7F-3 LX PBJ-1 EFL CZ T-28, C-150, 1500 P-51 & FW-190

                                  Comment


                                  • Hi guys, im happy to say that I'm joing the 1.6m Spitfite club.

                                    Been a funny route for me, I initially ordered the 1.2m to scratch the itch, but decided I'd made the wrong decission before the 1.2m even arrived. So thats on the way back and the 1.6m is winging its way to me now.

                                    I have an eflite 1.5m P51, so looking forward to see how these two compare.

                                    I have 140 pages to catch up on but I intend on using an AR636 and Turnigy 5k pack.

                                    Really looking forward to the build and suspect she will be very different to my normal EDF's.

                                    Comment


                                    • Welcome!

                                      Comment


                                      • my son says i'm wishy washy too. well maybe I am and maybe i'm not.

                                        welcome

                                        good work Charlie!

                                        Joe
                                        Platt: fw190d9 Dynaflite:PT-19 IMP:Macchi202 ESM:fw190 ESM:Tank, Hien Jackson:DH-2 BH:macchi200 Extr:fw190 Holman:me109F H9spit2 FL:F4u,spit 9 FW:me262 GP:us60, Stuka, cub, F4u PZ:me109, albi EF Hurri, T-28 FMS: 2x fw190, me109 Lone Star:Skat Kat RSCombat:2xfw190d9

                                        Comment


                                        • Originally posted by Evan D View Post
                                          When I taxied out on my first flight today the steering was all over the place. When I landed I found the square end where it fits into the control arm broken. It's out of stock and wonder if anyone, maybe from a crash, has an extra.

                                          Click image for larger version

Name:	flightline-1600mm-spitfire-tail-landing-gear-set-motion-rc-28774137881_1024x1024.jpg
Views:	848
Size:	82.4 KB
ID:	262784
                                          check pm...

                                          Comment

                                          Working...
                                          X