P-38 - The Ultimate EPO Lightning

You must Sign-in or Register to post messages in the Hobby Squawk community
Registration is FREE and only takes a few moments

Register now

Announcement

Collapse
No announcement yet.

New to the forum with a UH1-D 800 series

Collapse
X
Collapse
First Prev Next Last
 
  • Filter
  • Time
  • Show
Clear All
new posts

  • #61
    Ahhh okay...
    Yes I flipped my tail over as well.

    Comment


    • #62
      Small changes of the week:

      Manufacture of a support for the controller's fan with a 3D printer.

      Click image for larger version  Name:	IMG_5890_01.JPG Views:	0 Size:	85.8 KB ID:	346672

      Click image for larger version

Name:	IMG_5892_01.JPG
Views:	300
Size:	57.6 KB
ID:	346674

      Securing the 2 torque tube, the tips being just glued, I drilled and screwed them.

      Click image for larger version  Name:	IMG_5894_01.JPG Views:	0 Size:	319.9 KB ID:	346673

      Comment


      • #63
        Hi,

        This week:
        Modification of the fuselage of the UH-1D

        Replacement of the upper glazing (completely false) Vario 250/33, fiberglass, epoxy resin and polyester putty to plug the holes.
        Cliquez sur l'image pour la voir en taille réelle   Nom : 		IMG_5902_01.JPG  Affichages :	0  Taille :		98,4 Ko  ID : 			347247

        Modification of the landing gear (step, tips). Addition of ventilation intakes and upper position lights.
        Cliquez sur l'image pour la voir en taille réelle   Nom : 		IMG_5899_01.JPG  Affichages :	0  Taille :		144,9 Ko  ID : 			347248

        Replacement of the upper Beacon.
        Cliquez sur l'image pour la voir en taille réelle   Nom : 		IMG_5901_01.JPG  Affichages :	0  Taille :		133,6 Ko  ID : 			347249

        Relocation of the rear navigation lights.
        Cliquez sur l'image pour la voir en taille réelle   Nom : 		IMG_5900_01.JPG  Affichages :	0  Taille :		142,6 Ko  ID : 			347250

        To be continued.....

        Comment


        • #64
          First coats of paint RAL 6003 Mat
          The paint is not yet dry (that's why it shines)

          Click image for larger version

Name:	IMG_5905_01.JPG
Views:	284
Size:	75.1 KB
ID:	347316

          Click image for larger version

Name:	IMG_5903_01.JPG
Views:	277
Size:	174.2 KB
ID:	347317

          Feel free to correct me if you don't understand my English, I wouldn't be offended

          Comment


          • #65
            Hi,

            Installation of accessories: antennas, air intake, cable cutters, hinges, etc...
            2nd coat of paint.
            We can see on the rocket launcher pods the difference in color: On the left the RAL 6003, on the right the green Roban...

            Click image for larger version

Name:	IMG_5907_01.JPG
Views:	292
Size:	125.3 KB
ID:	347464

            Click image for larger version

Name:	IMG_5908_01.JPG
Views:	280
Size:	124.6 KB
ID:	347465

            To be continued.....

            Comment


            • #66
              Looks great!
              You are pretty much doing the same thing I'm doing! I am making all the same changes... I like that fan mount! Do you mind sharing the 3D file?
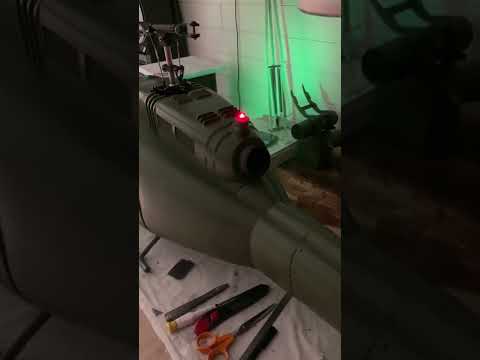
              I'm not going to mount the rocket pods... as I'm going with a 'slick' version...

              Comment


              • #67
                Hi sfcfury,
                I'm not going to mount the rocket pods too, i'm waiting for choosing.
                I send you the stl file by email.

                Comment


                • #68
                  Installation of upper glazing, drilling and installation of rivets.
                  Masking of glazing before painting.

                  Click image for larger version

Name:	IMG_5910 - copie.jpg
Views:	281
Size:	82.7 KB
ID:	347533

                  Comment


                  • #69
                    The painting is almost finished, (except the windshield which is very ugly and that I will redo) before the last finishes I mounted the mechanics to make a test flight.
                    Click image for larger version

Name:	IMG_5915_01.JPG
Views:	298
Size:	118.1 KB
ID:	347668

                    Click image for larger version

Name:	IMG_5916_01.JPG
Views:	275
Size:	124.1 KB
ID:	347669

                    Click image for larger version

Name:	IMG_5919_01.JPG
Views:	275
Size:	68.2 KB
ID:	347670

                    I also replaced the Roban light module with an Aurora Optotronix module that allows more functions.
                    https://www.hacker-motor-shop.com/Lighting/Optotronix/Optotronix-Aurora-LCU-EVO2.htm?shop=hacker_e&SessionId=&a=article&ProdNr =OPT2000&p=10169

                    Comment


                    • #70
                      Looks fantastic man! I'm using the unilight control module myself...

                      Comment


                      • #71
                        Unilight here also......

                        Comment


                        • #72
                          OK, your Unilight module has almost the same functions as my Aurora

                          Comment


                          • #73
                            Some photos of the Huey progress.
                            Painting of the rotor head in grey.
                            Painting the tail blades.
                            Installation of some decals, but their quality is so bad that I will make redo others.

                            Click image for larger version  Name:	IMG_5924_01.JPG Views:	0 Size:	158.2 KB ID:	347821

                            Click image for larger version  Name:	IMG_5925_01.JPG Views:	0 Size:	310.5 KB ID:	347822

                            Click image for larger version  Name:	IMG_5926_01.JPG Views:	0 Size:	254.0 KB ID:	347823

                            Click image for larger version  Name:	IMG_5928_01.JPG Views:	0 Size:	256.4 KB ID:	347824

                            Click image for larger version  Name:	IMG_5930_01.JPG Views:	0 Size:	200.6 KB ID:	347825

                            Click image for larger version  Name:	IMG_5933_01.JPG Views:	0 Size:	164.8 KB ID:	347826

                            To be continued.....

                            Comment


                            • #74
                              Originally posted by Astronome View Post
                              Some photos of the Huey progress.
                              Painting of the rotor head in grey.
                              Painting the tail blades.
                              Installation of some decals, but their quality is so bad that I will make redo others.

                              Click image for larger version Name:	IMG_5924_01.JPG Views:	0 Size:	158.2 KB ID:	347821

                              Click image for larger version Name:	IMG_5925_01.JPG Views:	0 Size:	310.5 KB ID:	347822

                              Click image for larger version Name:	IMG_5926_01.JPG Views:	0 Size:	254.0 KB ID:	347823

                              Click image for larger version Name:	IMG_5928_01.JPG Views:	0 Size:	256.4 KB ID:	347824

                              Click image for larger version Name:	IMG_5930_01.JPG Views:	0 Size:	200.6 KB ID:	347825

                              Click image for larger version Name:	IMG_5933_01.JPG Views:	0 Size:	164.8 KB ID:	347826

                              To be continued.....

                              That baby is looking great, also the Roban decals are junk as you said, anyone know a trick to applying the stock Roban decals??, maybe we are doing something wrong, every time I have tried, they just fall apart on me.

                              Comment


                              • #75
                                Hello DCORSAIR, thank you.

                                It's not the installation of the decals that is the problem (I let them soak in a bowl of warm water, then slide them in place.)
                                But the backing of the decals is "pink" and the white, for example, is therefore pink when dry.
                                Another thing: on a mat paint the support is shiny.
                                I have to find the German specialist who had made me "tailor-made" decals (I don't know if my translation is correct) for my Cobra.

                                Yesterday, I remanufactured a 0.5mm thick PETG windshield, i used Roban's as a template.
                                It took me 2 tries to get there.

                                Click image for larger version  Name:	IMG_5935.JPG Views:	0 Size:	102.5 KB ID:	347937

                                Click image for larger version  Name:	IMG_5936.JPG Views:	0 Size:	89.4 KB ID:	347938

                                Comment


                                • #76
                                  Hello ,

                                  News from my UH-1D.....
                                  I finished the replacement of the windshield with the installation of the wipers, the side protections with brass wire and various small things.
                                  I made the pitot tube.

                                  Click image for larger version  Name:	IMG_5937_01.JPG Views:	0 Size:	69.7 KB ID:	349978

                                  Click image for larger version  Name:	IMG_5963.JPG Views:	0 Size:	97.0 KB ID:	349979

                                  Click image for larger version  Name:	IMG_5966.JPG Views:	0 Size:	72.8 KB ID:	349981

                                  I also 3D printed the landing gear fittings
                                  Click image for larger version  Name:	IMG_5965.JPG Views:	0 Size:	128.0 KB ID:	349980

                                  I received the pilot and copilot from WarbirdPilots , but they are "a little" large...
                                  Click image for larger version  Name:	IMG_6003.JPG Views:	0 Size:	79.0 KB ID:	349982
                                  Click image for larger version  Name:	IMG_6001.JPG Views:	0 Size:	82.0 KB ID:	349983

                                  To be continued.....

                                  Comment


                                  • #77
                                    Hello,

                                    Preparation for the first flight early this morning before the heat.
                                    nothing to say: no vibrations, very quiet.
                                    more than 7 minutes of autonomy.
                                    Unfortunately I was alone at the club, so no video.

                                    Click image for larger version  Name:	IMG_6009_01.JPG Views:	0 Size:	279.8 KB ID:	350483

                                    Click image for larger version  Name:	IMG_6010_01.JPG Views:	0 Size:	285.8 KB ID:	350481

                                    Click image for larger version  Name:	IMG_6011_01.JPG Views:	0 Size:	221.6 KB ID:	350482

                                    Comment


                                    • #78
                                      Looks great!!

                                      Comment


                                      • #79
                                        Thank's sfcfury

                                        A little additional information:
                                        I found a decal manufacturer who already has a lot of versions in their catalog of the Bell UH-1 at different scales.


                                        Comment


                                        • #80
                                          Hello,

                                          Small return on the electronic part and equipment.
                                          After a lot of research I ended up with this:

                                          Hacker A50-12L Turnado V4 450 kV long shaft motor
                                          Controller Jeti Master Mezon 130A Bec
                                          1 Jeti box essential to correctly configure the controller
                                          Flybarless module Bavarian Demon 3X
                                          3 Savöx SA-1256TG 20Kg.cm/6v at cyclic
                                          1 Savöx SC-1258TG 12kg-0.08s at AC
                                          Graupner GR24 Hott Receiver
                                          Optotronix Aurora LCU EVO2 Lighting Module
                                          1 Nimh 5S 3000mAh battery to power the controller's lighting and fan (controlled by a PicoSwitch)
                                          2 x 6S 5200mAh 45C batteries for propulsion.

                                          I return a little more in detail on the controller and the JetiBox:
                                          It's the easiest controller I've had to program, number of motor poles, rotor speed, reduction ratio, brake, etc.... and live measurements.
                                          Click image for larger version  Name:	IMG_5771_01.JPG Views:	0 Size:	143.2 KB ID:	350522

                                          Click image for larger version  Name:	IMG_5774_01 2.JPG Views:	0 Size:	141.0 KB ID:	350523

                                          Click image for larger version  Name:	IMG_5775_01.JPG Views:	0 Size:	143.9 KB ID:	350524

                                          Click image for larger version  Name:	IMG_5772_01.JPG Views:	0 Size:	141.0 KB ID:	350525

                                          Click image for larger version  Name:	IMG_5777_01 2.JPG Views:	0 Size:	141.9 KB ID:	350526

                                          A very practical thing is to have access to the last recorded flight parameters (the photos show a test in the workshop without the blades).
                                          Click image for larger version  Name:	IMG_6020_01.JPG Views:	0 Size:	200.0 KB ID:	350527


                                          - maximum current reached for propulsion (56A during my last flight)
                                          Click image for larger version  Name:	IMG_6012_01.JPG Views:	0 Size:	147.4 KB ID:	350528

                                          - minimum battery voltage
                                          Click image for larger version  Name:	IMG_6016_01.JPG Views:	0 Size:	143.6 KB ID:	350529

                                          - controller temperature
                                          Click image for larger version  Name:	IMG_6013_01.JPG Views:	0 Size:	145.3 KB ID:	350530

                                          - max rotor rpm (1320 rpm during my last flight)
                                          Click image for larger version  Name:	IMG_6015_01.JPG Views:	0 Size:	138.9 KB ID:	350531

                                          - max current delivered by the BEC (6A during my last flight)
                                          Click image for larger version  Name:	IMG_6014_01.JPG Views:	0 Size:	142.2 KB ID:	350532

                                          - battery capacity used
                                          Click image for larger version  Name:	IMG_6017_01.JPG Views:	0 Size:	145.1 KB ID:	350533

                                          - and various programmable alarms....
                                          Click image for larger version  Name:	IMG_6019_01.JPG Views:	0 Size:	152.4 KB ID:	350534

                                          Click image for larger version  Name:	IMG_6018_01.JPG Views:	0 Size:	147.1 KB ID:	350535

                                          My only regret is not to report this info via Hott telemetry (and yes I'm in Graupner / JR) 😪

                                          Comment

                                          Working...
                                          X