Callie Graphics

You must Sign-in or Register to post messages in the Hobby Squawk community
Registration is FREE and only takes a few moments

Register now

Announcement

Collapse
No announcement yet.

Official Black Horse DHC-2 Turbo Beaver 2250mm ARF Build Thread

Collapse
X
Collapse
First Prev Next Last
 
  • Filter
  • Time
  • Show
Clear All
new posts

  • Official Black Horse DHC-2 Turbo Beaver 2250mm ARF Build Thread

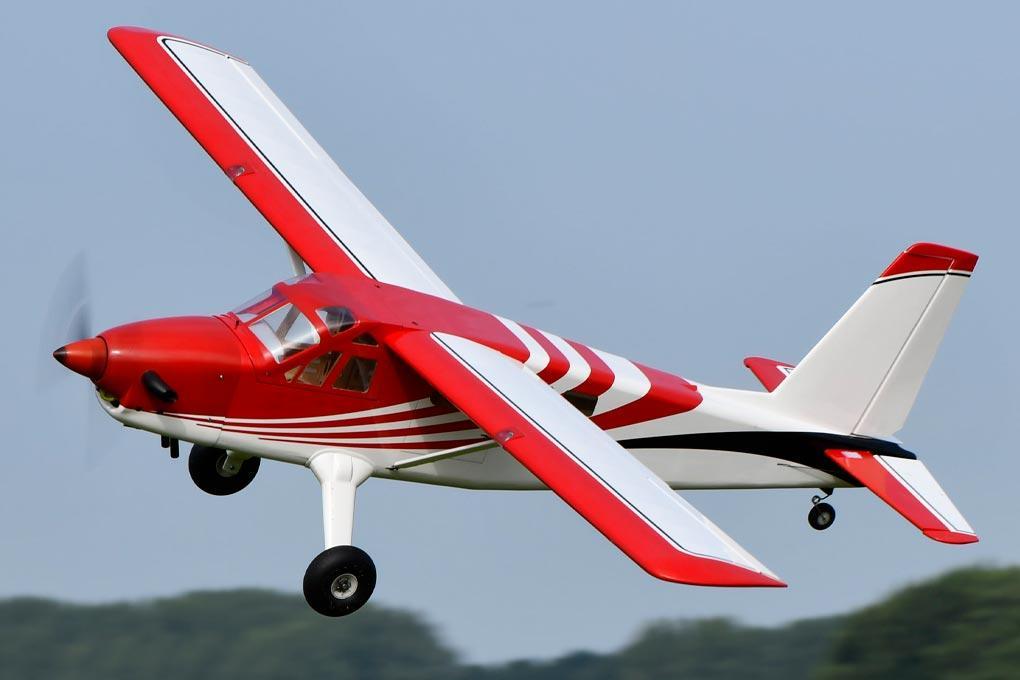
    DHC-2 Turbo Beaver 2250mm (88.5") Wingspan from Black Horse - ARF - BHBV000

    Available for sale on MotionRC.com

    The DHC Beaver was introduced in 1947 by DeHavilland as a single engine, high wing monoplane featuring stresses skin, monocoque construction. By the end of production in 1967, some 1600 aircraft had been produced. The late version presented here is a DHC 2T Turbo Beaver and is a development of the original piston-powered plane. The Beaver has gained a well-deserved reputation as the "workhorse of the north".

    The model is scaled to approximately 1:6.7 and attention was paid to a true-to-original appearance and best flight characteristics. The model can be operated using an electric power system or with an internal combustion engine about 20-35cc displacement.
    Features:

    • High level of prefabrication right out of the box
    • Lightweight and strong, laser cut balsa and plywood construction
    • Finished in high quality Oracover covering
    • Aerofoil section tail surfaces
    • Large, scale, pre-hinged fuel tank/battery/servo access hatches with sprung loaded latches
    • Painted and detailed cockpit, pilot and interior included
    • Fiberglass control horns with ball link connector
    • Pull-Pull control system on the rudder for precision control and authority
    • comprehensive control and fitting accessories included
    • Two-part bolt on wing for ease of transport, assembly and storage
    • Fiberglass cowl and landing gear covers
    • Mounts for both electric and gas power options included
    • Fully illustrated instruction manual included and also available for download (see tab above)
    Includes:

    • Black Horse DHC-2 Turbo Beaver 2250mm (88.5") Wingspan - ARF
    Requires (Electric):

    Requires (Gas):

    • Engine: 20 - 35cc 2 or 4-stroke. GT25 2-stroke/ GF-30 4-stroke recommended
    • Gas Propeller: 18x8-20x10


    Click image for larger version  Name:	black-horse-dhc-2-turbo-beaver-2250mm-88-5-wingspan-arf-motion-rc-7109941690481_1024x1024.jpg Views:	6 Size:	76.1 KB ID:	194376
    Click image for larger version  Name:	black-horse-dhc-2-turbo-beaver-2250mm-88-5-wingspan-arf-motion-rc-7109941854321_1024x1024.jpg Views:	5 Size:	108.3 KB ID:	194377
    Click image for larger version  Name:	black-horse-dhc-2-turbo-beaver-2250mm-88-5-wingspan-arf-motion-rc-7109941985393_1024x1024.jpg Views:	5 Size:	71.8 KB ID:	194378
    Click image for larger version  Name:	black-horse-dhc-2-turbo-beaver-2250mm-88-5-wingspan-arf-motion-rc-7109942313073_1024x1024.jpg Views:	5 Size:	78.1 KB ID:	194379
    Click image for larger version  Name:	black-horse-dhc-2-turbo-beaver-2250mm-88-5-wingspan-arf-motion-rc-7109942116465_1024x1024.jpg Views:	5 Size:	93.0 KB ID:	194380

  • #2
    Fans of balsa, welcome to our VERY FIRST official Blackhorse and balsa model build thread for MotionRC. In this thread I'll be building out the newly arrived Black Horse DHC-2 Turbo Beaver 2250mm (88.5") Wingspan - ARF as part of a full build and flight review that will follow asap.

    I'll come back soon and update this post with details on this model and how this thread (and others) are intended to progress and of course with media in support of the ongoing build. Until then, just one shot for now of the workbench with this beautiful model laid out and just screaming to be assembled. Oh, and this will be a gas powered build, more to come....

    Stuart.

    Click image for larger version  Name:	blackhorse Tubro Beaver.png Views:	0 Size:	1.63 MB ID:	194384

    Comment


    • #3
      "Because I was inverted"
      Live Q&A every Tuesday and Friday at 9pm EST on my Twitch Livestream

      Live chat with me and other RC Nuts on my Discord

      Camp my Instagram @Alpha.Makes

      Comment


      • #4
        Ok so lets start this build thread proper...... Now, it should be noted that I will be building this model completely by the book and this model will be gas powered using the NGH 25cc 2-stroke (link below). However, if any of you intend to build this Turbo Beaver for electric, you are very welcome and encouraged to post your progress of your build and experience here too. This thread is a 'come one come' community experience and not reserved for any one build. So, please feel free to post away. That said a stand alone thread for electric only power would be helpful to the community and so also encouraged.

        Several things should strike you guys when you first get the box, its a big one and nice and thick too, with all the content well packed and secure. once you do get it out and unpacked you really do see the quality and craftsmanship that's gine into the build and just how complete it is. The ply and balsa wood is vvery clean and all laser cut, I found no twists or warps in any of the assemblies. The covering is very well applied, even on the curved surface of the rear fuselage, its flawless, as good if not better than I can achieve after 20 years of covering ;) Same goes for the pre-hinged and fully airfoiled stabs, very nice indeed and not something you always see, even on the most recent of ARF balsa models to hit the market. All cowls from BlackHorse are pre-painted and glass fiber, again flawless finish on the TB and perfect paint match to the covering too.

        You'll find an extensive compliment of control and mounting accessories included, all really very nice items. Ball link connectors, glass fiber control horns, hex bolts, nylock nuts, stand offs for electric motor, firewall for the mounting of either gas and electric power systems, substantial hardened aluminum wing joining spar plus lots more besides. I'll be sure to go over these all in more detail as the build progress is covered here in this thread. Then there is the small details and nice touches, pre-painted pilot seats included, along with a very snazzy pre-painted (and light weight) pilot. A very detailed and raised cockpit dash board, already pre-installed, they were evern so kind as to install string in the wing under the servo hatches to help pull through your servo wires etc. Small things, but nice touches. Plus the landing light covers are NOT glues down, so adding LED's easily is an option if you want it.

        Next, lets talk set-up....


        S.

        ​ Click image for larger version

Name:	Screenshot 2019-05-15 at 11.54.35.png
Views:	2635
Size:	1.45 MB
ID:	194399 ​

        ​ ​

        ​ ​

        ​ Click image for larger version

Name:	Screenshot 2019-05-15 at 14.23.14.png
Views:	2736
Size:	1.08 MB
ID:	194398

        Click image for larger version

Name:	IMG_8645.JPG
Views:	2604
Size:	85.4 KB
ID:	194400Click image for larger version

Name:	IMG_8643.JPG
Views:	2640
Size:	55.8 KB
ID:	194401

        Click image for larger version

Name:	IMG_8642.JPG
Views:	2493
Size:	92.3 KB
ID:	194402

        Comment


        • #5
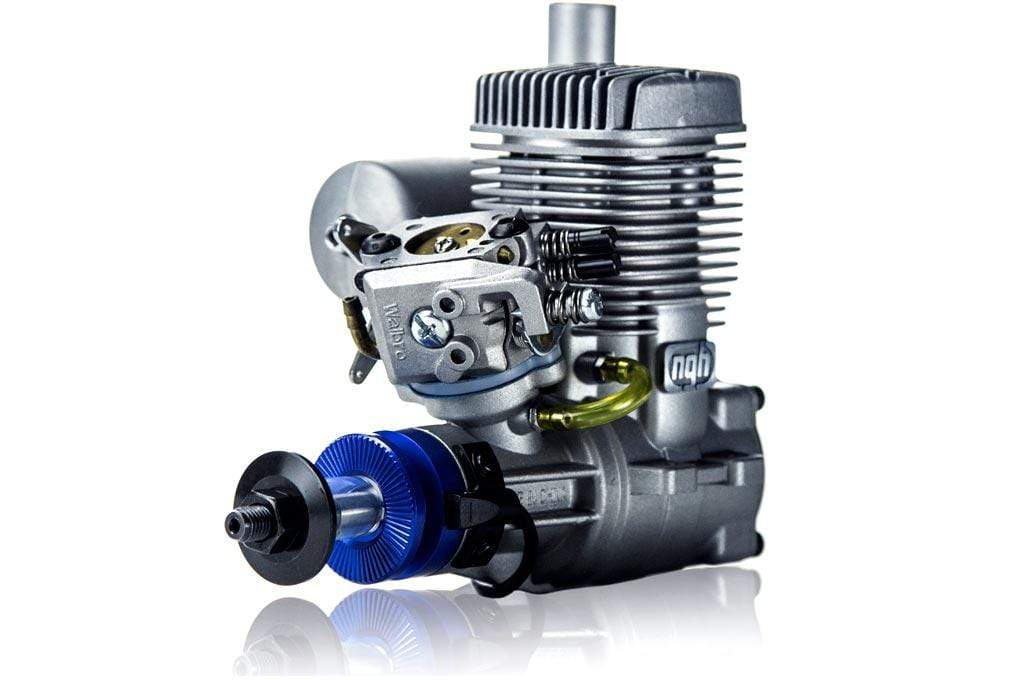
          Set-up for this build, now the TB is a BIG model (almost 90") but its also very light for its size (12bls RTF) so for electric, our new Admiral GP20 GP20 6320-295kV Brushless (coming soon) is the perfect motor on a simple 6S set-up. However my build out will be for gas power and for this I'll be using the NGH25cc 2-stroke which should provide ample power. Some trimming of the cowl will be required to get it to fit over the front mount carb, but other than that the install should be pretty straight forwards and there is even a nice little cut out for the CDI (ignition box) ahead of the firewall. As with any brand new engine, she'll need running in and I always prefer to do that on a test stand before installing in a model, and I'll touch on this in the thread when I come to it.

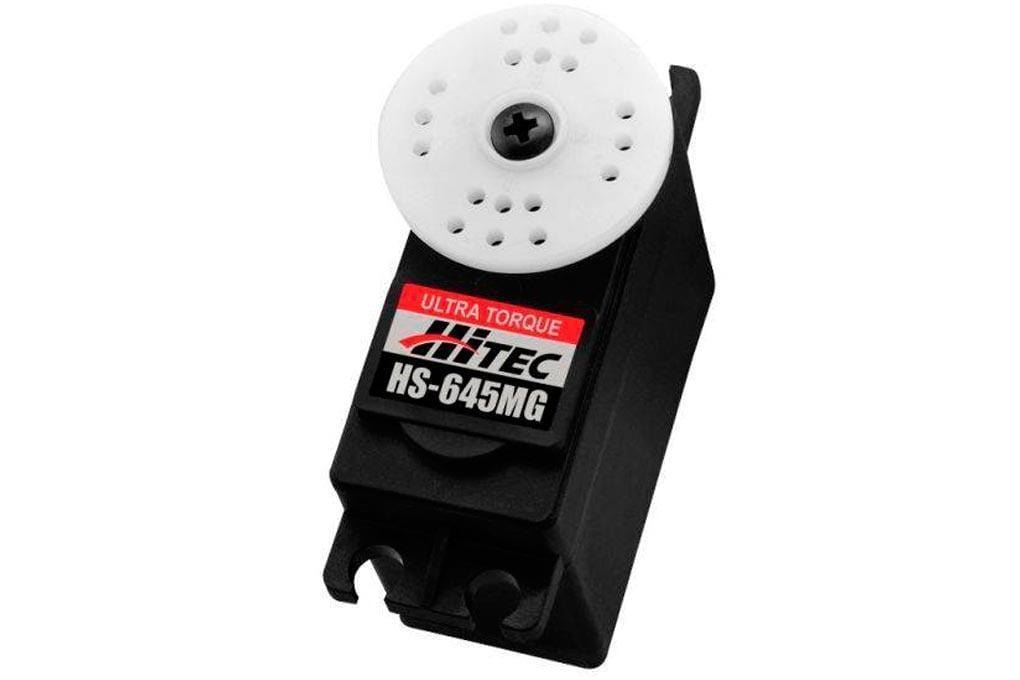
          For control I've opted for the Hitec 645MG servo's throughout (except for the throttle) and whilst they are not the fastest or most powerful standard size servo's out there, they are adequate for this model on 6V and will not break the bank. Some other smaller items will be needed like extensions, Rx switch, throttle kill switch etc, and again, I'll come onto those once I reach that stage of the build. You can find a full list of requirements on our site of course.

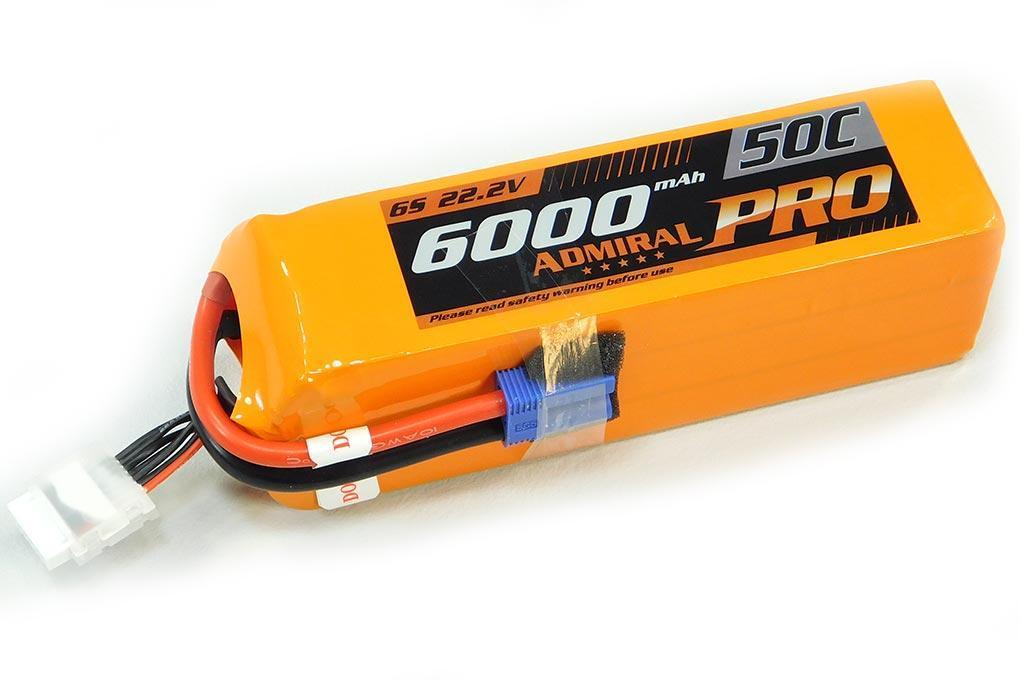
          One last side note for those going the electric route, the battery bay also doubles as the tank bay and it is HUGE! The picture below shows our biggest pack (6000mah 6S) dry installed, plenty of room to spare. Also its worth noting the top access hatch itself, again very big, making access and installations etc a breeze, espeically in combination with the side access doors (in scale location!).

          That's it for now, I hoping to get started proper on the build tomorrow and will post progress here as and when it happens. Until then, the BlackHorse announcement video below should give you a little more insight into this wonderful model, where you can see it laid out in the new studio/work shop here.

          Links to items described above and the model:

          DHC-2 Turbo Beaver 2250mm (88.5") Wingspan from Black Horse - Balsa Wood ARF - BHBV000 The DHC Beaver was introduced in 1947 by DeHavilland as a single engine, high wing monoplane featuring stresses skin, monocoque construction. By the end of production in 1967, some 1600 aircraft had been produced. The late version pr

          HS-645MG Ultra Torque Ball Bearing Metal Gear Standard Servo from Hitec - HRC32645S The powerful HS-645MG is one of Hitec’s most popular servos. It’s the perfect choice for those larger sport planes requiring a durable high torque servo. Featuring our unique M/P and metal gear train technology, the HS-645MG offers one

          GT25 25cc Two-Stroke Engine from NGH - NGH-GT25 Here at Motion RC we are pleased to present our customers with the NGH line of gas engines. NGH have become known for building quality gas engines that offer light weight, power and reliability at a very affordable price. They are manufactured and designed from scratch fo

          Admiral Pro Series 6000mAh 6S 50C LiPo Battery with EC5 Connector - EPR60006E Power you can trust! Admiral batteries are globally renowned for delivering superior power-to-weight ratio, reliable safety, and long lifespan. Produced in a world-class facility with an all-new formula that optimizes high performance across


          S.

          Click image for larger version

Name:	IMG_8635.JPG
Views:	2710
Size:	145.1 KB
ID:	194406Click image for larger version

Name:	IMG_8640.JPG
Views:	2558
Size:	84.3 KB
ID:	194407

          Click image for larger version

Name:	IMG_8636.JPG
Views:	2609
Size:	135.0 KB
ID:	194408Click image for larger version

Name:	IMG_8634.JPG
Views:	2574
Size:	138.4 KB
ID:	194409

          Click image for larger version

Name:	IMG_8637.JPG
Views:	2680
Size:	116.0 KB
ID:	194410

          Comment


          • #6
            So over the past few days I've been able to make a start on the assembly as part of the build review video and still continue to be impressed with the level of build and finish on this model. As much as possible I'm going to stick to the manual in the process, however if I feel there is a more practical sequence of assembly to that listing in the manual, I will steer off the path a little. First example of this, the very first job is the control surfaces on the wing. Manual calls out the process in this order 1) hinging the surfaces, 2) removing covering from hatches for servo horn access 3) installing servo's 4) gluing in surface control horns, 5) setting up control rods. In the grand scheme of things I felt it was best to hinge the surfaces later in the process, so I could better handle the surface when installing the horn and you can see from the attached sequence I followed. Doesn't make a real difference, just a personal preference, but it worked well for me.

            With all BH models all openings for servo horns, screw holes etc are covered, so you'll need to remove the covering to install these components. The manual suggests a good shape blade for this, and that works fine, however over the years I found a old soldering iron works even better as it melts the covering at the edge and therefore seals it. Its a neat trick that helps avoid covering lifting in these area's at a later date and is in fact quicker and cleaner than using a blade IMO, so you guys might want to give it a go.

            Servo's are installed next, and the HS 645MG's we recommended are a PERFECT fit as you can see. Nice to see the string laid out under the servo hatches too, its a real time saver using this string to pull servo/extension leads through the wing. The surface control horns a cut from glass fiber sheet and very light yet strong and epoxy into the pre-cut slots. These too align perfectly with the servo horn on every surface as does the push rods, BH do go the extra mile with these little details.

            For the hinging you should find that the supplied hinges are already pre-glued into the control surfaces, meaning you need only then install and glue into the wing T/E in the pre-cut slots. It is worth giving the pre-glued hinges a pull though to check they are firmly in place. I found one or two were not and had to re-glue them in. Also you'll want to run a parcel knife blade into the pre-cut slots on the T/E before hinging, this opens them out a little more making it easier to slot the hinges in and gives a little more room for the CA to wick into the hinge and slot. This extra room is invaluable as you have to be quick when working with thin CA! I like to get the hinges partly dry installed, then quickly run some CA on each hinge then even more quickly push the surface into place before the CA dries (as can be seen from the photo), but again, if doing this way, you will need to be quick. Otherwise just follow the manuals method of fully installing then running CA onto the hinge, it will work just fine, but I like my method for a little more piece of mind.

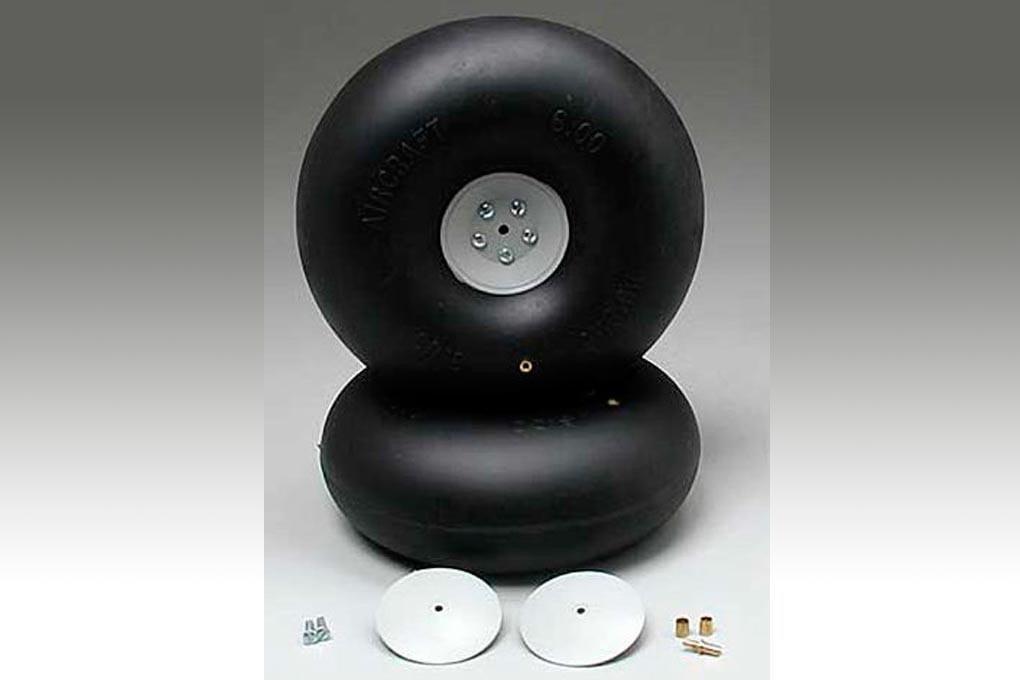
            Lastly I've been eyeing the Dubro 5" 'big wheels', as I'm a sucker for all things Tundra. I always liked the big bush wheels the full size on which this scheme is based uses, so I will look at upgrading to these wheels as I think they'll really set it off. They are heavier than the stock wheels, so I'll have to keep this in mind when checking/placing equipment for the CG. Link to the wheels below.

            Next up its onto the engine install and I plan to run it in on the bench first by giving it a few tanks on idle and taking it from there, then its back to the model assembly. So until then, please let us know if you have any questions.

            S.

            127mm (5") x 50mm Big Inflatable Rubber Wheels for 4mm Axle (2 Pack) from Du-Bro - 500RV Note: These wheels will not fit nor work for a beach cart or wheel chair. Features: Realistic Bolt-Together Hubs Smooth Inflatable Tires Positive Seal Air Valve Includes: Two Wheels Two Wheel Covers Two 5/32" Collars Two Wheel Cove


            Click image for larger version  Name:	IMG_8682.JPG Views:	0 Size:	155.7 KB ID:	195681Click image for larger version  Name:	IMG_8681.JPG Views:	0 Size:	145.4 KB ID:	195682

            Click image for larger version  Name:	IMG_8678.JPG Views:	0 Size:	24.7 KB ID:	195683Click image for larger version  Name:	IMG_8679.JPG Views:	0 Size:	50.1 KB ID:	195684Click image for larger version  Name:	IMG_8677.JPG Views:	0 Size:	36.8 KB ID:	195685

            Click image for larger version  Name:	IMG_8680.JPG Views:	0 Size:	54.7 KB ID:	195686Click image for larger version  Name:	IMG_8676.JPG Views:	0 Size:	62.3 KB ID:	195687Click image for larger version  Name:	IMG_8683.JPG Views:	0 Size:	113.7 KB ID:	195688Click image for larger version  Name:	bush beaver.jpg Views:	0 Size:	191.3 KB ID:	195689

            Comment


            • #7
              Some progress though not on the model itself. With the wings now hinged and servo's installed the manual calls out for the installation of your choice of power. This time round I've opted for the NGH 25cc 2-stroke. This is a lightweight airframe for its size so the 25cc should do nicely. However its perfectly possible with the parts supplied to later retro fit to electric which is in fact something I'm considering at a later date, just to give me the best possible impression of the model and to be able to share those experiences with those of you that might be interested.

              Back to the engine, as will all wet power systems its always good to run your engine in first on the bench. Today I get the NGH running for the first time and ran 3-4 tanks through her at various fixed throttle settings from idle to 3/4 throttle and a little bit of full power on the last tank of fuel. I'm running 1:25 oil/gas ratio in my fuel as recommended by NGH and with each tank she was starting with less and less throttle. On these first runs I recorded 2050rpm at idle and 8500 at full throttle and I expect to be able to achieve a steady 1850rpm once she's run in further. Pick up was good one I tuned the High and Low screw a little and generally very happy with these first runs. As per engine manual, I'm breaking her in on a 15x10 and later for flight I'll switch to a 16x8/16x10 and tune a little further.


              If you intend to use this engine you will need to purchase the NGH pitts style exhaust otherwise you'll be cutting some rather big holes in the cowl to make it fit with is not really desirable on a scale model. Pictures show the engine installed on my test rig and the pitts exhaust installed. In following posts I'll detail to some extent the install in the model and one or two small mods required to get this engine nicely at home in this airframe.

              S.

              Click image for larger version  Name:	NGH 25 1.png Views:	0 Size:	566.3 KB ID:	196643Click image for larger version  Name:	NGH 25 2.png Views:	0 Size:	576.8 KB ID:	196644Click image for larger version  Name:	NGH 25 3.png Views:	0 Size:	482.9 KB ID:	196645

              Comment


              • #8
                Good Morning. Has anyone tried sticking a Kingtech K45TP in this bird?

                Comment


                • #9
                  Did you ever finish this plane?

                  Comment


                  • #10
                    What prop did you use?

                    Comment


                    • #11
                      Originally posted by Spitfire4life View Post
                      So over the past few days I've been able to make a start on the assembly as part of the build review video and still continue to be impressed with the level of build and finish on this model. As much as possible I'm going to stick to the manual in the process, however if I feel there is a more practical sequence of assembly to that listing in the manual, I will steer off the path a little. First example of this, the very first job is the control surfaces on the wing. Manual calls out the process in this order 1) hinging the surfaces, 2) removing covering from hatches for servo horn access 3) installing servo's 4) gluing in surface control horns, 5) setting up control rods. In the grand scheme of things I felt it was best to hinge the surfaces later in the process, so I could better handle the surface when installing the horn and you can see from the attached sequence I followed. Doesn't make a real difference, just a personal preference, but it worked well for me.

                      With all BH models all openings for servo horns, screw holes etc are covered, so you'll need to remove the covering to install these components. The manual suggests a good shape blade for this, and that works fine, however over the years I found a old soldering iron works even better as it melts the covering at the edge and therefore seals it. Its a neat trick that helps avoid covering lifting in these area's at a later date and is in fact quicker and cleaner than using a blade IMO, so you guys might want to give it a go.

                      Servo's are installed next, and the HS 645MG's we recommended are a PERFECT fit as you can see. Nice to see the string laid out under the servo hatches too, its a real time saver using this string to pull servo/extension leads through the wing. The surface control horns a cut from glass fiber sheet and very light yet strong and epoxy into the pre-cut slots. These too align perfectly with the servo horn on every surface as does the push rods, BH do go the extra mile with these little details.

                      For the hinging you should find that the supplied hinges are already pre-glued into the control surfaces, meaning you need only then install and glue into the wing T/E in the pre-cut slots. It is worth giving the pre-glued hinges a pull though to check they are firmly in place. I found one or two were not and had to re-glue them in. Also you'll want to run a parcel knife blade into the pre-cut slots on the T/E before hinging, this opens them out a little more making it easier to slot the hinges in and gives a little more room for the CA to wick into the hinge and slot. This extra room is invaluable as you have to be quick when working with thin CA! I like to get the hinges partly dry installed, then quickly run some CA on each hinge then even more quickly push the surface into place before the CA dries (as can be seen from the photo), but again, if doing this way, you will need to be quick. Otherwise just follow the manuals method of fully installing then running CA onto the hinge, it will work just fine, but I like my method for a little more piece of mind.

                      Lastly I've been eyeing the Dubro 5" 'big wheels', as I'm a sucker for all things Tundra. I always liked the big bush wheels the full size on which this scheme is based uses, so I will look at upgrading to these wheels as I think they'll really set it off. They are heavier than the stock wheels, so I'll have to keep this in mind when checking/placing equipment for the CG. Link to the wheels below.

                      Next up its onto the engine install and I plan to run it in on the bench first by giving it a few tanks on idle and taking it from there, then its back to the model assembly. So until then, please let us know if you have any questions.

                      S.

                      127mm (5") x 50mm Big Inflatable Rubber Wheels for 4mm Axle (2 Pack) from Du-Bro - 500RV Note: These wheels will not fit nor work for a beach cart or wheel chair. Features: Realistic Bolt-Together Hubs Smooth Inflatable Tires Positive Seal Air Valve Includes: Two Wheels Two Wheel Covers Two 5/32" Collars Two Wheel Cove


                      Click image for larger version Name:	IMG_8682.JPG Views:	0 Size:	155.7 KB ID:	195681Click image for larger version Name:	IMG_8681.JPG Views:	0 Size:	145.4 KB ID:	195682

                      Click image for larger version Name:	IMG_8678.JPG Views:	0 Size:	24.7 KB ID:	195683Click image for larger version Name:	IMG_8679.JPG Views:	0 Size:	50.1 KB ID:	195684Click image for larger version Name:	IMG_8677.JPG Views:	0 Size:	36.8 KB ID:	195685

                      Click image for larger version Name:	IMG_8680.JPG Views:	0 Size:	54.7 KB ID:	195686Click image for larger version Name:	IMG_8676.JPG Views:	0 Size:	62.3 KB ID:	195687Click image for larger version Name:	IMG_8683.JPG Views:	0 Size:	113.7 KB ID:	195688Click image for larger version Name:	bush beaver.jpg Views:	0 Size:	191.3 KB ID:	195689

                      Comment


                      • #12
                        I really like that 3 blade prop, where can I get one?

                        Comment


                        • #13
                          HELLO?

                          What happened to the finish product? not a good sign at all

                          Comment


                          • #14
                            I have just competed one of these using,

                            Power 110 on 8s 4000mah Batteries
                            Hitec Servos
                            Hobbywing 100amp HV esc
                            Dubro 5inch Big Wheels

                            Had to move the battery placement to where the pilots sit and even then its a bit nose heavy :(
                            So will get around to making a Hatch under the tail to place some weight.​ ​

                            Its flies very well, using Flaperons it will fly quite slow .
                            Stalls are very gentle and no dropping of wing.


                            Comment


                            • #15
                              This plane caught my eye a few days ago as something to replace my great planes citabria 30cc. I was really bummed that great planes stopped making it cause ive had a few incidents that have me needing to retire the airframe. Im curious if the beaver will fly similar to the citabria. I like the semi sporty nature of being able to do hammer heads, knife edges and feeling light in the controls for loops and rolls. Would any of you think the beaver with a dle35 think that it could peform light airobatics or is it more of a lumbering type of plane that really doesnt like doing more than flying level? It weird how it has great reviews but almost nothing as far youtube or forums about its aerobatic capability.

                              Comment


                              • #16
                                Originally posted by Colorc View Post
                                This plane caught my eye a few days ago as something to replace my great planes citabria 30cc. I was really bummed that great planes stopped making it cause ive had a few incidents that have me needing to retire the airframe. Im curious if the beaver will fly similar to the citabria. I like the semi sporty nature of being able to do hammer heads, knife edges and feeling light in the controls for loops and rolls. Would any of you think the beaver with a dle35 think that it could peform light airobatics or is it more of a lumbering type of plane that really doesnt like doing more than flying level? It weird how it has great reviews but almost nothing as far youtube or forums about its aerobatic capability.
                                Have you looked at the extreme flight turbo Beaver? It is very aerobatic

                                Comment


                                • #17
                                  I dont think the extreme flight turbo bushmaster (beaver) is made for a gas engine. Im looking for something to put the dle35 into. A decathlon of citabria would be awesome, but there isnt anything exceot the beaver. I may be a little too impatient to wait for the black horse decathlon.

                                  Comment


                                  • #18
                                    .BLACKHORSE - TURBO BEAVER
                                    Manufacturer - Blackhorse RC Models, Ho Chi Min City , Vietnam 🇻🇳
                                    Place of Purchase Frodsham U.K. 🇬🇧
                                    Built by David Hall & Stuart Bower 🇬🇧
                                    flown at AMAC flying club U.K. 🇬🇧
                                    Wingspan 2.25 meters
                                    Length 1.675 meters
                                    Scale 1/7 scale
                                    7 x Hightec HS-5485HB servos
                                    Receiver - Spektrum AR8360T Through a NX10 transmitter (safe and AS3X available)
                                    Motor Overlander - T6354/15 2210W. (200kv)
                                    Propeller 19 x 10 inches - Falcon beach
                                    ESC YEP 120 A h/v ..programmed to 10s
                                    Receiver battery life 2200mah 2s
                                    Power system - 10s ( 2 x 5s 5000mah Lipos ) with EC5s
                                    Wings strobes via Banggood powered by 3s
                                    Average flight time 8-10 minutes dependant on throttle use .


                                    Click image for larger version

Name:	E8756AED-0C70-43C3-BD6C-A8CB17E791F8.jpeg
Views:	547
Size:	80.0 KB
ID:	340899Click image for larger version

Name:	E8756AED-0C70-43C3-BD6C-A8CB17E791F8.jpeg
Views:	497
Size:	80.0 KB
ID:	340902Click image for larger version

Name:	04FA6D01-3B0F-4CE5-B4AD-45B1EF53934A.jpeg
Views:	496
Size:	92.8 KB
ID:	340900Click image for larger version

Name:	00A908D6-2115-4584-85BA-A716AD5F21A3.jpeg
Views:	507
Size:	130.9 KB
ID:	340901

                                    Comment

                                    Working...
                                    X