
.png)


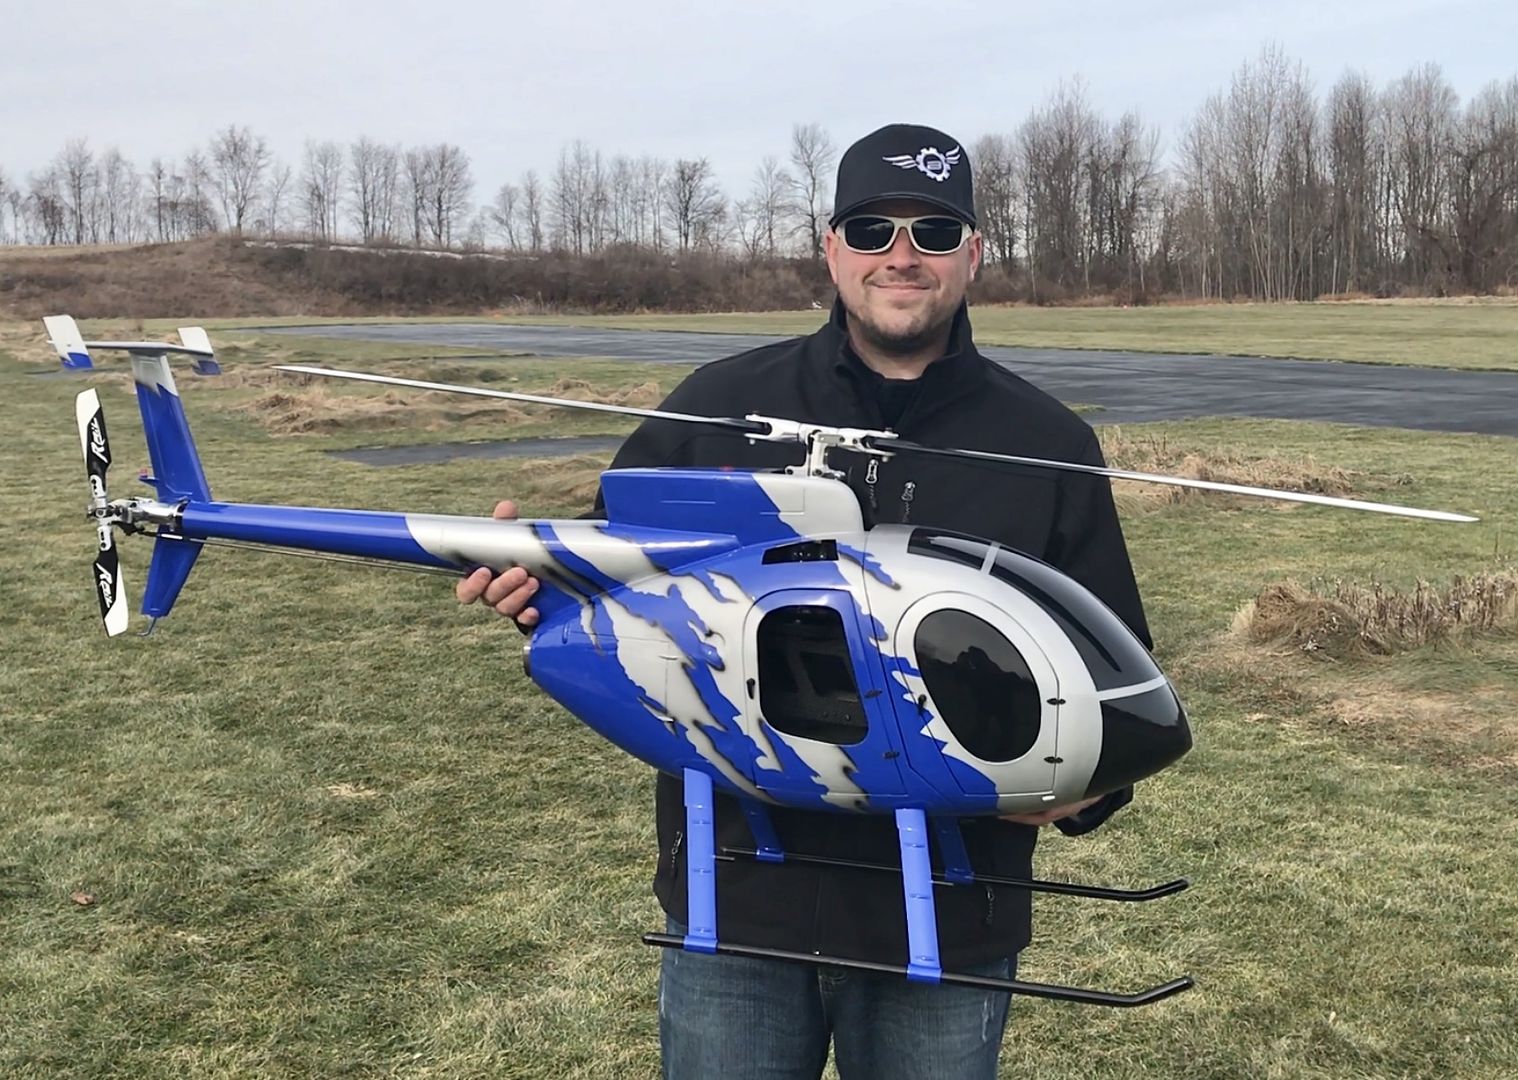
Synergy E5 (600size) MD500 G-JIVE Scale Build by Chris Reibert

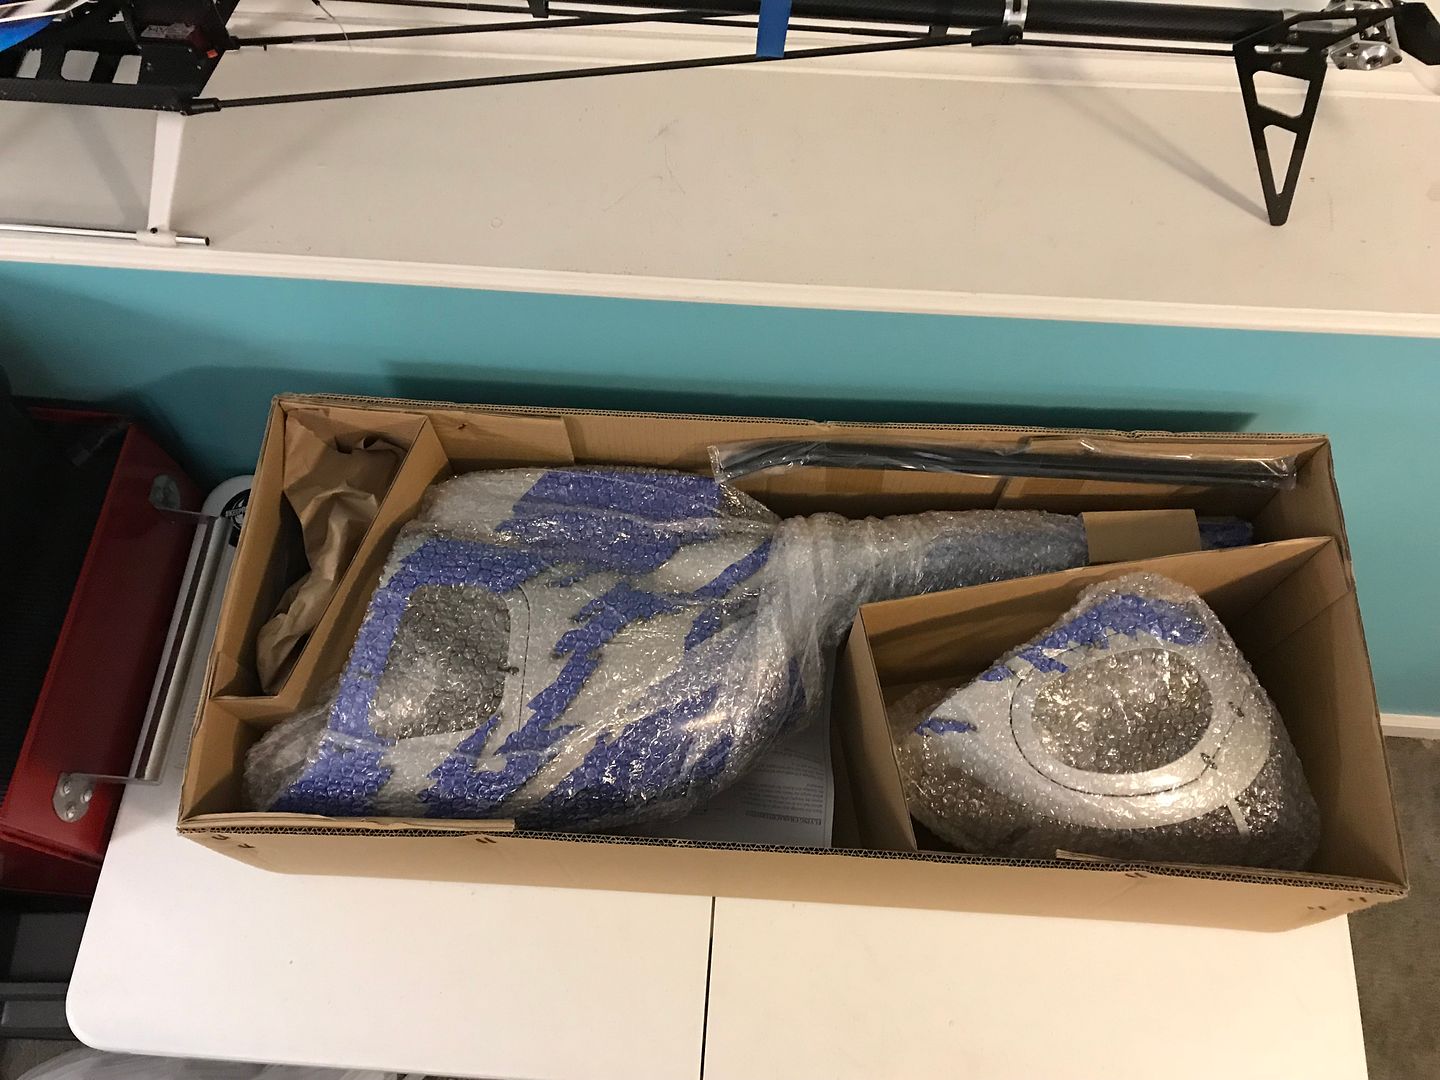
OPENING THE BOX
Opening the box I found everything well packed in plastic bubble wrap divided by cardboard to ensure a secure fit during the shipping process. Upon unwrapping the fuselage you are greeted by the most vibrant bright airbrushed colors. The fiberglass was smooth and flawless with no cracks or blemishes. I choose the blue G-Jive paint scheme again as I have done this scheme in both red and blue in past 450 size MD500 builds and really enjoyed it. With all the parts laid out it was time to start the Synergy E5 scale build project.
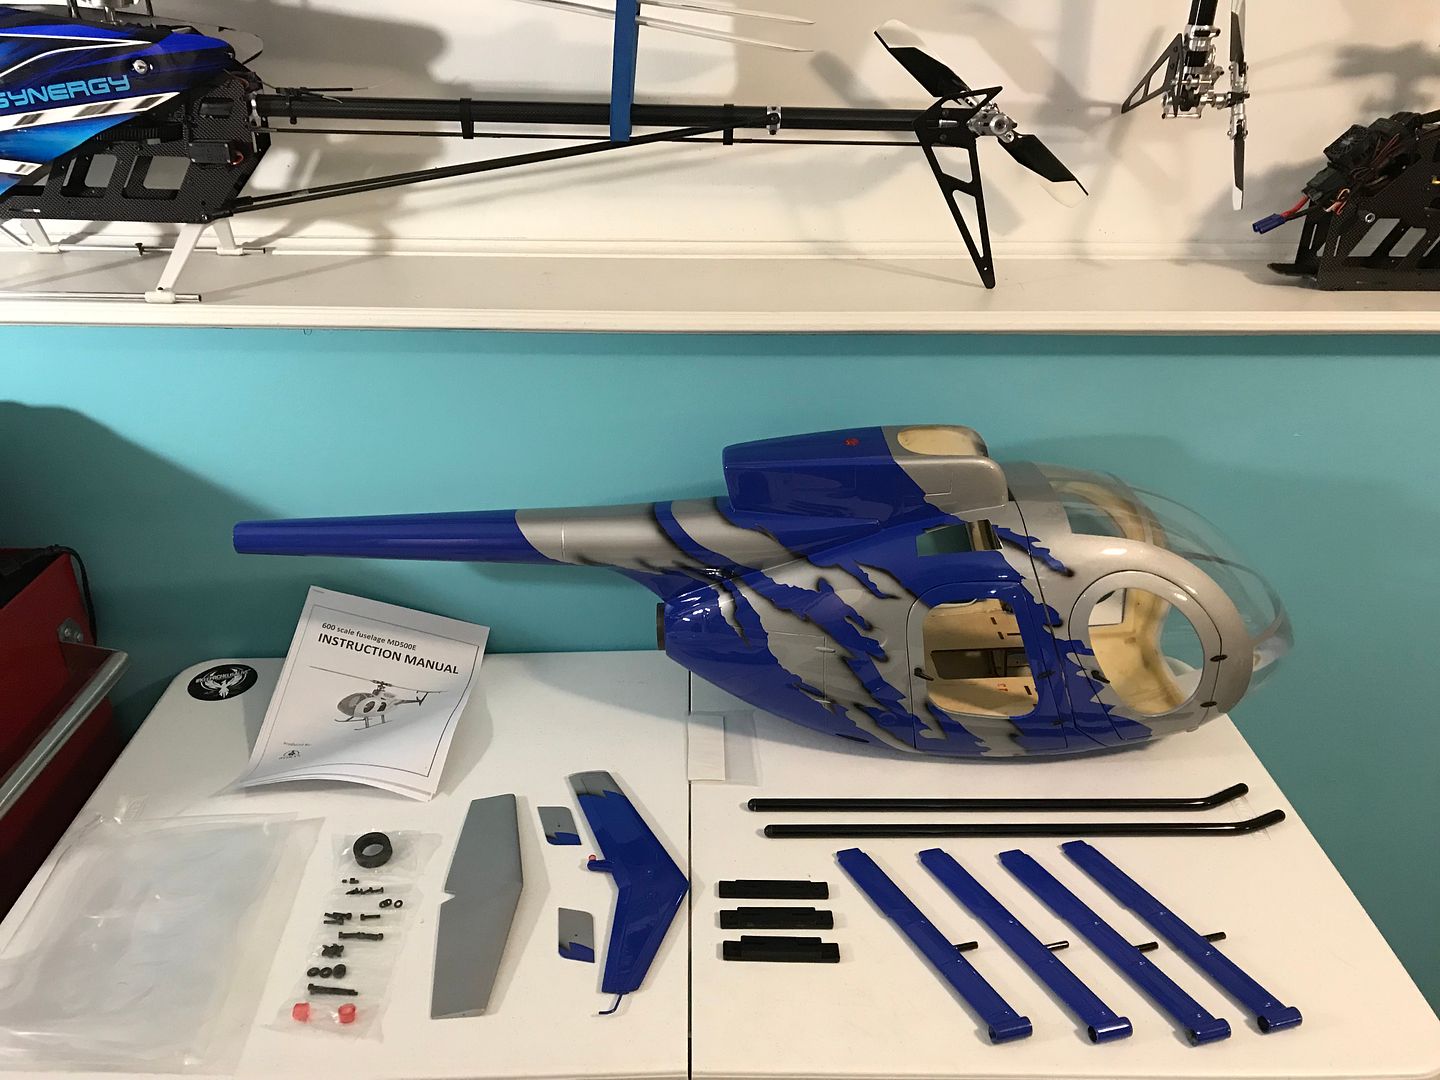
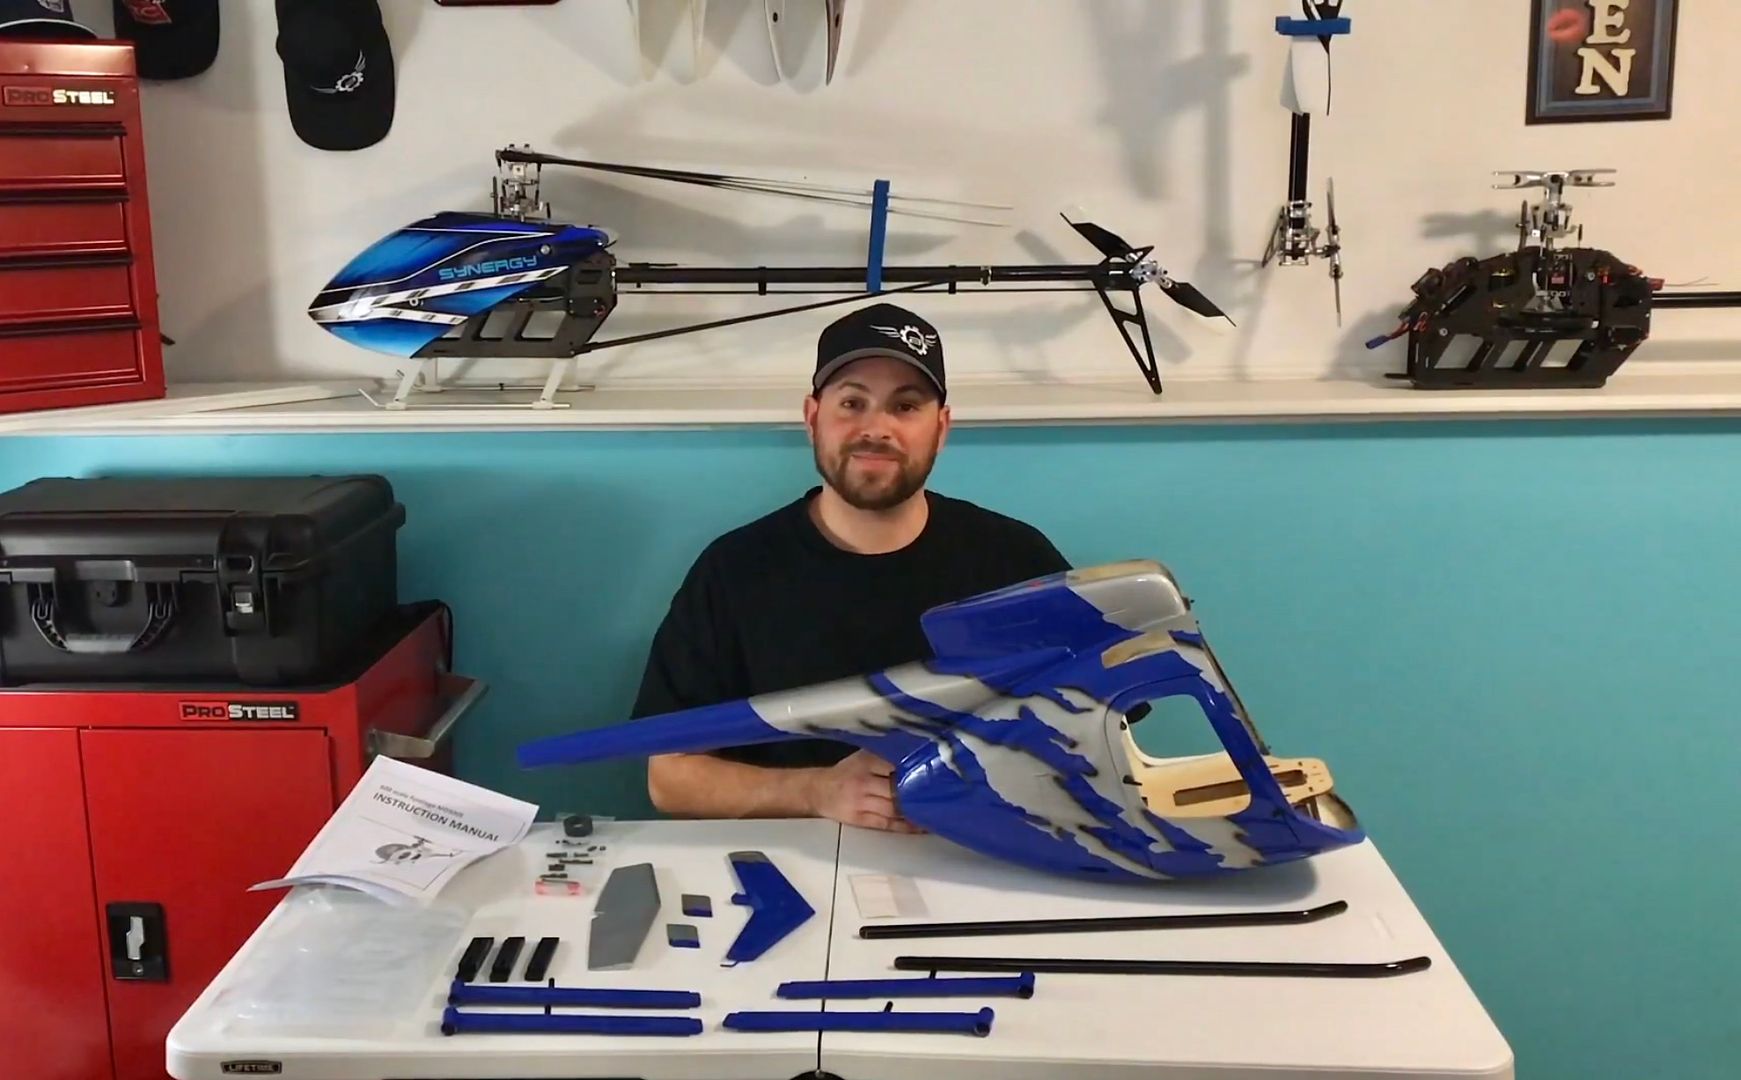
LET THE BUILD BEGIN
Mechanics / Electronics Chosen For The Scale Build:
Tools / Items Used For My Build:
Step 1: PREPPING THE MECHANICS
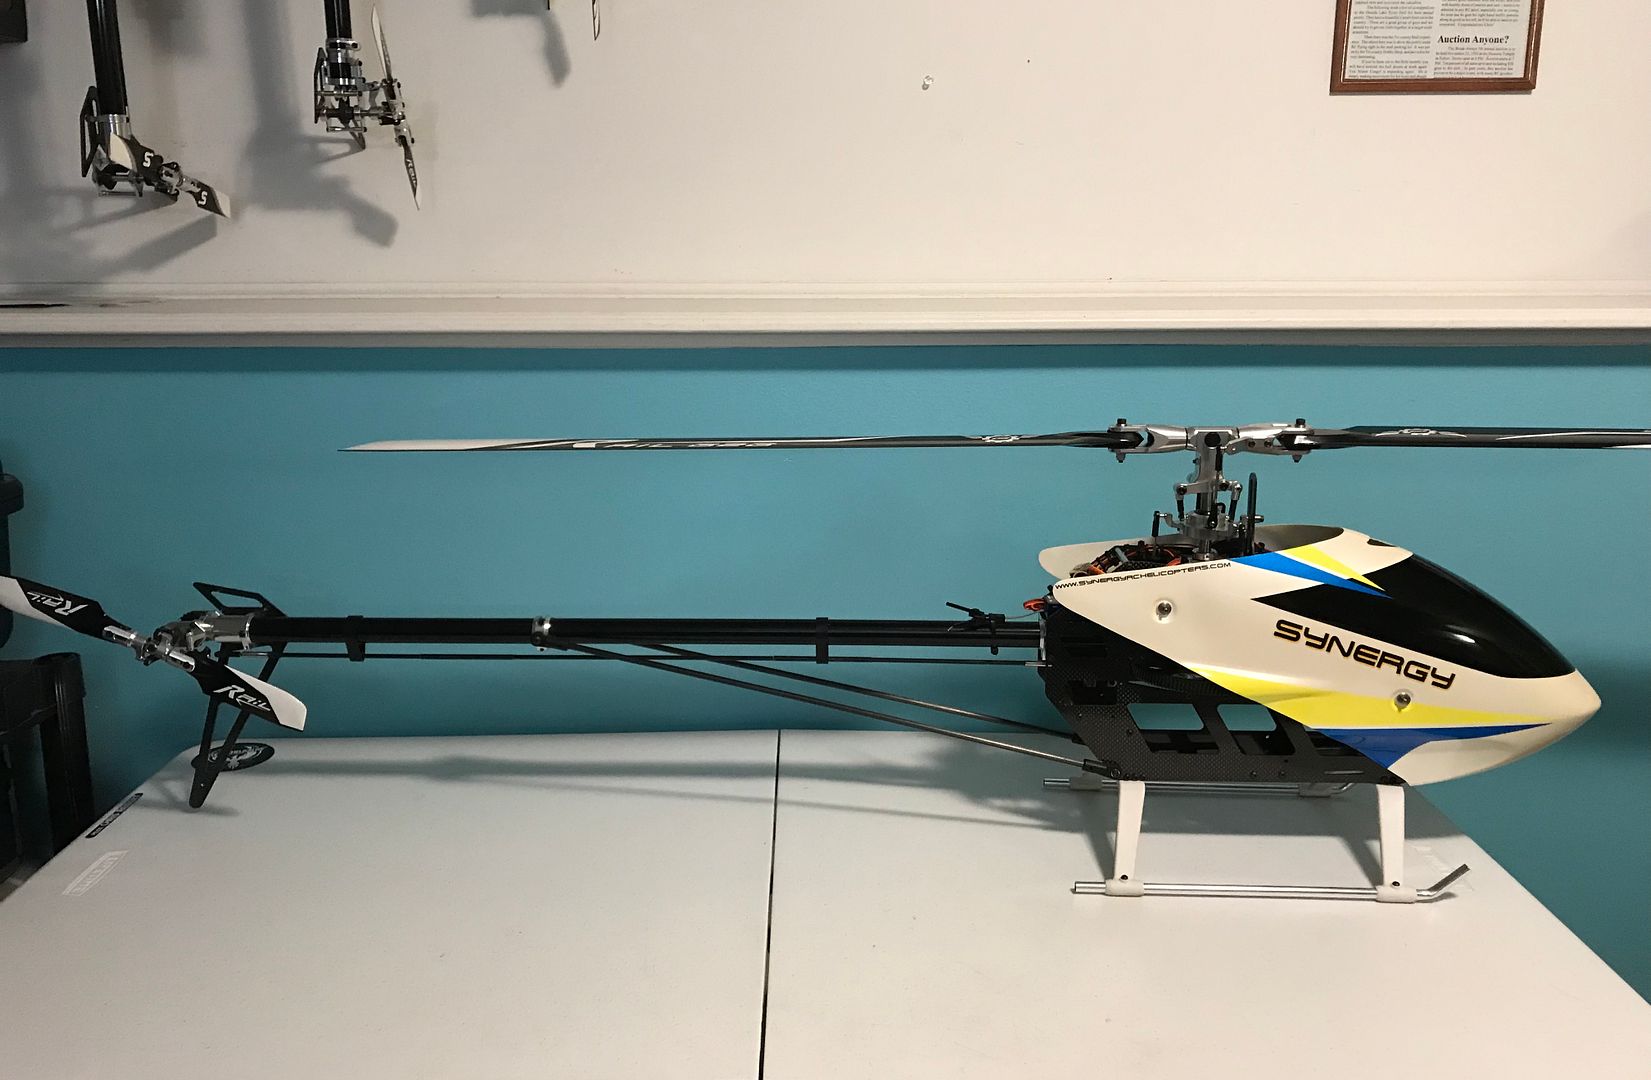
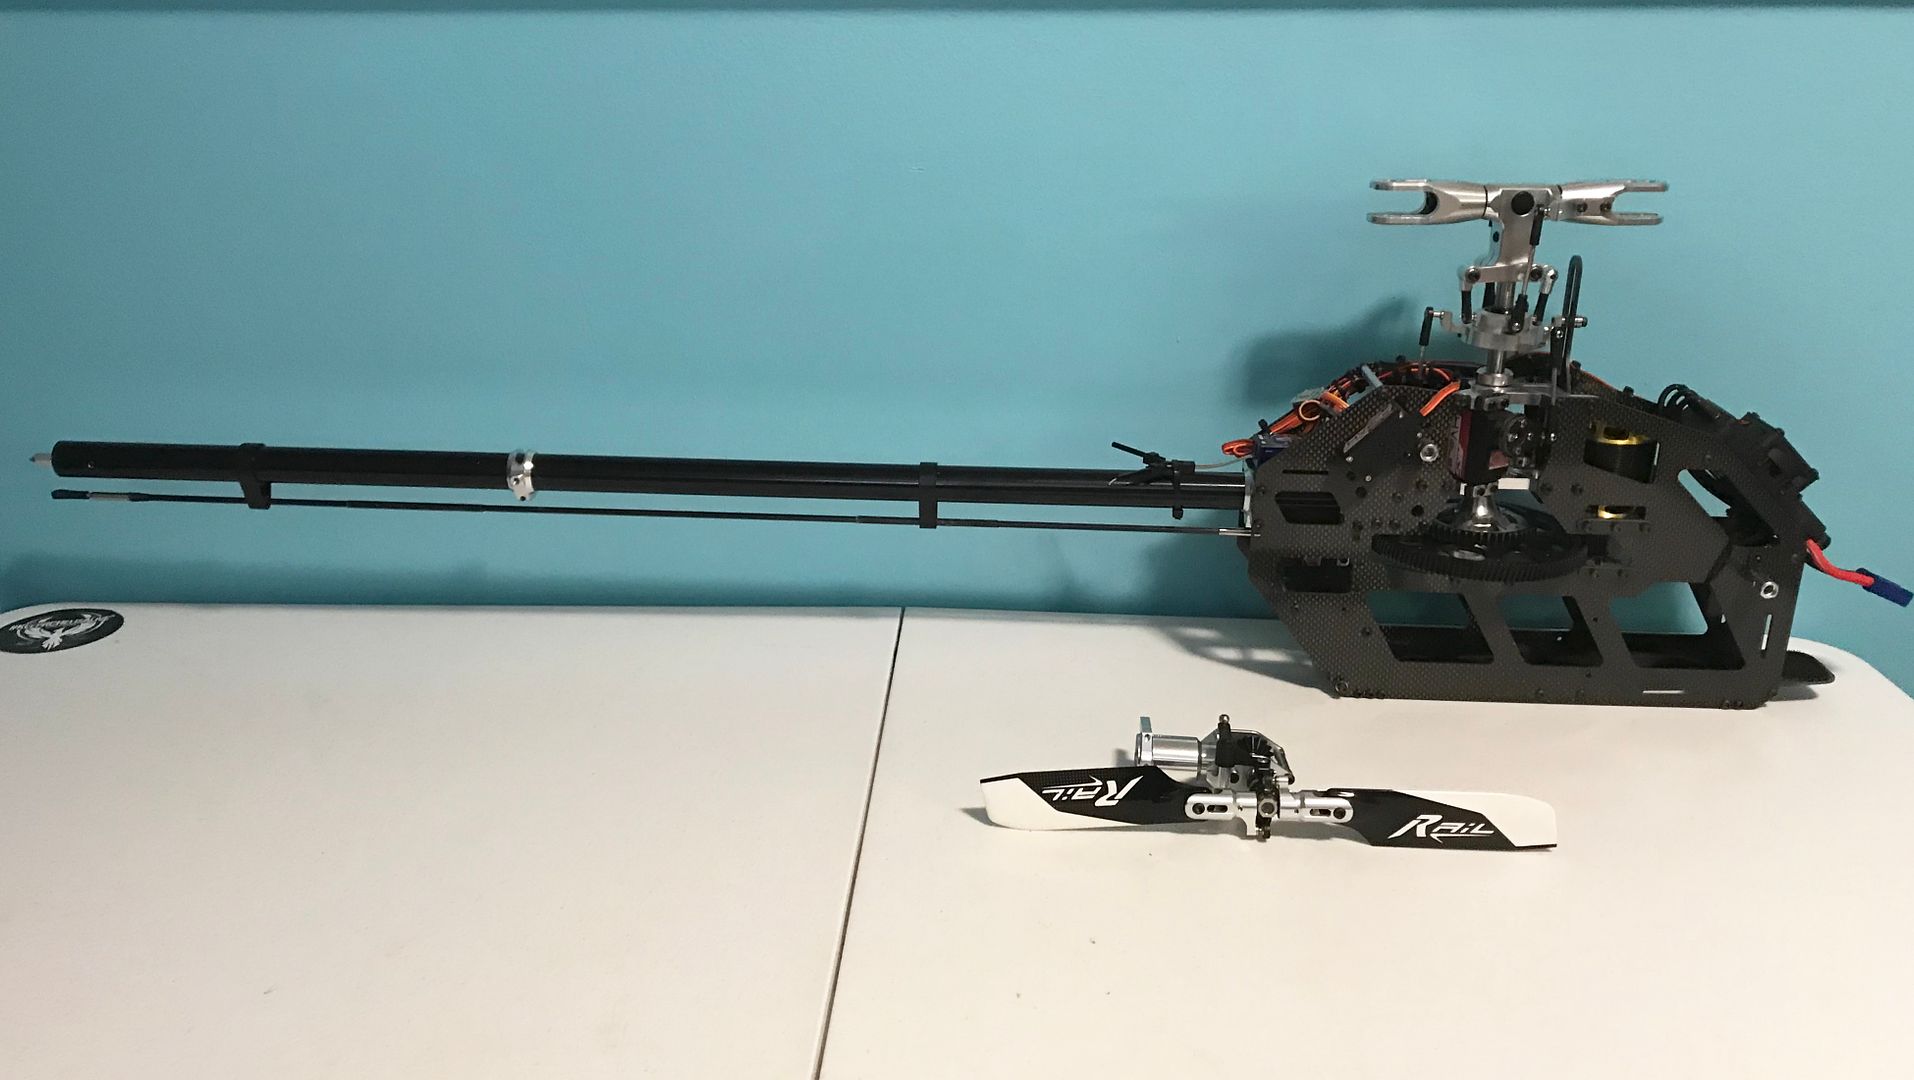
Once you have your Synergy E5 built and have test flown it a few times it is time to prep the helicopter to fit into the scale fuselage. The parts you will no longer need anymore include the main skids, boom supports, vertical fin and canopy. Once you removed those parts you will need to temporally remove the rear torque tube tail case. I also recommend removing the main blades so they are not in your way during the installation portion of the build. Once everything is removed you are now ready to start your scale build journey.
Step 2: MOUNTING THE LANDING SKIDS
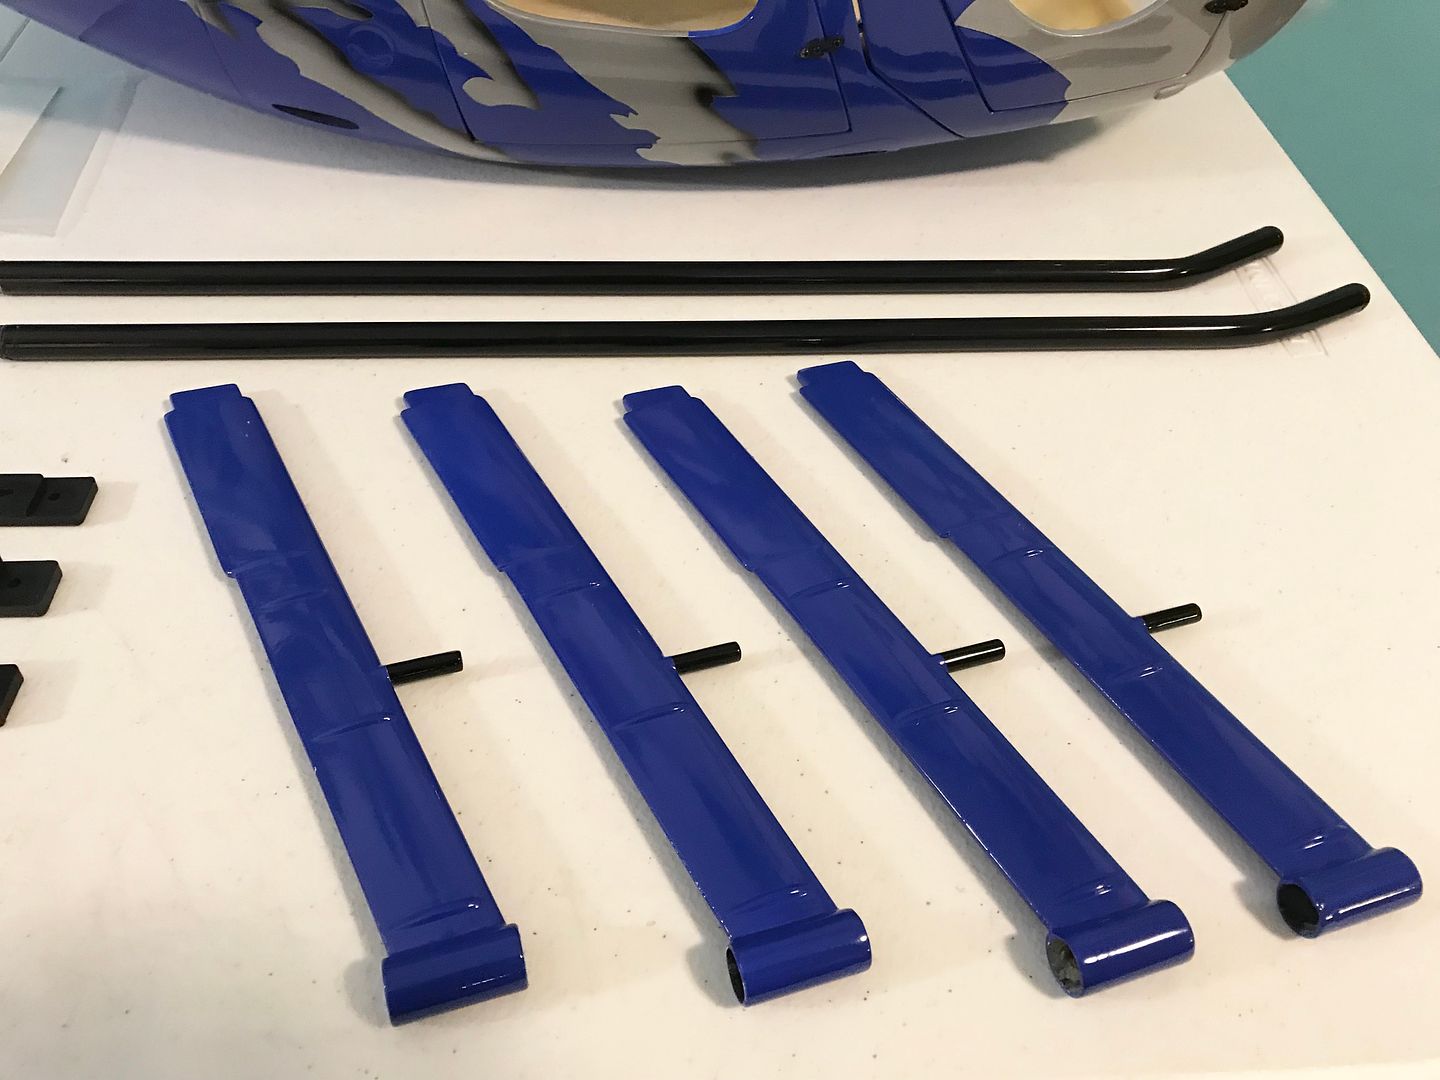
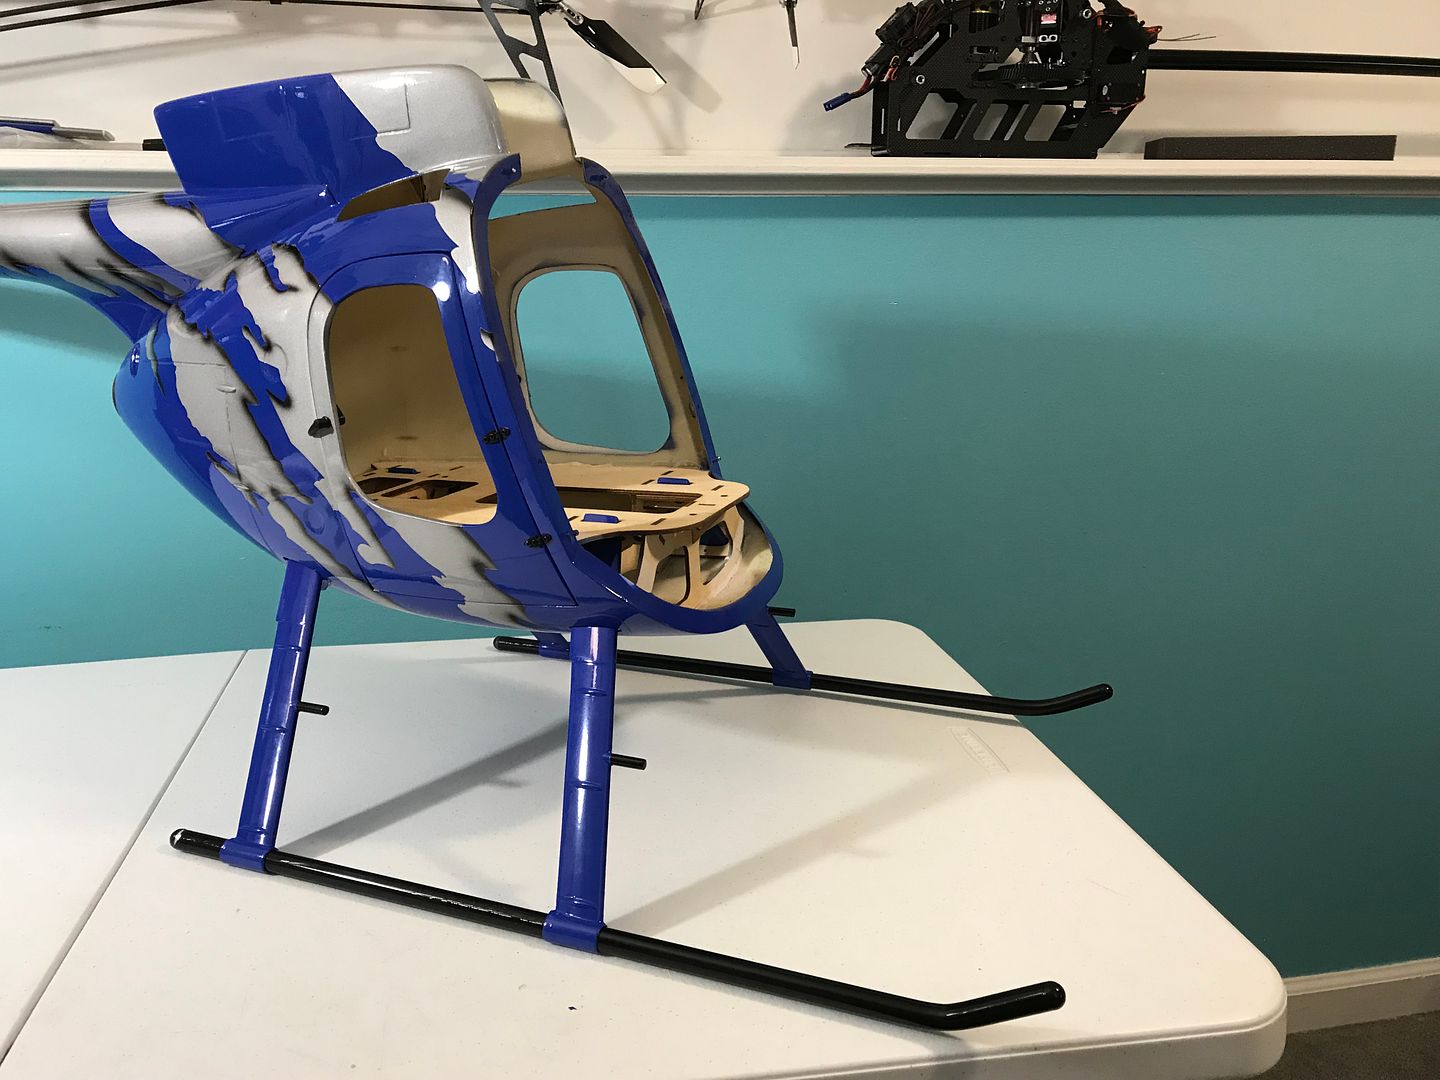
The first step of the build consists of installing the skid risers into the body of the fuselage. You want to test fit the skids into the wood plate inside the fuselage and insert the pipes before adding epoxy. Once test fitting has been done and everything looks good add some 5-30min epoxy on the skids, inside the frame on the floor where the skids come through the fuselage and where they seat into the wood deck framing. Once everything is true and straight put a battery inside to add some weight so that the glue can set up ensuring everything dries straight and even during the drying process. Once the glue has dried you can move into fitting the mechanics.
Step 3: FITTING THE MECHANICS
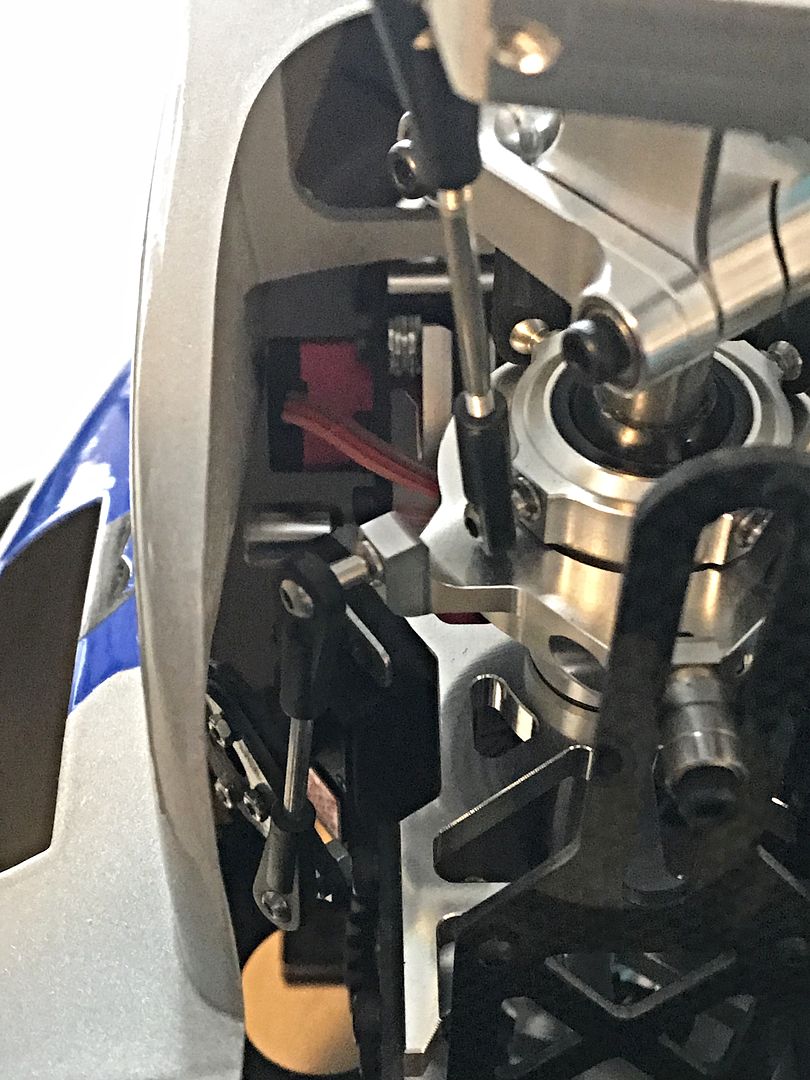
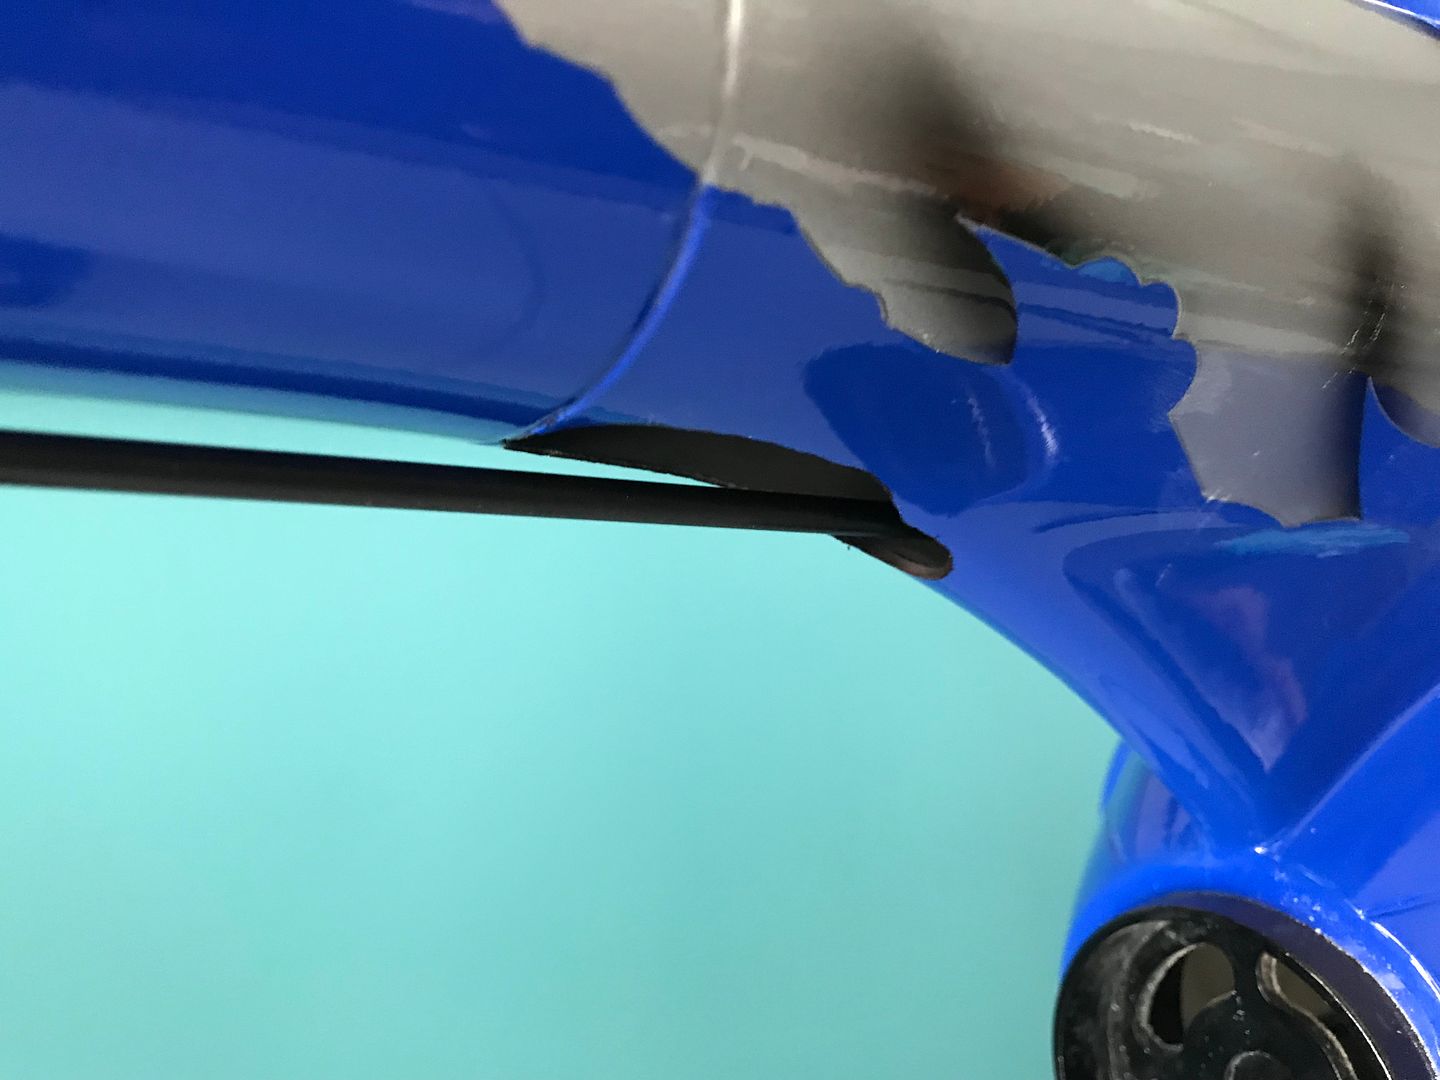
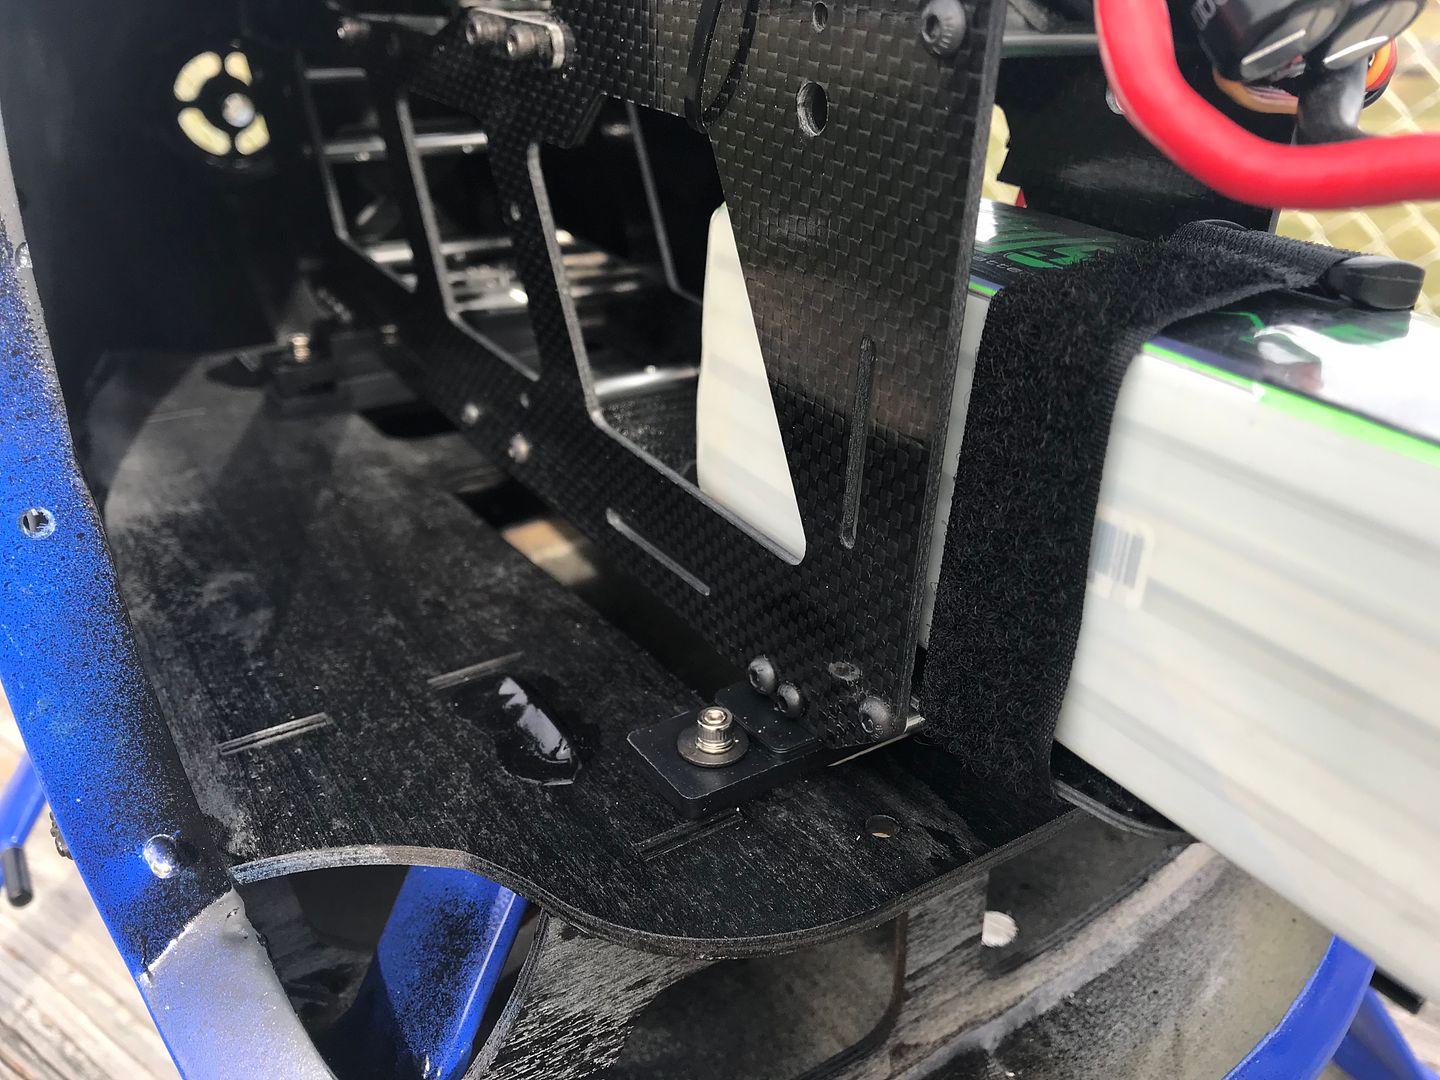
Time to fit the mechanics into the MD500 fuselage. Unfortunately the E5 only slid about 6” into the fuselage before the elevator servo hit the inside of the fuselage side. My first building decision was upon me and took some thinking. I wasn’t about to cut a channel in the side of the fuselage to fit the E5 nor was I going to give up on the build project. First thing I did was mark what the servo was hitting and dremel all the wood former down to the fiberglass fuselage where the servo was hitting. This allowed another inch to slide the E5 into the fuselage but the elevator servo still hit the side of the fuselage. To resolve this issue I decided to shim the elevator servo. I used servo spacers and shimmed the elevator servo into the frame about a 1/4 inch. To keep the elevator servo geometry correct I flipped the servo ball around to the back of the horn to regain perfect servo geometry. With this modification out of the way the E5 slid all the way into the fuselage with about an 1/8th clearance between the elevator servo case and fuselage wall. The next task was to achieve the proper height of the E5 with the included plastic riser blocks so that the tail boom centered straight down the fuselage. I doubled up the two thicker riser blocks in the rear and used the thinner riser block in the front. You need to mark where the tail pushrod will poke through the fuselage and Dremel a big enough hole for the tail pushrod to move free without any binding on the control rod. There are holes in the middle rear of the fuselage deck with blind nuts epoxied on the under side of the deck. To make sure the riser blocks on the E5 lined up with the holes in the fuselage I removed the rear bottom battery tray and drilled new holes to relocate the rear landing skid mount on the E5 frame that hold the riser blocks. It is very important that the mechanics are centered inside the fuselage, you have equal spacing on the left and right side of the frame and the tail boom is centered down the fuselage. With the airframe now fitting perfect I secured the riser blocks to the E5 with loctite and slid the E5 back into the fuselage sliding the tail pushrod through the hole I previously cut out. If you want to paint the inside of the fuselage black like I did to hide the mechanics do that before reinstalling the E5 back into the fuselage. I used 2.5mm screws with lock washers and tightened down the rear riser blocks to the deck. Next I drilled out the holes through the front riser blocks into the wooden deck. I could not get to the underside of the screws so I used a canopy reemer tool and made two small holes on the bottom of the fuselage so that I could insert my nut driver and installed the locknuts onto the 2.5mm bolts. With the E5 securely mounted into the fuselage I moved on the tail section of the build.
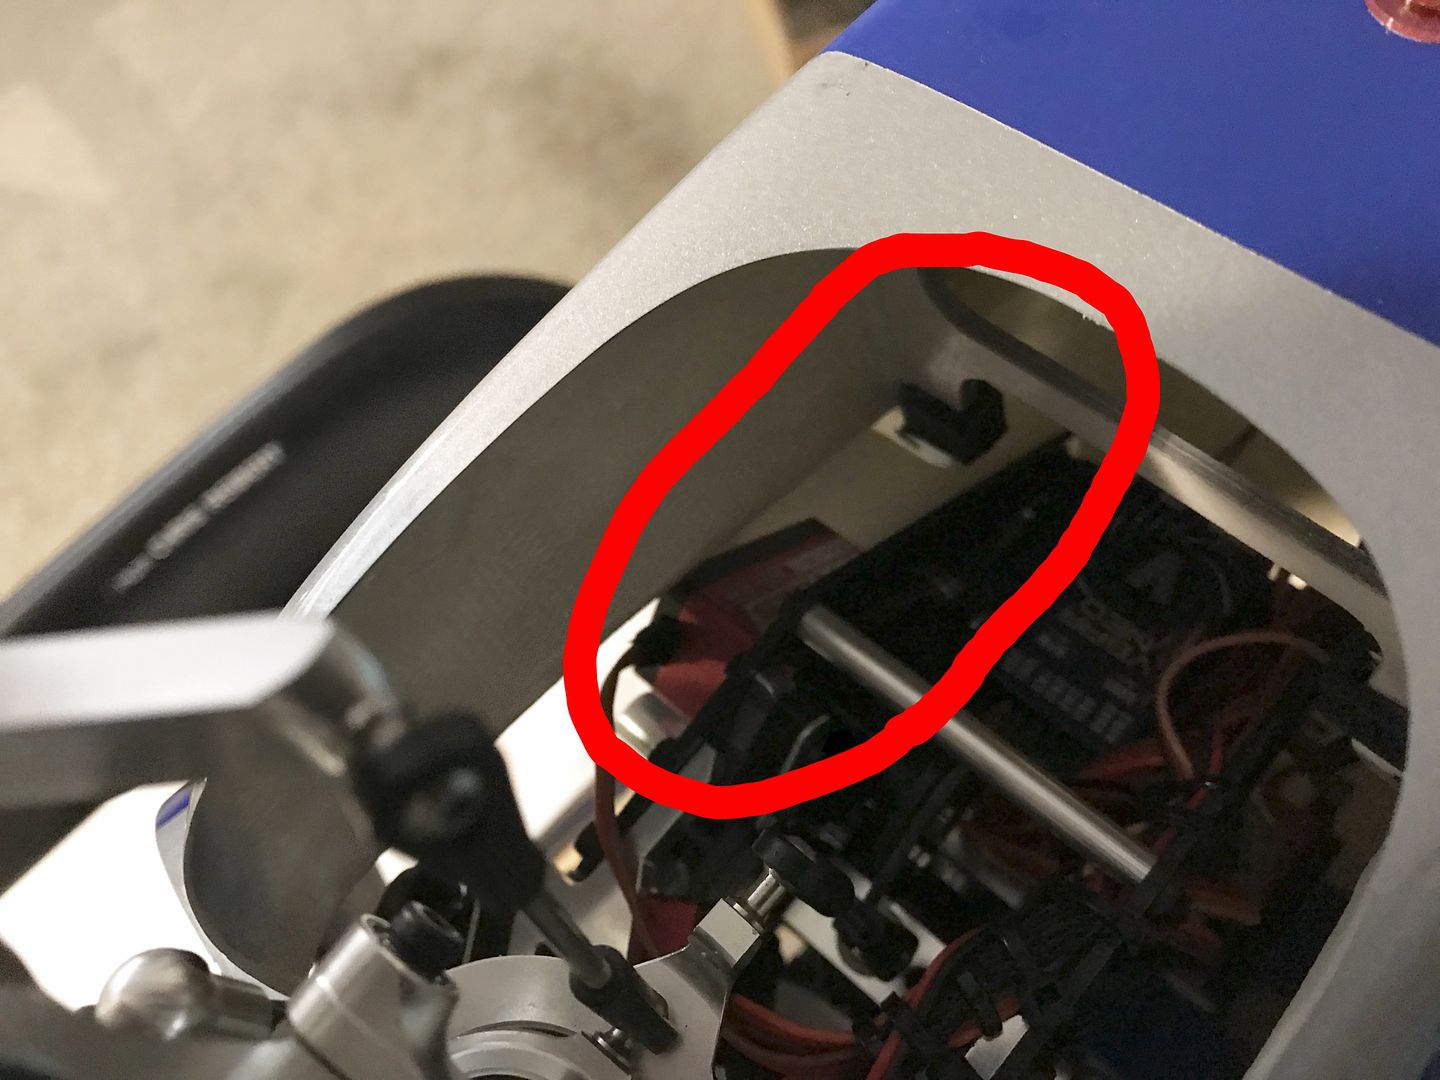
Servo hitting the inside wall and wooden frame spacer
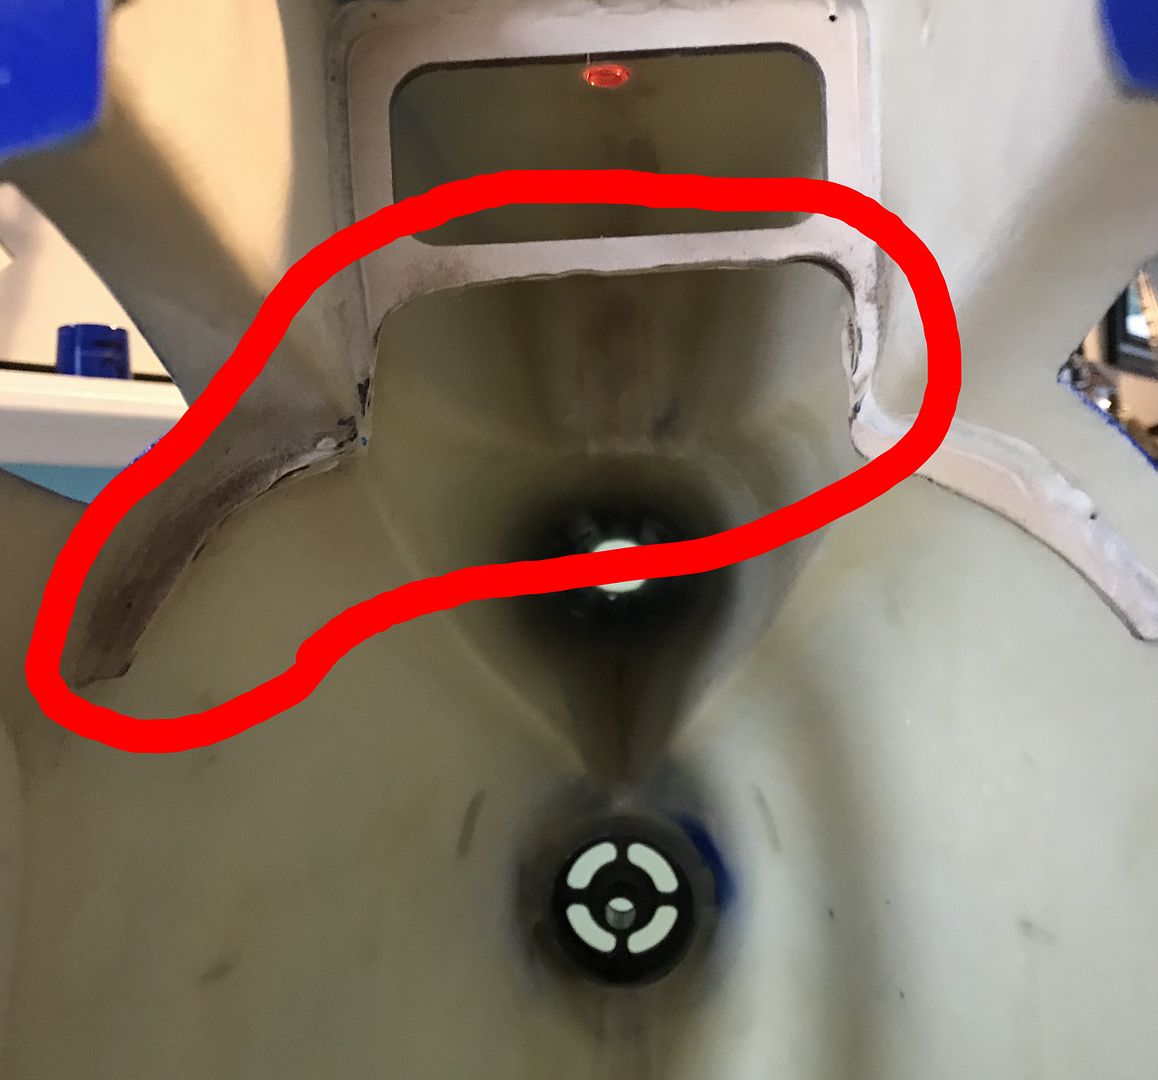
*Carefully* dremel away access wood does to the fiberglass
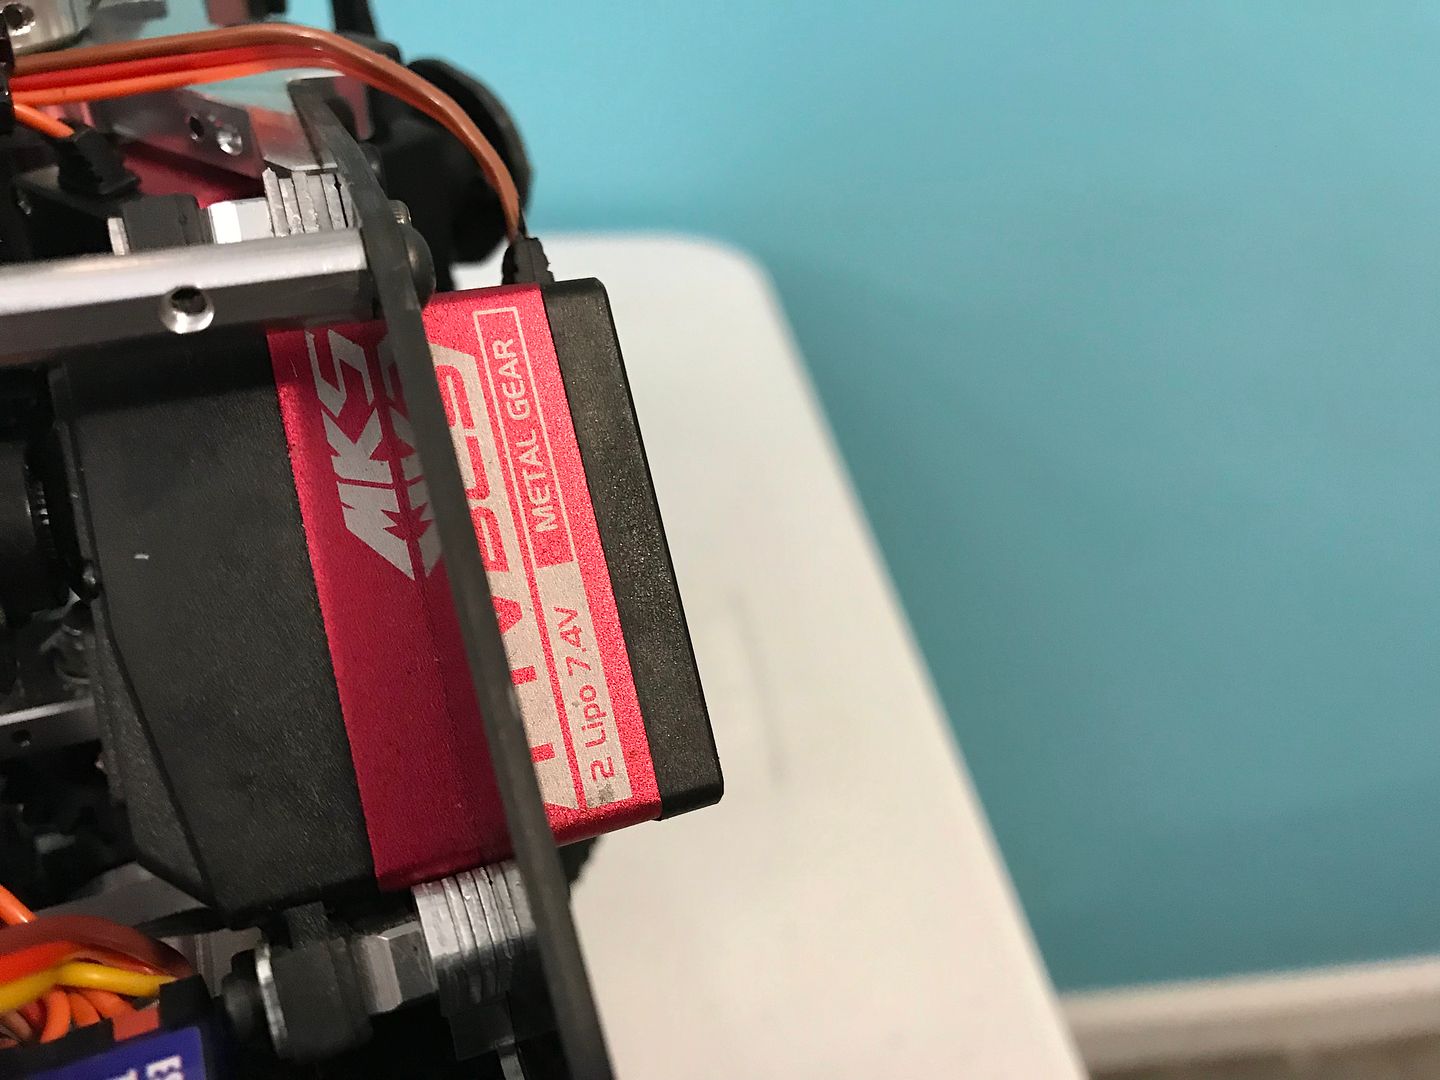
Shim elevator servo into frame
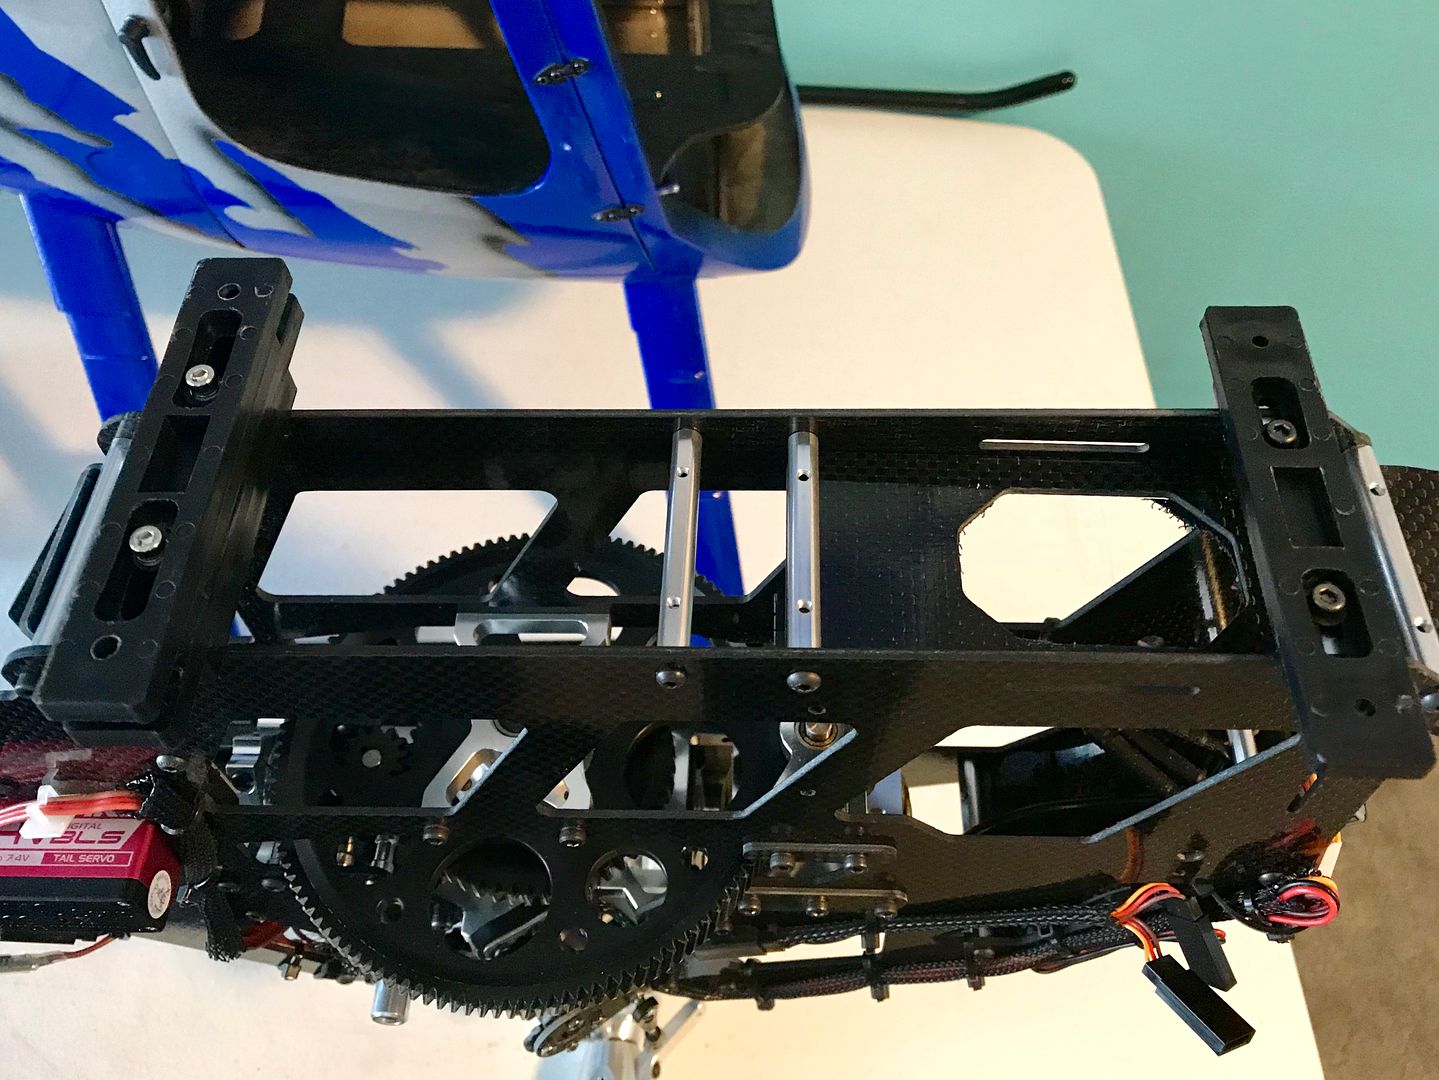
Perfect Fit
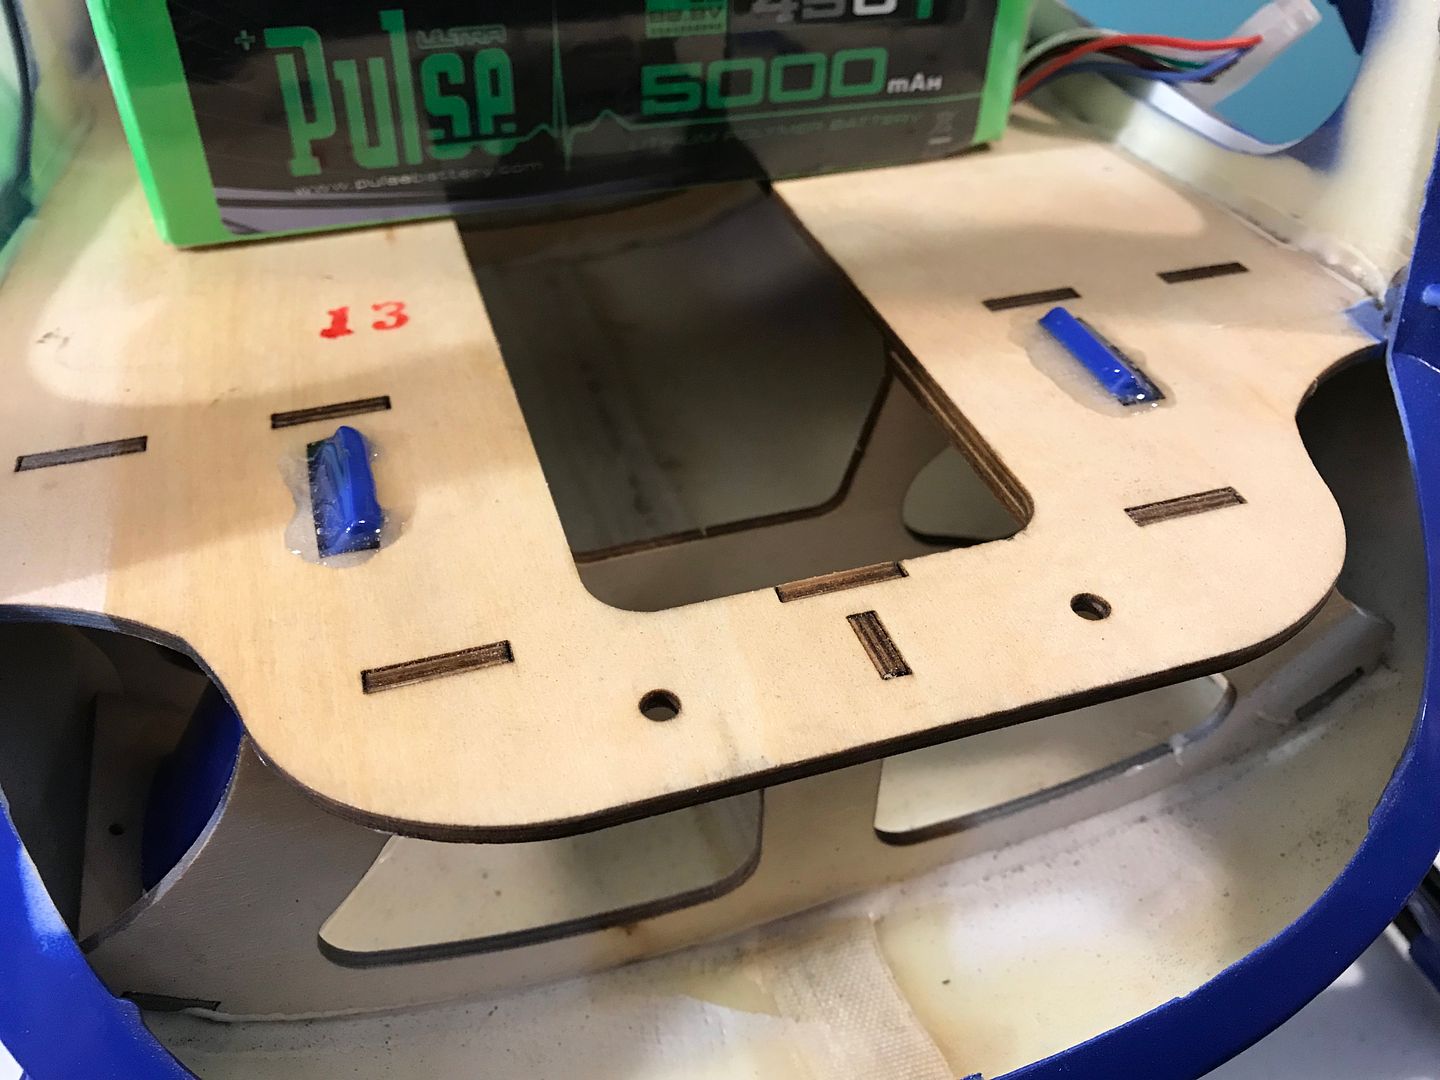
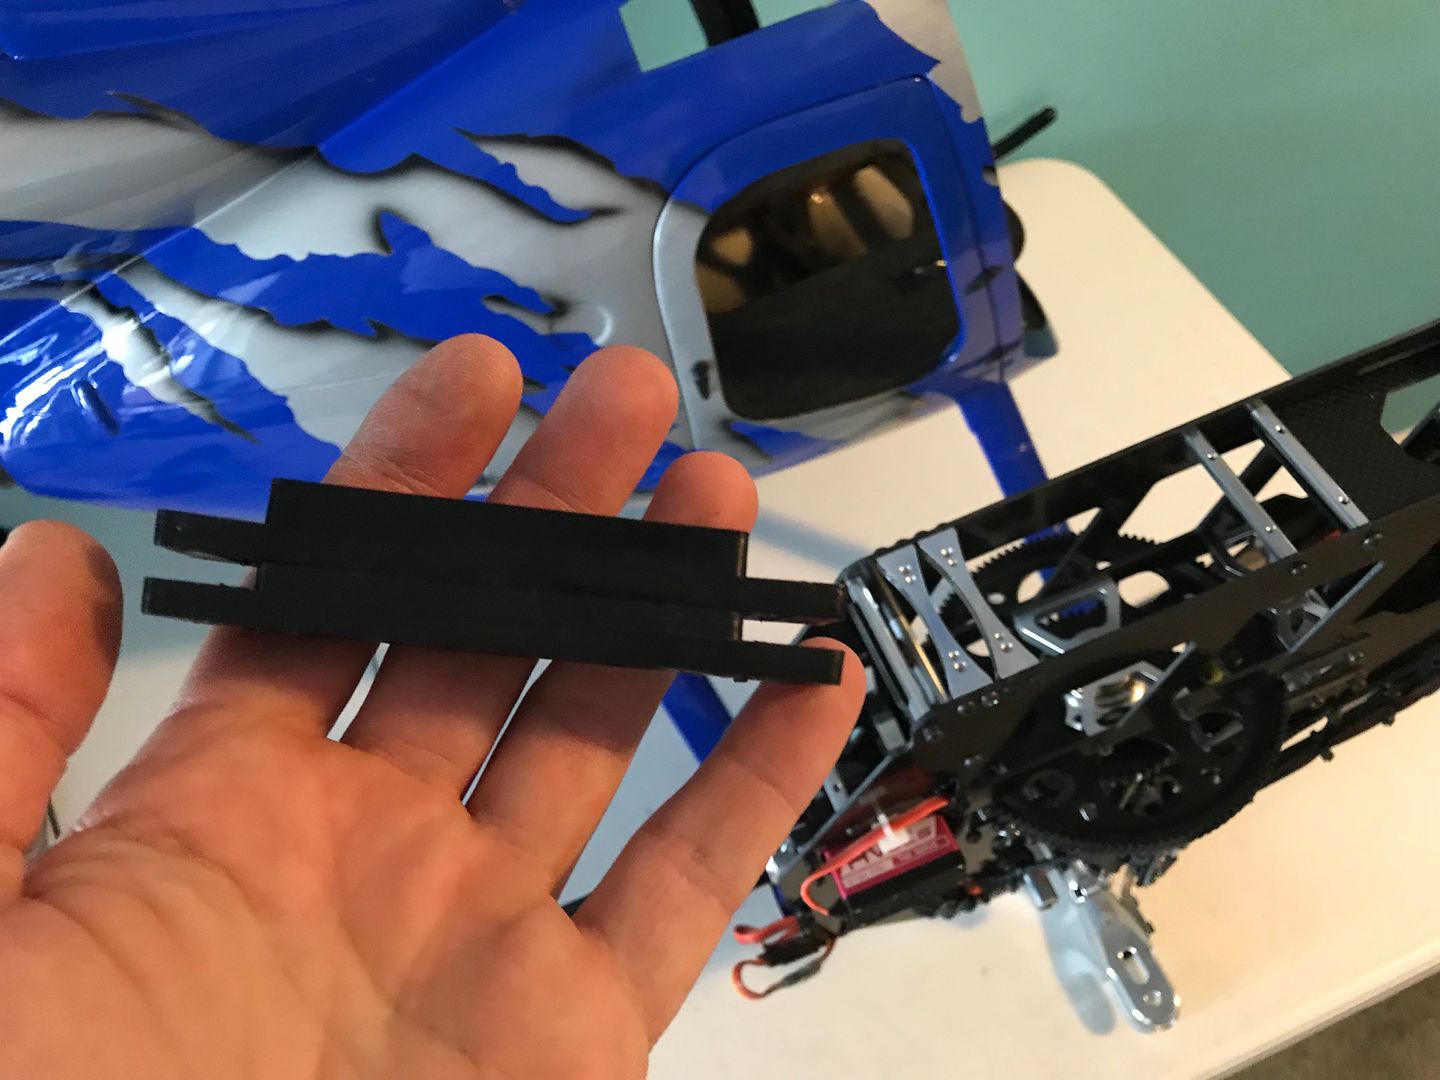
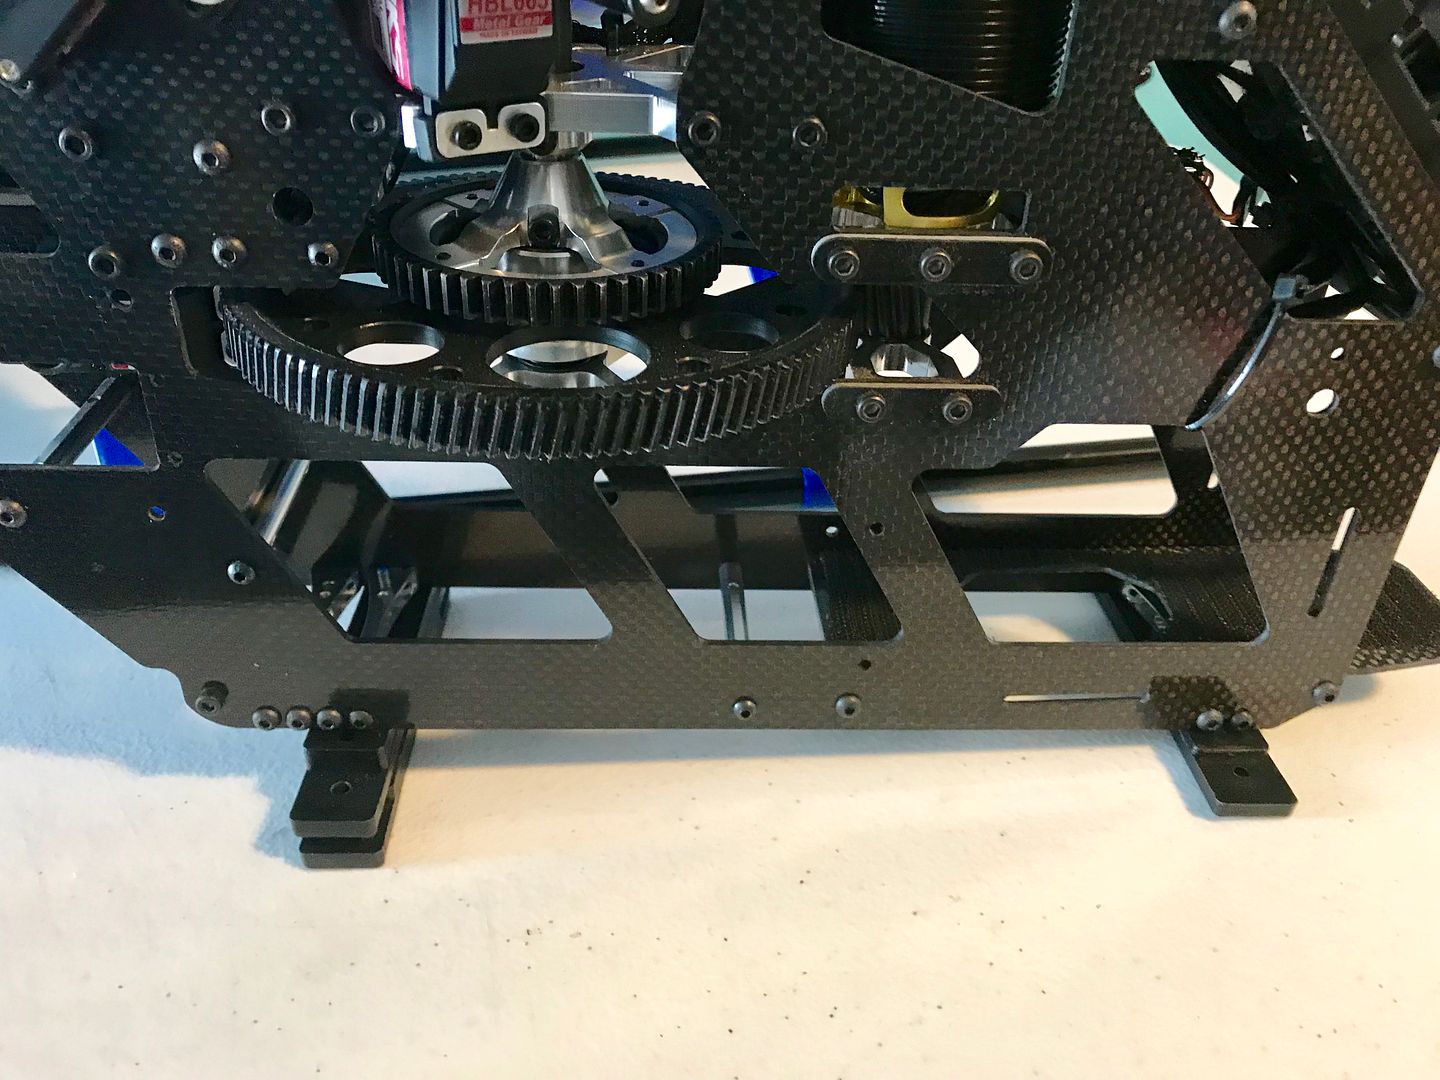
Frame riser blocks


OPENING THE BOX
Opening the box I found everything well packed in plastic bubble wrap divided by cardboard to ensure a secure fit during the shipping process. Upon unwrapping the fuselage you are greeted by the most vibrant bright airbrushed colors. The fiberglass was smooth and flawless with no cracks or blemishes. I choose the blue G-Jive paint scheme again as I have done this scheme in both red and blue in past 450 size MD500 builds and really enjoyed it. With all the parts laid out it was time to start the Synergy E5 scale build project.


LET THE BUILD BEGIN
Mechanics / Electronics Chosen For The Scale Build:
- Helicopter: Synergy E5
- Cyclic Servos: MKS HBL665
- Tail Servo: MKS HBL669
- Gyro: Mikado NEO
- Motor: Scorpion 4025-1100KV
- ESC: Castle Talon HV120
- Battery: Pulse 5000mAh 45C
- Blades: RAIL 556mm/96mm
Tools / Items Used For My Build:
- 5 Min Epoxy
- Super Glue
- Black Testors Spray Paint
- 2.5mm Screws, Washers and Lock Nuts
- Dremel
- Hot Glue Gun
- Canopy Reemer
Step 1: PREPPING THE MECHANICS
Once you have your Synergy E5 built and have test flown it a few times it is time to prep the helicopter to fit into the scale fuselage. The parts you will no longer need anymore include the main skids, boom supports, vertical fin and canopy. Once you removed those parts you will need to temporally remove the rear torque tube tail case. I also recommend removing the main blades so they are not in your way during the installation portion of the build. Once everything is removed you are now ready to start your scale build journey.


Step 2: MOUNTING THE LANDING SKIDS
The first step of the build consists of installing the skid risers into the body of the fuselage. You want to test fit the skids into the wood plate inside the fuselage and insert the pipes before adding epoxy. Once test fitting has been done and everything looks good add some 5-30min epoxy on the skids, inside the frame on the floor where the skids come through the fuselage and where they seat into the wood deck framing. Once everything is true and straight put a battery inside to add some weight so that the glue can set up ensuring everything dries straight and even during the drying process. Once the glue has dried you can move into fitting the mechanics.


Step 3: FITTING THE MECHANICS
Time to fit the mechanics into the MD500 fuselage. Unfortunately the E5 only slid about 6” into the fuselage before the elevator servo hit the inside of the fuselage side. My first building decision was upon me and took some thinking. I wasn’t about to cut a channel in the side of the fuselage to fit the E5 nor was I going to give up on the build project. First thing I did was mark what the servo was hitting and dremel all the wood former down to the fiberglass fuselage where the servo was hitting. This allowed another inch to slide the E5 into the fuselage but the elevator servo still hit the side of the fuselage. To resolve this issue I decided to shim the elevator servo. I used servo spacers and shimmed the elevator servo into the frame about a 1/4 inch. To keep the elevator servo geometry correct I flipped the servo ball around to the back of the horn to regain perfect servo geometry. With this modification out of the way the E5 slid all the way into the fuselage with about an 1/8th clearance between the elevator servo case and fuselage wall. The next task was to achieve the proper height of the E5 with the included plastic riser blocks so that the tail boom centered straight down the fuselage. I doubled up the two thicker riser blocks in the rear and used the thinner riser block in the front. You need to mark where the tail pushrod will poke through the fuselage and Dremel a big enough hole for the tail pushrod to move free without any binding on the control rod. There are holes in the middle rear of the fuselage deck with blind nuts epoxied on the under side of the deck. To make sure the riser blocks on the E5 lined up with the holes in the fuselage I removed the rear bottom battery tray and drilled new holes to relocate the rear landing skid mount on the E5 frame that hold the riser blocks. It is very important that the mechanics are centered inside the fuselage, you have equal spacing on the left and right side of the frame and the tail boom is centered down the fuselage. With the airframe now fitting perfect I secured the riser blocks to the E5 with loctite and slid the E5 back into the fuselage sliding the tail pushrod through the hole I previously cut out. If you want to paint the inside of the fuselage black like I did to hide the mechanics do that before reinstalling the E5 back into the fuselage. I used 2.5mm screws with lock washers and tightened down the rear riser blocks to the deck. Next I drilled out the holes through the front riser blocks into the wooden deck. I could not get to the underside of the screws so I used a canopy reemer tool and made two small holes on the bottom of the fuselage so that I could insert my nut driver and installed the locknuts onto the 2.5mm bolts. With the E5 securely mounted into the fuselage I moved on the tail section of the build.
Servo hitting the inside wall and wooden frame spacer

*Carefully* dremel away access wood does to the fiberglass

Shim elevator servo into frame
Perfect Fit
Frame riser blocks


Comment