You must Sign-in or Register to post messages in the Hobby Squawk community
Registration is FREE and only takes a few moments

Register now

Announcement

Collapse
No announcement yet.

Official Freewing 64mm EDF F9F Panther Thread

Collapse
X
Collapse
First Prev Next Last
 
  • Filter
  • Time
  • Show
Clear All
new posts

  • #81
    To all the folks whom are having issues with CG on this bird; spoke with the MRC tech-rep and he assured me that FreeWing designers tend to be conservative on where they place the CG, IOW-on the spot or slightly nose heavy. Here's the deal... I bought and built one of these beauties for myself, at that price it's a steal (in my book)! However; as Russ Henderson pointed out, on the design CG it's a touch sensitive! So, when I redesigned mine I added the wheels and an RCJuice (brand name) 6.4 oz 3S battery of 2200x50C plus a 9grm rudder servo across from the elevator servo and used each of their control wires in-place (one for elev and one for rud). I also added a 45 amp ESC to help handle future 4S batteries. On the elev I epoxied a 3mm plastic tube between elevators.

    Now, with all that said; my plane (w/battery) comes in at 1 pound 9.5 oz. That's 6.0 oz over their design weight with a 1600x35 (you do the math). I think 1.75" is a bit far back for the CG, that's 44mm for you metric types... So I made mine balance right at the front of the gear plates (at 1.5") with my 2200 as smooched rearward as I can get it up against the cut-a-way ply servo tray. So placing a 4S 2200x50 at 2 more oz is going to make it super nose heavy, so I'll need to figure something out later. Having said that; doing over I would definitely have placed the rudder servo in the vert. stab to add the tail weight and maybe a 4S might just balance it out at the same point (1.5")! If anyone does this, please let me know how it measures up.

    p.s. I added exactly 0 oz nose weight to the forward end, none whatsoever! I did order some new 4S 2200x60 batteries that weigh-in at 5 grams less that my 4S 2200s, it may help or may not, we'll see when they get here! That's it, hope this helps someone...

    Comment


    • #82
      Tazman Eager to hear how it goes!

      Still waiting for them to come out with a 80, or a 90mm version. I don't think they realize how well it would sell.

      Comment


      • #83
        agreed, maybe a 90mm version... it would be awesome!

        Comment


        • #84
          Just ordered mine. I have an idea for some customization when it arrives, so once it's done, I'll post photos.

          Comment


          • #85
            Looking forward to what you put together

            Comment


            • #86
              Here she is, all finished. It took me a little while to finish her up, but I maidened her on Sunday. I went with a fictitious air show bird paint scheme. My Better Half made the decals on her Cricut machine, and the pilot is 3D printed. Landing on the maiden was pretty ugly (my fault, not the plane's), but the photo below is post-maiden. She does fly nice.

              Comment


              • #87
                That looked like a smooth, uneventful maiden flight, just what you want !!!

                Comment


                • #88
                  For those interested, this is the .stl file I used for the pilot figure. As I recall, I reduced the pilot to 75%, and that seemed about right.

                  A sport "scale" cockpit set for an RC plane. Pilot, seat and a small dashboard - something to fill the canopy! The pilot needs to be printed with supports for the overhang on the mask - I found that the standard supports in Cura worked fine, for all sizes from 25mm height upwards. Update: I was messaged asking what scale this model is, and how to adjust for different scales, so have copied the response here for anyone else that might need it: This model is very approximate 1/11th scale pilot The way I work out the scale of the mode is to simply divide the real scale wingspan by your model's wingspan (using the same units) e.g Mustang wingspan = 37ft = 11277 mm. Divide this by your model's wingspan: 11277/1100 = 10.25. So you need a 1/10th scale pilot. This one is approximately 11% scale, so in your slicer you can rescale as follows (all figures are VERY much estimations!): 1/7th scale pilot = 170% enlargement of this 1/8th scale pilot = 150% enlargement of this 1/9th scale pilot = 130% enlargement of this 1/10th scale pilot = 115% enlargement of this 1/11th scale pilot = No scaling required 1/12th scale pilot = 98% reduction of this

                  Comment


                  • #89
                    Freewing Grumman F9F Panther . original 685mmm span, modified 800mm wingspan 850gms all up take off weight. Wing area of 12.86dm2 = 66 gms/dm2 . FMS 64mm 11 blade edf unit, 2840 3150kv out-runner, 135gms, 60amp ztw esc, 1150gms thrust, 1800mah 4s 70-140c (215 gms). Recalculated cg for modified wing with 15% static margin is 48mm back from LE of intake. Modified version has inboard wing extensions with flaps and a rudder. Blacked out canopy with open front window to cool battery, esc. I have now turned this into a hand launch version with Hobby Eagle A3v2 gyro, with on, off and autobalance mode. Auto balance mode used for hand launch. Cheater holes modified for hand launch grip

                    Click image for larger version

Name:	IMG_20221203_123853_989.jpg
Views:	418
Size:	128.5 KB
ID:	362810

                    Click image for larger version

Name:	IMG_20221203_123925_947.jpg
Views:	385
Size:	136.5 KB
ID:	362811

                    Click image for larger version

Name:	IMG_20221203_123818_471.jpg
Views:	379
Size:	131.6 KB
ID:	362812

                    Comment


                    • #90
                      Nicely done. I assume that 1150g thrust is you using the number off the FMS site and not what you measured installed in the plane, correct?

                      Comment


                      • #91
                        Originally posted by Evan D View Post
                        Nicely done. I assume that 1150g thrust is you using the number off the FMS site and not what you measured installed in the plane, correct?
                        Correct Evan, I normally assume about 75% of manufacturers figures for real life figures so it is near enough 1 to 1. I flew it with wheels and nose steering gear before I added the gyro and there is plently of power so I consider the gyro a fair swap for winter field hand launch and it looks better in the air.

                        Comment


                        • #92
                          Real life on a test stand. See the video linked below for the new FW fans. At least in these tests they are using a power supply set to 3.7V per cell and not a full 4.2V as many do when stating thrust. Note that the 2840-2850 is 1200g thrust on the stand. Installed in my Banshee it only has 990g. I also have the 2949-2500 in that test and they show 1950g thrust. I have it in my Banshee right now and it is 1586g installed. So in both my cases (and probably most) actual thrust is 82% of the published number.

                          With that you are probably about 950g at most. Still not bad.

                          Freewing 64mm EDF Version II power system thrust test video - YouTube

                          Comment


                          • #93
                            Originally posted by Evan D View Post
                            Real life on a test stand. See the video linked below for the new FW fans. At least in these tests they are using a power supply set to 3.7V per cell and not a full 4.2V as many do when stating thrust. Note that the 2840-2850 is 1200g thrust on the stand. Installed in my Banshee it only has 990g. I also have the 2949-2500 in that test and they show 1950g thrust. I have it in my Banshee right now and it is 1586g installed. So in both my cases (and probably most) actual thrust is 82% of the published number.

                            With that you are probably about 950g at most. Still not bad.

                            Freewing 64mm EDF Version II power system thrust test video - YouTube
                            Good to know that 
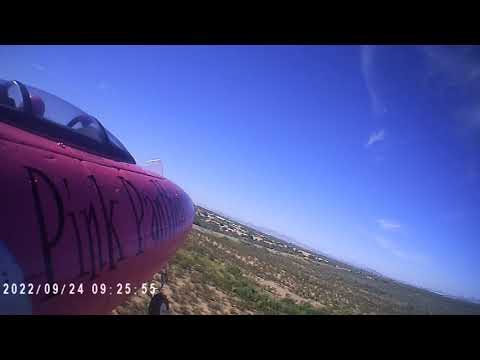
I will watch the video with interest

                            Comment


                            • #94
                              Rather than add the gear, I wanted a way to fly the airplane without the gear hanging down but I've had shoulder surgery and can no longer hand launch. Came up with the idea of a dolly, similar to what I did to get a sea plane off the runway. Here are a couple of photos. Used 3/8th inch poplar to build the dolly with 4-40 rods for landing gear and light weight wheels. Wanted to keep it light so I won't have much mass for the little fan to push down the runway.
                              FMS P-51B 1400 mm
                              Durafly T-28
                              1875 mm B-17 (lost in midair with FW-190 at Bomber Field)
                              Flyzone DE Havilland Beaver
                              Durafly 1200 mm F4U Corsair

                              Comment


                              • #95
                                I just got and built this jet today, I already set it up with the 4s 12blade fan unit. I'm figuring on flying it on 1800mah 4s packs. Want to keep it hand launchable.

                                Comment


                                • #96
                                  I put in an FMS unit, and I was able to (barely) fir in a Turnigy 4S 2650mAh battery and get the CoG just in front of the servo wires
                                  Click image for larger version

Name:	P1100846.jpg
Views:	261
Size:	80.5 KB
ID:	368653
                                  I feel like it has more than 1:1 thrust-to weight now, but weather hasn't allowed me yet to re-maiden this one. It still has the bungee hook, as with the original fan from some years ago it wasn't hand-launchable at all, it barely flew back then.
                                  I'm considering to cover that bungee hook with some sort of sled, so I could take off from grass. Worth the try.

                                  Comment


                                  • #97
                                    Originally posted by HangarQueen View Post
                                    I put in an FMS unit, and I was able to (barely) fir in a Turnigy 4S 2650mAh battery and get the CoG just in front of the servo wires
                                    Click image for larger version

Name:	P1100846.jpg
Views:	261
Size:	80.5 KB
ID:	368653
                                    I feel like it has more than 1:1 thrust-to weight now, but weather hasn't allowed me yet to re-maiden this one. It still has the bungee hook, as with the original fan from some years ago it wasn't hand-launchable at all, it barely flew back then.
                                    I'm considering to cover that bungee hook with some sort of sled, so I could take off from grass. Worth the try.
                                    Seems like with the cheater vents on the bottom it would suck up alot of FOD. I'd be careful with that aspect.

                                    Comment


                                    • #98
                                      Yeah, you're probably right, didn't consider that. But hand launch won't be a problem I think, and I have put in a stabilized receiver just for that purpose.

                                      Comment


                                      • #99
                                        Yes indeed, either way this is gonna be a fun little bird to fly!

                                        Comment


                                        • I just got the panther set up with my 4s system, got a 4 minute flight landed with 3.75vpc, 0 trim needed across the board with the cg spotted at the mid point of the aileron servo lead holes . It was perfect, and oh man, tons of fun. My setup was a 1800mah (claimed 75c) 4s pack up against the forward hatch point, mantis 65A (there is no kill like overkill) speed control shoved to the nose, the freewing 12 blade 4s power unit, had to shave some off the hatch for the strap to fit over the pack and under the canopy.

                                          Comment

                                          Working...
                                          X