You must Sign-in or Register to post messages in the Hobby Squawk community
Registration is FREE and only takes a few moments

Register now

Announcement

Collapse
No announcement yet.

Review and Discussion: Heng Long 1/16 "Panzer IV F.2" WW2 Light Tank

Collapse
X
Collapse
First Prev Next Last
 
  • Filter
  • Time
  • Show
Clear All
new posts

  • Review and Discussion: Heng Long 1/16 "Panzer IV F.2" WW2 Light Tank

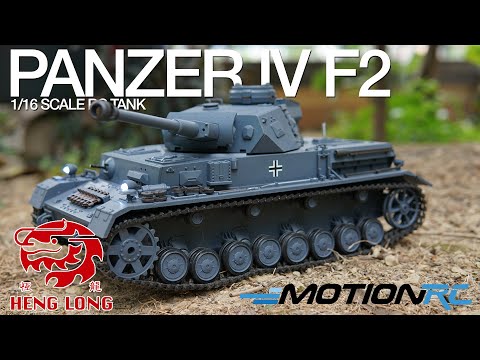
    Heng Long 1/16 Scale "Panzer IV F.2" WW2 Tank, Upgrade Edition

    Click image for larger version  Name:	PanzerIVF2LED.jpg Views:	0 Size:	118.9 KB ID:	222534

    Introduction:

    Representing the pinnacle of Panzer design in World War II, the Panzer IV series took the proven chassis of the Panzer III and upgunned it in response to the Soviet T-34 and American Sherman.


    My Personal Averaged Total Score for the Heng Long 1/16 Scale "Panzer IV F.2" WW2 Light Tank: 81 out of 100

    Read below to see how I arrived at this rating while evaluating the "Upgrade" version of this tank. "Upgrade" means that its exterior is plastic but its interior gears are steel. Note, where shown, the metal tracks denote a "Professional" version which includes more external metal parts at higher cost.
    As a visual companion to this written review, our Overview and Build Summary Video can be found *here*

    Functions:

    Featuring the latest TK6 MFCB (Multi-Function Control Board), all of Heng Long's other TK6 series 1/16 scale tanks are full of features:

    1) Proportional acceleration, steering, turret traverse, and gun elevation/depression
    2) Programmable radio settings for the amount of recoil, the sensitivity in turns, the overall sensitivity in acceleration, high speed and low speed modes, etc
    3) Smoke effect (On/Off)
    4) Headlights and Brake lights (On/Off)
    5) Volume (five settings including Off)
    6) Four different Sound Sets. Each Sound Set contains a unique engine start sound, idle sound, accelerating sound, traverse sound, elevate sound, machine gun, cannon firing, and shutdown sound.
    7) Track Recoil (Three settings from low, medium, and high) --This shudders the tank briefly rearward to simulate recoil when firing the main cannon. The Low or Medium settings are more realistic.
    8) Fires a 6mm plastic BB (~10 meters with minimal accuracy and limited velocity, but should still be treated with caution and with adequate eye protection)
    9) Fires an invisible IR signal to be used as part of Heng Long's Infrared Battle System, which disables other tanks when hit five times during simulated combat. Up to 20 tanks at the same time can battle each other!
    10) Independent suspension on all road wheels

    What's In the Box:

    As an RTR or "Ready To Run" RC model, everything is included in the box except six AA batteries for the radio transmitter. In areas where shipping liquids is restricted, the glycerin used for the "smoke effect" is absent, but can be found locally at hardware or convenience stores that sell glycerin oil.

    The radio, tank, cosmetic accessory parts, tank battery, tank battery charger, and plastic BBs, don't require any "assembly", other than installing the aforementioned "cosmetic accessory parts".

    Initial Two Minute Function Test:

    Because the tank itself is functionally complete and it doesn't require the cosmetic accessory parts to run, I recommend testing your tank's basic functions immediately after unboxing the tank, before you install the cosmetic accessory parts. If there happens to be any problems, it is better to report them to Motion RC for warranty support before the tank has any cosmetic parts attached to it.

    To conduct this initial two minute test, insert six AA batteries in the radio and turn it on. Plug in the tank's included 2s battery and slide the tank's switch to On. The radio and tank are already "bound" to each other via 2.4Ghz signal, so simply press the Key button on the radio and your tank will activate. Move all the tank's controls in every direction to evaluate their function. Refer to the Manual for all controls. Note that the turret and cannon barrel will produce a "clacking" sound when they reach their maximum travel points. This sound is normal and is a warning for you to stop moving it in that direction. Importantly, DO NOT run the tank more than two minutes for this initial test, since it arrives with only a storage charge.

    Once satisfied that your tank is operating normally, plug the battery into the included wall charger. While it's charging, turn your attention to the installation of the "cosmetic accessory parts", covered in the Details section, below.

    Details:
    Several "Cosmetic Spare Parts" are provided on plastic sprues for the modeler to install on the tank. These all plug into pre-drilled holes, and are nearly "snap fit". ABS glue can be used to adhere the parts permanently, but I prefer to keep them unglued. The Panzer IV F.2 has several tools that are installed on various flat surfaces around the tank. I recommend a sharp clipper designed for clipping out plastic parts, as it makes cleanup much easier. The accessory parts are pre-painted and really enhance the tank's overall surface detail. Modelers may touch up the paint to enhance the detail further. Note the open grates along the rear engine deck, which also serve as sound holes for the speaker inside. While the Panzer IV F.2 is small, it still sounds robust.
    Click image for larger version  Name:	3.jpg Views:	0 Size:	93.3 KB ID:	222537


    A glycerin based "smoke effect" is expelled through the rear exhaust pipe, in the same location as the real tank. Functional hatches are present on both sides of the turret, although they currently don't open to anything. Modeling tank crew members seat in this spot would be neat!
    Click image for larger version  Name:	PanzerIVF2Exhaust.jpg Views:	0 Size:	103.3 KB ID:	222535 Click image for larger version

Name:	7.jpg
Views:	4074
Size:	89.6 KB
ID:	222538
    Live Q&A every Tuesday and Friday at 9pm EST on my Twitch Livestream

    Live chat with me and other RC Nuts on my Discord

    Camp my Instagram @Alpha.Makes

  • #2
    Decals:

    The Panzer IV F.2's decal sheet is sparse, as real Panzers didn't have many markings. I opted not to install the "3848" decal because that is Heng Long's SKU number. I think Callie at Callie-Graphics.com would be a good source for a scale number. Apply the decals, as desired, on a cleaned and dried surface, using the instruction manual's clear diagrams. These are simple "peel and stick" adhesive vinyl decals, NOT water slide decals, so do not soak the decal in water otherwise you'll ruin the adhesive. Stick the decal to the surface, then use the back of your fingernail to firmly burnish the decal onto the surface, then carefully remove the clear upper film off of the decal itself.

    After applying the decals, you may want to seal them in with a clear coat such as a spray can of Testors Dullcote or WBPU ("Water Based PolyUrethane") from either Minwax or Varathane. I didn't apply a clear coat, but the decals continue to hold well to the surface, so I do not consider a clear coat absolutely necessary for casual use. If you do decide to apply a clear coat, always test under the tank first to ensure the colors do not react adversely to your chosen clear coat product.

    Two headlights are included on the Panzer IV F.2, that can be turned on and off using the radio transmitter via a button sequence as stated in the manual.


    Pre-Drive Checklist

    By the time you've finished detailing your tank with the parts sprues and decals, your tank's battery should be fully charged and you're now ready for your first full test run!

    Plug the battery back into the battery bay under the tank. I like how Heng Long designed the screw to always stay connected to the battery bay door, so it's impossible to lose that little screw. The 2s battery uses a Tamiya-style connector for main power, and also has a conventional three wire balance plug. I've found this to be convenient for checking the battery voltage with my battery voltage checker, just as I do with my larger airplane batteries. Heng Long's system will automatically shut down when the battery is depleted.
    Click image for larger version  Name:	DSC00211.JPG Views:	5 Size:	77.1 KB ID:	221369


    If you plan on battling your friends with the included IR (infrared) system, plug in the IR apple and locate its magnetic anchor spot behind the hatch. Heng Long's magnets are concealed inside the turret and thus there isn't any unsightly mount visible from the outside of the turret. The IR apple is low profile, and reasonably sensitive in overcast conditions out to ~10-15 meters.
    Click image for larger version

Name:	PanzerIVF2IR.jpg
Views:	3642
Size:	85.5 KB
ID:	222539

    As part of your pre-drive routine, inspect the Panzer IV's suspension bogies for any debris from previous use, especially if you run it outdoors in dirt or gravel. Check the suspension travel and rocking side to side, to ensure each road wheel moves smoothly.
    Click image for larger version  Name:	DSC00208.JPG Views:	5 Size:	105.2 KB ID:	221372Click image for larger version  Name:	DSC00209.JPG Views:	5 Size:	71.4 KB ID:	221373

    The Panzer IV's tracks are narrow, with exposed pins. Like the real Panzer III and Panzer IV, uneven off-road surfaces are best avoided.
    Click image for larger version  Name:	Tracks.jpg Views:	5 Size:	79.3 KB ID:	221371

    Live Q&A every Tuesday and Friday at 9pm EST on my Twitch Livestream

    Live chat with me and other RC Nuts on my Discord

    Camp my Instagram @Alpha.Makes

    Comment


    • #3
      Click image for larger version  Name:	DSC00295.JPG Views:	5 Size:	84.5 KB ID:	221457


      Running the tank:

      Driving the Panzer IV F.2 is easy! The right stick controls forward and reverse, and left and right travel of the tank treads. The left stick controls the turret's traverse (side to side) and elevation/depression (up/down) of the main gun. The trick is to synchronize your movements so that the tank moves realistically, and points the gun as the tank moves in a different direction. All Heng Long tank turrets can traverse 320 degrees, and the barrel elevates and depresses through a range of 20 degrees or so. When you hear a "clacking" sound, the movement has reached its maximum limit and you must stop pushing the stick in that direction. Perhaps in the future Heng Long will be able to implement a limit cutoff switch.

      Refer to the manual for how to fire the machine gun, the main gun sequence, load 6mm BBs, and conduct IR battles. The TK6 also allows the user to program a range of features by means of pressing down a combination of buttons and moving one or the two control sticks. The amount of recoil can be adjusted higher or lower, the top speed can be set to two limits, the sensitivity in forward turns and reverse turns, and other actions are programmable in mere seconds. Out of the box like most Heng Long tanks, the Panzer IV F.2's track recoil was too high for my liking, so I reduced it to the Low setting. The forward turning was too fast for my liking, more akin to an RC truck, so I reduced it down to turn more slowly and react to my inputs more sensitively like a real tank. RC Airplane pilots would recognize this feature as adding "Expo" or "Exponential". It's a neat feature that Heng Long has included in this latest generation of TK6 MFCB.

      Gears, Driveability, and Run Time

      The Upgrade version available from Motion RC does not use Zinc Alloy gears like Upgrade versions of years past. Rather, as of 11/2019, all of Motion RC's Upgrade version tanks include Steel gears, which are superior to the old Zinc Alloy gears in every way. While the remainder of the tank's running gear is ABS plastic, this Upgrade version is the better choice for a budget-conscious RC tanker because the steel gears in the gearbox are very durable, yet the plastic tracks keep the tank light and maneuverable. That being said, the Professional version of the Panzer IV F.2 replaces the plastic tracks, drive sprocket, and idler wheel with metal versions. This roughly doubles the tank's weight to over 8 pounds, and increases the cost as well, but the overall durability of the system is worth the investment if you plan to run your Panzer IV F.2 on grass or in rough conditions.

      Either version of this tank can easily climb a 40 degree incline on hard packed dirt. Avoid muddy conditions or wet grass, as it tends to clog the idler wheel rather quickly.

      Indoors, the sound is very loud, the LED headlight is bright, and the smoke is easily visible. Outdoors, the sound is still readily audible and the LED is also visible in daylight, and in fact I found the Panzer IV F.2's smoker to be among the better performers across the 20+ Heng Long tanks I've been driving. It uses a single tube that exits in the real tank's scale exhaust stack.
      Click image for larger version  Name:	DSC00282.JPG Views:	3 Size:	100.9 KB ID:	221458


      The stock battery is 2s 7.4v 1800mAh, with a Tamiya connector. With the smoke running, sound to maximum volume, and moving constantly, I run for an average of 20-25 minutes, or longer if I manage throttle and turn off the smoker. Spare batteries are inexpensive, so it's easy to keep running. On average, my stock batteries balance with the included charger to within ~0.1V between both cells.

      "Send It!" Firing the Airsoft BB Cannon and the IR Battle System

      Firing the machine gun by pressing the labeled button triggers a machine gun sound and a bright LED at the base of the coaxial mount located in the turret alongside the main cannon. Firing the main cannon is accomplished by holding down both the cannon button and the machine gun button, resulting in a cannon firing sound and a track recoil and a 6mm BB going flying 30 feet out of the tank. It's all synchronized very well, so that the overall effect is convincing. I prefer the lowest or the middle setting for track recoil, because the highest setting is too exaggerated and unrealistic in my opinion. I appreciate the need to push and hold two buttons to fire the main cannon, as this prevents accidental firing of the 6mm BB. The BBs don't hurt, but they are projectiles nonetheless, so all precaution should be taken for safety. I normally don't load any BBs, and after a hundred or so shots at the included target paper, I taped over the BB loading hole so that there's no risk of any further BBs firing from the main cannon.

      The most fun I've had with all these recent Heng Long tanks is engaging in IR Battles with other tanks equipped with the same TK6 MFCB. Whether a BB is loaded or not, firing the main cannon will always trigger the cannon sound and the track recoil, and will also always trigger the IR (infrared) emitter that's hidden in the mantlet, facing forward. This IR emitter sends an invisible beam that is detected by the IR mast that connects to any other TK6-equipped tank or Tamiya IR battle system equipped tank. The mast connects magnetically to the turret, and receives "hits" from other tanks. Registered hits result in the tank shuddering for a split second. After five hits, the tank plays back an "explosion and burning sound", then shuts down for five seconds, before powering back up automatically so you can resume battling your friends. A backyard brawl with four or five tanks is serious fun! Maneuvering and angling for a shot while driving for cover, all the while shouting taunts to your friends, becomes very competitive very quickly. Note the IR apple magnetically attached to the Panzer's turret:
      Click image for larger version  Name:	DSC00205.JPG Views:	0 Size:	85.7 KB ID:	222377


      I found the IR emitter's sensitivity to be acceptably consistent in overcast conditions out to ~10-15 meters. In optimum conditions, a hit can be registered out to 25 meters or more, but in my experience this was rare, and in local RC tank engagements, the range to target tends to be much shorter. It should also be noted that IR technology is susceptible to decreased performance in direct sunlight, which is why IR Tank Battlers often use sunshades on the IR receiver ("apple"). IR receivers can also be masked by obstacles, even those on the turret. Additionally, it appears that turning the turret can create less than consistent results when registering hits.

      Importantly, the Panzer IV F2's lower profile makes it a slightly harder target to hit during IR battles. Note its size compared to the Jagdpanther.
      Click image for larger version  Name:	DSC00199.JPG Views:	0 Size:	78.5 KB ID:	222378


      Power and Handling

      Simply stated, I wouldn't recommend buying the previous versions that came before the TK6. This TK6 MFCB makes the tank so much more enjoyable to drive and operate than all previous iterations of Heng Long's controllers that you've probably read about elsewhere online over the past 15 years or so. Even their tanks from two years ago don't drive like this new TK6.

      The Panzer IV F2 can be driven at a walking pace at full throttle on the High setting and about 25% slower on Low setting. Hold G and move the left stick up or down to select the High or Low setting, respectively. With the proportional steering controls, the Panzer can really be slowed down for "creeping" maneuvers that look very scale. This is where the TK6 MFCB shines, in giving excellent proportional control to everything that moves on the tank. Older versions only cycled their cannon barrel up/down in a loop, but now with this TK6 version I can elevate or depress the gun at any time along its path, and I can do so quickly or slowly in proportion with my stick inputs.

      To summarize the TK6 MFCB in one word: "Smooth".

      Upgrade path and "Wrenchability" --how easy is it to service, maintain, and upgrade this tank?:

      Speaking of the TK6 MFCB, I was pleased to see that it has several unused ports. There is a brake light port, and also turn signal ports. There is even a "Main Cannon Barrel LED" port, that flashes in sync with the cannon sound. If you were okay with running an LED into the barrel and cancelling the airsoft BB firing function, you could within minutes have a neat simulated "flash" at the tip of the barrel every time you fired the main gun.

      As mentioned previously, my Panzer IV F.2 is the "Upgrade" version, meaning its exterior components are all plastic, while the gears in the gearbox are steel. I find this to be a great balance between cost, driveability, and weight. The more expensive "Professional" version features metal tracks, road wheels, idler wheel, and drive sprocket --essentially all the moving drive system parts outside of the tank--. This significantly increases the weight, which some tankers may enjoy, and also the durability in certain conditions, but the trade-off for this weight gain is lower drive time. For anyone operating the heavier Professional version, I recommend buying a spare battery or two. Between the Upgrade and Professional, I prefer the Professional.

      The metal parts also arrive unpainted, making it easy to visually distinguish in product photos which version is which. If the road wheels are green and the track is black, they're plastic and that's the Original or Upgrade version. If the road wheels are metal colored and the tracks are as well, then they're metal and that's the Professional version. The metal wheels would need to be painted by the user, if he/she prefers.

      Things to watch out for:

      1) The plastic BBs included in all of Heng Long's tanks aren't the best. Their instruction manual recommends visually sorting the BBs and removing any BBs that are deformed, flat, broken, or oblong. About 5% of the Panzer's BBs were unusable.

      2) Don't flood the smoker. There is one smoker in the tank, with one exhaust tube exiting in the same location as the real tank. Those tubes in fact function as both the exhaust for the smoke and the intake for the smoke oil, so it's imperative that you only put one drop in each of the tubes every hour of smoking. Less is more! If you overflow the tubes, the smoke can't exit, causing the smoker unit to clog and die.

      3) Read our "Do's And Don'ts of RC Tanking" article *here* and watch its accompanying video *here* for all relevant tips, tricks, and warnings that pertain to any RC tank. Most importantly, do not attempt to run the tank into obstacles larger, in 1/16 scale terms, than what the real tank was subjected to. These tanks are not scale crawler trucks, so don't expect them climb over rocks and boulders taller than the tank's ground clearance, which is typically around 1" from the underside of the hull. Also, do not attempt to drive in water or mud. In their stock form, RC tanks are not intended to be used in wet or muddy conditions. Extensive waterproofing and cleaning is just the start of upgrades required to make such operation repeatable without irreparable damage.
      Live Q&A every Tuesday and Friday at 9pm EST on my Twitch Livestream

      Live chat with me and other RC Nuts on my Discord

      Camp my Instagram @Alpha.Makes

      Comment


      • #4
        CONCLUSION

        As with all Heng Long 1/16 tanks, I assess a rating for each of seven key areas. Having driven all of Heng Long's 20+ tanks, my ratings are in the context of the Panzer IV F2's own cost and intended audience, which is the entry level and mid-level RC tank enthusiast looking to get started in the $150-$250 range without breaking the bank. From that vantage point, here is how I rank the Heng Long 1/16 Scale "Panzer IV F2" light tank:

        Initial Quality: 94/100
        Like all Heng Long tanks, the Panzer IV F2 is primarily composed of ABS plastic, and arrives completely painted in a German Gray that, I should mention, is slightly less blue than Heng Long's Tiger I. The packaging was secure, and nothing was missing. During the two minute test drive, everything functioned as it should. Aside from a few poorly molded airsoft BBs, the rest of the overall RTR package's initial quality cannot be faulted.

        User-Friendliness and Transportability: 90/100
        The convenience of Heng Long's RTR package really makes it easy to get started in the world of RC tanks. In that sense, all of Heng Long's tanks excel in lowering the cost of entry into this segment of the hobby, and I think many scale enthusiasts would appreciate a scale tank as much as they would a scale airplane, car, truck, or boat. Heng Long's included radio does the job, without being overly flashy. I tend to prefer a cheaper overall package with this basic radio than one with super low latency and 1km range and hall effect sensored bearing gimbals. This isn't a jet flying at 100mph away from me at a thousand feet. While other manufacturers dominate the higher scale and higher featured market, the price is often prohibitive for someone starting out with their first tank to see if it's even something they're interested in.

        The Panzer IV F2 lacks an adjustable idler like the newer Challenger II or T-72, which means fine adjustments cannot be made to track tension. As it was delivered out of the box, my Panzer did not need adjustments to the track tension, but if it ever did, a tanker would need to learn how to remove or add track links. This simple task is still technically less friendly to new tankers than if the Panzer IV F2 had included a built in adjustable idler.

        In terms of transportability, the Panzer IV is very easy to carry around with one hand while firmly gripping the glacis. It fits in a backpack or small duffle bag, and doesn't have too many small parts hanging off of it which could get snagged and lost during transport. Its barrel is longer than the Panzer III, but the Panzer IV's metal outer barrel is sturdy and I don't worry about it as much compared to the long barreled King Tiger, T-99, Leopard 2A6, etc.
        Click image for larger version

Name:	IR Battle.JPG
Views:	11219
Size:	75.0 KB
ID:	222540


        Mobility and Drive Experience 78/100

        The bogie suspension does its best to represent the real Panzer IV's suspension, however, like the real tank, this 1/16 scale model's suspension does not have a lot of travel to absorb deeply uneven terrain. Additionally, the narrow tracks, and scaled as they are to depict the outer pins, are less robust compared to wider tracked vehicles. It's just physics, and this works against the Panzer IV F2. On harder surfaces, it runs like a champ. But turning in place while on carpet or grass may eventually work out the idler wheel screw or otherwise fouling the track system. This is a tank that is happiest running on pavement, packed dirt, or roadway, but not on grass or soft sand due to the higher rolling resistance.
        Click image for larger version  Name:	DSC00284.JPG Views:	0 Size:	113.0 KB ID:	222374


        Durability 78/100
        After about 8 hours of testing, I was able to work out the port idler screw. I was able to epoxy it back into place, so it was an easy fix, and the issue occurred while I was spinning in place on grass during my destructive testing, so it wasn't "normal use", but I still want to mention that it happened. Under normal use on the harder surfaces I mentioned in the previous paragraph, the Panzer IV's expected durability ranks in the high 80s. But this one incident knocks it down as a matter of caution.

        Scale Fidelity 82/100
        The included sprues of "cosmetic accessory parts" are pre-painted as shown below, and really enhance the tank's overall surface detail, as can be seen on the engine deck. I think a static modeler would have lots of fun detailing and weathering this tank. It's big enough to fill a display cabinet, but not too large where its unwieldy to move around. As mentioned in my summary in the video in post #1, I ditched the metal elbow wire provided for the front tow shackles because they didn't fit well.

        Click image for larger version

Name:	Tracks.JPG
Views:	3772
Size:	99.5 KB
ID:	222541Click image for larger version

Name:	DSC00291.JPG
Views:	0
Size:	0
ID:	222542

        Ease of Maintenance and Upgrade Potential 81/100
        As a smaller tank, the Panzer IV is easy to maintain externally, but its internals are somewhat cramped. There are several aftermarket upgrades available for the Panzer III and Panzer IV variants, for modelers wanting to enhance the tank's scale fidelity and add features like a recoiling cannon barrel.

        Overall Value (Cost, Size, Performance, Quality) 82/100
        The Panzer IV was a major workhorse in WW2. In 1/16 scale from Heng Long, it is a good looking tank that runs well on hard surfaces, but its scale-esque suspension limits it capabilities for certain users. As an occasional driver with good looks and great historical significance, the Panzer IV could become a gem in the hands of the right owner.
        My Personal Averaged Total Score for the Heng Long 1/16 Scale Panzer IV F.2: 83/100
        Click image for larger version  Name:	3.jpg Views:	0 Size:	93.3 KB ID:	222376

        Live Q&A every Tuesday and Friday at 9pm EST on my Twitch Livestream

        Live chat with me and other RC Nuts on my Discord

        Camp my Instagram @Alpha.Makes

        Comment


        • #5
          Love the look of the this Panzer, really pops on video.

          Comment


          • #6
            Something to be said about the Panzer. Very Nice!

            Comment


            • #7
              VERY interested in this tank! The Pz.IV is probably my favorite german medium tank from WWII. The F2 did indeed use the /L43 75mm gun, with the later H and J variants using the /L48. At first I was skeptical of the panzer grey finish, but after some research it is correct for early F2 models. Later on all German armor wore the dark yellow (dunkelgelb) straight from the factory with various camouflage schemes applied by the crews in the field. I would be very tempted to get out my airbrush and repaint to the later pattern. If it were a Pz.III or Pz.II on the other hand....
              Tarasdad

              Comment


              • #8
                Love this tank.

                Comment


                • #9
                  just bought one 2nd hand with metal upgrades. However no instructions for controller can anyone advise where I maybe able to source instructions. New to this hobby so floundering

                  Comment


                  • #10
                    Originally posted by mciver View Post
                    just bought one 2nd hand with metal upgrades. However no instructions for controller can anyone advise where I maybe able to source instructions. New to this hobby so floundering
                    There have been a few generations of this tank with very different remote control systems. It would help to see a photo of the transmitter and if possible the inside of the tank showing the receiver/MFU.

                    Keep in mind the older electronics 5.3, 5.2, and down perform nowhere as good as the new 6.0/1 systems.


                    Comment


                    • #11
                      Thanks Rubicon99 I will do that when I know how to get inside

                      Comment


                      • #12
                        Hello fellow tankers. This was my first jump into scale tanking. This is officially from the MotionRC new batch of Heng Long tanks and my first custom tank ever. I have painted many model kits over the years but never one so big that I got to drive around after finishing. Firs run after charging we got around 30 minutes of runtime from the model running on smooth wood floors.... the dog hates it. The smoke system is fantastic on this model (I have two other tanks now) this tank has a little puff to it that’s different than the other models and I really enjoy this one more than some of the others. I’d say this tanks biggest week spot is the tracks if I where to purchase this one again metal tracks would be a must. If you plan on running it outside as I have it struggles in sand. Just go into it expecting it on the standard version but hay you save money to buy more tanks. I like painting the model as much as driving it. The techniques I used where hairspray white wash and lots of rust. I highly recommend the YouTube channel night shift for weathering techniques. I will link him at the end. The tank doesn’t disappoint and I’d definitely recommend this to a friend. Go get chew sum!!!!
                        I'm a night owl. And also a modeller obsessed with rough steel textures and weathering ¯\_(ツ)_/¯ Well hello there! I'm Martin, a plastic modeller from Eastern Europe. I enjoy building, detailing, weathering and documenting the creative process on my models (which are usually tanks, and by usually I mean always). My channel is about all the things we, armor modellers, enjoy. I make detailed vlog-style video tutorials from my builds where I explain and demonstrate how to use techniques ranging from basic to advanced. Washes? Oil paints? Chipping? Rust? Mud? Dust? Battle damage? Well, I've got just the thing. If you want to learn some new techniques and maybe get inspired for your own projects, you've come to the right place. I'm sure we'll be the best armor buddies!

                        Comment


                        • #13
                          Originally posted by Merry Boozer RC View Post
                          Hello fellow tankers. This was my first jump into scale tanking. This is officially from the MotionRC new batch of Heng Long tanks and my first custom tank ever. I have painted many model kits over the years but never one so big that I got to drive around after finishing. Firs run after charging we got around 30 minutes of runtime from the model running on smooth wood floors.... the dog hates it. The smoke system is fantastic on this model (I have two other tanks now) this tank has a little puff to it that’s different than the other models and I really enjoy this one more than some of the others. I’d say this tanks biggest week spot is the tracks if I where to purchase this one again metal tracks would be a must. If you plan on running it outside as I have it struggles in sand. Just go into it expecting it on the standard version but hay you save money to buy more tanks. I like painting the model as much as driving it. The techniques I used where hairspray white wash and lots of rust. I highly recommend the YouTube channel night shift for weathering techniques. I will link him at the end. The tank doesn’t disappoint and I’d definitely recommend this to a friend. Go get chew sum!!!!
                          https://www.youtube.com/channel/UCNM...XBA9buLmJqYLdw
                          Nicely done Panzer👍👍👍

                          Comment


                          • #14
                            That's some seriously awesome weathering.

                            Comment


                            • #15
                              Originally posted by Prowler901 View Post
                              That's some seriously awesome weathering.
                              Thanks it really is one of the most enjoyable part of tanking to me. I’m in the process of doing the bulldog and I plan on documenting it here on squawk. I want to show the awesome products I’ve found over the years that really make it a breeze to weather now.

                              Comment


                              • #16
                                Excellent. I look forward to seeing your Walker. I have one and I'm planning on "modernizing " it. Similar to what the Dutch have done.

                                Comment


                                • #17
                                  Prowler, Im currently building an M41 DK1 myself. heres what ive got so far Click image for larger version

Name:	DK1.jpg
Views:	3144
Size:	133.0 KB
ID:	250546

                                  Comment

                                  Working...
                                  X