You must Sign-in or Register to post messages in the Hobby Squawk community
Registration is FREE and only takes a few moments

Register now

Announcement

Collapse
No announcement yet.

Ram II Tank

Collapse
X
Collapse
First Prev Next Last
 
  • Filter
  • Time
  • Show
Clear All
new posts

  • Ram II Tank

    Click image for larger version

Name:	Ram II 02.jpg
Views:	375
Size:	149.6 KB
ID:	352017

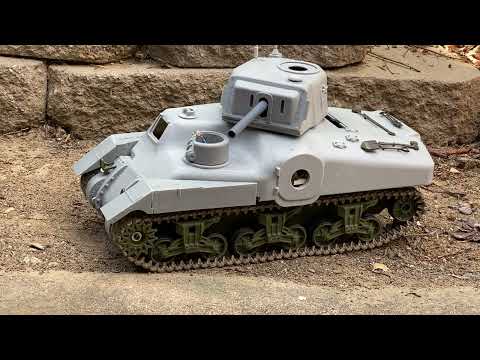
    It's me again, starting another thread. I'm going to be converting a HL Sherman to a Ram II tank using Vandramodel's conversion kit. The mod is on its way from DAK RC. While waiting, I'm disassembling my M4 Sherman, a "static" kit Toucan sells without electronics. A major step is to modify the bogies to an earlier type, like that found on the M3 Lee. To accomplish this, the bogies need to be removed.

    (Photos from Vandramodel's assembly guide.)

    Click image for larger version

Name:	1 (3).jpg
Views:	395
Size:	64.5 KB
ID:	352015Click image for larger version

Name:	1 (5).jpg
Views:	337
Size:	122.0 KB
ID:	352016

    I learned something about the "static kits" I thought I'd share. In reality, they are kits that failed quality control so they bill them as non-operational . In this case, two of the six bogies had been broken and glued on the hull because the screw posts were cracked. That was the bad news, the good news is they used CA, so debonder loosened them quickly. This isn't a slam on Toucan, the static kits are still great starting points for projects.

    Anyway, once the kit arrives, I'll post more.
    Twenty six tanks, and not done yet!

  • #2
    Ok, my box 'o parts came today. Having made three other Vandra kits, including the M3 Lee, I immediately looked at what my tasks would be. I'm sharing this build in case others feel like tackling one of their projects.

    Specific to the HL Sherman based builds, the gearboxes have to be modified to allow the "early three piece" front end to fit. The metal frame has to be cut down for the front piece to mate with the hull. You'll see the black ink line where I'll have to cut. There may be some additional rounding of the metal. but that comes later. I have a bench rotary cutter, like a heavy duty Dremel, with a cutting disk that I'll use for the purpose. Can't be timid about cutting into stuff!

    Click image for larger version

Name:	Ram build 01.jpg
Views:	331
Size:	110.5 KB
ID:	352414

    Twenty six tanks, and not done yet!

    Comment


    • #3
      Is there a risk of hot spark damage?

      Comment


      • #4
        A couple of hours work with the rotary tool - cutting disk, sanding disk, router bit - has the front, upper hull and side boxes fitted, almost. Everything is only dry-fitted at this point. My procedure is to wrestle with the gross assembly steps, and go back later to add details, etc.


        Working on a Vandra kit is like building the old balsa airplane kits. Instructions are minimal, and the builder is expected to adjust and improvise to overcome deficiencies. It's definitely not a "shake the box and its done" product! My plan is to make it into an IR battler since it's based on the very reliable HL Sherman chassis. I'll make the secondary mg turret move an RC Geek Random Servo Motion Generator, with the mg flashing LED mounted in it.


        Interesting photo, showing a wavy black camo scheme. Might have to do that!
        Twenty six tanks, and not done yet!

        Comment


        • #5
          Bob is spot on with Vandra kits. I still have a Vandra SU-122 I'm struggling with to get the gun to just go up and down straight.

          Comment


          • #6
            Originally posted by tank_me View Post
            Bob is spot on with Vandra kits. I still have a Vandra SU-122 I'm struggling with to get the gun to just go up and down straight.
            I had a 76 turret for a T-34 that had the same problem. Not a Vandra product, but similar production quality. Sort of a pain, huh?

            I don't usually post photos of tools, but this one has been absolutely indispensable. In two largely full time days, I trimmed the hull top to fit cut a bunch of stuff to make the barrel elevate and the turret rotate freely, started on altering the bogies to an earlier type, and other tasks. Without this machine, I'd be on step one, or maybe even Step X, the round file! Viva power tools! A lot of sanding & cutting is required for this kit.

            Click image for larger version

Name:	IMG_2736.jpg
Views:	322
Size:	244.4 KB
ID:	352486

            As an example, major surgery is required for the bogies. (Their photos, it's all you get for instructions.)

            Click image for larger version

Name:	1 (3).jpg
Views:	291
Size:	64.5 KB
ID:	352487Click image for larger version

Name:	1 (5).jpg
Views:	273
Size:	122.0 KB
ID:	352488

            Since I'm posting, here are a couple of progress shots:

            Click image for larger version

Name:	IMG_2737.jpg
Views:	287
Size:	179.8 KB
ID:	352490Click image for larger version

Name:	IMG_2738.jpg
Views:	277
Size:	108.0 KB
ID:	352489
            Twenty six tanks, and not done yet!

            Comment


            • #7
              Another day of "work". Don't know why my wife calls it play...

              The front bins and fenders are in. A major caution here. The bins should be attached to the upper hull, not the chassis, and the fenders to the bins. logically one would think to attach them to the chassis. Nay nay! The bins/fenders need to be removable to access the front lower glacis, or the screws would be inaccessible. I discovered this when I wanted to install the headlights. Can't be done without removing the front. Thank god for a good debonder!

              Click image for larger version

Name:	Ram build 06.jpg
Views:	296
Size:	109.2 KB
ID:	352526
              Twenty six tanks, and not done yet!

              Comment


              • #8
                Coming along nicely!

                Comment


                • #9
                  A short clip just meant to show my progress; turret and gun works, lights work secondary turret and mg flash work. Now for the tedious part, retrofitting the bogies. What an oddball looking tank, which makes it irresistible to me!


                  Twenty six tanks, and not done yet!

                  Comment


                  • #10
                    I cut a length of lucite rod and installed it in the secondary turret. I painted all but the end black. Works good!

                    Click image for larger version

Name:	IMG_2743.jpg
Views:	283
Size:	84.2 KB
ID:	352637
                    Twenty six tanks, and not done yet!

                    Comment


                    • #11
                      Looking great!

                      Comment


                      • #12
                        Status update:

                        First coat of paint. Many art pictures show a brownish khaki, and one modeller provided a mix to replicate the Canadian color. It's hard to know what it really looked like since the period photos and the modern examples display a shocking range, from a sage green, a dusty rose to a strong green, I guess whatever the owner had in their paint cans. Dirt, mud and dust will change it anyway. I have Forgebear decals enroute from the UK, so that's next. Disappointingly I won't be hinging the side, front and top hatches. I tried, but the resin isn't strong enough to endure much opening and closing.


                        Click image for larger version

Name:	IMG_2744.jpg
Views:	257
Size:	245.2 KB
ID:	352865

                        A feature of this model is the M3 style bogies with return rollers mounted on top, not offset like the M4's. Vandra's design seems very fragile. I don't know if it will withstand battle stress, although I have driven it around on cement, brick and loose dirt. There is a plan B; I've seen wartime Ram II's with M4 bogies (maybe their M3's broke too?) so if these fail, I'll just replace them with M4's.

                        Click image for larger version

Name:	IMG_2746.jpg
Views:	239
Size:	189.1 KB
ID:	352866

                        Some of the detail I anticipate adding is external stores, tarps, satchels, boxes and the like. My "what if "scenario is if Ram's were actually used in combat in WW2, which wasn't the case in reality. To this end, I have a question; how was this stuff secured on the tanks? Photos don't show enough detail to answer this, and if they aren't secured, I imagine they'd fall off like a Starbucks coffee left on your car roof!

                        Twenty six tanks, and not done yet!

                        Comment


                        • #13
                          I use ropes on my Sherman and adlib a bit. There are so reasonable stowage photos here.https://www.theshermantank.com/sherm...-guns-and-men/

                          Hope it helps. The Ram looks great!

                          Comment


                          • #14
                            Variations on a theme..

                            Twenty six tanks, and not done yet!

                            Comment


                            • #15
                              Got some Canadian Tank Brigade decals from Forgebear in the UK. Sprayed clear gloss, applied decals, will wait for them to dry for the next step.

                              Click image for larger version

Name:	IMG_2750.jpg
Views:	256
Size:	208.5 KB
ID:	353036
                              (Sorry about the preceding empty post. I encountered a technical glitch, called "I forgot" to add a photo.)
                              Twenty six tanks, and not done yet!

                              Comment


                              • #16
                                WOW!!!!!! Looks fantastic! Well done!

                                Comment


                                • #17
                                  Ok, these were the “variations” I mentioned earlier.

                                  Click image for larger version

Name:	DCDDADB5-4929-4694-A32D-ADB1475AC3FF.jpeg
Views:	241
Size:	190.7 KB
ID:	353078
                                  Twenty six tanks, and not done yet!

                                  Comment


                                  • #18
                                    Nice collection! Which is your favorite?

                                    Comment


                                    • #19
                                      Ok, it's done. It received its baptism of fire today at the San Diego IR battle, and all went well. My chief concern is whether the return rollers which were CA'ed would hold up and they did.

                                      Click image for larger version

Name:	Ram II 07.jpg
Views:	239
Size:	151.6 KB
ID:	354080

                                      Click image for larger version

Name:	Ram II 06.jpg
Views:	216
Size:	260.5 KB
ID:	354081

                                      Click image for larger version

Name:	Ram II 10.jpg
Views:	207
Size:	194.4 KB
ID:	354082
                                      (Photos also posted in the gallery.)


                                      Twenty six tanks, and not done yet!

                                      Comment


                                      • #20
                                        Looks great! Another job well done.

                                        Comment

                                        Working...
                                        X