Callie Graphics

You must Sign-in or Register to post messages in the Hobby Squawk community
Registration is FREE and only takes a few moments

Register now

Announcement

Collapse
No announcement yet.

Official Tongde US M60A1 ERA 1/16 Scale Battle Tank Discussion Thread

Collapse
X
Collapse
First Prev Next Last
 
  • Filter
  • Time
  • Show
Clear All
new posts

  • Official Tongde US M60A1 ERA 1/16 Scale Battle Tank Discussion Thread

    Click image for larger version

Name:	tongde-us-m60a1-era-upgrade-edition-1-16-scale-battle-tank-rtr-motion-rc-35185308532921.jpg
Views:	352
Size:	188.3 KB
ID:	398355


    The specs and images shown are for the upgrade edition. The professional edition comes with metal upgrades and can be found here.


    Motion RC is pleased to offer Tongde RC tanks and IFV’s to global RC tankers! Offering unique subjects, these models are available in similar versions to other familiar manufacturers. When combined with Motion RC’s industry-leading selection, parts support, and customer service, Tongde RC models deliver an unbeatable value for RC armor enthusiasts.

    Originally designed as a replacement for the M48 Patton, the M60 series became a primary MBT during the Cold War, with more than 15,000 units manufactured. The largest deployment of M60A1 tanks was in the 1991 Gulf War conflict, where US Marines defeated Iraqi forces equipped with T-72’s. The ERA (Explosive Reactive Armor) enhancements are accurately depicted on this model. This tank remains in service today in several NATO countries.

    This upgrade version offers nylon tracks and road wheels for light weight and budget friendliness, while delivering an extensive feature list that includes LED lights, sound, airsoft BB launch, IR battle system (compatible with other brands), and more. All of Motion RC’s Tongde 1/16 scale tanks utilize the latest TD 2.0 MFCB (Multi-Function Control Board) for outstanding control, performance, playability, and upgrade potential!
    Compact and Efficient Gearboxes

    Tongde Upgrade models feature lightweight, economical nylon gearboxes while Professional versions include a metal-geared unit.
    LED Lights and Scale Details

    The ideal balance of scale detail and practical RC Tanking, each Tongde model has LED lights and arrive factory painted and includes accessory detail parts to further enhance the tank's realism.
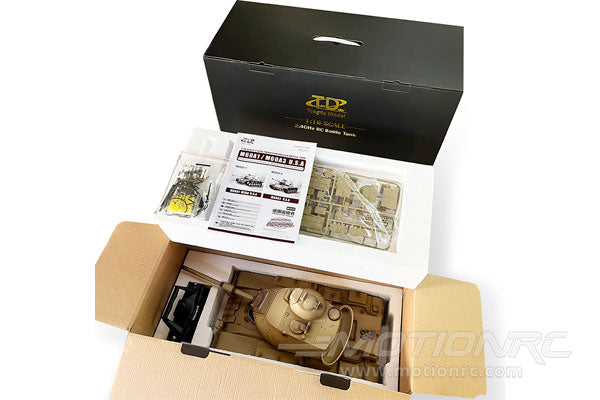
    Ready to Run

    Each Tongde model arrives "Ready to Run" (RTR) to allow enthusiasts to join the exciting world of RC Tanks quickly and easily!
    Airsoft BB Launch

    In addition to IR battle capability, the M60A1 can safely fire 6mm plastic airsoft BBs at targets up to 10M (30’) away. Please always take safety precautions and wear eye protection.
    Features:
    • Latest generation TD 2.0 Multi-Function Control Board (MFCB)
    • Proportional acceleration, steering, turret traverse, and gun elevation/depressio
    • Programmable radio settings for the amount of recoil, the sensitivity in turns, the overall sensitivity in acceleration, high speed/ low speed modes, etc.
    • Cannon recoil system
    • Adjustable track tension
    • Smoke effect (on/off)
    • LED lights (on/off)
    • Sound effects volume
    • Four different sound sets. Each contains a unique engine start, idle, accelerating, traverse, elevate, machine gun, cannon firing, and shutdown sound
    • Track recoil
    • Fires a 6mm plastic BB (10 meters with minimal accuracy and limited velocity, but should still be treated with caution and with adequate eye protection)
    • Fires an invisible IR signal to be used as part of Tongde’s Infrared Battle System, which disables other tanks when hit five times during simulated combat.
    • Independent suspension on all road wheels
    Includes:
    • Tongde US M60A1 ERA Upgrade Edition 1/16 Scale Battle Tank - RTR
    • 2S 7.4v 1800mAh Li-ion battery with Tamiya connector
    • 2S USB LiPo/Li-ion battery charger
    • 12 channel 2.4GHz radio transmitter
    • Magnetic infrared (IR) battle system receiver
    • Painted cosmetic accessory parts
    • Adhesive decal sheet
    • 6mm plastic BBs (50 Pack)
    • Smoke oil
    • Comprehensive instruction manual
    Requires:Optional:Product Specifications:

    AGE LEVEL : 14 and up
    SKILL LEVEL : Beginner
    BUILD TIME : 1 Hour
    Scale 1:16
    Length 59.5cm / 23.2in
    Width 23cm / 9.0in
    Height 20cm / 7.8in
    Weight 4,350g / 155oz
    Body Material ABS plastic
    Chassis Material ABS plastic
    Track Material Plastic
    Motors Two 380 motors (28x37mm)
    Bearings Metal bushings
    Gearbox Gear Material Plastic
    Adjustable Gear Ratio No
    Differential Type N/A
    Suspension Type Torsion bar
    Sprocket Plastic
    Road Wheels Plastic
    Idler Wheel Plastic
    Adjustable Idler Yes
    Turret Rotation 320 degrees
    Lights Yes
    Sound Yes
    Exhaust Effect Yes
    IR Battle Ready Yes
    Airsoft BB Launch Yes, 6mm
    Track Recoil Yes
    Cannon Barrel Recoil Yes
    Required Battery 2S 7.4V 1800mAh Li-ion battery with Tamiya connector (included)
    Required Radio 12 channel 2.4GHz (included)
    Skill Level Beginner
    Build Time 1 hour
    Recommended Environment Indoor / outdoor

  • #2
    I have an early production plastic version of TD M60A1 ERA. I upgraded it with TD metal gearbox, sprocket and idler wheel. I added ball bearings to the suspension arms and road wheels with excellent results. I upgraded the torsion bar suspension arm brackets with the resin ones from RichJohnson . All screws were replaced with steel screws.

    I replaced the TD motors with a pair of the Tamiya380 on the gearbox. The motor were really screwed on tight to the gearbox case. I already noticed that TD used cheap screws (M2.5) for the motor mounting. I still stripped the philips head of the 4th screw. It took me a 3 hours battle to remove this screw from the motor. I mounted the tamiya motors and reassembled the gearbox.

    The 4 screws hold the 2 gearbox halfs together are NOT the standard M3 machine screws that I expect. The screws are coarse thread self tapping type. I decided not to touch them.
    While Tongde tank has reasonable chassis structure thickness, they have this bad habit of drilling screw holes in to the structure making the screw seat at half the thickness. The result is many crack and broken places. It happens at both side of the gearbox mount.
    Click image for larger version  Name:	IMG_5168.jpg Views:	11 Size:	94.4 KB ID:	377837Click image for larger version  Name:	IMG_5170.jpg Views:	10 Size:	125.1 KB ID:	377838
    The self tapping screw also created a one inch crack on the plastic gearbox. I repaired it with a small amount of CA glue and sanded it down flash again. The screw looks like a #4 screw which is just a hair smaller than the M3 machine screw. I decide to tap the holes on the gearbox for M3 machine thread. Because the #4 screw hole is smaller leaving enough material for the M3 tap. One pair of the M3 screws are 18mm long. I saw off a 20mm screw and grid it smooth. The metal gearbox is now using M3 machine screws which makes me feel making it much more secure. The use of #4 self tapping screw for the gearbox mounting is very unprofessional. Re-tapping and changing to M3 machine screws makes the chassis and gearbox act like one piece structurally. Mounting the gearbox to the chassis sidewall is a much better design than the Heng Long's long pole floor mounting scheme.

    Click image for larger version  Name:	IMG_5171.jpg Views:	0 Size:	92.8 KB ID:	377841Click image for larger version  Name:	IMG_5172.jpg Views:	0 Size:	128.3 KB ID:	377842 Click image for larger version  Name:	IMG_5241.jpg Views:	8 Size:	134.6 KB ID:	398653 Click image for larger version  Name:	IMG_5251.jpg Views:	43 Size:	154.1 KB ID:	398654 Click image for larger version  Name:	IMG_5252.jpg Views:	43 Size:	126.4 KB ID:	398655 Click image for larger version  Name:	IMG_5250.jpg Views:	43 Size:	75.2 KB ID:	398656

    Comment


    • #3
      When leaving the factory, the internal components, MFU, speaker, battery were glued to the chassis floor using double faced tape. It did not work well and the parts were knocking around inside the chassis. I cut a 1/8" plastic to build a plateform over the torsion bars. I screw it onto an unused pole on the chassis floor. I replace the OEM battery with a DIY 2S26650 Li-Ion cells for a 5000mAh pack. The MFU, speaker, battery were fixed using Velcor tape for flexibiltiy. I charge the battery off the tank.
      Click image for larger version

Name:	IMG_5295.jpg
Views:	269
Size:	172.5 KB
ID:	398724 Click image for larger version

Name:	IMG_5296.jpg
Views:	252
Size:	133.7 KB
ID:	398726 Click image for larger version

Name:	IMG_5297.jpg
Views:	255
Size:	126.9 KB
ID:	398725

      Comment


      • #4
        I got mine the other day and I'm still having trouble getting my mind around the fact that you can't remove the battery. I like Rubicon's mod for the battery but having to push past the gear boxes kind of bothers me, so when I get around to mine I think I'll do some kind of lift off top attached with magnets. I'm told rubicon did quite a bit of testing with the upper hull off the tank and the lower alone seems to be pretty rigid. If necessary I can always add additional bracing.

        Comment


        • #5
          Originally posted by Max-U52 View Post
          I got mine the other day and I'm still having trouble getting my mind around the fact that you can't remove the battery. I like Rubicon's mod for the battery but having to push past the gear boxes kind of bothers me, so when I get around to mine I think I'll do some kind of lift off top attached with magnets. I'm told rubicon did quite a bit of testing with the upper hull off the tank and the lower alone seems to be pretty rigid. If necessary I can always add additional bracing.
          I ended up with a hybrid process - some magnets, but two screws also. I used to use only magnets, but I bounced the tank once so hard the top fell off. The screws keep that from happening. Using two screws isn't so much more than the single screws Heng Long uses. To give context, the Mato I have all require removing one or two screws and lifting off the top. I do see that TD has added new access options to their M2 Bradley and the forthcoming Churchill that other companies don't include.
          Twenty six tanks, and not done yet!

          Comment


          • #6
            Originally posted by Max-U52 View Post
            I got mine the other day and I'm still having trouble getting my mind around the fact that you can't remove the battery. I like Rubicon's mod for the battery but having to push past the gear boxes kind of bothers me, so when I get around to mine I think I'll do some kind of lift off top attached with magnets. I'm told rubicon did quite a bit of testing with the upper hull off the tank and the lower alone seems to be pretty rigid. If necessary I can always add additional bracing.
            The rear panel access mod is really not intended to be used for installing and remove the entire battery. It's is just to ease the access to the battery connections and simplify the charging process bypassing the need to crank the turret to one side to access the charging hatch/port and on off switch. You are correct trying to push a battery in and out past the motors would be a feat unto itself.

            I am definitely not a fan of the way TD did the battery set up on the M60 but it is done and we can only work around the design as best we can. A lot of people have gone the way of a "magnetized" stock hull attachment mounting points.

            I don't use Lipos or Li-ion, I am a custom built NiMH guy when it comes to tank batteries, but I am looking at setting up my next M60 with the option to add magnets. I am having all new mounts designed and printed to make it a relatively straightforward mostly "drop in" mod that bypasses the stock hull mounting points and can hand being bounced around quite a bit without the top come off. Hopefully 🤞🤞they work as expected.


            Comment


            • #7
              Video of rear panel access to charge a battery

              https://youtu.be/gSkjlnKe710?si=bzNZ2dsetzUZT-eu
              RC tank parts and accessories I make
              www.RichardSJohnson.net/id28.html

              Comment


              • #8
                Originally posted by Max-U52 View Post
                I got mine the other day and I'm still having trouble getting my mind around the fact that you can't remove the battery. I like Rubicon's mod for the battery but having to push past the gear boxes kind of bothers me, so when I get around to mine I think I'll do some kind of lift off top attached with magnets. I'm told rubicon did quite a bit of testing with the upper hull off the tank and the lower alone seems to be pretty rigid. If necessary I can always add additional bracing.
                The baseline battery came with the tank is a 2S Lithium Ion pack. You connect the 2 pole Tamiya connector to the MFU controller and the 3 pole balance charge JST-XH connector to a built-in extension cable to the switch panel. You can charge the Lithium battery without opening the RC tank. You can get longer run time using high end Li-Io such as the Admiral 7000mAh.
                2 Cell 7.4V Li-ion 7000mAh Battery w/ Tamiya Connector from Admiral - ADM6024-015 Assembled using high quality imported Taiwanese NCR 18650 cells, this Admiral Li-ion battery is intended as an upgrade battery for Heng Long tanks and other 2s powered surface vehicles with the pre-soldered Tamiya connector. This pack's 7


                The alternate battery access is necessary if you switch to the NiMH type which has no JST-XH connector.

                I prefer to charge the 2S26650 pack off the tank for faster charge and safety reason.

                Comment


                • #9
                  New more detailed ERA panel coming from JVM3Dconepts.

                  Here is a test sample "teaser" of a prototype next to the corresponding stock TongDe panel. There are a few more details being added to the next set of test panels and a completely new front armor layout that is more accurate then what is currently on the stock tank.

                  Click image for larger version

Name:	3899B817-43E9-46AC-B3DD-A0BED9CFD89B.jpg
Views:	180
Size:	79.8 KB
ID:	398972 Click image for larger version

Name:	0D105D76-F566-40C2-82AA-50E94C7A6FE6.jpg
Views:	197
Size:	94.2 KB
ID:	398971

                  Comment


                  • #10
                    Your doing a great job driving this project forward with JVM3D. Those guys do such great work for us and you being able to swing by on occasion makes collaborating on these detail projects really great. I cant wait till you have all the parts in hand and start assembling your build and then they can make up a few RISE kits I can market.
                    RC tank parts and accessories I make
                    www.RichardSJohnson.net/id28.html

                    Comment


                    • #11
                      Making slow progress with my pre "Desert Storm" USMC "ERA" M60. Shown here with new more correct 3D printed "ERA" panels, more correct spare road wheel and a new scale M68 cannon to replace that ugly thing TD calls a cannon. The road wheel and M68 cannon are available from RichJohnson Model's.

                      New ERA panels circled in red.
                      Click image for larger version  Name:	E254C9EF-890C-47DB-BA57-E337AF1E370C.jpg Views:	0 Size:	349.6 KB ID:	399418 Click image for larger version  Name:	E4001E68-2E83-4494-A014-CD596B5F5F95.jpg Views:	0 Size:	318.0 KB ID:	399419

                      Comment


                      • #12
                        Looking damn good!
                        RC tank parts and accessories I make
                        www.RichardSJohnson.net/id28.html

                        Comment


                        • #13
                          TongDe M60 USMC "RISE" with ERA in pre "Desert Storm" theme. Shown here having fun tarring up a sandy washout.
                          Click image for larger version

Name:	1AE50437-0FB7-419D-8625-42601AB4D9E2.jpg
Views:	97
Size:	346.5 KB
ID:	399751 Click image for larger version

Name:	32956BC4-25FF-4B2F-B4A8-09F7EA32C060.jpg
Views:	84
Size:	322.5 KB
ID:	399752

                          Comment

                          Working...
                          X