Roban - World Class Scale Helicopters

You must Sign-in or Register to post messages in the Hobby Squawk community
Registration is FREE and only takes a few moments

Register now

Announcement

Collapse
No announcement yet.

3d Printed Part Sets - Freewing 90mm F-22 Raptor

Collapse
X
Collapse
First Prev Next Last
 
  • Filter
  • Time
  • Show
Clear All
new posts

  • Radar-Guy
    replied
    Here is the second part to improve the air flow in front of the fan. I made similar parts for the Lippisch and the L-39 (divider only, no spar fairing necessary on the Albatros) with noticable performance improvements. Due to the poor weather here I won't be able to do flight-testing in the near future. Happy New Year!
    Attached Files

    Leave a comment:


  • RCjetdude
    replied
    Originally posted by Radar-Guy View Post

    Yes, they are! Thanks!
    Excellent! Thank you for the feedback.

    Leave a comment:


  • Hardway
    replied
    Love it!! My nav lights are not scale at all!! Just where I thought they look cool.... However, on my serious scale projects, a rivet out of place is just not cool at all!!! LOL Glad you are here on the Squawk. Rheinland rocks!! Jerry

    Leave a comment:


  • Radar-Guy
    replied
    And a report from Scale Police: The Stars n' Bars insignia at the fuselage sides and at the wing bottom are painted in a darker color than the surface below (i.e. the decals on the model are wrong). Only the one on top of the wing comes in a lighter color, which is correct with the stock decals.


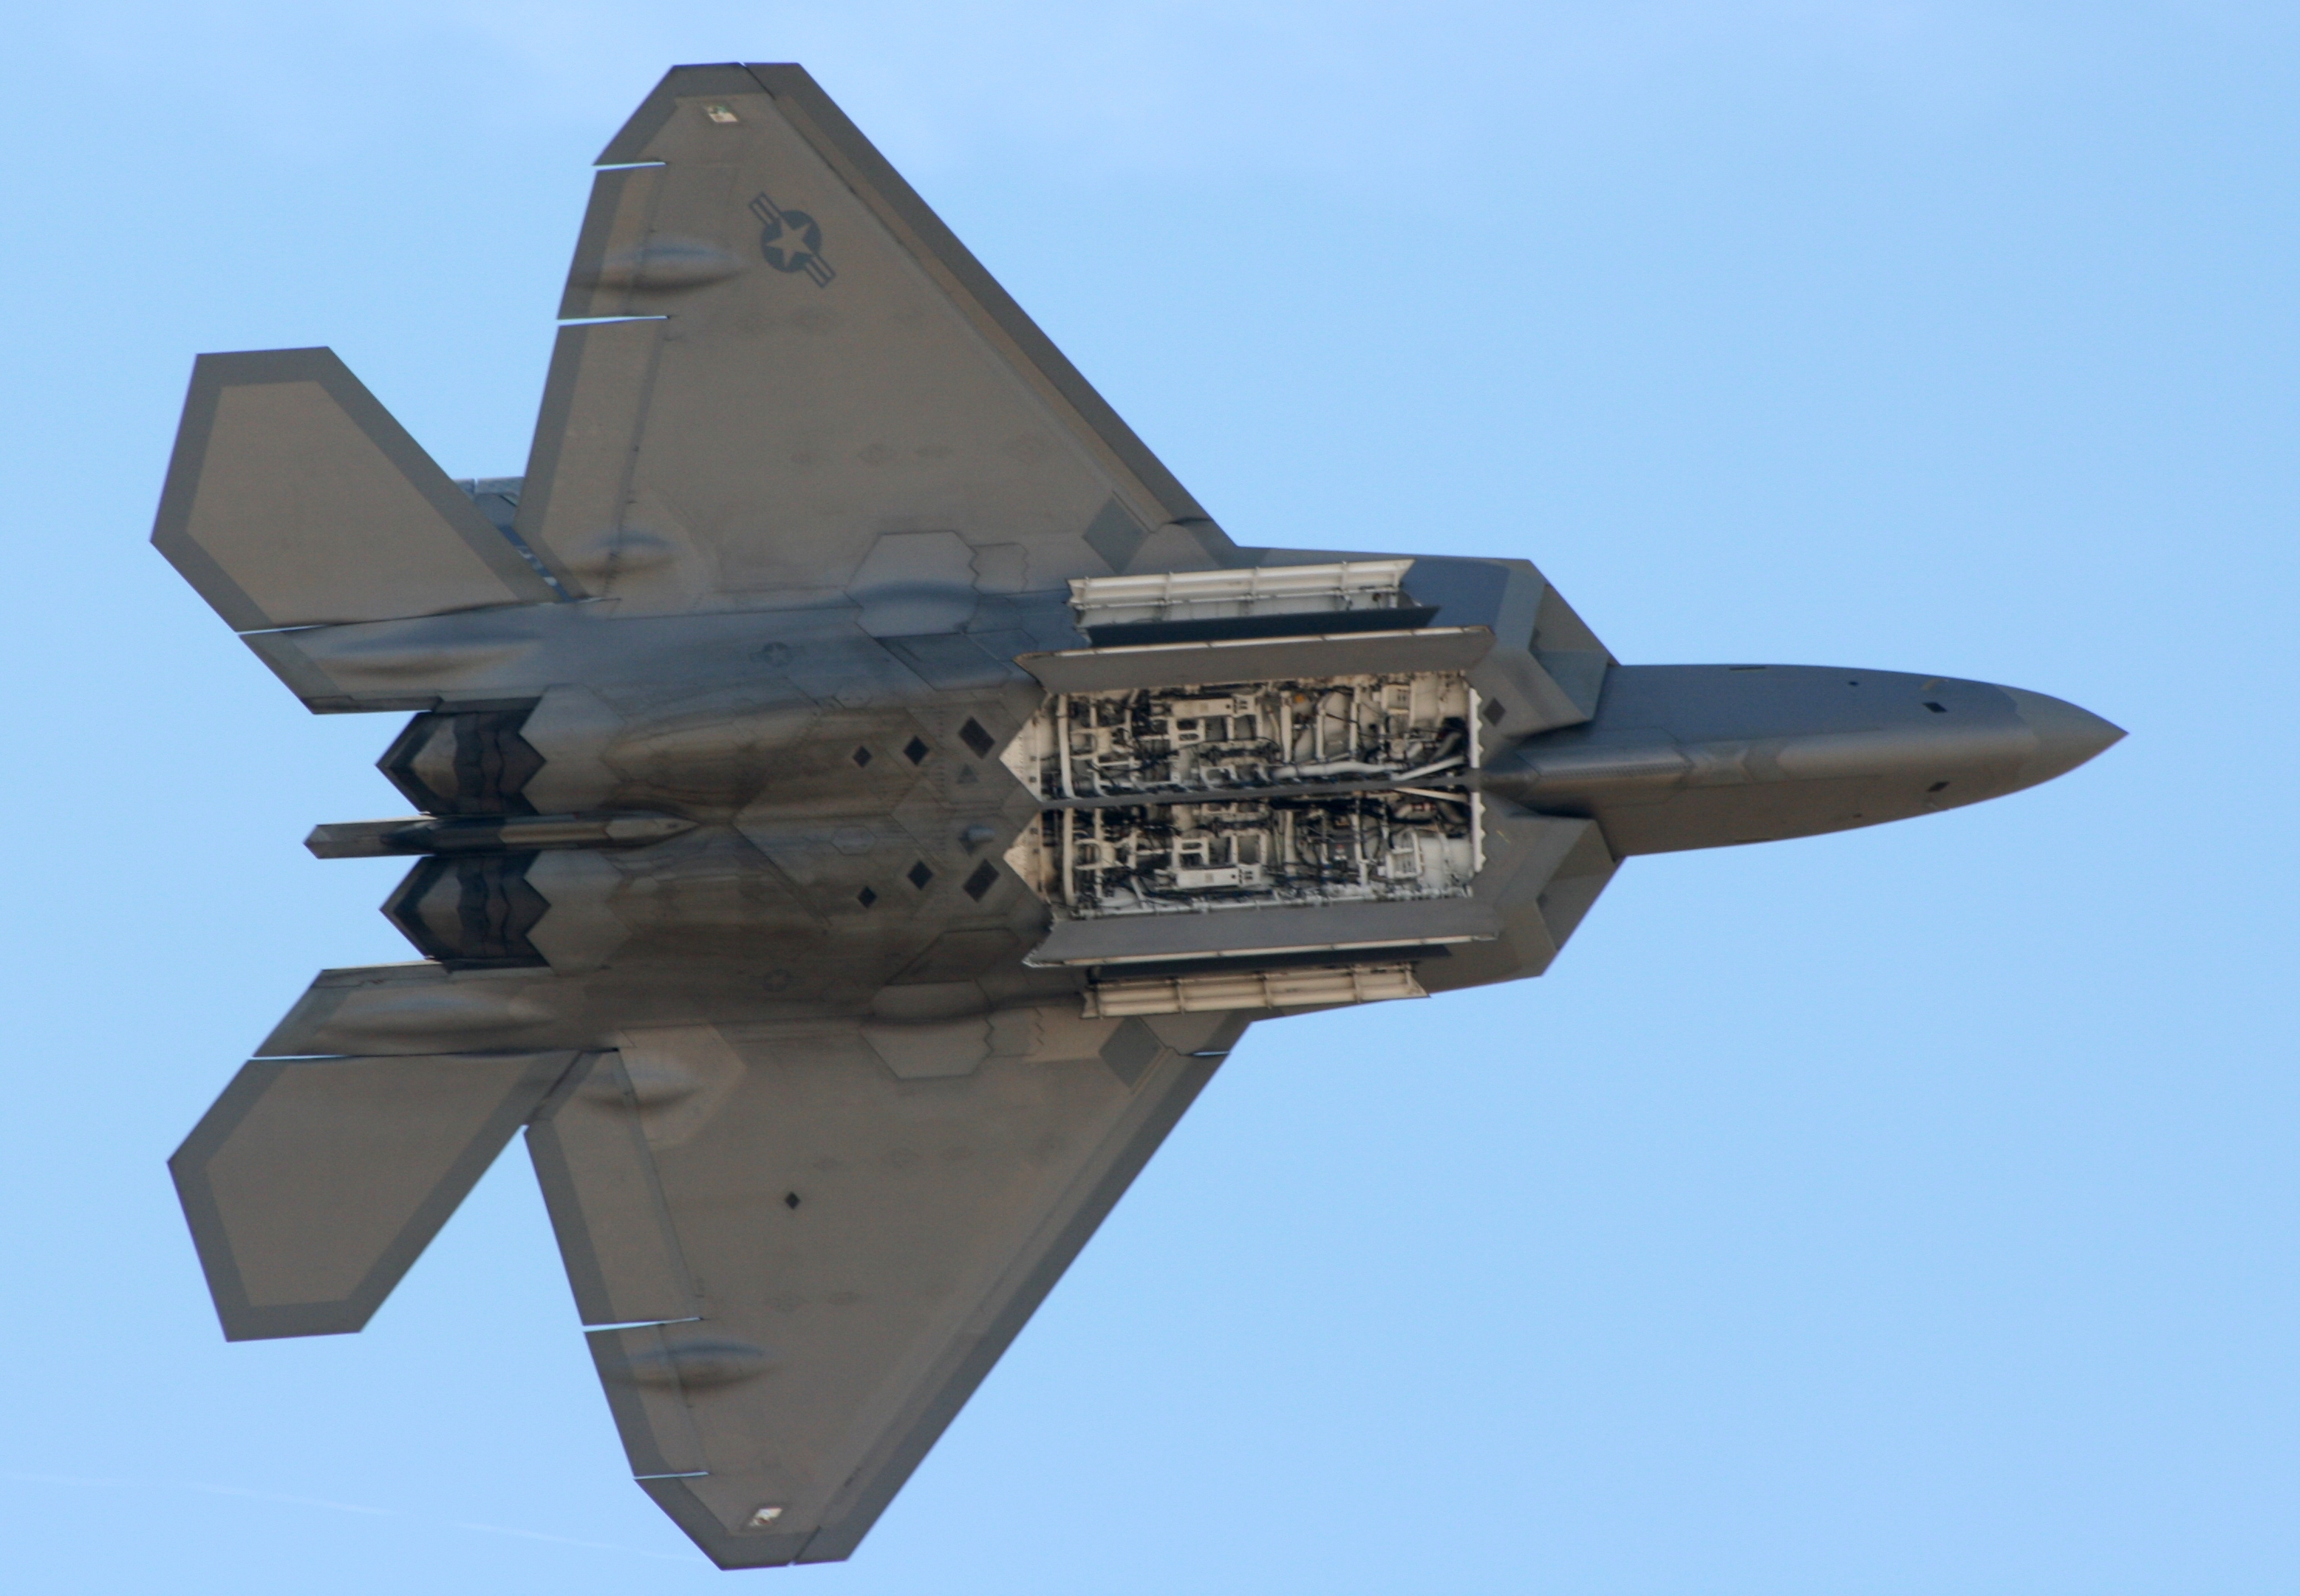
    https://nationalinterest.org/blog/th...2-raptor-25212

    Leave a comment:


  • Radar-Guy
    replied
    Here is the first part to improve the airflow in the inlet ducting, a fairing to transform the tube holding the wing spar into a tearshape profile. The second part I'm currently working on will provide a sharp divider in front of the fan.
    Attached Files

    Leave a comment:


  • Radar-Guy
    replied
    Originally posted by RCjetdude View Post
    May have just learned something here.....are the files in my previous post accessible?
    Yes, they are! Thanks!

    Leave a comment:


  • RCjetdude
    replied
    May have just learned something here.....are the files in my previous post accessible?

    Leave a comment:


  • RCjetdude
    replied
    Originally posted by crxmanpat View Post
    Steve,

    On your original post it looks like you did the "Post Link" option (which is right next to the "Share Photos" button and also looks like a paperclip) instead of the "Upload Attachments" option which is on the right next to the Advanced Editor and Smilies buttons. Probably too late to go back and edit your post as the forum only allows you twelve hours to do so. But no worries, we have them attached now.

    And once again, thanks for creating and sharing these files!
    I have only ever used the upload attachments button but I have tried two times in different browsers to attach the files again and it only lets me insert or remove them individually and in the same way as my original post. Here is an example. Not sure what I am doing wrong here.
    Attached Files

    Leave a comment:


  • RCjetdude
    replied
    Originally posted by Radar-Guy View Post
    Thanks, Gentlemen. Here is a small contribution from my side, the "nose gear brace".

    Frank
    Awesome! Thank you!

    Leave a comment:


  • Radar-Guy
    replied
    Thanks, Gentlemen. Here is a small contribution from my side, the "nose gear brace".

    Frank
    Attached Files

    Leave a comment:


  • crxmanpat
    replied
    Here's the PDF file. When printing, choose "Actual Size" from the print options list.
    Attached Files

    Leave a comment:


  • crxmanpat
    replied
    To give a little more detail about which pictures I used for what, I outlined them in red. For the armament panel (bottom center) I had to stretch it sideways just a bit to make it fit. I'll post up a PDF shortly that will have the correct sizing so that all you have to do is print and cut.

    Leave a comment:


  • crxmanpat
    replied
    Originally posted by RCjetdude View Post

    Thanks Pat. I did that individually instead of as a group. Not sure how that would have mattered but, live and learn.
    Steve,

    On your original post it looks like you did the "Post Link" option (which is right next to the "Share Photos" button and also looks like a paperclip) instead of the "Upload Attachments" option which is on the right next to the Advanced Editor and Smilies buttons. Probably too late to go back and edit your post as the forum only allows you twelve hours to do so. But no worries, we have them attached now.

    And once again, thanks for creating and sharing these files!

    Leave a comment:


  • RCjetdude
    replied
    Originally posted by crxmanpat View Post
    Steve,

    To attach, click on the button that looks like a piece of paper with a paperclip. It's on the right hand side. Then just choose the files to attach.
    Thanks Pat. I did that individually instead of as a group. Not sure how that would have mattered but, live and learn.

    Leave a comment:


  • Visva11
    replied
    Sorry to ask this again....
    Alpha,

    when can we expect the .stl file of main gear door to be uploaded?
    can't wait to install it to mine.

    thanks in advance.

    Leave a comment:


  • crxmanpat
    replied
    Originally posted by Skyboom View Post

    Will the glass panels and increments actually light up?
    I thought about doing that, but it would have required carving out some foam as there is a solid wall right behind the instrument panel. But I did test it before installing, and yes light will shine through the paper, making them look illuminated.

    Leave a comment:


  • crxmanpat
    replied
    Originally posted by RCjetdude View Post

    I just tried to individually upload them to the thread. Never done it before so wasn't sure how it would work. I sent them separately to Pat so how did you upload them Pat? I want to know how to do it right in the future.
    Steve,

    To attach, click on the button that looks like a piece of paper with a paperclip. It's on the right hand side. Then just choose the files to attach.

    Leave a comment:


  • Skyboom
    replied
    Originally posted by crxmanpat View Post
    And here are the picture files I used for my instrument panel. The first is for the 5 main glass panels, and the second is for the glass panel in the center bottom. I didn't like my painting skills on the top center display for the radio settings, so I sanded down the face and used the third pic to show the detail.

    What I did was take these pics and copy them to a Word doc. Then I sized them to fit the panel, printed them out, and glued them on. For the glass panels I first put on a couple layers of Minwax Polycrylic Gloss to give them some shine.
    Will the glass panels and increments actually light up?

    Leave a comment:


  • RCjetdude
    replied
    Originally posted by Radar-Guy View Post

    Steve,
    many thanks for publishing those files, but the download is not possible. When clicking on one of the files published by Alpha in post #2, a subwindow opens with the choice to save the respective file. In addition, there is an icon left of each file plus the file size. Your attachments look different. When clicking on one of your files, nothing happens. When using the save option via the right mouse button I'm just getting an error message. Did anyone else succeed in downloading these files?

    Frank
    I just tried to individually upload them to the thread. Never done it before so wasn't sure how it would work. I sent them separately to Pat so how did you upload them Pat? I want to know how to do it right in the future.

    Leave a comment:


  • Hardway
    replied
    Finishing the final little details on the F-22 today... I opened the box on December 8th, and had one little delay after another. And of course Christmas and all that entails, as well as a cold and a gout flare-up! But to top it off, I had an intermittent short in one of the wiring harnesses and finally found it!! Glad it was on the ground and not at 100 mph and 200 ft AGL...:Scared: I didn't add lights to the wings, but I did nav lights and strobes and a beacon on the fuselage. It looks pretty cool! Looking forward to a smooth maiden... A pic or two to follow later today. Happy New Year to everyone, and I hope your Christmas was blessed with joy and love and lots of family and friends!!! Jerry

    Leave a comment:

Working...
X