


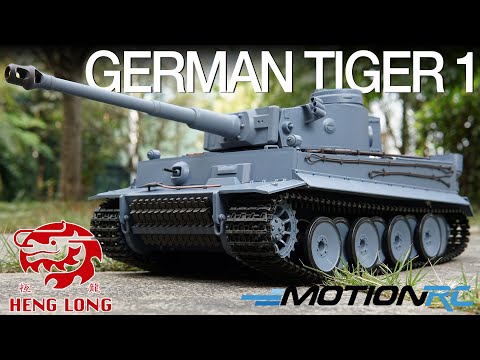
Heng Long 1/16 Scale "Tiger I Early Type" German WW2 Tank

Introduction:
Able to penetrate the armor of Allied vehicles even beyond typical engagement range, the Tiger I's 8.8cm cannon earned it a reputation for lethal, unmatched firepower. Heng Long's rendition of this popular tank in 1/16 scale RC has been on the market for many years, but with 2020 comes some important changes to the mold and the electronics that bring this tank into the new decade with style. Read below to see how I arrived at a 90 out of 100 rating for this incredibly popular RC tank.
My Personal Averaged Total Score for the Heng Long 1/16 Scale "Tiger I": 90 out of 100
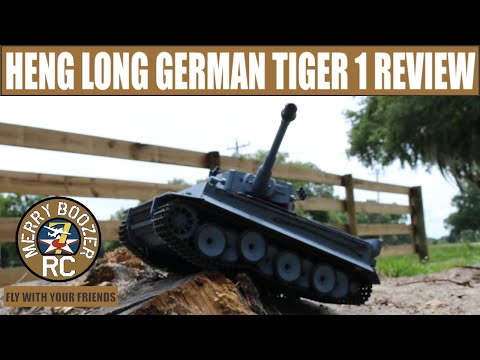
As a visual companion to this written review, our Overview and Build Summary Video can be found below:
Functions:
Featuring the latest TK6 Multi-Function Control Board (MFCB), Heng Long's Tiger I like its other TK6 series 1/16 scale tanks is full of features:
1) Proportional acceleration, steering, turret traverse, and gun elevation/depression
2) Programmable radio settings for the amount of recoil, the sensitivity in turns, the overall sensitivity in acceleration, high speed and low speed modes, etc
3) Smoke effect (On/Off)
4) Headlights and Brake lights (On/Off) *note, the real Tiger I didn't have brake lights, so neither does this RC tank, but the MFCB does have extra ports for lights to be added if you choose
5) Volume (five settings including Off)
6) Four different Sound Sets. Each Sound Set contains a unique engine start sound, idle sound, accelerating sound, traverse sound, elevate sound, machine gun, cannon firing, and shutdown sound.
7) Track Recoil (Three settings from low, medium, and high) --This shudders the tank briefly rearward to simulate recoil when firing the main cannon. The Low or Medium settings are more realistic.
8) Fires a 6mm plastic BB (~10 meters with minimal accuracy and limited velocity, but should still be treated with caution and with adequate eye protection)
9) Fires an invisible IR signal to be used as part of Heng Long's Infrared Battle System, which disables other tanks when hit five times during simulated combat. Up to 20 tanks at the same time can battle each other!
10) Independent suspension on all road wheels
 |
Durable Tracks Confidently conquer terrain with durable tracks that are easy to service. Professional Versions feature metal tracks. |
| Independent Suspension and Steel Geared Gearbox Reliable steel geared gearboxes transfer power while independent suspension provide traction over rough surfaces. |
 |
 |
Omnidirectional Proportional Control The latest generation TK6 Multi-Function Control Board (MFCB ) provides smooth driving response and personalized configuration options. |
| IR Battle Ready Engage in friendly infrared ("IR") combat with other TK6-equipped tanks, both inflicting hits upon and receiving hits from opponents! Sounds and action signal each hit, until the 5th hit disables the tank. After 10 seconds, the disabled tank restarts and can rejoin the fight! |
 |
 |
Airsoft BB Launch Safely fire 6mm plastic airsoft BBs at the included paper target at short ranges. *Take safety precautions and wear eye protection. |
| Scale Detail The perfect balance of scale detail and practical RC Tanking, each Heng Long tank arrives factory painted and includes Cosmetic Accessory Parts to further enhance the tank's realism. |
 |
 |
Realistic Operation 320 degree turret traverse, 30 degree cannon elevation, programmable track recoil, and four different sound sets put you in complete control. |
| LED Lights LED lights indicate the tank's standby and active modes, and also flash when "hit" during IR Battles. |
 |
 |
Exhaust Effect Glycerin-based "exhaust effect" simulates engine exhaust for added realism. |
| RTR The convenience of "Ready to Run" (RTR) allows new players to join the world of RC Tanks with ease! |
 |
As an RTR or "Ready To Run" RC model, everything is included in the box except six AA batteries for the radio transmitter. In areas where shipping liquids is restricted, the glycerin used for the "smoke effect" is absent, but can be found locally at hardware or convenience stores that sell glycerin oil.
The radio, tank, cosmetic accessory parts, tank battery, tank battery charger, and plastic BBs, don't require any "assembly", other than installing the aforementioned "cosmetic accessory parts".
Initial Two Minute Function Test:
Because the tank itself is functionally complete and it doesn't require the cosmetic accessory parts to run, I recommend testing your tank's basic functions immediately after unboxing the tank, before you install the cosmetic accessory parts. If there happens to be any problems, it is better to report them to Motion RC for warranty support before the tank has any cosmetic parts attached to it. One of the neatest updates that Heng Long did to this generation of their Tiger I is to add functioning hatch covers for the Driver and Bog. The driver's hatch opens to reveal the On/Off switch. I really enjoy this more convenient switch location, compared to its previous location under the tank.
To conduct this initial two minute test, insert six AA batteries in the radio and turn it on. Plug in the tank's included 2s battery and slide the tank's switch to On. The radio and tank are already "bound" to each other via 2.4Ghz signal, so simply press the Key button on the radio and your tank will activate. Move all the tank's controls in every direction to evaluate their function. Refer to the Manual for all controls. Note that the turret and cannon barrel will produce a "clacking" sound when they reach their maximum travel points. This sound is normal and is a warning for you to stop moving it in that direction. Importantly, DO NOT run the tank more than two minutes for this initial test, since it arrives with only a storage charge.
Once satisfied that your tank is operating normally, plug the battery into the included wall charger. While it's charging, turn your attention to the installation of the "cosmetic accessory parts", covered in the Details section, below. Installing the cosmetic parts onto the exterior of the tank result in the finished result:
Details:
Several sprues of plastic parts are provided for the modeler to install on the tank. These all plug into pre-drilled holes, and are nearly "snap fit". A few of the parts were loose, so I bonded them with ABS glue. But otherwise, I prefer to keep the parts unglued so they're easy to remove or replace if needed in the future. Plan for about 30-45 minutes to clip the parts off their sprues and attaching them to the outside of the tank. I recommend a sharp clipper designed for this purpose, as it makes cleanup much easier.
The Tiger I's pre-painted tools, shackles, and tow cables clip onto the hull and turret with ease. One of the longer tow cable pieces didn't quite sit down flush, so I trimmed its mounting pin to sit more securely in the mounting hole. A dab of Beacon might help it lay even more flat against the upper hull.
At this point I also take a moment to hold the tip the tank's rear upward about 45 degrees and insert 1-2 small drops of glycerin oil into the exhaust stacks. The smoke effect is expelled through these two exhaust stacks, so don't flood the exhaust stacks. Less is more! The clear bow machine gun barrel falls out from time to time, so again a dab of beacon adhesive or hot glue helps hold it in place.


 Or are you not in Europe?
Comment