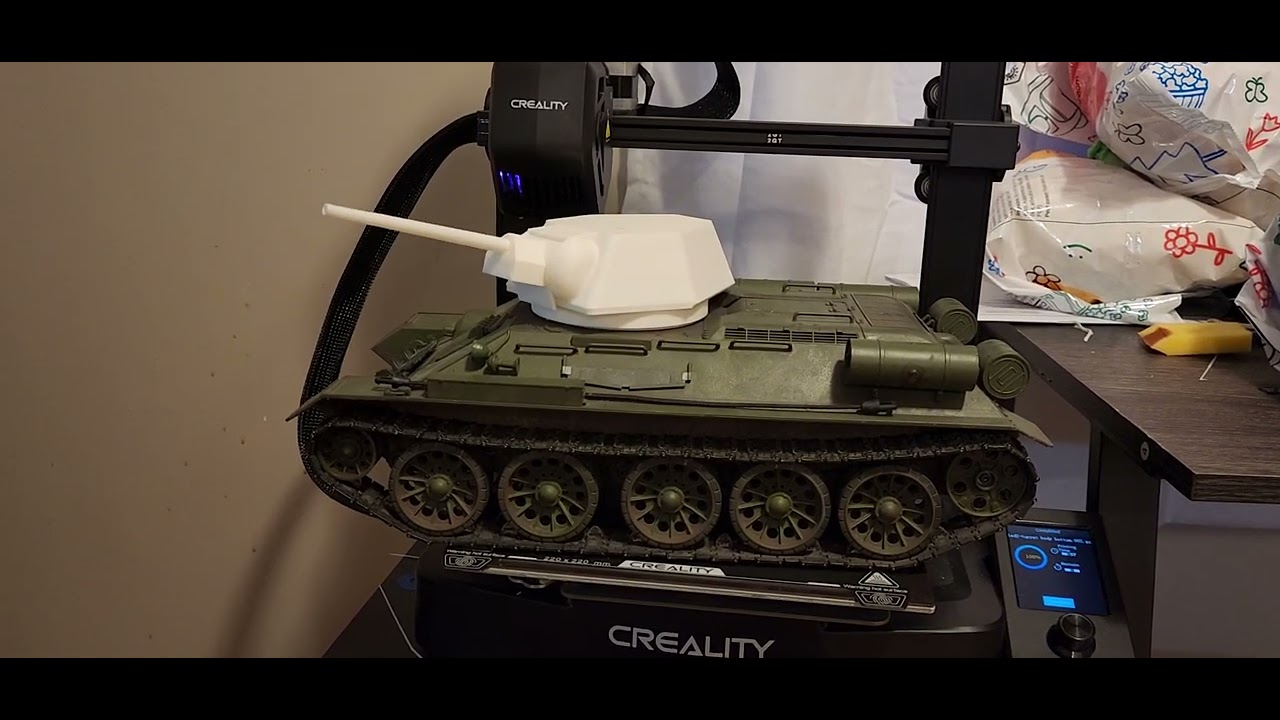
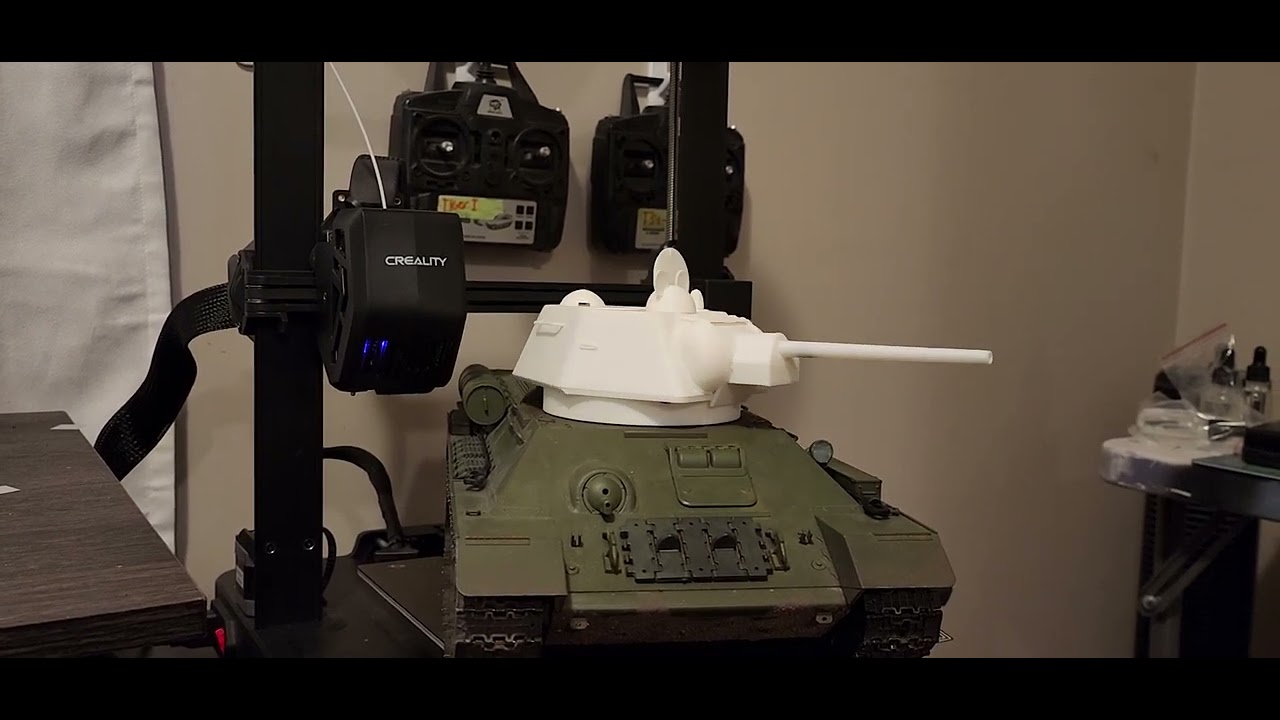
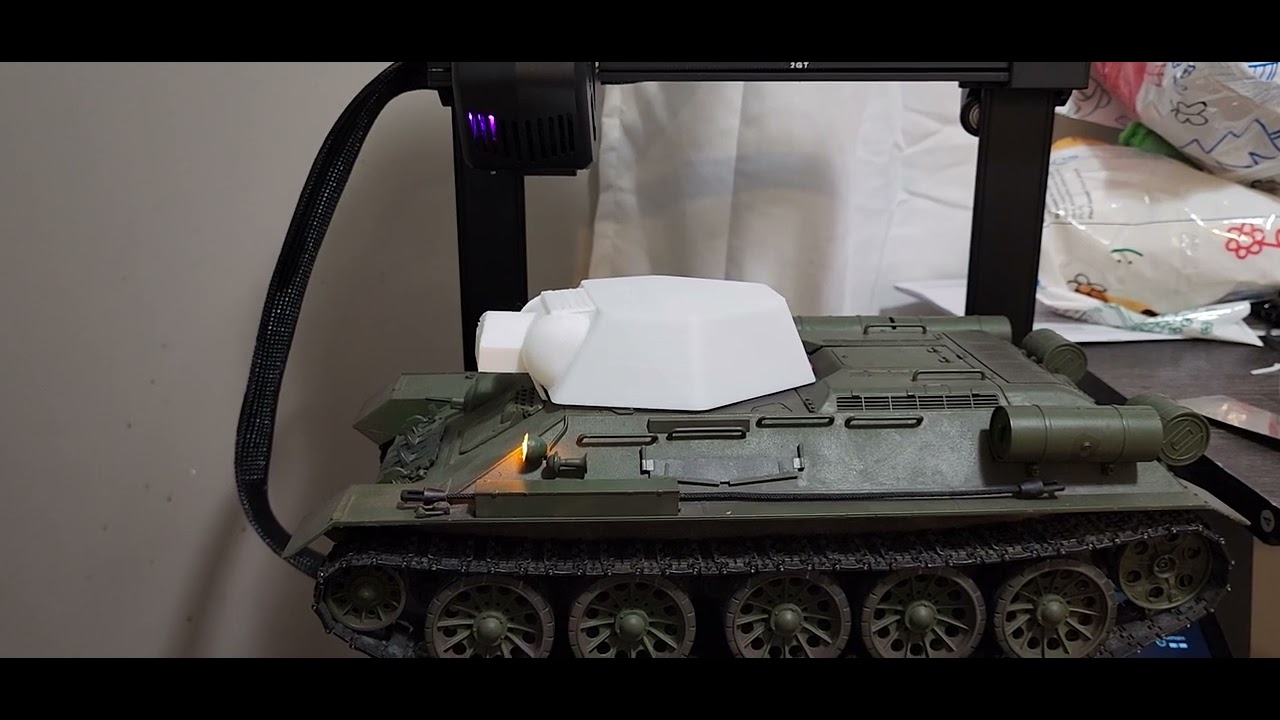
I said I was gonna do it.

Collapse
X
Collapse
First Prev Next Last
 
  • Time
  • Show
Clear All
new posts
  • Delta_19
    Member

    • Apr 2021
    • 170
    • Send PM

    #1

    I said I was gonna do it.

    So started work on the mickey mouse turret. Think I've made good progress so far.


    Click image for larger version  Name:	Screenshot 2024-01-20 151200.png Views:	0 Size:	256.7 KB ID:	395392 Click image for larger version  Name:	Screenshot 2024-01-21 021056.png Views:	0 Size:	374.3 KB ID:	395393 Click image for larger version  Name:	Screenshot 2024-01-21 021015.png Views:	0 Size:	423.4 KB ID:	395394
  • Kendusan28
    Member
    • Aug 2023
    • 27
    • Send PM

    #2
    Looking forward to seeing Mickey Mouse come alive! Great job so far. Where did you get the realistic head lamp for the T34, stock one looks miserable.

    Comment

    • Delta_19
      Member

      • Apr 2021
      • 170
      • Send PM

      #3
      Originally posted by Kendusan28
      Looking forward to seeing Mickey Mouse come alive! Great job so far. Where did you get the realistic head lamp for the T34, stock one looks miserable.
      That is the stock head lamp. I just took off the front, replaced the bulb with a warm white one and filled it with hot glue to diffuse it. If I ever get around to ordering clear resin I'll print some glass for it.

      Comment

      • Kendusan28
        Member
        • Aug 2023
        • 27
        • Send PM

        #4
        Just a random question. Are you making the 57 or the 76? Based on the barrel length it’s the 57 right?

        Comment

        • Delta_19
          Member

          • Apr 2021
          • 170
          • Send PM

          #5
          Originally posted by Kendusan28
          Just a random question. Are you making the 57 or the 76? Based on the barrel length it’s the 57 right?
          bore was modelled for the 76mm but the length might be wrong. would have to go over the blueprints again, may have the length wrong

          Comment

          • Delta_19
            Member

            • Apr 2021
            • 170
            • Send PM

            #6

            Comment

            • SoCalBobS
              Senior Member

              • May 2020
              • 2736
              • Southern California
              • Send PM

              #7
              Any chance you’ll make the files available? I bought a -76 turret from eBay a while back. It was a pirated mold from a plastic kit. Would love to redo it. Oh, I love your hot glue light lens mod. I’ll definitely be using it.
              The more screws it takes to reassemble a tank, the more likely it is you left something out!

              Comment

              • Kendusan28
                Member
                • Aug 2023
                • 27
                • Send PM

                #8
                Wikipedia says the F-34/ZIS-5 gun is 3.2 meters long so in scale it should be about 20 cm (seems kind of odd). If it’s after the other 76 (L11) it’s 2.3 meters, and in scale should be 14.3 cm.

                Comment

                • Kendusan28
                  Member
                  • Aug 2023
                  • 27
                  • Send PM

                  #9
                  If this is the 1942 modification it will be using the F-34 gun, so the barrel length should be 20cm, from the breech. And the breech is located in that bit that sticks out.

                  Comment

                  • SoCalBobS
                    Senior Member

                    • May 2020
                    • 2736
                    • Southern California
                    • Send PM

                    #10
                    Are those measurements from breech to muzzle? Oops, you answered while I was typing..
                    The more screws it takes to reassemble a tank, the more likely it is you left something out!

                    Comment

                    • Delta_19
                      Member

                      • Apr 2021
                      • 170
                      • Send PM

                      #11
                      As per german naming it'd the 76D "mickey mouse" and as for barrel length I got 200m millimeters as well but looking at pictures and info on this site the barrel isn't that long

                      comparing the length to length with gun its only a difference of 65cm. Click image for larger version

Name:	59f5b0c7f199f96c5a4e07cb0c4ea440.jpg
Views:	409
Size:	103.8 KB
ID:	395422

                      As for making the files available we shall see. Dont really want to put something out there that takes a lot of work to get right so well see if I can make this in way that anyone can just print and glue with no extra bull. A level 1 model if you will

                      Comment

                      • Delta_19
                        Member

                        • Apr 2021
                        • 170
                        • Send PM

                        #12
                        ok update time!

                        so did some work on detailing and getting this ready for use.

                        Click image for larger version

Name:	Screenshot 2024-01-22 025957.png
Views:	354
Size:	211.0 KB
ID:	395462

                        first the gun breech. so opened it up inside for the IR emitter to slide in behind the elevation arm.

                        Click image for larger version

Name:	Screenshot 2024-01-22 030115.png
Views:	337
Size:	524.5 KB
ID:	395463

                        heres the top of the turret both hatches open as you can see and the commander hatch has fittings for the IR receiver board

                        Click image for larger version

Name:	Screenshot 2024-01-22 030132.png
Views:	338
Size:	289.7 KB
ID:	395464

                        both hatches have hinges with stopper blocks for that mickey mouse look, hinge itself uses a .5mm rod so track pin should work

                        Click image for larger version

Name:	Screenshot 2024-01-22 030153.png
Views:	339
Size:	290.3 KB
ID:	395465

                        added screw bosses for attaching the elevation motor and mating the two halves of the turret. here you can also see the screw holes and opening for the IR receiver as well as the elevation arm from the mantlet to the elevation motor.

                        Click image for larger version

Name:	Screenshot 2024-01-22 030247.png
Views:	346
Size:	510.2 KB
ID:	395466

                        and finally the turret bottom, not much here just screw holes for mating the turret halves and you can see the turret ring has screw bosses as well. there is also a notch to make sure the two pieces of the bottom mate together straight

                        Comment

                        • Delta_19
                          Member

                          • Apr 2021
                          • 170
                          • Send PM

                          #13
                          Click image for larger version

Name:	Screenshot 2024-01-22 031612.png
Views:	362
Size:	366.1 KB
ID:	395468

                          Comment

                          • SoCalBobS
                            Senior Member

                            • May 2020
                            • 2736
                            • Southern California
                            • Send PM

                            #14
                            Wow, a lot of great detail!
                            The more screws it takes to reassemble a tank, the more likely it is you left something out!

                            Comment

                            • Delta_19
                              Member

                              • Apr 2021
                              • 170
                              • Send PM

                              #15
                              and im gonna say thats done.

                              all thats left is to print everything i can on the fdm and the rest when it warms up enough to use the resin printer, put it all together and see what needs adjusting

                              Click image for larger version

Name:	Screenshot 2024-01-22 090703.png
Views:	360
Size:	553.0 KB
ID:	395474 Click image for larger version

Name:	Screenshot 2024-01-22 090721.png
Views:	309
Size:	584.0 KB
ID:	395475

                              Comment

                              • Delta_19
                                Member

                                • Apr 2021
                                • 170
                                • Send PM

                                #16


                                DISNEYLAND

                                Comment

                                • Delta_19
                                  Member

                                  • Apr 2021
                                  • 170
                                  • Send PM

                                  #17
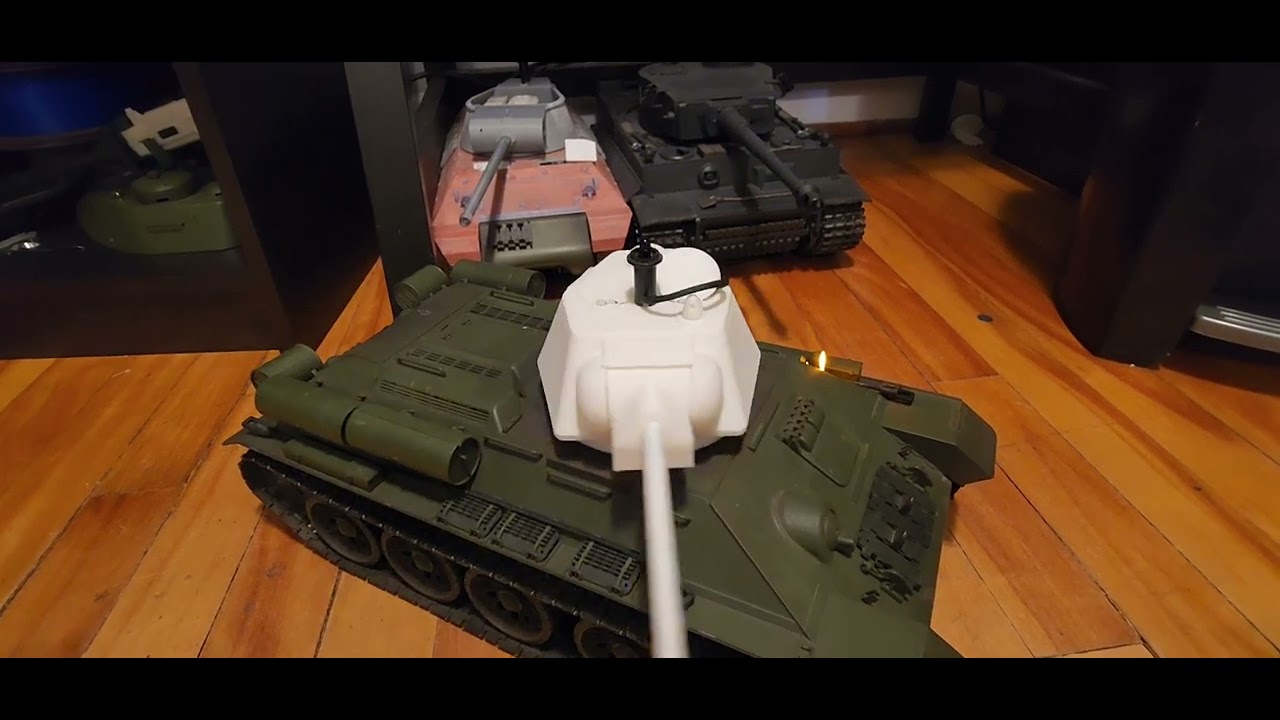
                                  so im calling this done, removed the side vision ports cause they added artifacts i didnt like, i'll probably make them a separate part to print and glue on but for now she g2g.


                                  Comment

                                  Working...