


Originally posted by Gmack908
View Post
-
Oh sorry for not making that clear for you , I see Delta got you covered on that part as for whats needed to complete it, also the cockpit is not included as well, you will have to purchase that seperate, the way the wording is on the MRC web page, I thought it was included, also kind of misleading. -
awesome! Really looking forward to putting this together. Should be a fun project.Originally posted by DCORSAIR View Post
Comment
-
Would certainly like the cockpit kit. The UH1N cockpit correct?Originally posted by DCORSAIR View PostComment
-
That’s correct. I also suggest 3D printing pilot figures if you can. The ones that come with the cockpit set are pretty hideous.Originally posted by Gmack908 View Post
Comment
-
It was a very easy build for me, the hardest part was the two horizontal fins, I installed a carbon rod across the fuselage and glued it into both fins, I don't know if just gluing them on will be strong enough so I wanted more strength in that area, but when I tried to pull the mechanics out the 45 degree gear box hit the rod, so I had to disassemble the whole gear box to pull the mechanics out, lesson learned, make the fins removable........Originally posted by Gmack908 View Post
Comment
-
Great info! I will certainly keep this in mind! I heard maybe the heavy lift version decals come with it. Anxious to see if they do.Originally posted by DCORSAIR View PostComment
-
Yes, the heavy lift decals come with it, but I have had no luck putting on Roban decals on my helis, they just crumple, don't know what I'm doing wrong, Callie graphics has done all mine so far, I just send the sheet to her and she makes some nice one, they are not water slide decals though so they do not lay flat with the fuselage like water slides do, hers are sticky and will never come off, I gurantee you that, lol.Originally posted by Gmack908 View PostComment
-
Awesome! Maybe I’ll give here a try for decals. I have heard great things about her products just haven’t given them a try yet.Originally posted by DCORSAIR View PostComment
-
I can't wait for you to get it, it is a beauty of a fuselage, post some pics if you can, would love to see another one being built, actually I keep looking at another one myself...
Comment
-
Thanks for all of the help! It should be here Thursday’ I will certainly take pictures and do a bit of documentation on using the Phoenixtech 600 esp like I plan on using. And what all it takes for parts to get it going.Originally posted by DCORSAIR View PostComment
-
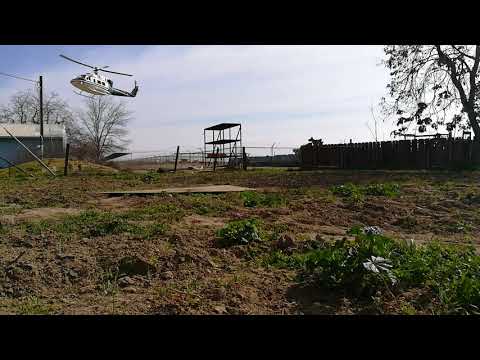
Glad you like the Bell 212, I wanted to post this video for you, this is with no nose weight added to it, only a single Gensace 5000 60C placed in the nose long ways as in front to back, so I had no room for a cockpit with the battery this way but I didn't have to add any weight, it was tail heavy just a bit but flew great and made some nice scale approaches with the tail hanging down, it flew great tail heavy so I just left it as is, as you can see in the video of the first hover that it actually drops the tail first like the real one, it was maybe a two inch drop, now mine did have a flybar so that may have helped being tail heavy too and fly just fine, I would recommend you try to get it level for the first flights if your going FBL just to be safe, but it flew fine tail heavy and I don't think it would be a problem, if you do put the battery behind the cockpit then it will be extremely tail heavy I would think and I wouldn't fly it that way.Originally posted by Gmack908 View Post
Comment
-
Great video! Thank you for sharing. It looks great. So my setup is FBL using the Spirit RS for a FBL gyro. I would like to use the scale cockpit setup. Hopefully get a decent runtime with lowest weight possible. Battery placement is basically wherever we want and just use Velcro?Originally posted by DCORSAIR View PostComment
-
I just put it sideways against the back of the pilot seats. That’s about the farthest forward you can get with the scale cockpit installed. Personally, I think the weight penalty is worth having the scale cockpit.Originally posted by Gmack908 View PostComment
-
-
Started mocking up my kit this morning and see that since I am using 54mm phoenixtech 600 esp mechanics they are wider than trex by 7mm. Included in the kit were two 3.5mm spacers for the tail shaft bearing blocks. ( still need two more for other frame side) and I would need 18 3.5mm spacers to go between all of the frame spacers included with the kit. Any thoughts? Thanks!Comment
-
So they didn't include what you need, I thought they would have got that right by now with all the complaints about it, your going to have to contact MRC and talk to Ed, he is the one who has been dealing with this issue, see what he says or open a ticket with MRC and see what they say.Originally posted by Gmack908 View PostComment
-
That fuselage kit needs to be updated with the right spacers because that kit is really made for the old Trex 600E or ESP version with the 47mm width frames.Comment
-
Thanks! I will jump on that! I’m going to make a list of everything it needs and let MRC know. This is the kind of things that make new builders Leary about buying these kits.Originally posted by DCORSAIR View PostComment
-
Exactly, I thought they updated it by now with the right spacers, they say everything needed to convert your 600 using the included side frames and all that jazz,, so why are those spacers not included???Originally posted by Gmack908 View Post
MRC you need to get on this if your going to continue to sell these kits, the Pheonixtech 600ESP is the heli you carry and recommend for this project, yet the spacers that are needed to convert the 600 are not included for this.............
Comment
-
I put in a ticket this morning with MRC regarding the issue so hopefully they get back to me quickly so I can finish this heli.Originally posted by DCORSAIR View PostComment


Comment