You must Sign-in or Register to post messages in the Hobby Squawk community
Registration is FREE and only takes a few moments

Register now

Announcement

Collapse
No announcement yet.

Russian T-35A

Collapse
X
Collapse
First Prev Next Last
 
  • Filter
  • Time
  • Show
Clear All
new posts

  • #41
    Originally posted by DavidN View Post
    So our new battle rule for your tank to fight with the rest of us....we will have to shoot 12 hits for it to be out of action, lol.
    I should put IR bulbs in the secondary turrets. When I fire the main gun, they will too, at whatever random direction they're pointed in at the time!

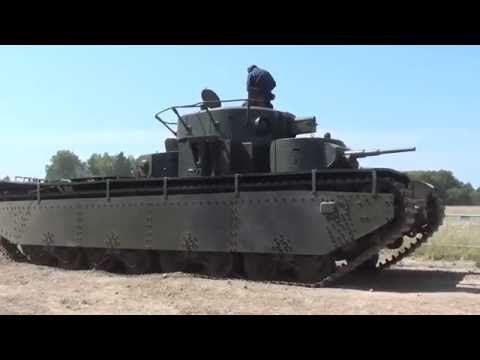
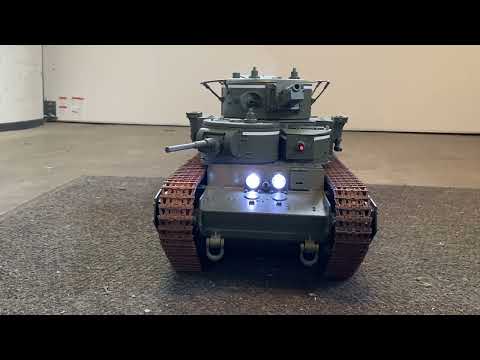
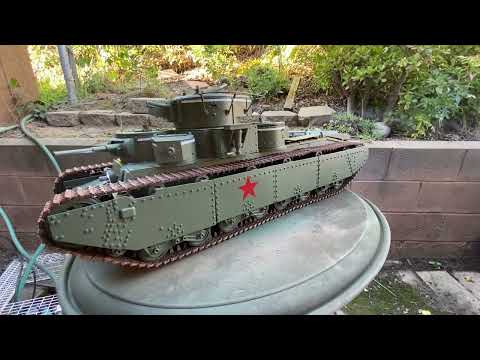
    Nah, this one's not a battler, I don't think the printed track links would hold up to our scrambling. It's more of a parade queen.
    Twenty six tanks, and not done yet!

    Comment


    • #42
      Bob what did you guys print the tracks out of? I have a Hetzer I am doing and haven't got to the tracks yet, and was wondering what to print them with. Plan to use PETG

      Comment


      • #43
        I will find out. We had a range of quality, some clear and crisp, some stringy.
        Twenty six tanks, and not done yet!

        Comment


        • #44
          Vaseline, here is your answer. My buddy is "Gringotuerto" on Hobby Squawk.

          1. It is PETG, which is slightly more temperature tolerant than PLA. I did not use ABS because it warps a lot. In retrospect, that should not be a problem for a small part like the track, and maybe I should try some ABS tracks. But I thought ABS would warp too much for large parts like the body, so I just stuck with PETG for everything.

          2. These tracks have tiny features (at this scale) and I think they would not be useable without a very fine nozzle. I used a 0.25mm nozzle, and something like 95-100% infill.

          3. I had trouble printing large batches of these at first. With the help of an infrared thermometer, I traced this problem down to uneven bed heating. When I set the bed to 80C, parts of the bed were at 80C, but other parts were at 108C. This melted and warped tracks on that part of the bed. I resolved this by backing off to a lower temperature (like 60C) starting with the second layer.

          4. I initially had a lot of frustration with PETG but eventually found a profile that printed pretty much 100% reliably. I notice a lot of conflicting advice on the web about how to print PETG, but eventually found something that worked for me. If anyone wants the profile I used (for Lulzbot Taz 6 and Lulzbot Mini, with no enclosure), they can contact me.
          Twenty six tanks, and not done yet!

          Comment


          • #45
            We've talked about how ungainly this tank would be to turn with such a long thin body. If anybody wants proof of this, watch this Youtube video of a real one at a show:

            Twenty six tanks, and not done yet!

            Comment


            • #46
              Electronics Update:

              I was having trouble with the RSMG's and I discovered another module that does similar stuff, actually much more. Pololu Robotics & Electronics makes a line of "Maestro" actuators, whereby you write a script of sequences and it will run your servos. In my case, I've set up a series of random movements for the auxiliary turrets. It's more complicated, but so far it's working well. I have to learn the scripting sequence to fine tune what I want, but it has a lot of potential. The smallest of the bunch has six separate circuits. Another modeller built a T-35 and activated secondary turret gun elevations.

              Anyway, this module would be great for running radar dishes or other motion items on modern tanks. Google it if you're interested.
              Twenty six tanks, and not done yet!

              Comment


              • #47
                Bob
                I was going to ask what and how you made the big lenses for Russian head lights
                Thank you sir.

                Comment


                • #48
                  Originally posted by Vaseline View Post
                  Bob
                  I was going to ask what and how you made the big lenses for Russian head lights
                  Thank you sir.
                  heh heh, nervous chuckle. Haven't yet, they're bare bulbs for now. I did spray the inside of the shell bright silver. Eventually I'll take some clear plastic, cut circles out, and spray some paint that will frost the lenses.
                  Twenty six tanks, and not done yet!

                  Comment


                  • #49
                    Ahh you clever dog

                    Comment


                    • #50
                      A clip showing auxiliary turret animation and machine gun LED. Motion is produced in a writable scripted sequence with a Pololu Micro Maestro module. It's powered via a y-cable off a servo circuit on the Heng Long 6.1S board.


                      So far so good!
                      Twenty six tanks, and not done yet!

                      Comment


                      • #51
                        Damn… very cool Bob.
                        RC tank parts and accessories I make
                        www.RichardSJohnson.net/id28.html

                        Comment


                        • #52
                          Hopefully Bob when you get it all sorted it would be nice to know how you assigned the TX and MFU to do all the functions?
                          You are a great trail blazer.
                          Thanks for your sharing and time.

                          Comment


                          • #53
                            That's a nice job on your T-35. I see you move your Secondary turrets a lot faster than I did, maybe if I sped mine up it would eliminate some of the perceived jitter.

                            Comment


                            • #54
                              Originally posted by jps99 View Post
                              That's a nice job on your T-35. I see you move your Secondary turrets a lot faster than I did, maybe if I sped mine up it would eliminate some of the perceived jitter.
                              Jps99, thanks. That's just my first sequencing. As long as nothing glitches, I'll probably slow them down, both in speed and frequency. Also, I gotta look into barrel elevation like yours!

                              Vaseline, I'm pretty much done hooking up the electronics, I'll write it up soon. The bottom line, though is that I'm using the Heng Long 6.1S.
                              Twenty six tanks, and not done yet!

                              Comment


                              • #55
                                Ok, wiring. Hope this clears things up:

                                Click image for larger version

Name:	IMG_2170.jpg
Views:	298
Size:	138.9 KB
ID:	338428

                                Self explanatory, huh? (kidding) So as I said, I've used the HL 6.1S board for its extra functions and higher Amp capacity for the HL Red motors and my extras. Stock HL 6.0 Transmitter. Admiral 2S 7000mah battery.

                                Stock connections for the following:

                                Motors of course, M1 & M2.
                                Headlights: LED 4.
                                Machine Gun Light: LED 5 (More on this later.)
                                Launch Flashing Light (muzzle flash): LED 1.
                                Smoke generator: CN 11 for the heater, CN12 for the motor.
                                Sound: CN9.

                                Adaptations for the following:

                                A jumper on the Trigger CN6 to bypass the Airsoft cocking function.
                                Cannon Recoil Servo: CN7 (6.1S).
                                Cannon Elevation Servo: CN8 (6.1S).
                                Turret Rotation: CN3. (See my earlier posts on converting a servo to a motor/reduction gear unit.)

                                There are two machine gun LED's. I made a wire y-splitter to run the two bulbs off the LED5 circuit (see below).

                                The auxiliary turret motion is run by a Micro-Maestro module, per my recent post. I powered it by using a servo wire y-splitter (available at hobby stores), plugging that into CN7 and plugging the servo and the maestro into the Y.

                                Possible for the future:
                                IR Emitter on CN15, IR Receiver on CN16. I use an aftermarket IR Emitter bulb and a LegoDEI IR receiver on my tanks. I wire the hit indicator LED's on the receiver to the Taillight circuit, LED3.
                                There is a circuit I haven't used yet, the Aiming Light LED2. This goes on when you push the cannon button on the right of the Controller. Maybe red LED's, IR LED's or even Laser Emitters in the secondary turrets?

                                You'll need the following on your workbench for all this:

                                A soldering gun with a point tip.

                                Plugs and Sockets for the wiring. They're available cheap as dirt on Amazon, like 50 for $6 and such.
                                JST plugs, and a terminal crimper for same.

                                Click image for larger version

Name:	IMG_2171.jpg
Views:	241
Size:	134.1 KB
ID:	338429


                                Twenty six tanks, and not done yet!

                                Comment


                                • #56
                                  That is a fantastic write up! Really liked the picture of the wiring looks like most of my planes and tanks too LOL
                                  Thanks again for your time

                                  Comment


                                  • #57
                                    Originally posted by RichJohnson View Post
                                    snip

                                    Since your building a battleship on tracks, it reminds me of how I made my HO scale battleship turrets turn. The two forward and one aft all had gear drives on servos but the 5 dual 5" turrets on each side I was not going to make operate separately. I used one servo for all the turrets on one side and cams and rudder linkage on all of them so the servo would turn them all from facing for and aft, to a 45 deg angle from the ship, or to a 90 deg angle broadside. It was quite an impressive set up to engineer. but with all the turrets, you could rig up something similar.
                                    Cool! This sounds a bit like what Lindberg models supposedly did on their large Blue Devil Fletcher destroyer kit where the turrets repeat their turns over and over as the motors turn…

                                    Comment


                                    • #58
                                      Here's all four turrets in motion. jps99, you can see I slowed down the sequences. Nfafan, don't you wish we had all these fancy electronics back in the Blue Devil days?

                                      Twenty six tanks, and not done yet!

                                      Comment


                                      • #59
                                        Starting to weather it, still haven't attached the track guards (fenders).

                                        Click image for larger version

Name:	IMG_2209.jpg
Views:	191
Size:	261.1 KB
ID:	339973
                                        Twenty six tanks, and not done yet!

                                        Comment


                                        • #60
                                          It's done! Well actually, it's assembled! Specifically, the track guards (fenders) are finally installed. Time for painting, weathering and detailing.

                                          Click image for larger version

Name:	T-35 40.jpg
Views:	193
Size:	208.3 KB
ID:	340535

                                          Click image for larger version

Name:	T-35 41.jpg
Views:	169
Size:	252.4 KB
ID:	340536
                                          Twenty six tanks, and not done yet!

                                          Comment

                                          Working...
                                          X