You must Sign-in or Register to post messages in the Hobby Squawk community
Registration is FREE and only takes a few moments

Register now

Announcement

Collapse
No announcement yet.

Official Heng Long 1/16 Scale Soviet Union KV-2 Heavy Tank Discussion Thread

Collapse
X
Collapse
First Prev Next Last
 
  • Filter
  • Time
  • Show
Clear All
new posts

  • Official Heng Long 1/16 Scale Soviet Union KV-2 Heavy Tank Discussion Thread

    Soviet Union KV-2 Upgrade Edition 1/16 Scale Heavy Tank RTR from Heng Long - HLG3949-001
    Soviet Union KV-2 Professional Edition 1/16 Scale Heavy Tank RTR from Heng Long - HLG3949-002

    Click image for larger version

Name:	heng-long-soviet-union-kv-2-upgrade-edition-1-16-scale-heavy-tank-rtr-motion-rc-34078395531449.jpg
Views:	999
Size:	93.9 KB
ID:	361415

    Click image for larger version

Name:	heng-long-soviet-union-kv-2-professional-edition-1-16-scale-heavy-tank-rtr-motion-rc-34078464704697.jpg
Views:	535
Size:	101.3 KB
ID:	361416


    A heavy assault tank using a 152mm main cannon, the Soviet KV-2 was produced at the same time as the KV-1. Due to the size of its heavy turret and gun, the KV-2 was slower and had a much higher profile than the KV-1. Due to an increase in turret weight from the expanded dimensions and a heavier gun, the turret traverse mechanism could work only on level ground. In service between 1940-1945, the tank was named after the Soviet defense commissar and politician Klim Voroshilov who operated with the Red Army during World War II. The KV tanks were known for their heavy armor protection during the early stages of the war, especially during the first year of the German invasion of the Soviet Union. In certain situations, even a single KV-1 or KV-2 supported by infantry could halt German formations. The German Wehrmacht at that time rarely deployed its tanks against KVs, as their own armament was too poor to deal with the Russian weapon. The KV tanks were practically immune to the guns mounted on the early Panzer III and Panzer IV tanks fielded by the invading German forces.

    This Upgrade version features steel gears and plastic tracks for an economical balance between durability and weight. Heng Long has produced RC tanks for over 20 years, and their products offer an ideal starting point for new customers wanting to explore the world of RC tanks. All of Motion RC’s Heng Long 1/16 scale tanks utilize the latest TK7.0 MFCB for outstanding control, performance, playability, and upgrade potential!
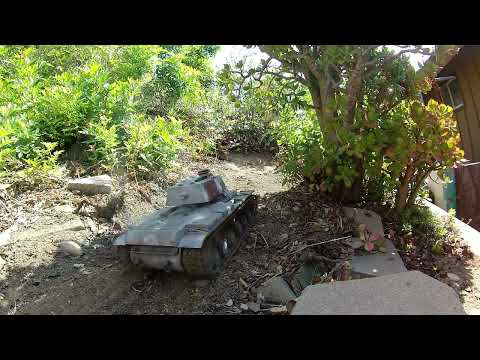
    Durable Tracks

    Confidently conquer terrain with lightweight yet durable tracks that are easy to service. Professional Versions feature metal tracks for the ultimate in performance and realism.
    Independent Suspension and Steel Geared Gearbox

    Reliable gearboxes featuring steel gears efficiently transfer power while independent suspension provide traction over rough surfaces.
    Airsoft BB Launch

    Safely fire 6mm plastic airsoft BBs at the included paper target at short ranges. *Take safety precautions and wear eye protection.
    IR Battle Ready

    Engage in friendly infrared ("IR") combat with other TK7-equipped tanks, both inflicting hits upon and receiving hits from opponents! Sounds and action signal each hit, until the 5th hit disables the tank. After 10 seconds, the disabled tank restarts and can rejoin the fight!
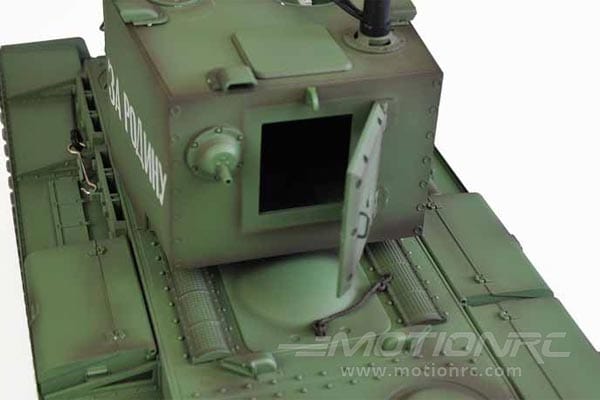
    Scale Details

    The perfect balance of scale detail and practical operation, each Heng Long tank arrives factory painted and includes Cosmetic Accessory Parts to further enhance the tank's realism.
    RTR

    The convenience of the "Ready to Run" (RTR) format allows new enthusiasts to join the world of RC Tanks with ease!
    Features:
    • Latest Generation TK7.0 Multi-Function Control Board (MFCB)
    • Proportional acceleration, steering, turret traverse, and gun elevation/depression
    • Programmable radio settings for the amount of recoil, the sensitivity in turns, the overall sensitivity in acceleration, high speed and low-speed modes, etc.
    • Smoke effect (On/Off)
    • Headlights and Brake lights (On/Off)
    • Volume (five settings including Off)
    • Four different sound sets. Each contains a unique engine start, idle, accelerating, traverse, elevate, machine gun, cannon firing, and shutdown sound
    • Track Recoil (Three settings from low, medium, and high) -This shudders the tank briefly rearward to simulate recoil when firing the main cannon
    • Fires a 6mm plastic BB (10 meters with minimal accuracy and limited velocity, but should still be treated with caution and with adequate eye protection)
    • Fires an invisible IR signal to be used as part of Heng Long's Infrared Battle System, which disables other tanks when hit five times during simulated combat. Up to 20 tanks at the same time can battle each other!
    • Independent suspension on all road wheels
    Includes:
    • Heng Long Soviet Union KV-2 Upgrade Edition 1/16 Scale Heavy Tank – RTR
    • 2S 7.4v 1800mAh Li-ion battery with XT60 Connector
    • 2S USB LiPo/Li-ion battery charger
    • 10-Channel 2.4GHz radio transmitter
    • Magnetic Infrared (IR) battle system receiver
    • Painted cosmetic accessory parts
    • Adhesive decal sheet
    • 6mm plastic BBs (50 Pack)
    • 2x spare track links
    • Smoke oil
    • Complete instruction manual
    Requires:Optional:Product Specifications:

    AGE LEVEL : 14 and up
    SKILL LEVEL : Beginner
    BUILD TIME : 1 Hour
    Scale 1:16
    Length 54cm / 21in
    Width 21cm / 8.2in
    Height 20cm / 7.8in
    Weight 2390g / 85.3oz
    Body Material ABS Plastic
    Chassis Material ABS Plastic
    Track Material ABS Plastic
    Motors Two 380 motors (28x37mm)
    Bearings Metal Bushings
    Gearbox Gear Material Steel
    Adjustable Gear Ratio Fixed
    Differential Type Gear
    Suspension Type Idler Arm
    Sprocket Plastic
    Road Wheels Plastic
    Idler Wheel Plastic
    Adjustable Idler No
    Turret Rotation 320 Degrees
    Lights Yes
    Sound Yes
    Exhaust Effect Yes
    IR Battle Ready Yes
    Airsoft BB Launch Yes, 6mm
    Track Recoil Yes
    Cannon Barrel Recoil No
    Required Battery 2S 7.4V 1800mAh with XT60 connector (included)
    Required Radio 10 Channel 2.4GHz (included)
    Skill Level Beginner
    Build Time 30 Minutes
    Recommended Environment Indoor / Outdoor

  • #2
    Mine arrived today happy to say....I must tag behind Martin after all....

    Comment


    • #3
      Congrats on the KV-2. Ken, you probably know the KV's exhaust smoke came out on the rear deck, not where HL did it. I know you like your tanks to smoke. I got some metal exhausts from Germany I think and I relocated the smoke. Actually a fun project. Biggest headache was routing the pipes around the gearboxes, hence the angle.

      Raw video:


      Click image for larger version  Name:	KV-1E 20.jpg Views:	0 Size:	105.1 KB ID:	361468Click image for larger version  Name:	sKV-1E 17.jpg Views:	0 Size:	65.5 KB ID:	361467Click image for larger version  Name:	KV-1E 18.jpg Views:	0 Size:	119.8 KB ID:	361469Click image for larger version  Name:	IMG_2234.jpg Views:	0 Size:	127.5 KB ID:	361470
      Twenty six tanks, and not done yet!

      Comment


      • #4
        Originally posted by SoCalBobS View Post
        Congrats on the KV-2. Ken, you probably know the KV's exhaust smoke came out on the rear deck, not where HL did it. I know you like your tanks to smoke. I got some metal exhausts from Germany I think and I relocated the smoke. Actually a fun project. Biggest headache was routing the pipes around the gearboxes, hence the angle.

        Raw video:


        Click image for larger version Name:	KV-1E 20.jpg Views:	0 Size:	105.1 KB ID:	361468Click image for larger version Name:	sKV-1E 17.jpg Views:	0 Size:	65.5 KB ID:	361467Click image for larger version Name:	KV-1E 18.jpg Views:	0 Size:	119.8 KB ID:	361469Click image for larger version Name:	IMG_2234.jpg Views:	0 Size:	127.5 KB ID:	361470
        Bob, your awesome. Much thanx for the suggestion,I'll have fun with this one. Looks to be doable for sure. Putting the correct smoke in the Stug III-now that was murder...

        Got a link for the exhaust tips? Or were they taken off the tank itself? I havnt paid attention to it as Im out of town right now...

        Comment


        • #5
          There are two types of exhaust pipes that work. The ones from Taigen look like these, but I'm not sure where they can be purchased in the US: https://www.forgebeartanks.com/store...A16_Scale.html

          Then there is a version from Schumo I used on my Tamiya KV-2 and the only place I know of to purchase them is in Germany: https://www.axels-modellbau-shop.de/...kv-1-kv-2.html

          Comment


          • #6
            I got the Taigen ones. Forgebear is a safe place to buy from. Shipping takes about 7 days.
            Twenty six tanks, and not done yet!

            Comment


            • #7
              Good Lord have mercy....Between the shipping & currency exchange, $$$$$ ouch. Its time to dive into 3D printing

              Comment


              • #8
                Originally posted by Zippersnapper View Post
                Good Lord have mercy....Between the shipping & currency exchange, $$$$$ ouch. Its time to dive into 3D printing
                Yeah, I bought mine a LONG time ago and I bought a bunch of stuff from them so I didn't have to spend more on shipping than I did on the items.

                Comment


                • #9
                  This is another source https://www.rctank.de/KV-1-Auspuffe-aus-Metall

                  Like Bob said, the gearbox is a bit of an issue but it's doable.

                  Comment


                  • #10
                    My total bill for the exhaust tips & a pack of 48 stars & stripes was almost $30, yet this morning I got an email saying $13 was refunded back to my card....so not too bad after all. I can live with that.

                    Comment


                    • #11
                      Sweet

                      Click image for larger version  Name:	20221118_121055.jpg Views:	0 Size:	131.6 KB ID:	361611

                      Lol

                      Click image for larger version  Name:	20221118_121001.jpg Views:	0 Size:	188.6 KB ID:	361612

                      Hmmm........I guess metal tips won't be so bad after all.....

                      Click image for larger version  Name:	20221118_131217.jpg Views:	0 Size:	107.1 KB ID:	361613


                      Comment


                      • #12
                        The springs on my sample were quite week so there was plenty of sag & dive, even after I increased tension by re-anchoring them. I ended up getting stiffer springs for mine. Hair dryer is your friend in removing the glued on exhaust tips.

                        Comment


                        • #13
                          Originally posted by sclui56 View Post
                          The springs on my sample were quite week so there was plenty of sag & dive, even after I increased tension by re-anchoring them. I ended up getting stiffer springs for mine. Hair dryer is your friend in removing the glued on exhaust tips.
                          Thanx, and thats good to know before I start pouring de-bonder over everything !

                          Comment


                          • #14
                            Both work, heater and debonder. Sclui tipped me off to that.
                            Twenty six tanks, and not done yet!

                            Comment


                            • #15
                              Couldnt wait on Forgebear, so I made it myself...

                              Click image for larger version  Name:	20221119_002821.jpg Views:	0 Size:	159.9 KB ID:	361721


                              https://youtu.be/ZVSlk_PE5Iw

                              Comment


                              • #16
                                Now you can fit the tail light in the factory exhaust route.

                                Always wanted the Torro KV-2 but IMEX doesn't bring it in so I picked up an upgraded KV-2 when it was available. This one is fully upgraded with metal + barrel recoil running 7.0. When I first removed it from the carton, there was zero suspension play, it just sat there at near max compression, must have been the weight of the

                                Comment


                                • #17
                                  Originally posted by Zippersnapper View Post
                                  Couldnt wait on Forgebear, so I made it myself...

                                  Click image for larger version Name:	20221119_002821.jpg Views:	0 Size:	159.9 KB ID:	361721


                                  https://youtu.be/ZVSlk_PE5Iw
                                  This was my plan with my TK7.0 KV-1E as well. Just sorta fabricobble something. I got a drill, tiny drill bits, copper pipe/bending tools for my nitro RC airplanes, a butane microtorch, so I'm sure I have what I need to reroute the smoke. As it is I can't really bring myself to run the smoke on mine because it irks me so much it's coming out of the taillight instead of the exhausts.

                                  Love the tank otherwise. I might buy a couple of turrets for it...I have a soft spot for the KV-2 because I've played a lot of War Thunder Ground Forces and that thing is hella fun in arcade tanks...the KV-1e and KV-85 turrets would be more practical options so I'd probably use a T-34/85 turret if I don't find a turret I can 3D print to make an accurate KV-85 turret.

                                  Gonna go out in the rhubarb with markings, too. I put a Puddin's Fab Shop sticker on the UFP of mine and I'll probably be putting Fallout faction markings on the turret. Haven't decided on Brotherhood of Steel, New California Republic, or Minutemen yet. Those factions are the ones I feel would be most likely to want an operating tank and most likely to be able to get one operating in the first place. And in roughly that order.

                                  Comment


                                  • #18
                                    Awesome Jenny. The smoke tips arent that hard (I used a pin vise), and I dont think any copper or other tubing is really necassay besides the short pieces going into the tip itself. Silicon tubing is readily available on Amazon in various diameters. Once the tips are mounted, its just a matter of running the silicon tubing from point A to B. There is a major advantage of silicon tubing over the soft plastic type found in the stock tanks-Its much less prone to kinking in a tight bend.

                                    Comment


                                    • #19
                                      Originally posted by Zippersnapper View Post
                                      Awesome Jenny. The smoke tips arent that hard (I used a pin vise), and I dont think any copper or other tubing is really necassay besides the short pieces going into the tip itself. Silicon tubing is readily available on Amazon in various diameters. Once the tips are mounted, its just a matter of running the silicon tubing from point A to B. There is a major advantage of silicon tubing over the soft plastic type found in the stock tanks-Its much less prone to kinking in a tight bend.
                                      Ye got plenty of that too. It's the fuel tubing my nitro RCs use. I'm sure I can find enough in my stash to make something work. I'm kinda thinking making a Y pipe to connect the exhausts to one another right across from one another underneath the engine deck, then bending down into a single pipe that runs to the smoker itself.

                                      Aside from the non-accurate exhaust location, I'm absolutely LOVING this thing. I got the pro version so it's got all the chonk and...all the power. Thing does not care what's in front of it, or what's behind it. I was just outside driving it around in my...admittedly effed up...front yard. We use it to turn our cars around so it's super rough and potholed, but the tank just didn't care. I was also towing a trailer with it! Used the included recovery ropes as a hitching device, trailer is made out of the lower hull of a Hobby Boss 1/16th T-34/85 model I built years ago. Had a couple of 4-stroke nitro engines in it as weight. Got video uploading too.

                                      Also need to paint my tracks and I'm waffling a bit on that. Part of me wants to just lay flat black right on the metal and let natural operation wear through to the base metal in areas this would have happened on the real tank. Part of me wants to run a layer of rust colored paint on them first, THEN the flat black, so there'd be spots here and there where it looks like they've rusted because the black paint wore off but not the rust paint beneath it. Will decide on that once I decide what operator markings to paint onto the turret and made stencils to do so with.

                                      I almost wonder if someone's made STL files for an SU-152 conversion. That's a big thing HL themselves could do with this hull and was a more practical 152mm gun mount on this hull. Were used extensively in the war to crack Tigers and Panthers open.

                                      Comment


                                      • #20
                                        Nice. I too bought the all meteal version. TBH, I ONLY buy all metal version tanks as its allot cheaper than upgarding them, The the only exception is the Hooben Fury in which case I had no choice. Anyway, Many people use blackening solution on their tracks, I dont. I do what you suggested, spray paint them black-then they get a heavy dose of mud,dirt & dust.

                                        This Henglong model is impressive from the shear size aspect. Im wondering just how to scale it actually is. I'm betting from a scale aspect, its way off. This is a monster of a tank to be sure. Please post a vid when complete as I would be very interested in seeing your final result.

                                        Comment

                                        Working...
                                        X