Callie Graphics

You must Sign-in or Register to post messages in the Hobby Squawk community
Registration is FREE and only takes a few moments

Register now

Announcement

Collapse
No announcement yet.

Mato tanks with Faulty IR emitters

Collapse
X
Collapse
First Prev Next Last
 
  • Filter
  • Time
  • Show
Clear All
new posts

  • Mato tanks with Faulty IR emitters

    Any help with this issue would be appreciated.

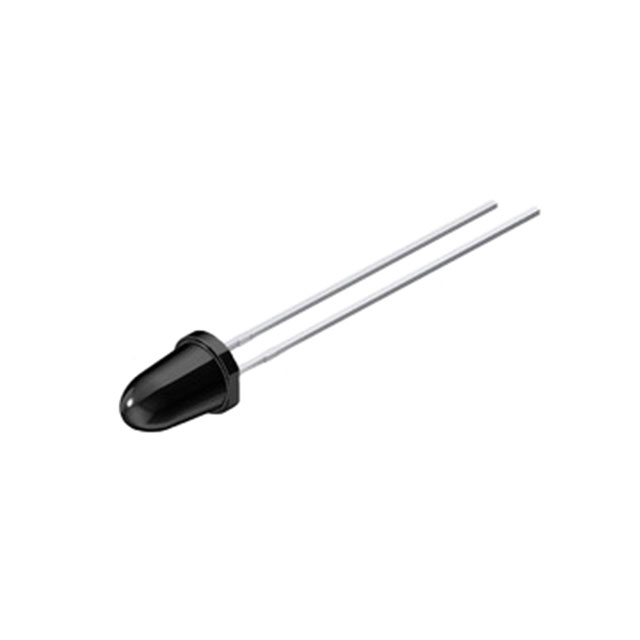
    I have two Mato tanks with IR emitters that do not behave as they should.

    the first is an M4 Sherman, and an opposing tank will only register a hit from this tank when the two tanks are within 2-3 feet of each other.

    The second tank is a Stug III, and opposing tanks do not register hits from this tank at all, no matter how close they are ( I think there was one instance when an opposing tank did register a hit from the Stug III, but only when they were inches away from each other, I have not been able to reproduce that).

    These tanks were bought new from Mato this Spring and they both behaved like this upon arrival.

    Initial emails to Mato ( 2 months ago ), resulted in a reply from them that said they will test out some different IR emitters in their shop and get back to me with a replacement. I've heard nothing since than and my follow-up emails to them have not gotten any kind of response.

    Any tips or suggestions would be appreciated.

    thanks

  • #2
    My thought....Open them up to see if the IR emitters are in the correct position and adjust them. Or purchase the new IR bulbs from this website and replace them.

    Order today, ships today. SFH 4545 – Infrared (IR) Emitter 950nm 1.5V 100mA 550mW/sr @ 100mA 10° Radial from ams-OSRAM USA INC.. Pricing and Availability on millions of electronic components from Digi-Key Electronics.
    SoCal RC Tank Club Facebook Group
    Largest active RC Tank club in Southern California
    Gathering 1-2x monthly/All Ages & Experience levels welcome​

    Comment


    • #3
      First, what system is in each tank I’m not familiar. What is put into Mato tanks these days second what infrared receiver are you using on the roof of the tank? That’s where you start then. Also use your phone camera to look at the IR bulb when you fire the tank on the workbench and see if the IR bulb lights up it should light up a faint purple color Sometimes they’re slightly blue, depending upon the brand of IR bulb
      RC tank parts and accessories I make
      www.RichardSJohnson.net/id28.html

      Comment


      • #4
        Originally posted by DavidN View Post
        My thought....Open them up to see if the IR emitters are in the correct position and adjust them. Or purchase the new IR bulbs from this website and replace them.

        https://www.digikey.com/en/products/...A5AIiALoC%2BQA
        Thank you.

        I'm not even sure where the emitter is located on these. On the Stug III, the only place I can see where it could possibly go is in the barrel of the main gun since there is no other area on the front of the tank where there is an opening for it. Since this tank also has a barrel flash, I'm not sure how well an IR emitter would work in that location.

        On the Sherman there appears to be an opening to the left of the main gun where an emitter could go.

        I have tried looking for the IR signal on these tanks, as well as other tanks I have that I know to be functional with my iPhone camera set to video, but I have not detected any type of signal that way (even on the functional tanks).

        Unfortunately, it's going to be a few weeks before I can dig into these and in any great detail in terms of taking them apart and replacing things. I'm currently recovering from rotator cuff surgery and have some restrictions in place that prevent me from doing too much...

        In any case, whats involved with changing the IR bulb on these ? Do they just plug into a socket of type of is there soldering that is required ?

        As far as the system MATO uses goes, I really have no clue.

        The tanks are great otherwise ( aside from the paint that chips when you breathe too heavy on it ) and the Tiger 1 and M10 destroyer I have work fine.

        I've attached some pics of the IR receiver and the internals of the Stug III, hopefully that can give a clue as to what system is being used.

        That connection with the blue tape attached to it is for a camera battery.

        Attached Files

        Comment


        • #5
          On my Mato Stug, there is a small hole over the barrel in the mantlet. I bought it as a static kit, no IR installed.

          Click image for larger version  Name:	StuG III Mato 06.jpg Views:	0 Size:	166.6 KB ID:	426956

          I drilled out the hole and installed an IR bulb. This included mounting the bulb in a brass tube.

          Click image for larger version  Name:	IMG_2376.jpg Views:	0 Size:	113.4 KB ID:	426955

          I bought it as a kit and installed my own Heng Long compatible electronics. I don't know if Mato stock IR electronics interact with Heng Long's. Maybe others can answer that. I believe Mato installs Clark boards of some sort. That's what it looks like in yours, anyway.
          The more screws it takes to reassemble a tank, the more likely it is you left something out!

          Comment


          • #6
            Originally posted by SoCalBobS View Post
            On my Mato Stug, there is a small hole over the barrel in the mantlet. I bought it as a static kit, no IR installed.

            Click image for larger version Name:	StuG III Mato 06.jpg Views:	0 Size:	166.6 KB ID:	426956

            I drilled out the hole and installed an IR bulb. This included mounting the bulb in a brass tube.

            Click image for larger version Name:	IMG_2376.jpg Views:	0 Size:	113.4 KB ID:	426955

            I bought it as a kit and installed my own Heng Long compatible electronics. I don't know if Mato stock IR electronics interact with Heng Long's. Maybe others can answer that. I believe Mato installs Clark boards of some sort. That's what it looks like in yours, anyway.
            Thanks.

            Yes, what Mato puts in their tanks works well with Heng Long tanks. The Mato Tiger, and the Mato M10 Tank Destroyer I have both send and receive hits to a HL King Tiger I have at distances up to 20-30 feet at least ( the max distance I've been able to test inside my house, its been too wet and muddy here in Eastern PA to take these outside).

            That hole you used for your IR emitter is not drilled out on my factory finished Stug III. Now I am truly baffled and am wondering if they put the emitter in without drilling that out, but like I said I am almost positive I was able to get one tank to take a hit from this Stug III when the two were within inches of each other.

            Emailing them and asking where exactly they put the emitter...Hopefully they respond.


            Attached Files

            Comment


            • #7
              I wonder....in your last photo, see a bump on the mantlet where the IR would be. Do you suppose they painted over the bulb? In the last of your three earlier photos, I see a red and white wire routing forward, but I can't see where it goes from the edge of the frame. Where does that wire go? If it's into the mantlet, it's probably to the IR bulb. Otherwise it might be to the headlight. If you want, you could take a hobby knife and scrape that bump a little to see if the paint comes off.
              The more screws it takes to reassemble a tank, the more likely it is you left something out!

              Comment


              • #8
                Bob, I believe the Mato Stug doesn't come with any headlights.

                Comment


                • #9
                  This guy,

                  Click image for larger version

Name:	IMG_2377.jpg
Views:	272
Size:	102.0 KB
ID:	426973
                  The more screws it takes to reassemble a tank, the more likely it is you left something out!

                  Comment


                  • #10
                    Mato typically uses the Clark TK-22 in their tanks. From personal experience, I have accidentally taken the mini-JST connector that is used on the IR LED port and plugged it into the wrong port before. There are two parts, J1 and J3 that use that mini plug. J1 is for the IR LED transmitter. J3 is for the cannon flash LED. You can see from the diagram below where the IR LED should be plugged in (yellow dot) and where the cannon LED goes (red X). That really dark LED is your IR LED. From dealing with LukeZ from Open Panzer on an IR LED issue before, the IR LED port actually pulses for a few seconds and in the case of the Tamiya IR LED, it actually overvolts it briefly. The cannon LED just flashes and won't provide the pulse length needed to make hits on other tanks. I think yours is an Osram type like this:

                    https://www.digikey.com/en/products/...20228387720&gb raid=0AAAAADrbLliJdtclw7k7v0pWiLYWyWPgT&gclid=CjwK CAjwo4rCBhAbEiwAxhJlCZBfVh0mM4Z9B0q1E7L7ugHaw9jlCu CLKNMYbXvms57Rvd3s78H0LRoCdx0QAvD_BwE&gclsrc=aw.ds

                    I had a bunch of those that I used, but found they didn't work in all of my tank applications for some reason. Either that or I got a ton of bad ones which is probably unlikely as Osram is a fairly respected company in the lighting world. Instead I started using the Vishay 6100. It is less power than the Osram SFH4544, but for my requirements the Vishay has been more reliable. I have had no issues with range even in the Texas sun. I know LukeZ from Open Panzer tested the Vishay and recommends it:

                    "Alternative IR LEDs

                    The Tamiya IR LED works very well, but is extremely expensive - over $10 US from most suppliers, if you can even find one in stock. The vast number of LEDs we burned up in testing motivated us to find a comparable replacement. We believe we found one with the Vishay TSAL6100. The DigiKey Part number is 751-1203-ND but it can easily be found at suppliers worldwide. Cost per LED is roughly 50 cents US even in small quantities. Without the actual specifications of the Tamiya LED we can never be sure of an exact replacement. But the price difference of the alternative could make it attractive for clubs to buy them in bulk and distribute them for sanctioned battles."

                    Now, if you want to keep the Osram LED, I will say that when it lights up, it is very faint due to the darkness of the LED cover even though it is a higher power LED:

                    Click image for larger version  Name:	image.png Views:	0 Size:	121.2 KB ID:	426976


                    Click image for larger version  Name:	Screenshot 2025-06-06 173240.jpg Views:	0 Size:	146.1 KB ID:	426975

                    Comment


                    • #11
                      Originally posted by tank_me View Post
                      Mato typically uses the Clark TK-22 in their tanks. From personal experience, I have accidentally taken the mini-JST connector that is used on the IR LED port and plugged it into the wrong port before. There are two parts, J1 and J3 that use that mini plug. J1 is for the IR LED transmitter. J3 is for the cannon flash LED. You can see from the diagram below where the IR LED should be plugged in (yellow dot) and where the cannon LED goes (red X). That really dark LED is your IR LED. From dealing with LukeZ from Open Panzer on an IR LED issue before, the IR LED port actually pulses for a few seconds and in the case of the Tamiya IR LED, it actually overvolts it briefly. The cannon LED just flashes and won't provide the pulse length needed to make hits on other tanks. I think yours is an Osram type like this:

                      https://www.digikey.com/en/products/...20228387720&gb raid=0AAAAADrbLliJdtclw7k7v0pWiLYWyWPgT&gclid=CjwK CAjwo4rCBhAbEiwAxhJlCZBfVh0mM4Z9B0q1E7L7ugHaw9jlCu CLKNMYbXvms57Rvd3s78H0LRoCdx0QAvD_BwE&gclsrc=aw.ds

                      I had a bunch of those that I used, but found they didn't work in all of my tank applications for some reason. Either that or I got a ton of bad ones which is probably unlikely as Osram is a fairly respected company in the lighting world. Instead I started using the Vishay 6100. It is less power than the Osram SFH4544, but for my requirements the Vishay has been more reliable. I have had no issues with range even in the Texas sun. I know LukeZ from Open Panzer tested the Vishay and recommends it:

                      "Alternative IR LEDs

                      The Tamiya IR LED works very well, but is extremely expensive - over $10 US from most suppliers, if you can even find one in stock. The vast number of LEDs we burned up in testing motivated us to find a comparable replacement. We believe we found one with the Vishay TSAL6100. The DigiKey Part number is 751-1203-ND but it can easily be found at suppliers worldwide. Cost per LED is roughly 50 cents US even in small quantities. Without the actual specifications of the Tamiya LED we can never be sure of an exact replacement. But the price difference of the alternative could make it attractive for clubs to buy them in bulk and distribute them for sanctioned battles."

                      Now, if you want to keep the Osram LED, I will say that when it lights up, it is very faint due to the darkness of the LED cover even though it is a higher power LED:

                      Click image for larger version Name:	image.png Views:	0 Size:	121.2 KB ID:	426976


                      Click image for larger version Name:	Screenshot 2025-06-06 173240.jpg Views:	0 Size:	146.1 KB ID:	426975
                      Wow. Thats pretty helpful information. Thanks.

                      i located the IR emitter. It was placed near the rectangular drivers viewport to the right of the main gun and is held in olace by what looks like a glob of CA glue. See attached photo.

                      its not even aligned with the opening, but is placed above the viewport, and im guessing most of the signal is blocked ad a result.

                      i took anothet tank and was finally able to get repeated hits on that tank from the Stug III by taking the IR receiver of the opposing tank and keeping it much lower than it originally was. I basically had to keep it halfway down the side of the tank in order for it to receive hits but that only worked when the two tanks were with 6-8 inches of each other.

                      is it safe to use acetone to loosen that glob of glue ( acetone wont damage the emitter or wires?) and reposition the emitter?

                      should the emitter be placed into some kind of tube to have a more focused signal?

                      also, i don't mind paying ten bucks for a better/stronger emitter, but how are these connected? Soldered on? Or is there a socket they plug into thats hidden by the wiring harness. Its literally been decades since ive soldered anything so that skillset is rusty to say the least.

                      Im frankly surprised this left the factory like this. The tank runs great otherwise, and was packed extremely well.
                      Attached Files

                      Comment


                      • #12
                        Glad you found it. Just so you're aware, most of the advice you get from us is oriented towards using our tanks outdoors. This is particularly true with the IR equipment. A HP (high power) IR emitter can hit a target at 100' or more in sunlight, and the associated aftermarket IR receiver will register those hits. You need both to be effective. A HP emitter may not register a hit on the stock IR receiver from a distance, and a stock emitter won't reach as far. The flip side of this is that the "outdoor" electronics are too powerful for indoor battles. HP IR reflections from walls and other objects will register hits from almost any angle, even from facing away if it hits a wall. You'll need to decide where you will be battling.

                        We like to place the HP IR bulb in a metal tube, with the bulb recessed 9mm or so. This doesn't focus the beam so much as it keeps side scatter from hitting tanks off to the side. This is important at club battles, where there can be eight or more tanks on a side. Friendly fire is a big issue then! Your stock bulb may stick out from the hole if you reposition it, so side scatter might occur.

                        Your IR bulb in the Stug vision port raises another issue. Most IR bulbs are either barrel or mantlet mounted so you can elevate or depress it as needed. This is important at range and on uneven ground. Keep this in mind when choosing your field. Indoors or on flat ground makes this not as critical.

                        I'd guess from your photo hot glue was used to hold the bulb. You can peel the bulb off the glue blob, remove the blob, and reglue the bulb where you want it. If you get another bulb, most likely you will need to solder the new bulb, with a fine point soldering unit and thin electrical solder.

                        There are more things to think about, but this should get you moving forward.
                        The more screws it takes to reassemble a tank, the more likely it is you left something out!

                        Comment


                        • #13
                          Originally posted by SoCalBobS View Post
                          Glad you found it. Just so you're aware, most of the advice you get from us is oriented towards using our tanks outdoors. This is particularly true with the IR equipment. A HP (high power) IR emitter can hit a target at 100' or more in sunlight, and the associated aftermarket IR receiver will register those hits. You need both to be effective. A HP emitter may not register a hit on the stock IR receiver from a distance, and a stock emitter won't reach as far. The flip side of this is that the "outdoor" electronics are too powerful for indoor battles. HP IR reflections from walls and other objects will register hits from almost any angle, even from facing away if it hits a wall. You'll need to decide where you will be battling.

                          We like to place the HP IR bulb in a metal tube, with the bulb recessed 9mm or so. This doesn't focus the beam so much as it keeps side scatter from hitting tanks off to the side. This is important at club battles, where there can be eight or more tanks on a side. Friendly fire is a big issue then! Your stock bulb may stick out from the hole if you reposition it, so side scatter might occur.

                          Your IR bulb in the Stug vision port raises another issue. Most IR bulbs are either barrel or mantlet mounted so you can elevate or depress it as needed. This is important at range and on uneven ground. Keep this in mind when choosing your field. Indoors or on flat ground makes this not as critical.

                          I'd guess from your photo hot glue was used to hold the bulb. You can peel the bulb off the glue blob, remove the blob, and reglue the bulb where you want it. If you get another bulb, most likely you will need to solder the new bulb, with a fine point soldering unit and thin electrical solder.

                          There are more things to think about, but this should get you moving forward.
                          Thanks. It's unlikely I'd ever be doing battles on a field at a tank club where I'm at. It looks like there might be one roughly 90 minutes to 2 hours away but thats just a drive that will never happen, so unless I find one a club thats within an hour drive of me ( and even that kind of drive is a stretch for me these days ), these tanks will only be used for entertaining myself and a friend or two at my place. Getting way off topic here, but you west coast/southwest people are fortunate you get to do these types of events.

                          With regards to my tank, Mato used a ton of hot glue on that emitter, I used my hot glue gun on a low setting to soften the glue up than was able to get off the tank hull with an exacto knife, but after repositioning it and testing it out, the emitter appears to be dead. Im sure it was faulty to begin with, and I guess maybe the heat from hot glue gun could have done some damage.

                          On a positive note, Mato did finally respond to my emails and told me a " new IR unit " is on its and it should be here on Monday. It sounds like they are sending me more than just an emitter.

                          In terms of placement of the IR emitter, you pretty much echoed what I was thinking and I will have to give that some more thought. I really don't want to drill out that divot above the main gun like you did on yours because that would require a fair amount of disassembly that I am just not interested in doing ( time constraints, and an overall history of screwing things up are why I bought RTR tanks to begin with ) so in the meantime I'll probably just leave it in the vision port.

                          thanks for all the assistance !

                          Comment


                          • #14
                            ackk...

                            Good grief I am a big dummy. That photo I posted that I thought was the IR emitter, is not the IR emitter. It's a LED that illuminates when the machine gun sound is triggered by the remote control. I swear I never noticed that light before, probably because it was tucked up and away behind the vision port, so as of now I have no clue where the IR emitter on this thing is located.

                            I emailed Mato asking them where they placed it at..Hopefully they respond...

                            Comment


                            • #15
                              Gotta trace those wires! You can use the schematic Tank-Me posted, unwrap the spiral covering and see where the wires from the "J1" socket goes. You'll need to do that anyway to replace the emitter if it's not working. Another tidbit; if the machine gun is fired for about 10 seconds or more continuously, it sometimes causes a hit, at least on Heng Long setups. Not always, though. In club battles, cheaters sometimes just hold down the mg button continuously. If we see that, they're ejected.
                              The more screws it takes to reassemble a tank, the more likely it is you left something out!

                              Comment


                              • #16
                                Originally posted by SoCalBobS View Post
                                Gotta trace those wires! You can use the schematic Tank-Me posted, unwrap the spiral covering and see where the wires from the "J1" socket goes. You'll need to do that anyway to replace the emitter if it's not working. Another tidbit; if the machine gun is fired for about 10 seconds or more continuously, it sometimes causes a hit, at least on Heng Long setups. Not always, though. In club battles, cheaters sometimes just hold down the mg button continuously. If we see that, they're ejected.

                                thanks. Yeah i am hoping to set aside time this weekend to trace them.

                                in the meantime the replacement emitters from Mato arrived, I've attached a photo of what they sent. Do these plug into the connector or are they soldeted in? Where can i get the actual connector from?
                                Attached Files

                                Comment


                                • #17
                                  Use the one from your faulty emitter.
                                  The more screws it takes to reassemble a tank, the more likely it is you left something out!

                                  Comment


                                  • #18
                                    Originally posted by SoCalBobS View Post
                                    Use the one from your faulty emitter.
                                    lol...yeah that won't work. I removed it easily enough, but when I pulled the wires out of it that led to the ffaulty emitter, the internal metal piece that I guess holds the wire in place went AWOL..trying to locate it was impossible and the wire doesn't stay in place without it, so I need to order some.

                                    Dont forget, Im new to working on this kind of stuff so mistakes and stupid things will happen. I searched throughout digikey and did not locate anything that look correct

                                    Comment


                                    • #19
                                      Originally posted by glocke12 View Post

                                      lol...yeah that won't work. I removed it easily enough, but when I pulled the wires out of it that led to the ffaulty emitter, the internal metal piece that I guess holds the wire in place went AWOL..trying to locate it was impossible and the wire doesn't stay in place without it, so I need to order some.

                                      Dont forget, Im new to working on this kind of stuff so mistakes and stupid things will happen. I searched throughout digikey and did not locate anything that look write.
                                      The connector in J1 for the IR LED is a JST 1.25mm. I hate soldering connectors that small and crimping them is harder so I buy pre-wired ones and mate them to my wiring:

                                      http://https://www.amazon.com/smseace-Connectors-twinkle-connections-JST-1-25mm-25/dp/B088NQBF3V/ref=sr_1_1?crid=2PYHYCJZF7MC7&dib=eyJ2IjoiMSJ9.aoK bNJ1Ab9GhjExcpcvkf8cLMLl1Y9m7YTAsvjYuOakEVXyURcDFp l730I6EdADCcNiVjBp1PNg2mAa4FTI7igi6I5PRCIvWGXeGGne S-WnDcltB2KZfJuS7lzxv0d2f18-L1K-cBED1ahkvLfmahZ8yDMfjHTi2BIKSvFpTk7c0SJtcLdI7OEDAl p7eScJOa6QXeXipvExY5Bs211J5htD6Um7sUr-XCn9k_TS8TqBUtG7YB_qdxch8HYz2Y2zzEN19OnyxKN1KExLqg QGkjKuWUOhoZCQ_1OTxV5Lrye0.sM0lsg_Hmfoho***cNH0ds8 mSbW36SedtlQII-aGqCU&dib_tag=se&keywords=smseace+25pair+26AWG+JST +1.25mm+2pin+Wire+Connectors+100mm+Cable+for+Indoo r+3D+Plane+Twinkle+Light+LED+Belt+Light+sm+Connect ions+JST-1.25mm&qid=1749799564&s=industrial&sprefix=smseace +25pair+26awg+jst+1.25mm+2pin+wire+connectors+100m m+cable+for+indoor+3d+plane+twinkle+light+led+belt +light+sm+connections+jst-1.25mm%2Cindustrial%2C105&sr=1-1

                                      The bigger white connectors are "JST 2.54" and the black ones that are used for servo connectors/LEDs on the 7.x boards are called "Dupont" connectors.

                                      Comment


                                      • #20
                                        thanks ordered and thankfully amazon will have them here today...another question lol..how do you mate the wires together ? Solder ( if so what type, I have some here but its probably not the right kind for that) ? a wiring cap of some type ?

                                        also, is there a sticky somewhere that lists a set if useful tools for working on these tanks ? I had a heck of time getting that connector out of the J1 socket...

                                        Comment

                                        Working...
                                        X