



What's the issue with the recoil? Is it servo recoil? According to the Clark TK50 manual, "RealRecoil Servo Port is always turned ON, no setting is needed to turn it on".
-
-
check to see if the servo went bad.Don't just fly--WREAK HAVOC!!!Comment
-
It's not a servo, I've been trying to find out how to install one to plug into the clark tk 50Comment
-
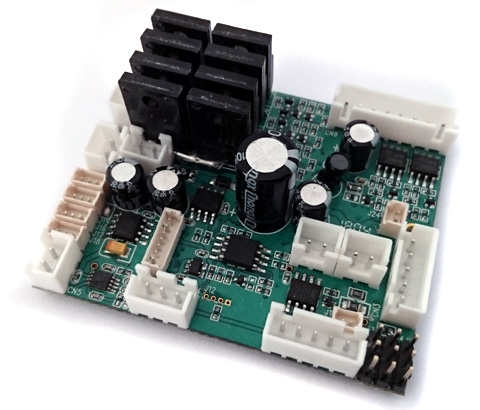
Looks like you have the default Torro/Taigen recoil unit which is not servo driven
Go down to the section that says "Example 3: Asiatam recoil unit installation:"
Then, make sure nothing is plugged into the servo ports except the programming jumper on the left+top most column
Then you have to program the board to utilize Asiatam recoil mode which is POWER button, until you get 3 flashes indicating it is in Asiatam recoil (CN9) mode.SoCal RC Tank Club Facebook Group
Largest active RC Tank club in Southern California
Gathering 1-2x monthly/All Ages & Experience levels welcomeComment
-
Thank you for the advice but I have tried all the different settings and nothing works! I think you have to do something with the wiring but I'm not understanding it! I did put a servo in today which worked until I put everything back together 😁Comment
-
I think we can't do much without understanding how you're setting up the servo, if it's mounted correctly, what your recoil and such look like. And we keep jumping around to different things not working but never making progress on the core problems. The descriptions you're giving are really vague and we can't guess what you did wrong or right. I think we gotta go tackle it in sections before you even try to do recoil and all that stuff.
I urge you to go back and revisit my earlier questions and see if we can get it to respond to your remote and move around and make noise first of all. This can be done without adding the upper hull functions. Goal should be first to make it respond and drive and make sounds from the speaker. I'm not trying to insult you or come off that way, but I really have to ask so I can get an idea if you're following and if you are doing the steps correctly otherwise we'll get nowhere. If I ask you if you did something and can show you did it right, you're not allowed to throw your hands up and say OH WELL :P
1) Is the 3 pin cable from the Clark board (Board CH1) plugged into the Receiver SERVO port.
2) When you power on the tank, is there a light on the receiver? If not and you did step 1, invert the plug the other direction, keeping it in the same port. It SHOULD power on provided you did the battery wire and switch correctly. It will not respond to control inputs yet so don't worry about it, don't skip ahead.
3) Did you bind your i6S to the compatible receiver? If you did not, the procedure to bind is to go to the settings in the remote and press BIND RX. It will start searching for a receiver that is in BIND mode. The receiver needs to have the jumper pin installed (included) to the BND port. When there is jumper in the BND port, and you power the tank on and it is getting power, the LED on the receiver will blink rapidly, meaning it is ready to bind. If your remote is already in BINDING mode or you press it now, it should pair up to the tank and you'll hear a confirmation beep, and the remote will give a message.
4) Next, turn off your tank. In the remove submenus, make sure the Stick Mode is set with M1/M2 on the right stick, M3/M4 for the left stick. Make sure throttle mode is set to SELF CENTERING. Now look for the submenu that has the protocols and make sure it is set to SBUS and PWM.
5) Tank still off, but map your switches in the remote's submenus under AUX SWITCHES. There, you can tell what channels 5-10 should be mapped to. Channel 5 should be Switch A, Channel 6 is Switch D, Channel 7 is Switch B, Channel 8 is Switch C, Channel 9 is Var A, Channel 10 is Var B. Very important you copy this exact, don't go off the script. The control scheme is specific to being able to access all the functions on the clark board.
6) At this point, your motors should be plugged into the Clark board on CN6 and CN7. Consider putting the tank on a block so it doesn't drive away on you in case you don't have control.
7) Have an 8 or 4ohm speaker plugged into CN5. I forget how many watts max but let's say 10w to be safe. Have a potentiometer (10k resistance) plugged into CN6 for volume control. Potentiometer should be wired as +/-/S
8) if ALL of the above steps are met, you can fire the MG sound or cannon sound on Var B (switch 10) and hear a sound. That'll be your first indicator that things are hooked up correctly.
9) "engine on" is the 3 position switch (Switch C) all the way down and then all the way up once. The middle position of this switch toggles Neutral or In Gear, while the bottom position toggles the engine ON/OFF. If you do it in one motion, you're putting the tank in Gear + turning on the engine. You can shift in and out of gear by just going to the middle position and then returning it to the top. The tank can drive without the engine being on.
You shouldn't bother setting up recoil and all this other stuff until you get the items I outlined above squared away, otherwise we're just talking in circles TBH
SoCal RC Tank Club Facebook Group
Largest active RC Tank club in Southern California
Gathering 1-2x monthly/All Ages & Experience levels welcomeComment


Comment