-
Yep. It definitely takes longer to program a new model into the radio than to assemble this model. Getting the elevon servo wires pushed through the wing is definitely the most tedious part. The wings and V Stab fit well into their respective slots and were perfectly aligned. My only struggle is that I want to run a stabilized Lemon receiver, since the plane is so small, but I'm having trouble finding a good flat, wide spot onto which to mount the RX. I may end up mounting it inverted to the bottom of the battery hatch.Leave a comment:
-
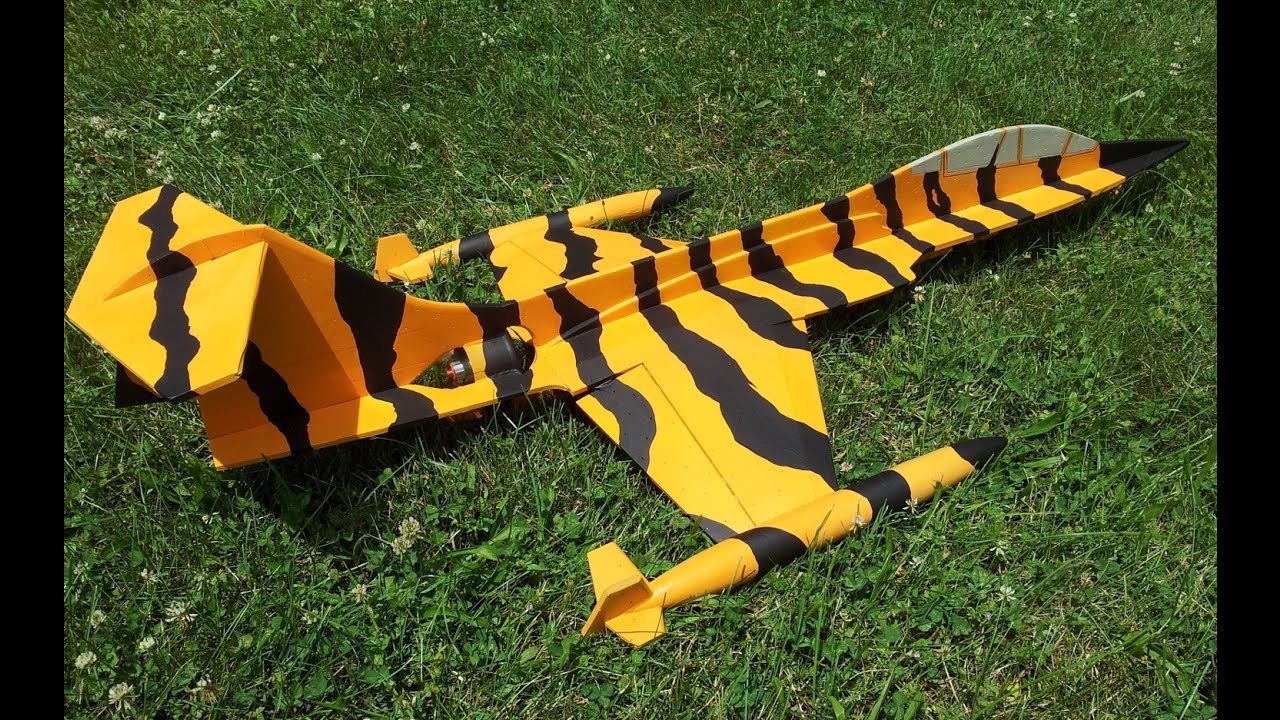
Hee Hee Hee... only one? I don't mean to thread-jack, but the F104 looks super-cool with the stripes. (Just like the P15) Here's my model in the air....Leave a comment:
-
-
There was a Belgian F104 that was painted like TI's model. It was saved for a museum. I've always liked this scheme and I painted my F-104 this way.
Leave a comment:
-
How much of a build? It literally takes longer to take it out of the box!! :)
You insert the CF tube. Then apply glue to the wing, insert the connector wire, and stick the wing on. Then glue the other wing, insert the wire, and stick it on. Then glue the rudder on.
I just inserted the antenna (didn't glue that) and pooof ... done.. There are only 5 pieces including the antenna and fuselage. Super-easy.
Actually it took me longer to get the wires into the channel through the fuselage, they were being a bit stubborn. That increased my build time (and blood pressure) by 83%., but I got over it.Leave a comment:
-
-
TiredIronGRB Love The Tiger Stripes JG26 ( 'schneller machen ) ;)Leave a comment:
-
I pulled the trigger tonight! Will order the landing gear hopefully when they come back in stock.Leave a comment:
-
-
Mine will be here tomorrow, for those that have it can you answer a question for me?
Are the two wing servos Y'ed together and then plugged into the elevator or aileron spot in the receiver? I know the transmitter will get set up as a delta wing.Leave a comment:
-
Got the P-15 today, took about 15 minutes to put it together including installing the Admiral 6ch receiver and setting up the radio, after the Foam-Tac cured a couple hours I took it out and flew it. I really like my F-8 and F-105 but the P-15 is a whole different story...it is crazy fast and stable but be careful doing rolls on high rate as it's hard to see when it gets out there. To help with orientation I repainted it in a fantasy livery and added some leftover decals, I did the underside in flat gray and just masked over the factory decals.
Leave a comment:
-
A cup of coffee and an hour in the AM and she will be ready to fly, gyro and all!!Leave a comment:
-
It arrived today! Super fast shipping!! In great shape. No time available to build today..... :PLeave a comment:








Leave a comment: