


I installed the circular antenna on mine yesterday! Looks great!
The benefit with the nose reinforcement isn't so much about grass or pavement. Its all about the stress the nose gear puts on the fuselage. You're correct, if you always keep the nose up during landing you might be ok! But mistakes happen! This model basically has a "glass jaw". There is very little strength in the fuselage structure right at the front edge of the battery bay. A relatively small vertical (up) force on the gear can snap the fuselage in two at that point.
Its a big battery up front, with a lot of weight. The nose on my Version-1 broke off during a normal landing on our fabric runway, after I touched down normally on the mains.... the nose came down and the fuselage just snapped in two. There was some discussion about this earlier in the thread ...
The good thing about this mod is that it doesn't affect anything on the outside and takes only about 5 minutes to do. You'll need two 10-inch CF tubes (I used 5mm) and a drill bit to make a pilot hole at the front. Cut slots for the tube to fit in like you see in the picture, and use the drill bit (by hand) to make a hole in the front and stick the tube in about 2 inches. Then just glue it in with some Foam-Tac and its done.
-
Thanks for the advice about the pilot! I'll give that a shot when I work more on the cockpit itself (adding panel wash, coloring dials, etc.)! About the nose, however, I won't be able to get a carbon spar in time for the maiden and I don't think it's that necessary for me. I fly off a not paved, but basically a cut turf field (search up SACRC - Sac rats). I also always make a point to land on main gear first (with my F-35), as to not stress the nose so much. Would you still deem it necessary?Leave a comment:
-
Hey there, great job on adding those little details - doing those little things really makes them look great. I really like that circular antenna, I'm going to add that to mine!
Something you may want to consider - pry off the canopy and move the pilot forward. Compare with the real plane, the pilot didn't sit 3 feet back from the instrument panel. What this model needs is an armored seat-back for the pilot.
And - don't forget to reinforce the nose by installing CF tubes on each side. The nose is weak and in a relatively hard landing you can snap it right off. This is easy to do and will solve that problem.
"before and after"
Leave a comment:
-
Aces of Iron or Warbirdpilots.com are my go-to's for scale pilots...Leave a comment:
-
Hi guys regarding the Freewing ME262 do any of you have any recommendations for a more realistic/scale pilot
thanks. CarlLeave a comment:
-
Looks great! Looking forward to your mod/customizing progress and flight video!Leave a comment:
-
Sorry for being so long. The last Freewing Me-262 in stock arrived at my door on Sunday. I love it. Twin 70mm, 1.5 m wingspan. This will be fun. As I said earlier, I plan on making this a scale competition model by adding a few details. First impressions, it looks great! The stock scale detail is great, and besides the nacelles not placed on exactly right (corrected by taking off, putting back on), it is perfect. No wing warping and no paint flecks. Hobbysquawk helped a ton with assembling and setting up rates, after my maiden I'll post my rates. The plane actually looks better (and bigger) in person and than in video! And about finding the CG, I actually had to add about an ounce and a half in the nose to get it to balance on 100mm mark. For better help with taxiing, I set my rudder rates lower for flight, and then straight 100% for taxiing. The rates I'm using now is a mix between what was found here on HS and what TheRCGeek did. Anyways, to making this more scale. It’s the little things that make the biggest difference. Made a circular antenna using a paper clip and some Rustoleum oil rubbed bronze (same as my F-35 exhaust). That one thing makes it look so much better! Then came the pitot tube, which was made with a toothpick and some thinned out paint from Home Depot that was airbrushed on. Not perfect, but it looks good enough. As my friend thercgeek says, imitate, not replicate! (Best piece of advice ever)! If you’re one of the closer eyed people here, you’d see I also did a bit of gun smoke. Not great, but I’m happy with it! Finally, there was a little bit on the canopy that was bugging me. The plastic canopy was brown next to a green foam fuselage. So some little masking and some airbrushing later, I think the results speak for themselves! The 262 is looking to be a beautiful model, and every little improvement makes her look that much more realistic!Attached FilesLeave a comment:
-
-
-
Great, look forward to seeing your 262 in all its glory as a competitive scale model -- not a small task I would imagine but as she flies so well, definitely not a waste of effort. Keep us posted.Leave a comment:
-
I am well aware of the amazing quality of Freewing jets! I am a scale pilot and I like to improve them cosmetically. With my F-35 V3, all I did was paint a couple of things on it to make it look more scale and installed a centerburner. The 262 looks like a fantastic jet and stock, flies perfectly. What I would like to do however is turn this existing beauty into a scale competition model. So I'll be adding the details I talked about earlier plus a weathering job. I do plan on reinforcing the nose and nose gear with 5mm Carbon rods (as shown in earlier posts).Leave a comment:
-
Leave a comment:
-
DaFlyingSnek, the truth is for this model (which I own) and for many more EDF foamies you need to do absolutely nothing to "improve" them if you don't want to. Assemble, check simple issues such as glue joints, servo solidarity etc and go fly. Many of the posted cosmetic mods can never be seen in flight anyway and the structural mods seem aimed at those who abuse the model on landing !
For the record I did add split flaps ( after flying "as is" and just because) and did reinforce the nose section on my 262 -- she handles like a trainer but can be flown very scalelike. Has never tried to bite me at take-off, in flight or landing.Leave a comment:
-
I don't remember reading about the wheels or landing gear. What issue did people post about in this regard? I fly this plane with the stock gear off GeoTex and grass and the gear/tires have never been a problem. What is it that you're worried about? What you might want to do is to reinforce the nose section. On a hard landing, the whole nose from the front of the cockpit canopy can break off.Leave a comment:
-
Hey all, I just got the last (for now) Me-262 V2 as a graduation gift, and after reading all these comments, I just cannot wait to go fly! And yes, I am sad too that so many comments with so much knowledge was lost, especially about the landing gear and wheel size. So I got to thinking. For the main gear, I am going to see and try putting in the Robart 2.75 in wheels, that is the best I can do for that, with the wheel well and all. For the nose gear however, I was thinking that what if you can swap out just the wishbone assembly with that from the upgraded nose gear with the Flightline F7F? I don't know if it would be the right size, and I am concerned about it blocking the nose doors from closing, so if anyone has both the 262 and the F7F, can you please let me know if the nose wheel on that can fit? Thank you! And if it works, I'll have to paint over that blue :D Another easy mod that I was looking at doing is with the main gear. It shouldn't be that hard to make your own gear doors for them. Just buy a spare set of the nose landing gear doors, cut the gear doors a little shorter (width wise), put a piece of balsa on the inside to glue it together and add some detail, put in 2 little holes by the wheel well, and if you want, put in a servo and using some y-connectors, sync the main gear doors with the nose. I'll have to try that when I get it. And I'm sure everyone here knows what do do about the flaps. Really, other than the gear, spilt flaps, and large canopy (which I don't plan on changing), this is an absolutely BEAUTIFUL model and I wonder why it isn't as popular! Bravo Freewing!Leave a comment:
-
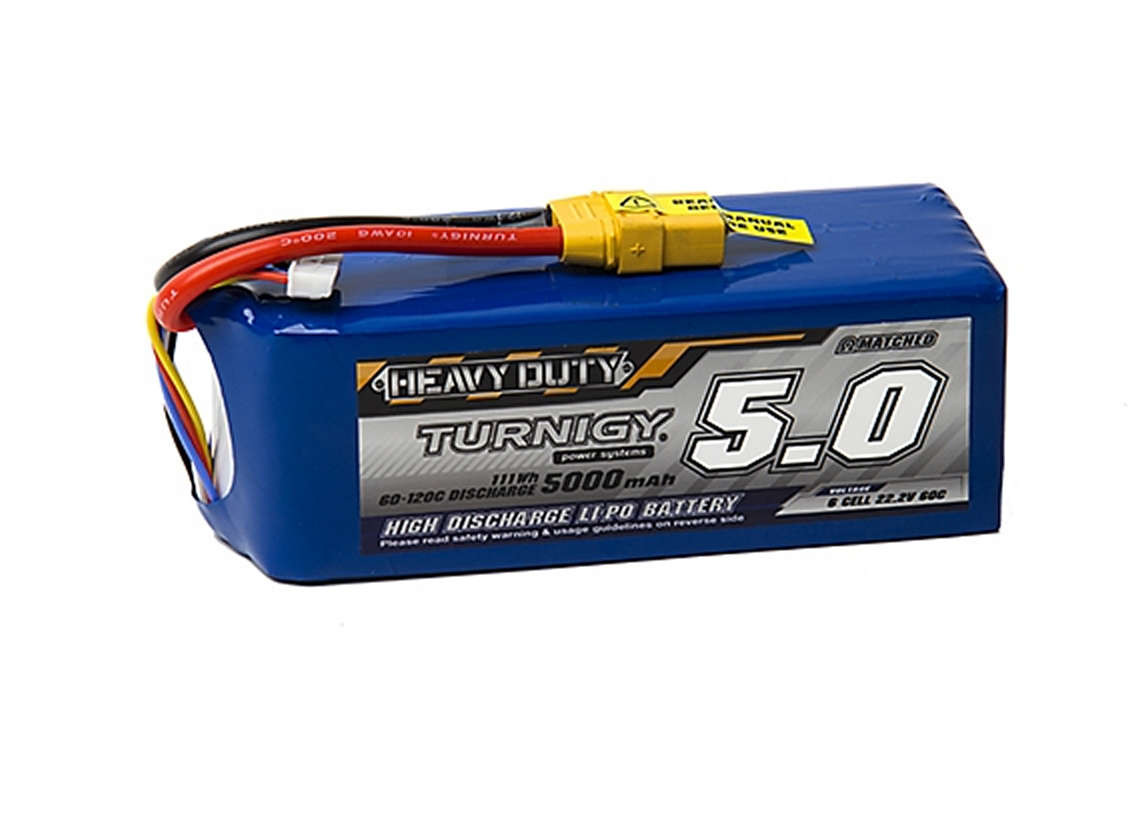
I’ve have about 6 different brands of lipos that I have used within the past couple years and in my experience I feel that the best value is the HRBs. I have about 12 of them total. The come in 4, 5, and 6000’s in 6s, but also offer compatible 2s for each size for mixing up cell count. I use them in my 8s F-22 and, like every other jet I own, they are great. On my twin 70mm jets I use 6000mAh 50c. I’m pretty sure the 6k’s are 819g, 5k’s are 740g, and the 4k (60c) are 614g. Which are considerably lighter than the Admiral equivalents and are 60% the cost.Leave a comment:
-
Motion's 6000 is $124 and its an excellent product. Like others here, I started with the Admiral 5000 but I have been using the RoaringTop 6250 6S pack, this sells for $105.
The 6250 give you about 20% more capacity in terms of the gas tank. The RT is rated at 35C but it has performed with valor in all of my EDF jets.
The timer on my radio is set for 3:40 on my 262, that is what I was using with the Admiral 5000 and I was including time for one wave-off. With the RT 6250 on this plane it usually has plenty of reserve left, meaning that I could easily set the time for 4 minutes and still have enough for at least one wave-off. The ME262 seems to do best when its flying fast but I don't use full throttle most of the time. So I've enjoyed using the 6250's on the 262, the A10, the MIG-17 because it gives me extra time compared to the 5000 and doesn't weigh any more. https://www.roaringtopusa.com/35c-62...is-35c-6250-6sLeave a comment:
-
A 6000 will get you the 4 minutes you want unless you've got the throttle pegged the whole time. I fly mine on a 5000 and I can get 4 minutes with varying throttle. Nothing will give you any decent flight times if you go balls to the wall from beginning to end.
6000 Expensive? Yes. But that's the price one must pay to play if you want a premium product. I fly these in most of my jets and they perform extremely well given the lower price point.
Leave a comment:
-
Need to review my battery for this ME 262 .I have been using 6s 4200 35c,hence I am only getting just over a 2 minute flight .So I think I need to get some better battery for the 262 .The recommended battery for this model is the Admiral 6s 6000 pro but they are a bit expensive I am OK buying 2 of these battery from Motion RC but need to know will they improve my flight times .I am hoping for around a 4 minute flight but not sure if the 6000 pro will give me these times .Do not want to fork out a lot bucks and I do not get much difference in flight times ?Leave a comment:
-







Leave a comment: