You must Sign-in or Register to post messages in the Hobby Squawk community
Registration is FREE and only takes a few moments

Register now

Announcement

Collapse
No announcement yet.

New E-flite P-51D 1.5

Collapse
X
Collapse
First Prev Next Last
 
  • Filter
  • Time
  • Show
Clear All
new posts

  • Oh quite a while ago. This is Bearcat III
    Click image for larger version

Name:	IMG_5301.jpg
Views:	247
Size:	131.8 KB
ID:	375854
    And this is Bearcat....I
    Click image for larger version

Name:	20220316_095653.jpg
Views:	221
Size:	144.5 KB
ID:	375855Click image for larger version

Name:	20220316_095653.jpg
Views:	207
Size:	144.5 KB
ID:	375856
    I guess as Bearcat two was a rebuild after I smucked Bearcat I into the ground at Nefi.
    Yes, that's right there is no more Bearcat II, this is actually all Bearcat I with the exception of the motor and ESC.
    One of those cases where all the parts sat in a box until I asked myself
    Can it be done?? Can I actually straighten out the nose enough to fly again?

    Apparently so!!
    She has some creases but that's okay, flies like a dream!
    OV 10, my buddy Charlie Brown was there to witness the accident at Nefi, brought on by the fact that the receiver and gyro got wet in a rain storm. Hard to believe she 's flying again.

    Grossman56
    Team Gross!

    Comment


    • I've got to do a picture with all my smucked up birds that have been rebuilt back to flying status. The Bearcat, Tigercat, Avanti, FW P51, P 40, Pitts. Proof positive it can be done in some cases.

      Grossman56
      Team Gross!

      Comment


      • Originally posted by Grossman56 View Post
        I've got to do a picture with all my smucked up birds that have been rebuilt back to flying status. The Bearcat, Tigercat, Avanti, FW P51, P 40, Pitts. Proof positive it can be done in some cases.

        Grossman56
        My F-4N that you saw yesterday that I didn't fly due to the wind has over 20 flights on it, but on one of the first ones I got a bit slow on final approach and it stalled and went in from about 4-5 feet high passing the threshold of the runway and landing in the grass. It severed the fuselage right at the cockpit. I did repair it and it looks ok, but I noticed when I flew it the cockpit was slightly "bent" to the left. So, I had to put in a little right aileron trim for it to fly straight. It still flies great, although I don't fly it all that often.

        Cheers

        davegee

        Comment


        • Click image for larger version

Name:	IMG-0855 (1).jpg
Views:	167
Size:	162.1 KB
ID:	380863 I have had my E Flite P-51D for over two years now. painted it up, a complete redo of the WWII version of LOU IV flown by Col. TJJ Christian, Jr., the great grandson of General Stonewall Jackson of Civil War fame. I loved flying this airplane, just a great flyer. Once I replaced the stock main wheels with Robarts, the landings got much easier and they "stuck" on almost every decent approach and landing attempt I have tried.

          Well, somewhere in there, maybe I misaligned the mating of the wing and fuse with all its connectors, the problems started mounting with electrical glitches. It got worse until it became totally unflyable. I told my friend Dan Grossman about it, and before I consigned it to the junkpile or parted it out, he agreed to take a look at it. He found one of the problems, I had misconnected one of the wires that made at least some parts go a little haywire. Also, there was a inner gear door servo that had gone bad, and he surmised that might also be part of the problem.

          In the meantime, I had ordered a new E Flite P-51, thinking I'd paint it up in the same colors as the other one. But I tried one more thing: I put the center wing section from the new plane on my old troublesome P-51 LOU IV and the old center section on the new plane I had just bought. Well, Everything fell into place somehow! My old LOU IV was running perfectly now, and I took it out to the field the past two days and have flown it a ton. I'll attach a pic of it this morning after its 6th flight today.

          The "new" airplane now doesn't need to be painted up as LOU IV, as I got it back in flying shape. So, I decided I will do a total repaint on the new plane, and paint it up as Hun Hunter from Texas, flown by Lt. Henry Brown, the top ace in the 355th Fighter Group out of Steeple Morden, England in WWII.

          Now, I'll have TWO planes in beautiful paint schemes and airplanes I really love to fly! I've already removed the foam fairing that attached to the front of the vertical stab, as I did for LOU IV. They were both P-51D-5NA's, early model D's before they needed to add the stabilization with the fin fairing. The model has no such lateral control problems, so I'm used to removing this part and patching around the tail.

          I'll report back progress on this redo to the new look.


          Davegee

          Click image for larger version

Name:	P44-74391.jpg
Views:	202
Size:	56.4 KB
ID:	380861Click image for larger version

Name:	download.jpg
Views:	164
Size:	86.8 KB
ID:	380862

          Comment


          • davegee Nice Dave! I love this plane, it flies so well. (After replacing the wheels of course, it can't be said enough)

            I look forward to seeing your Hun Hunter from Texas!

            Comment


            • I had an aileron not work,, back in this thread,, so i permanantly connected all of that centre section wiring( so i cant separate it from the fuse) hav not had a problem since.. and i too always look forward to any daveegee rendition..

              Comment


              • Originally posted by f4u ausie View Post
                I had an aileron not work,, back in this thread,, so i permanantly connected all of that centre section wiring( so i cant separate it from the fuse) hav not had a problem since.. and i too always look forward to any daveegee rendition..
                Hi F4U Aussie: yes, that is a good idea, and I had considered it. Back in the day, we had no fancy connectors like this, and I used color coded tape on each lead to easily put it together without error. I had been a little skeptical of this slick operation of sliding the wing into the fuse and everything is connected, no muss, no fuss. But in the end, I must have accidentally mashed the two together a bit when putting it together, and the problems began.

                Well, I've got a new start with the replacement inner gear door servo that I installed yesterday. Everything has fallen into place with both planes. I will fly the new plane tomorrow, weather permitting, for another test flight. It's going to look pretty goofy for awhile as I get around to painting all the parts to the new Hun Hunter scheme. I think I'll paint the spinner and cowl band white today. That will be a start. I rarely remove the wing from the fuse on most of my planes as I have enough room in my truck to carry it intact, and that seems to keep some of these issues at bay. Bill always maintains that he was NOT a fighter pilot, but a bomber pilot Flying a fighter. He had no real training in fighter pilot skills so he feels that paint scheme might have saved his bacon a few times!

                Cheers

                Davegee

                Comment


                • Originally posted by SanExup View Post
                  davegee Nice Dave! I love this plane, it flies so well. (After replacing the wheels of course, it can't be said enough)

                  I look forward to seeing your Hun Hunter from Texas!
                  Thanks,! I think I will paint the prop spinner and nose band white later today. That will be a start to the repaint. Callie sells the Hun Hunter decals but I will have her make a couple of specialized decals that were on the real airplane that aren't in that decal selection.

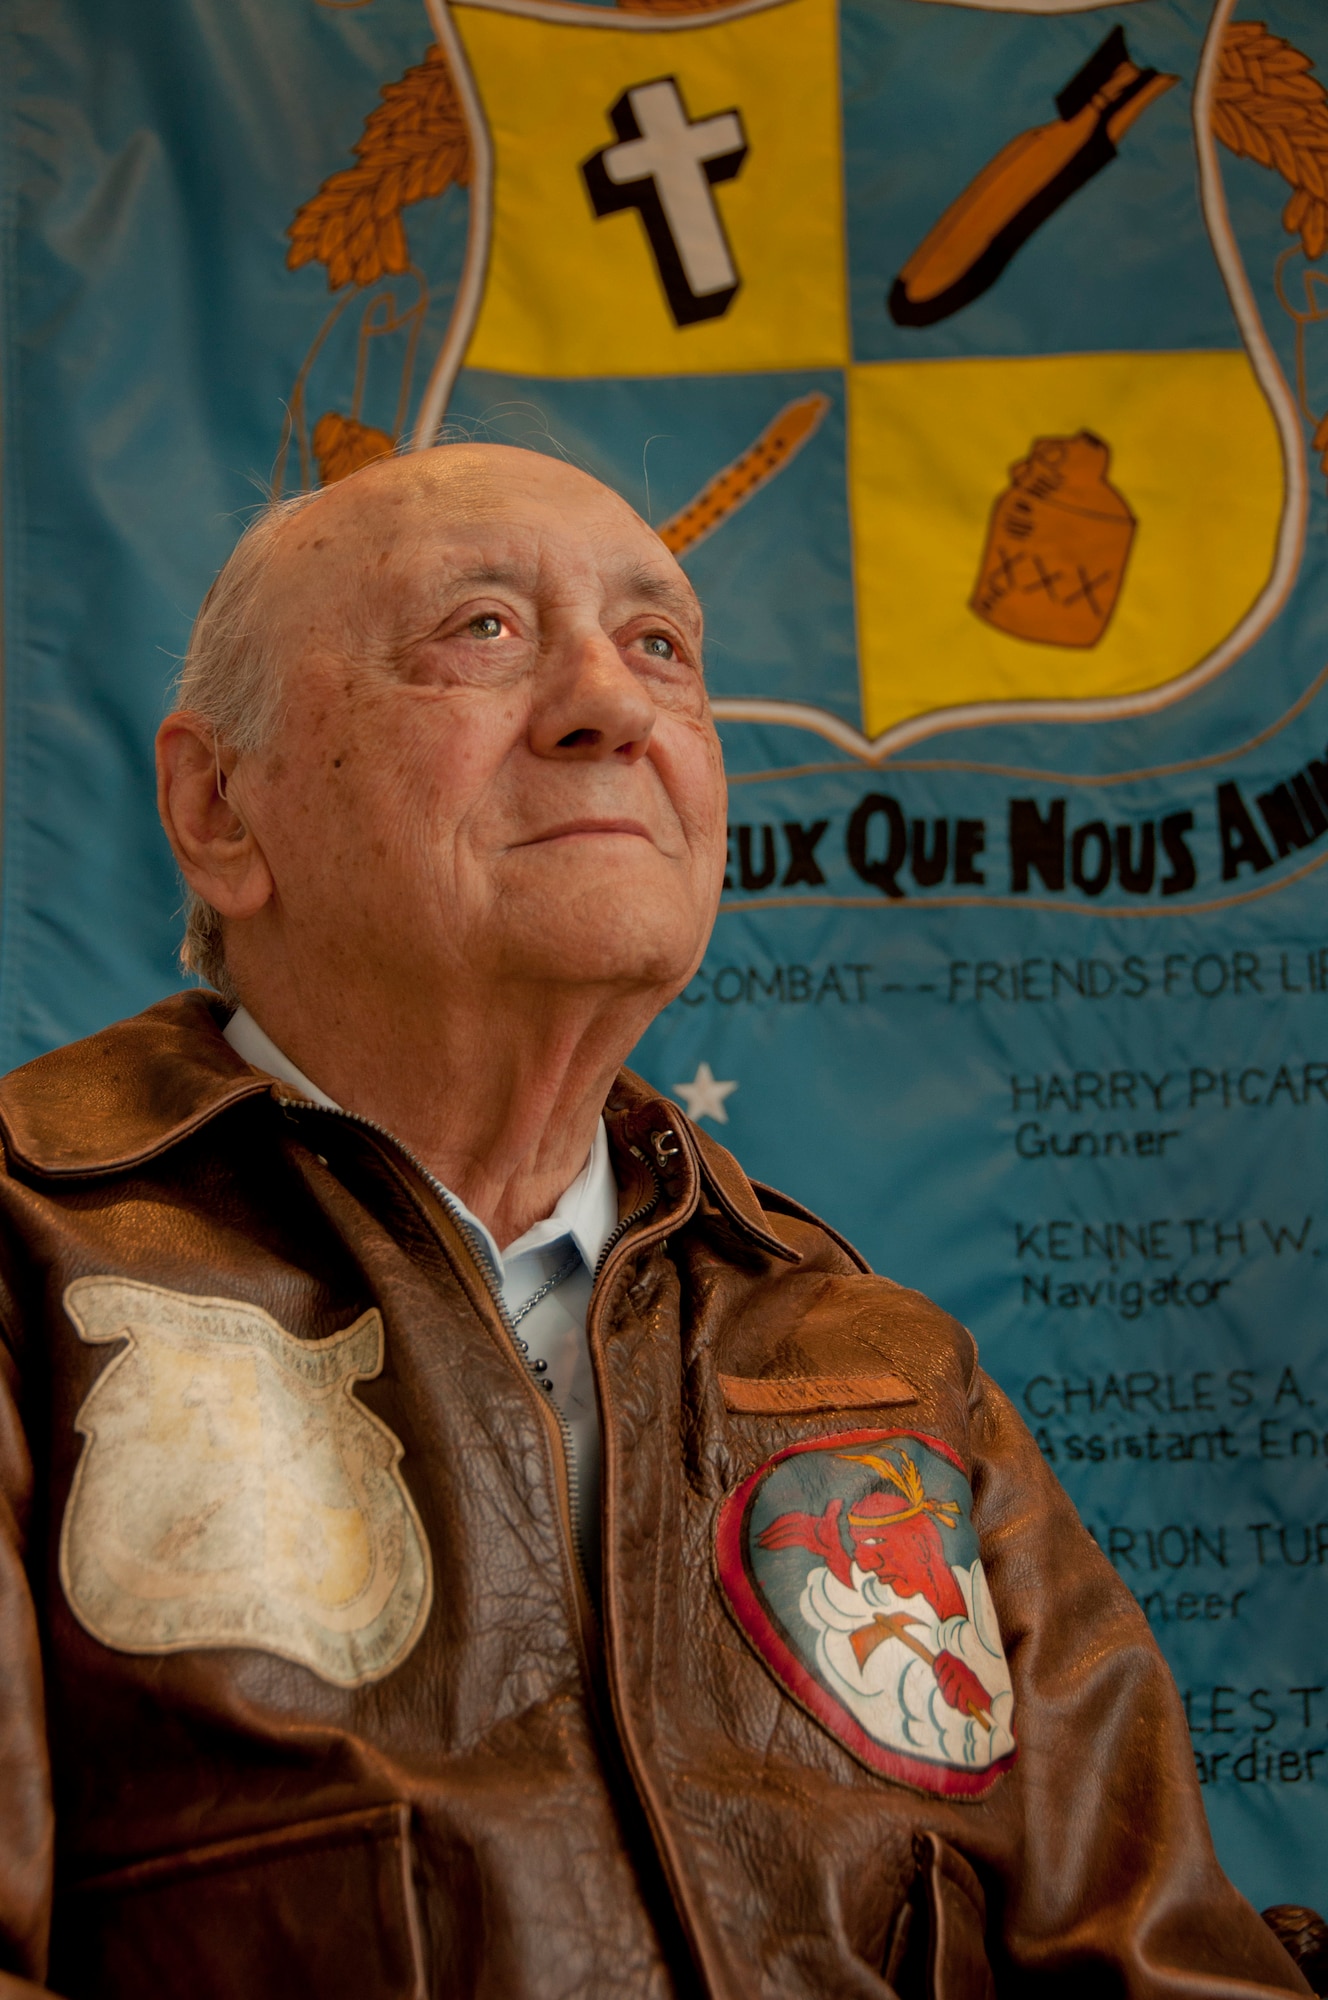
                  Funny story: A good friend of mine, Bill, now 99 year old, was a 19 year old B-24 A/C based out of England in WWII. They finished their required 31 missions in almost record time, about 68 days, due to the fact that they flew a bunch of tactical missions to France at D-Day and afterwards where they flew two or more missions per day. Anyway, instead of coming home, his duty done, he volunteered for a new assignment, flying P-51Ds with a new Scouting Forces unit. These former aircraft bomber commanders would fly ahead of the big bomber formations to relay back weather, flak, and enemy aircraft concentrations. They would be the "eyes" of the bomber stream coming up from behind.

                  Bill got assigned a P-51D airplane painted up as WR*Z. He didn't think anything of it. But being attached to the 355th Fighter Group out of Steeple Morden England, The real Hun Hunter from Texas had had those same markings, but he had recently been shot down and captured by the Germans.

                  Bill flew many missions with the Scouts, even got a probable kill on a Me-262 jet on a mission. But having the same paint scheme and markings of one of the top aces in the ETO made Bill think some. He noticed that some German fighters would shy away from him when they got close. Bill thinks possibly those German pilots thought Henry Brown was flying that airplane, and they didn't want any part of that gunfight! We'll never know, but Bill got in contact with Brown after the war and shared his story. They had a good laugh over it.

                  Cheers

                  Davegee

                  Comment


                  • Deterence by reputation! That is funny! At 19, what a beginning to adult life for your buddy.

                    Comment


                    • Originally posted by SanExup View Post
                      Deterence by reputation! That is funny! At 19, what a beginning to adult life for your buddy.
                      Yeah, he did his 31 combat missions in the B-24, and about 50 missions as a Scout. Came home, and celebrated his 21st birthday!

                      Here is a link to some info on him. Amazing guy, hanging in there at 99 years old!

                      Lieutenant Colonel (Ret.) Bill Getz was a senior in high school when the Japanese attacked Pearl Harbor on December 7th, 1941. From that day forward, Getz knew his fate was forever changed. By age 19


                      Davegee

                      Comment


                      • Originally posted by davegee View Post
                        Click image for larger version  Name:	IMG-0855 (1).jpg Views:	27 Size:	162.1 KB ID:	380863 I have had my E Flite P-51D for over two years now. painted it up, a complete redo of the WWII version of LOU IV flown by Col. TJJ Christian, Jr., the great grandson of General Stonewall Jackson of Civil War fame. I loved flying this airplane, just a great flyer. Once I replaced the stock main wheels with Robarts, the landings got much easier and they "stuck" on almost every decent approach and landing attempt I have tried.

                        Well, somewhere in there, maybe I misaligned the mating of the wing and fuse with all its connectors, the problems started mounting with electrical glitches. It got worse until it became totally unflyable. I told my friend Dan Grossman about it, and before I consigned it to the junkpile or parted it out, he agreed to take a look at it. He found one of the problems, I had misconnected one of the wires that made at least some parts go a little haywire. Also, there was a inner gear door servo that had gone bad, and he surmised that might also be part of the problem.

                        In the meantime, I had ordered a new E Flite P-51, thinking I'd paint it up in the same colors as the other one. But I tried one more thing: I put the center wing section from the new plane on my old troublesome P-51 LOU IV and the old center section on the new plane I had just bought. Well, Everything fell into place somehow! My old LOU IV was running perfectly now, and I took it out to the field the past two days and have flown it a ton. I'll attach a pic of it this morning after its 6th flight today.

                        The "new" airplane now doesn't need to be painted up as LOU IV, as I got it back in flying shape. So, I decided I will do a total repaint on the new plane, and paint it up as Hun Hunter from Texas, flown by Lt. Henry Brown, the top ace in the 355th Fighter Group out of Steeple Morden, England in WWII.

                        Now, I'll have TWO planes in beautiful paint schemes and airplanes I really love to fly! I've already removed the foam fairing that attached to the front of the vertical stab, as I did for LOU IV. They were both P-51D-5NA's, early model D's before they needed to add the stabilization with the fin fairing. The model has no such lateral control problems, so I'm used to removing this part and patching around the tail.

                        I'll report back progress on this redo to the new look.


                        Davegee

                        Click image for larger version  Name:	P44-74391.jpg Views:	34 Size:	56.4 KB ID:	380861Click image for larger version  Name:	download.jpg Views:	27 Size:	86.8 KB ID:	380862
                        Well, I took my first steps in converting this LOU IV paint scheme to the Hun Hunter from Texas paint job that Lt. Henry Brown flew with the 355th Fighter Group in WWII. He was the top scoring ace in the 355th, even though he got shot down and captured and spent the last several months of the war in a German Stalag.

                        I started with the nose, repainting that white. I haven't done anything else yet, as I want to get a few more flights in as is to be sure it is all dialed in before I start in on the repain in earnest. I have two flights on it so far. I did remove the foam fairing on the vertical stab and did some bondo and primer for now. This plane was also a P-51D-5-NA as was Hun Hunter, and both these early D models did not have the fin fairing on the tail yet. Once I get going on it, I'll strip all markings off completely and sand and primer it before repaint and decals. As usual, I'll be using Callie transfers and a few extras that she'll make up to make it as close as possible to what the real plane looked like. Specifically, things like the aircraft data decal on the left side of the fuse below the cockpit, I have the number on that decal match the serial number on the tail, and the pilot name plate is painted on the side of the canopy frame. All of these were different and unique depending on what the pilot wanted it to read.

                        Click image for larger version  Name:	unnamed (1).jpg Views:	0 Size:	181.3 KB ID:	380971

                        Comment


                        • Please post pics as u go,, will learn something

                          Comment


                          • Originally posted by f4u ausie View Post
                            Please post pics as u go,, will learn something
                            Be happy to, f4u Aussie. You can see that the plane is a mish-mosh of colors right now. The outer wing panels are stock from my new airplane in that gawdawful blue color, the fuselage is also new and will have to have all the stickers replaced and primed prior to going any further, and the center wing section is from my old LOU IV. For some reason the stars aligned and all the electrical glitchy problems I had with my LOU IV ironed out after I switched those sections out.

                            I'm going to run some test flights with this airplane today and maybe tomorrow too to see that it is all trimmed out ok and doesn't have any mechanical issues before I go ahead with the redo on the model. I'll take pics and discuss anything that might be helpful to other modelers doing repaints or scale detail work on based on actual aircraft, as I am doing. I won't be going wild on the redo's as I am going to enjoy flying the plane and won't be in any scale contests. But I want to be happy with how it looks and a tribute to the real plane and pilot who flew her almost 80 years ago.

                            Cheers

                            davegee

                            Comment


                            • Originally posted by davegee View Post

                              Be happy to, f4u Aussie. You can see that the plane is a mish-mosh of colors right now. The outer wing panels are stock from my new airplane in that gawdawful blue color, the fuselage is also new and will have to have all the stickers replaced and primed prior to going any further, and the center wing section is from my old LOU IV. For some reason the stars aligned and all the electrical glitchy problems I had with my LOU IV ironed out after I switched those sections out.

                              I'm going to run some test flights with this airplane today and maybe tomorrow too to see that it is all trimmed out ok and doesn't have any mechanical issues before I go ahead with the redo on the model. I'll take pics and discuss anything that might be helpful to other modelers doing repaints or scale detail work on based on actual aircraft, as I am doing. I won't be going wild on the redo's as I am going to enjoy flying the plane and won't be in any scale contests. But I want to be happy with how it looks and a tribute to the real plane and pilot who flew her almost 80 years ago.

                              Cheers

                              davegee
                              Got two more flights in with the new P-51D this morning. I took a couple of pics after its second flight. I now have it in my shop and all apart. I've already removed all markings and will start on priming, sanding,, etc. as I work towards making it look like Hun Hunter. I'll be placing and order with Callie for the markings probably today or tomorrow.

                              Cheers

                              Davegee

                              Click image for larger version

Name:	IMG-0871.jpg
Views:	177
Size:	147.9 KB
ID:	381002Click image for larger version

Name:	IMG-0873.jpg
Views:	167
Size:	257.0 KB
ID:	381003

                              Comment


                              • Davegee,

                                Another scale masterpiece that I will be watching. Just because you want an everyday flyer doesn't mean you can't scale it out . Ha ! Looking forward to see what you do
                                Best Regards, Rex

                                Comment


                                • Originally posted by jetfool View Post
                                  Davegee,

                                  Another scale masterpiece that I will be watching. Just because you want an everyday flyer doesn't mean you can't scale it out . Ha ! Looking forward to see what you do
                                  Best Regards, Rex
                                  Thanks, Rex. I'm making up my order for Callie as we speak. I really wasn't expecting this option of having TWO working P-51s instead of just one for parts and a new replacement. But this should be fun. Will post pics/comments as I proceed on here.

                                  Cheers

                                  Dave

                                  Comment


                                  • Wow, miss a day and look what happens!
                                    Glad to hear it was just the servo that was causing the problem. I would guess that it was sending mixed messages to the sequencer along with the fact that the one input on the receiver was in the wrong slot. I was telling Dave that the way I remember the channel sequence on a receiver is that the first channel ( after the bind plug of course) is always throttle, then the following are "A,E,R' as in aero but actually Aileron, Elevator, Rudder. On a number of occasions, I've sat two birds side by side to help with wiring. The FMS P51D guided me in the wiring for the FMS P51B and when I got my second P40 (Thanks again, Hardway, I'll never forget that!) people were reporting that the tail wheel would turn one way and the rudder the other. Turns out mine did as well. One glance at the old P40 showed me that the tray that the elevator and rudder servos fit into was put in backwards by the factory. Turned the servo 180 degrees and problem solved. In Dave's case we had it narrowed down to either the clam shell door servo or the sequencer or both. Installing the new center section proved that it was not the sequencer. I was there when Dave took her up for the first time (after numerous cycling of everything while on the ground) and you could see he was a happy guy as the airplane performed flawlessly!
                                    Glad to help Dave, great to see that Mustang fly once more, can't wait to see number two. I'll bring my three Mustangs out for some pics for the Annual Wyoming Mustang Roundup!
                                    Click image for larger version

Name:	9776461-cowboy-emoticon.jpg
Views:	162
Size:	124.9 KB
ID:	381042

                                    Grossman56
                                    Team Gross!

                                    Comment


                                    • Originally posted by Grossman56 View Post
                                      Wow, miss a day and look what happens!
                                      Glad to hear it was just the servo that was causing the problem. I would guess that it was sending mixed messages to the sequencer along with the fact that the one input on the receiver was in the wrong slot. I was telling Dave that the way I remember the channel sequence on a receiver is that the first channel ( after the bind plug of course) is always throttle, then the following are "A,E,R' as in aero but actually Aileron, Elevator, Rudder. On a number of occasions, I've sat two birds side by side to help with wiring. The FMS P51D guided me in the wiring for the FMS P51B and when I got my second P40 (Thanks again, Hardway, I'll never forget that!) people were reporting that the tail wheel would turn one way and the rudder the other. Turns out mine did as well. One glance at the old P40 showed me that the tray that the elevator and rudder servos fit into was put in backwards by the factory. Turned the servo 180 degrees and problem solved. In Dave's case we had it narrowed down to either the clam shell door servo or the sequencer or both. Installing the new center section proved that it was not the sequencer. I was there when Dave took her up for the first time (after numerous cycling of everything while on the ground) and you could see he was a happy guy as the airplane performed flawlessly!
                                      Glad to help Dave, great to see that Mustang fly once more, can't wait to see number two. I'll bring my three Mustangs out for some pics for the Annual Wyoming Mustang Roundup!
                                      Click image for larger version

Name:	9776461-cowboy-emoticon.jpg
Views:	162
Size:	124.9 KB
ID:	381042

                                      Grossman56
                                      You bet, Dan! I did get two more flights this morning on P-51D #2, making four flights now. It perfomed MUCH better, although after the first flight I adjusted the elevator a turn and a half turns on the connector at the elevator to relieve its tendency to be out of trim, downwards. That helped and it flew very well after that.

                                      One item that I will have to keep an eye on: these past four flights have been spotless as far as electrical glitches are concerned. However, when I cycled the gear closed on the stand at the field, the right gear would not retract for a couple of cycles. I reset everything and then it operated perfectly through about 5 gear cycles. I'm hoping this won't become a problem down the road, but I do have a new sequencer I can put in there if it happens again. Other than that, everything is running great.

                                      Comment


                                      • Originally posted by davegee View Post

                                        Got two more flights in with the new P-51D this morning. I took a couple of pics after its second flight. I now have it in my shop and all apart. I've already removed all markings and will start on priming, sanding,, etc. as I work towards making it look like Hun Hunter. I'll be placing an order with Callie for the markings probably today or tomorrow.

                                        Cheers

                                        Davegee

                                        Click image for larger version  Name:	IMG-0871.jpg Views:	6 Size:	147.9 KB ID:	381002Click image for larger version  Name:	IMG-0873.jpg Views:	5 Size:	257.0 KB ID:	381003
                                        Here are a few photos I took this afternoon as I worked on sanding and priming. This is the "grunt work" of pulling off stickers, patching rough areas, sanding, priming, Rinse and repeat. I'm taping off the bottom of the fuse and wings to preserve the invasion stripes, although I will probably repaint them, anyway.

                                        One item I like to add on my P-51s is the round flare gun port where supposedly a pilot could shoot his Very pistol outside this small tube on the left side of the cockpit. I don't think it was used for that very often, but probably much more popular using to flick cigarette ashes or smoke from cigarettes out of the cockpit during missions. I used a small brass tube that I had lying around, cut it to length, and glued it into the fuse. It will have a small square cover over it to complete the look.

                                        In time, I will paint the entire airplane aluminum silver, and then add the camo RAF Dark Green to the top surfaces of the fuse, wings, and horizontal tail. I don't believe Lt. Brown did much if any bombing missions, although he was shot down attacking a ground target. Another pilot tried to help him by landing next to where he was, but for some reason they couldn't try to escape in the good airplane. So, they made a dash for it and eventually had to surrender to the Germans, where they remained until the end of the war.

                                        Click image for larger version  Name:	IMG-0875.jpg Views:	3 Size:	176.3 KB ID:	381057Click image for larger version  Name:	IMG-0876.jpg Views:	2 Size:	201.6 KB ID:	381058Click image for larger version  Name:	IMG-0874.jpg Views:	2 Size:	187.5 KB ID:	381059Click image for larger version  Name:	IMG-0879 (1).jpg Views:	2 Size:	105.1 KB ID:	381060Click image for larger version  Name:	IMG-0880.jpg Views:	2 Size:	140.5 KB ID:	381061

                                        Comment


                                        • Can i ask what type of primer you use... and does it react to any edges.. or the foam?. looks like u have primed almost all and u dont mess around

                                          Comment

                                          Working...
                                          X