P-38 - The Ultimate EPO Lightning

Post Your Pictures: RC Tank Gallery

Collapse
X
Collapse
First Prev Next Last
 
  • Time
  • Show
Clear All
new posts

  • SoCalBobS
    replied
    Nice cars. Both my cousin and a coworker had Austin Healey's, back in the 60's-70's.

    The tank is a Soviet T-26, pre and early WW2. Many countries used them. Mine has Spanish Civil War (red/yellow/red) markings, as they were used extensively there. A lot of tank experience was developed at that war. The tank is 100% 3DP, so I wouldn't use it in outdoor tank battles. I wouldn't be able to get replacements if anything broke.

    . The T-26 had many variants. This would have been my real favorite, with twin mg turrets, but nobody makes one in 1/16.
    Click image for larger version

Name:	images.jpg
Views:	7
Size:	71.3 KB
ID:	452056

    Leave a comment:


  • rb67mustang
    replied
    Originally posted by SoCalBobS
    Once I saw that model, I knew I had to have it!
    Bob, everyone should have one. Maybe the So Cal group needs a couple of platoons of them!!! BTW, what tank is it, and what country used them?
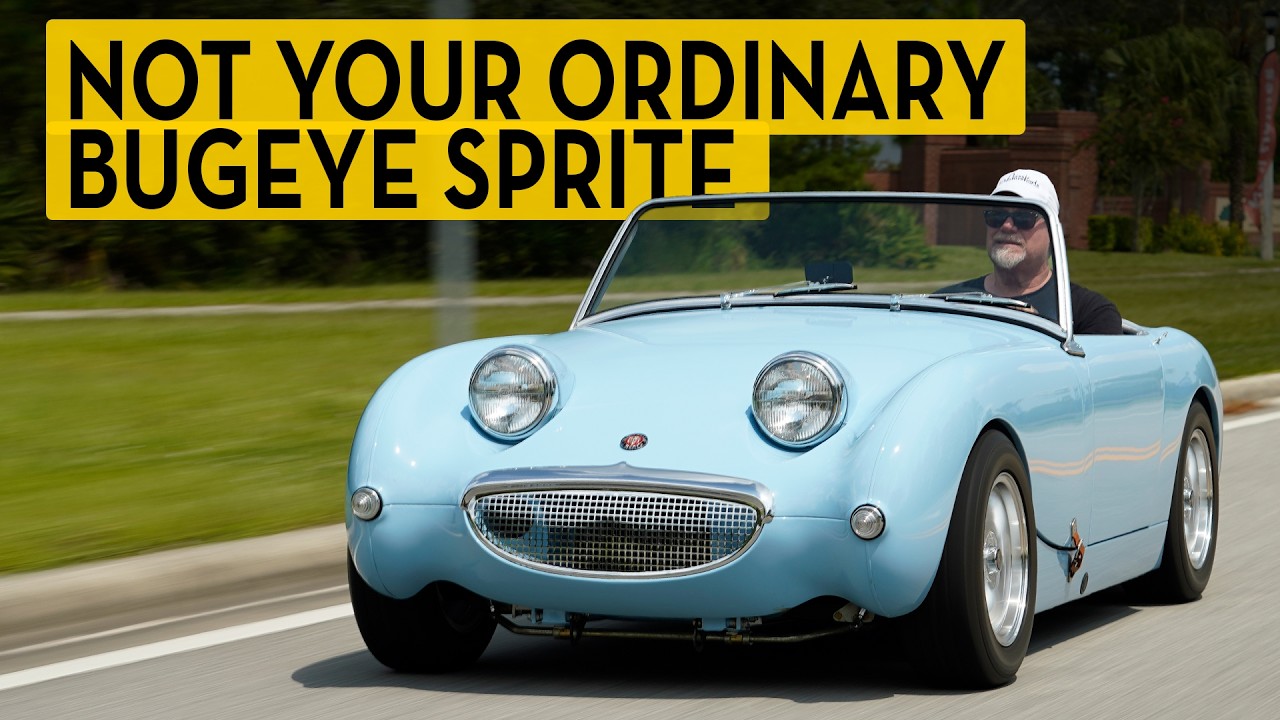
    The Bugeye lights make me think of the Austin Healey Bugeye Sprite. My Dad had many different British sports car when I was young. He'd buy them damaged, and fix them up and sell them. Here's a 5 minute video.

    Leave a comment:


  • SoCalBobS
    replied
    I added the 3DP searchlight from East Coast Armory on my NF Model painted in Israeli colors, and asked ChatGPT to add a nighttime battle background.

    Click image for larger version

Name:	6d02bdf6-416d-450d-83ee-913c8f6446f4.png
Views:	60
Size:	1.44 MB
ID:	452011

    Leave a comment:


  • SoCalBobS
    replied
    Once I saw that model, I knew I had to have it!

    Leave a comment:


  • rb67mustang
    replied
    Originally posted by SoCalBobS
    Close up photos always show something you missed - the lower front detailing. Otherwise, it came out well. Anyway, back to the paint shop.

    Click image for larger version Name:	ChatGPT Image Jul 23, 2026, 09_05_09 AM.png Views:	7 Size:	1.94 MB ID:	451299
    Click image for larger version

Name:	ChatGPT Image Jul 23, 2026, 11_17_47 AM.png
Views:	170
Size:	2.05 MB
ID:	451302
    LOLLLLLLLLLLLLLLLLLLLLL!!!!!!!!!!!!!!!!!!!!! Bob, I almost fell off my chair!!! LOLLLLLLL!!!!!!! All it needs now are Bunny Ears!!! LOLLLLLLL!!!!!!!

    Leave a comment:


  • Hellcat 7
    replied
    NORDPAC at the 2026 JBLM living History weekend.


    Leave a comment:


  • DavidN
    replied
    Another old metal Taigen KV1 was rescued and reworked on. It is now ready for battle this weekend at our event.

    Click image for larger version

Name:	IMG_9499.jpg
Views:	147
Size:	229.7 KB
ID:	451522 Click image for larger version

Name:	IMG_9496.jpg
Views:	121
Size:	119.7 KB
ID:	451523 Click image for larger version

Name:	IMG_9484.jpg
Views:	120
Size:	275.6 KB
ID:	451524 Click image for larger version

Name:	IMG_9498.jpg
Views:	117
Size:	252.0 KB
ID:	451525 Click image for larger version

Name:	IMG_9489.jpg
Views:	114
Size:	179.5 KB
ID:	451526 Click image for larger version

Name:	IMG_9485.jpg
Views:	113
Size:	266.1 KB
ID:	451527 Click image for larger version

Name:	IMG_9494.jpg
Views:	117
Size:	233.5 KB
ID:	451529 Click image for larger version

Name:	IMG_9490.jpg
Views:	110
Size:	251.1 KB
ID:	451528

    Leave a comment:


  • Panzermechaniker
    replied
    Click image for larger version

Name:	251244.jpg
Views:	154
Size:	284.3 KB
ID:	451434 Click image for larger version

Name:	251242.jpg
Views:	132
Size:	349.8 KB
ID:	451435 Click image for larger version

Name:	251243.jpg
Views:	133
Size:	327.6 KB
ID:	451436

    Leave a comment:


  • SoCalBobS
    replied
    Close up photos always show something you missed - the lower front detailing. Otherwise, it came out well. Anyway, back to the paint shop.

    Click image for larger version  Name:	ChatGPT Image Jul 23, 2026, 09_05_09 AM.png Views:	7 Size:	1.94 MB ID:	451299
    Click image for larger version

Name:	ChatGPT Image Jul 23, 2026, 11_17_47 AM.png
Views:	170
Size:	2.05 MB
ID:	451302

    Leave a comment:


  • DavidN
    replied
    I acquired this used Torro Tiger I early last week. It is now ready to join its unit including the 1/10 Tiger for operation Citadel, heheh!

    Click image for larger version

Name:	1000000734.jpg
Views:	235
Size:	190.6 KB
ID:	451248 Click image for larger version

Name:	IMG_9294A.jpg
Views:	194
Size:	193.0 KB
ID:	451249 Click image for larger version

Name:	IMG_9287A.jpg
Views:	199
Size:	223.2 KB
ID:	451250 Click image for larger version

Name:	IMG_9291A.jpg
Views:	192
Size:	212.1 KB
ID:	451251 Click image for larger version

Name:	IMG_9297A.jpg
Views:	190
Size:	208.8 KB
ID:	451252 Click image for larger version

Name:	IMG_9309A.jpg
Views:	197
Size:	195.1 KB
ID:	451253 Click image for larger version

Name:	IMG_9308A.jpg
Views:	198
Size:	177.1 KB
ID:	451254 Click image for larger version

Name:	IMG_9305A.jpg
Views:	199
Size:	231.5 KB
ID:	451255 Click image for larger version

Name:	IMG_9319A.jpg
Views:	194
Size:	237.7 KB
ID:	451256 Click image for larger version

Name:	IMG_9312A.jpg
Views:	203
Size:	263.8 KB
ID:	451257 Click image for larger version

Name:	IMG_9315A.jpg
Views:	199
Size:	276.0 KB
ID:	451258 Click image for larger version

Name:	IMG_9316A.jpg
Views:	194
Size:	250.9 KB
ID:	451259


    Leave a comment:


  • NCO Retired
    replied
    Originally posted by GetSmart
    To get the mud on the tracks, I found a shallow plastic tray large enough to put one set of tracks in, filled it with the Vallejo earth texture, and turned the tank on. By holding the tank in place, and with the track moving, the mud went where it went, just like it drove through a muddy field. Before the mud set completely, I held the tank stationary on concrete, which with the motor running, removed the mud from the steel tracks. With a brush, I daubed footprints and hand prints where I thought the crew would clamber aboard. I am currently doing a Caunter camo scheme on the Coolbank Crusader III. I hope someone will come up with metal tracks and drive sprockets for this one. Lots of masking required to get the nice straight lines this design requires, photos to follow...
    Did you thin out the earth texture any?

    Leave a comment:


  • DavidN
    replied
    Originally posted by SoCalBobS
    Interesting detail I hadn't noticed before; tracks are different. NF has put a lot of detail into their offerings.
    The hatches are different too.

    Leave a comment:


  • GetSmart
    replied
    To get the mud on the tracks, I found a shallow plastic tray large enough to put one set of tracks in, filled it with the Vallejo earth texture, and turned the tank on. By holding the tank in place, and with the track moving, the mud went where it went, just like it drove through a muddy field. Before the mud set completely, I held the tank stationary on concrete, which with the motor running, removed the mud from the steel tracks. With a brush, I daubed footprints and hand prints where I thought the crew would clamber aboard. I am currently doing a Caunter camo scheme on the Coolbank Crusader III. I hope someone will come up with metal tracks and drive sprockets for this one. Lots of masking required to get the nice straight lines this design requires, photos to follow...

    Leave a comment:


  • NCO Retired
    replied
    Originally posted by GetSmart
    Howdy all. I bought my first tank, a Heng Long Sherman earlier this year, and I've had a lot of fun working on it. I chose the Sherman because it's the classic US WW2 tank and I'd recently started re-reading about the D-Day landings, as an alternative to reading about politics. And the reason I started reading about WW2 is that I watched the movie T-34 on Amazon Prime. If you haven't seen it, check it out, it's easily one of the best tank movies I've seen, and that includes Fury. But I digress...

    In order to customize this particular Sherman, I had to come up with a back-story. This M4A3 armed with a 150 mm howitzer would have been, in my imagination, the command tank with the headquarters company that saw action with Patton's Third Army in Normandy. This accounts for the mud (Vallejo earth texture) which I applied liberally. I slathered it on the metal tracks and since this stuff sets up like rock, I just kept the motor going with the tank held stationary, which also scraped off the excess mud on the bottom of the tracks, revealing the steel tread. I had to do some research on this because apparently some tanks had rubber treads. I love the effect of the bare steel showing through the mud.

    Tank crews lived with their tanks, as indicated by the sleeping rolls, tarps, tent poles and groundsheets, along with supplies and spares that festoon the rear deck. Note too the orange identification sheet, used to warn off Allied fighters hunting for targets. In an effort to survive against the better armed Panther and Tiger tanks, crews would weld steel plates to the side of the hull to protect the crew. (I made these out of simple polystyrene sheet 2 mm thick). For the same reason, crews would paint over the 5-pointed star: they felt it gave the Germans too good a target to aim at from a long distance.

    I have no direct experience of any of this of course. But I read a lot of books and looked at a lot of photos. I hope you enjoy mine.
    Your mud application, airbrush or brush?

    Leave a comment:


  • SoCalBobS
    replied
    Interesting detail I hadn't noticed before; tracks are different. NF has put a lot of detail into their offerings.

    Leave a comment:


  • rb67mustang
    replied
    Originally posted by DavidN

    Thank you for your statement. If you were referring on the 2 batches of 19 tanks, I ordered them to save shipping cost and then distributed among my members in the club. I only kept 2; a version 1 and a version 2.

    Click image for larger version Name:	IMG_9207A.jpg Views:	0 Size:	279.5 KB ID:	450942 Click image for larger version Name:	IMG_9203A.jpg Views:	0 Size:	276.0 KB ID:	450943 Click image for larger version Name:	IMG_9204A.jpg Views:	0 Size:	208.9 KB ID:	450944 Click image for larger version Name:	IMG_9213A.jpg Views:	0 Size:	274.8 KB ID:	450945 Click image for larger version Name:	IMG_9205A.jpg Views:	0 Size:	231.8 KB ID:	450946 Click image for larger version Name:	IMG_9209A.jpg Views:	0 Size:	241.0 KB ID:	450947
    Ahhhhhh!!! Now I understand!!! You know David, you still have to create a platoon of Scout vehicles. It could consist of some M8 Greyhounds, M5 Stuarts, an M24, and a few 4WD Scout cars if anyone has 3D Printed any for RC use.

    Leave a comment:


  • rb67mustang
    replied
    Originally posted by DavidN


    Here is the Andy's HQ M8 that Carlos converted to RC. He drove it a bit and the parts on the upper hull were falling off. So when I gave mine to him, he put mine aside and printed one for me instead.


    Click image for larger version

Name:	M8A.jpg
Views:	325
Size:	200.2 KB
ID:	450937
    It looks great David!!! Carlos has done a great job 3D Printing the M8 Greyhound. I wonder how much one would cost??? I know there so many free 3DP files as well as 3DP files that can be purchased, but I've not come across 3DP files for an M8 Greyhound.

    Since I don't use my RC Tanks and vehicles that much, I think I'll buy the files to 3DP a couple of WW-II Tanks to see how well they come out on my printer.

    As a retired Machinist who reads blueprints, and I can do traditional mechanical drafting, I was hoping 3D CAD would've been easier for me to learn. Maybe I should learn CAD first, and then maybe 3D CAD will be easier to learn. It's said that everyone learns differently. Some things for myself are easier to learn in a physical class room setting, but I don't want to spend the funds to pay for classes like that.

    I'm 66, and I'm still learning things all the time. Scratch building to me is as if I were either working in my Dad's metel fab shop, or working as a machinist.

    Leave a comment:


  • DavidN
    replied
    Originally posted by rb67mustang

    OMG David!!!!!!! You're a prolific RC Tanker if I've ever seen one!!!!! Most of us get one tank at a time, you get tanks by the platoon!!!!! I've never seen anyone do what you're doing before.
    Thank you for your statement. If you were referring on the 2 batches of 19 tanks, I ordered them to save shipping cost and then distributed among my members in the club. I only kept 2; a version 1 and a version 2.

    Click image for larger version  Name:	IMG_9207A.jpg Views:	0 Size:	279.5 KB ID:	450942 Click image for larger version  Name:	IMG_9203A.jpg Views:	0 Size:	276.0 KB ID:	450943 Click image for larger version  Name:	IMG_9204A.jpg Views:	0 Size:	208.9 KB ID:	450944 Click image for larger version  Name:	IMG_9213A.jpg Views:	0 Size:	274.8 KB ID:	450945 Click image for larger version  Name:	IMG_9205A.jpg Views:	0 Size:	231.8 KB ID:	450946 Click image for larger version  Name:	IMG_9209A.jpg Views:	0 Size:	241.0 KB ID:	450947

    Leave a comment:


  • DavidN
    replied
    Originally posted by rb67mustang

    Tang, it looks great!!! Yes the kit is fragile. I don't use my RC vehicles as you in IR battles. I have a 3DP, but I haven't yet learned to use 3D CAD to make my own parts. I scratch build everything the old fashion way. I've used very similar parts as you've used in your build. Mine is a true 6 wheel drive as yours is and the others made by Carlos. I got bogged down with other things and I set my M8 build aside, but I'll begin working on it along with trying to finish my Tongde M24.

    Thank you very much for sharing your work, I appreciate seeing how others decide to build/convert things into RC vehicles.

    Here is the Andy's HQ M8 that Carlos converted to RC. He drove it a bit and the parts on the upper hull were falling off. So when I gave mine to him, he put mine aside and printed one for me instead.


    Click image for larger version

Name:	M8A.jpg
Views:	325
Size:	200.2 KB
ID:	450937

    Leave a comment:


  • rb67mustang
    replied
    Originally posted by DavidN
    I am finally done with my British tank group for WWII.

    Click image for larger version

Name:	IMG_9180A.jpg
Views:	359
Size:	183.4 KB
ID:	450893 Click image for larger version

Name:	IMG_9181A.jpg
Views:	338
Size:	260.7 KB
ID:	450894 Click image for larger version

Name:	IMG_9172A.jpg
Views:	339
Size:	342.1 KB
ID:	450895 Click image for larger version

Name:	IMG_9178.jpg
Views:	325
Size:	294.1 KB
ID:	450896 Click image for larger version

Name:	IMG_9174.jpg
Views:	337
Size:	262.3 KB
ID:	450897 Click image for larger version

Name:	IMG_9177.jpg
Views:	335
Size:	303.1 KB
ID:	450898 Click image for larger version

Name:	IMG_9173.jpg
Views:	338
Size:	307.5 KB
ID:	450899 Click image for larger version

Name:	IMG_9179.jpg
Views:	336
Size:	337.7 KB
ID:	450900 Click image for larger version

Name:	IMG_9175.jpg
Views:	341
Size:	317.8 KB
ID:	450901
    OMG David!!!!!!! You're a prolific RC Tanker if I've ever seen one!!!!! Most of us get one tank at a time, you get tanks by the platoon!!!!! I've never seen anyone do what you're doing before.

    Leave a comment:

Working...