


SoCalBobS.
Thank you for the information. I want to paint a winter camouflage on my Tiger 1 and thought this would be a good time to install while disassembled.
Best Regards, Rex
-
You can find it on eBay. Toucan Hobby's retailers on there sells lots of Heng Long associated parts. Be aware, there is a wide price range for the same article. I've seen it sold for up to $70. Mine was $22.90 plus shipping.Originally posted by jetfool View Post
For anyone thinking of doing this, here's a quick runthrough.
The kit consists of a motor/pump module, a heater/reservoir module, a control circuit, silicon tubing and a 3mm orange LED. There were no instructions with it, but there are numerous Youtube videos showing how. I viewed Toucan Hobbies' clip. One plug fits into CN5 on the Heng Long board, which is a switchable on/off circuit originally used for a wifi module. The other plugs into the LED1 socket. You will need to run both the LED and the silicon tube through the barrel. I found it difficult to thread both through, clearance was too tight. The Challenger barrel is very long, it might be possible to do it on a shorter barrel. Instead I used a brass tube of slightly smaller diameter and pushed the silicon tube onto it at the base.
You will need to eviscerate the stock BB shooting mechanism. Cut off enough so that it is easy to thread the silicon tube and the LED wires through it. You'll also need to disable the airsoft circuit, either by placing a jumper on CN6 or via the controller; Buttons G and B.
I managed to place the motor and heater in my turret, so that turret rotation doesn't kink up the tubing or wires. If your turret is smaller, you'll just have to find out your own satisfactory solution.
As you can surmise, this will require a lot of disassembly, Just go slow and remember what goes where!
Leave a comment:
-
Where did you purchase your muzzle smoke/ light? I have a 1/16 HL Tiger 1 Pro I'd like to add this too. Your tank looks great.
Best Regards, RexLeave a comment:
-
Love it Bob. I picked up one of those smoke/flash setups for my current tiger project too. Very cool. I'm a gun recoil/smoke/flash convert guy now.Leave a comment:
-
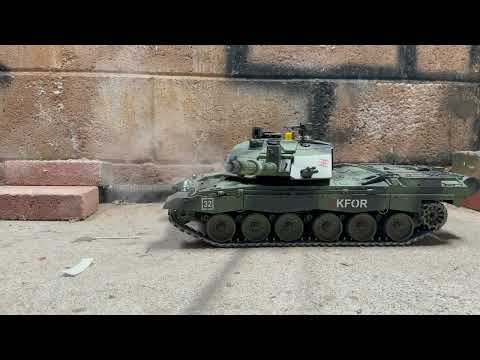
A smokin' hot Challenger!
From little, my last project the M24 Chaffee to the largest, my Challenger II. I saw the muzzle smoke and flash unit on sale for $23, so I thought I'd give it a try.
It took a few hours of fiddling, but it works. The unit has two parts, the motor and the smoke reservoir. They are fairly large, vertically as well as horizontally, so it needs a big turret to fit.
Leave a comment:
-
Thanks guys! Here's a short clip:
(I recommend watching on Youtube. Sometimes the resolution on the forum is coarser.)Leave a comment:
-
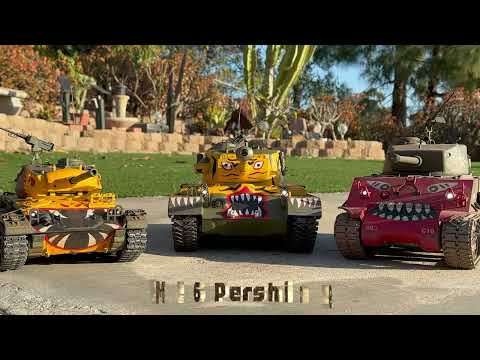
M26 Pershing, 6th Tank Battalion, Korea 1951.
Tiger painting is all done. Still will be dirtying it up and adding external stores.
Leave a comment:
-
Another TongDe M60 ready for the battle field. This one is in a theme similar to US desert Merdec.
Upgrades include a new TD "dual current drive" transmission, HL sprockets, Tamiya Abrams tracks, servo recoil/elevation, new more accurate M68 main gun( by RichJohnson Models N Stuff) and a HL7.1 controller system.
Leave a comment:
-
Ohhhh yeah that looks great Meter Rat! Perfect amount of white stuff for the camo.Leave a comment:
-
-
At some point in the future I will do a winter camo. I'll be bothering you for assistance in getting a result as nice as yours😊😊Leave a comment:
-
A little winter camo work to get me back into the swing. Just in time for the Battle of the Bulge Anniversary.


Leave a comment:


Leave a comment: