


You’re balanced where I am and I have roll and pitch on canards… but I have TV on two of my Gripens and no TV on the third one. No gyro on any and I love how mine fly. Maybe move the balance up a bit and try again?
-
-
After viewing this thread, it seems most move the CG back from 10mm - 25mm, I guess you all are advanced flyer or want to perform hi alpha. Just curious, does anyone or does this plane can fly normal level with the factory marking CG. I just want to take the bird up with CG factory, trim out for now.Comment
-
It will fly at the marks under the wings…Comment
-
Mine balances about 25mm behind the marks and has no tendency to behave in the manner described by ArmorBolt. It flies just fine with the CG there.Originally posted by Evan D View PostComment
-
You must have added at least 4 grams to the rear of the jet for CG 25mm behind the mark. Thanks.Originally posted by kallend View Post
Comment
-
BTW, my instruction manual showed CG 122mm behind the rear canard. But there was a video from MotionRC by James I think showed 130mm behind the mark. Which one is accurate. Thanks.
Thanks.Comment
-
Here's 130mm from MotionRC video..
Comment
-
Factory CG sucks, and many of us have pushed CG past 30-40mm behind the marks. And in order to achieve that, one usually needs to add over 130g of tail ballast, there's no way you'd do that with just 3g. I bet there's something else going on with your setup, what else have you done to the jet? Are you using exponentials? Definitely remove the roll from the canards. It's worse than worthless, it will mess up the wing's aerodynamics in high alpha. Are you using a gyro? was it on? how's it set up? Is the thrust vectoring nozzle installed?
To me, it sounds like you had large throws with no expo and a bad trim. If the TV nozzle is installed, maybe the thrustline is off. Can't tell you much without giving us more info. A video of the maiden would be helpful.Comment
-
4g will move the CG about 0.5mm. You need more like 120g.Originally posted by ArmorBolt View Post
"Kallend's Heavy Nozzle" for the Gripen can accommodate up to 60g of lead weights in addition to its own weight.
I have a lighter one for the Gripen TV unit too.
Comment
-
First the book CG at Motion says 130mm but the marks on mine are at 122mm. This is not 122 from the canards but from the wing root. If you measured from the canard you are about 10mm aft of the 122 or 130. I am flying at 150mm from the wing root. 3g, are you really meaning 3g? 3g is almost nothing.Comment
-
This will be my first active canard plane. I watched the video by Motion on the Canard mixing. It makes sense. However, watching videos of this model and watching some airshow videos of this in High Alpha the canards appear to be deflecting opposite. Is there a need to make different mixes where the canards follow and one to make them opposite of the elevons.? I would only be using the canards in pitch.Comment
-
This is a model based on a real plane. There are significant differences such as airframe material (this is foam), power plant (electric) and flight control (this doesn't come with one). When you decide to install your radio you can make it as complicated or simple as you want. You can use a simple 7ch set up without a gyro or go 12+ channels with a flight controller and a lot of different modes. You can also program functions to replicate the real aircraft or choose to set it up in a more simplified way. I chose to not replicate the air flow typ mode and have canards doing pitch, roll and a higher throw air brakes, and TV's. I don't have a gyro or flight controller.
It'll be interesting to hear what you decide to do and how it works.Comment
-
Thanks for the info. I had to watch the videos a couple of times, the real 1/1 scale and the video posted by "Airguardian". Around 6:02 of the video on a slow flyby high alpha pass, you can distinctly see the canards are pushing down and it seemed counter to what the Motion set up and how I would think the canards worked. I am planning on using the latest 10 channel lemon receiver with stabilization and vectored thrust. Won't use the vectored thrust till I get used to the plane. Will only use canards for pitch unless I get a wild hair. I have a DX-18 G2(time for an upgrade ??) . Will be using stock edf and motor with a 4k 6 cell 60c battery.Originally posted by Evan D View Post
What is the air flow mod and is it used only in High Alpha?
Thanks for your time !Comment
-
I think maybe Jon (two brothers RC) or Jandro would be the only ones to answer that as I think they are the only ones I know that have done programming to have the canards control air glow over the wings. I think Jon is more active over on RCG.
the DX 18 is still a very good radio.Comment
-
Just viewed Jons setup video. Very informative. I was glad to see my old eyes were not deceiving me. So he has a mix called High Alpha where the canards during the first half of elevator input go opposite the corresponding elevon up input. The latter half they follow. Not sure my Dx-18 has that ability. Thanks for pointing me to some good info.Originally posted by Evan D View PostComment
-
Moved the light controller back from under wooden tray. Very crowded under there. Required adding about 6 inches of wire to the landing gear light. Also redid the very bland cannon. Liberties were taken!🤣 Maiden soon, going with 10mm behind the cg mark. Working my way back if I feel comfy! Lots of good info here!!Comment
-
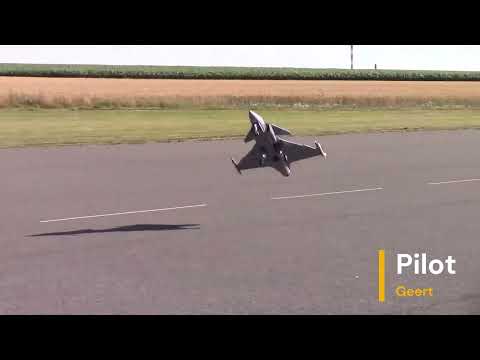
Here's a flight with my Gripen in some serious crosswings which made the landings very "interesting"
Comment
-
Interesting indeed ! I really like how you painted your missles white, I'm guessing to help orientation. I have some Freewing F-14 armament laying around might do the same. Can you share what power system you were running in that video ?Originally posted by Icarus the 2nd View PostComment
-
If you have access to a 3D printer, I have posted files for IRIS-T and Meteor missiles, along with underwing missile pylons, for the Gripen on
and
Comment


Comment