


Originally posted by Arycon
View Post
-
I had the same thought last night. So I went into my Mancave and grabbed a couple Admiral 3600's. I placed them in the plane and they fit, but would have to use a different strap setup or velcro to secure. And, duh...thinking now, i never did attempt to put the battery hatch on. Reason on that is the 3600's is the same width as the 2500's I have. Will do some more checking on this option later today after work.Lon
EFlite F-16 80mm, EFite DRACO, EFlite Night Radian, E-Flite P51 1.5m
Freewing A-10 80mm, F-86 80mm, F-15 90mm, Avanti. FMS DHC-2 Beaver, Fliteline P-38L ,HSD HME-262, HSD F86. -
Yes, it's easy to take the strut apart, remove the pin that the P51 gear cover connects to and the small phillips screw next to it then remove the pin (also phillips head) that rides in in the slot which keeps the lower strut aligned.Originally posted by PlaneCrazy View Post
There's more detail about this in my build thread.
Robart 2.5" Diamond Tread.Originally posted by tdevince View Post
I don't want to use spacers because it will limit travel, I will stretch the springs on the ends where the coils are tighter then test them here in the shop. If they sag after testing I will change them out, I have a bunch of springs I've rat-holed over the years.Originally posted by Flyer Phill View Post
Comment
-
This was posted by ryramZ (MRC video guy) on RCG yesterday:
"For the record the Admiral 3600 4s packs fit inside together. I flew her that way once."PatComment
-
TiredIronGRB,Originally posted by TiredIronGRB View Post
How did you handle the bend in the 38's main gears to add the 51's mains.
Thanks R.
Never mind I looked closer and the 51's main is offset.AMA 424553Comment
-
Here's some pics of how I did the screens for the radiators.
Step 1 - With a very sharp knife, cut away the plastic leading edge of the radiator scoop.
Step 2 - Use the plastic leading edge to draw a template on paper.
Step 3 - Cut out the paper template, then trim the inner curve to match the boom.
Step 4 - Use the template to cut out your screen.
Step 5 - Trim the screen as necessary for fit, then glue to the plastic leading edge. I used medium CA.
Step 6 - Reattach the plastic leading edge to the radiator scoop. Since I had CA on the plastic part (which still had some foam inside it), I simply sprayed the scoop with kicker and pressed the plastic in place until the CA kicked off. Touch up paint as needed (I had not done that yet in the last pic).
I used black fabric screen material, but painted it silver so that it showed up better.


 Pat
PatComment
-
Nice, I wish we could find some honeycomb screen.Comment
-
So the supercharger intakes have an opening on the front. It's not a perfect solution, but looks better than just solid silver!
 Pat
PatComment
-
Nice job Pat! Great idea and I was wondering when someone was going to carve a hole out of the front of the supercharger intakes! How did you cut out such a clean hole?My YouTube RC videos:
https://www.youtube.com/@toddbredaComment
-
I don't think he cut into it, Aros. Looks like he painted a black dot/decal where the hole would be. Nice and quick, and effective! I like it!
I dremeled mine out, took a few seconds. But the black dot idea has the same effect for even less work.Live Q&A every Tuesday and Friday at 9pm EST on my Twitch Livestream
Live chat with me and other RC Nuts on my Discord
Camp my Instagram @Alpha.MakesComment
-
I'm contemplating pre-ordering one but would like to know how easy is it to remove the wings for transporting? It looks like the biggest issue would be disconnecting and then reconnecting the wires.
ThanksComment
-
Very easy, two screws and unplug your wires and you're good to go. Plenty of room in the cavities for the plugs and the screws have metal threads so no wear.Comment
-
You're absolutely right. The mechanical part is easy, four machine screws. The servo and light wires are kind of a pain. You hook them up, and then delicately and careful tuck them in a tiny hole, while you slide the wing on. A bid tedious trying to not unplug the plugs, not pinch the wires, and get the wing fully seated. Especially if you are on your knees. Bring a stand and table to the field...Originally posted by Chalredline1 View Post
The up side is I can fit it in my wife's mid size SUV, with the wings on. Just barely makes it, sitting sideways. We'll be swapping cars when I fly...I hate that motorcycle they make me ride. I'm here to tell you, there ain't nothing in the world I hate more than that elephant under my ass.
-Officer John Wintergreen-
ElectraGlide in Blue, 1973Comment
-
-
FLTRI is right, bring a stand to the field and invert the bird to reattach the wings. I can reattach both wings completely in 90 seconds total.Live Q&A every Tuesday and Friday at 9pm EST on my Twitch Livestream
Live chat with me and other RC Nuts on my Discord
Camp my Instagram @Alpha.MakesComment
-
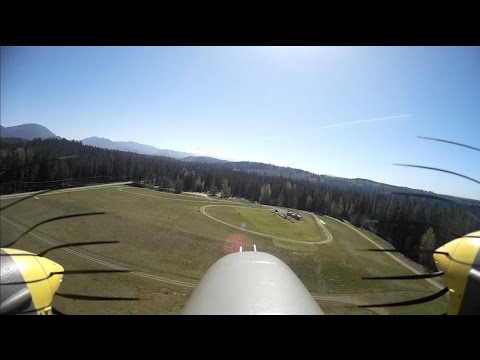
Great flight, Chris! What a beautiful backdropped flying area. Smooth rolls and nice big loops! Maiden? Flight 2?Live Q&A every Tuesday and Friday at 9pm EST on my Twitch Livestream
Live chat with me and other RC Nuts on my Discord
Camp my Instagram @Alpha.MakesComment
-
Originally posted by xviper2 View Post
Thanks Viper. It's highly probable I've ##$@ up the settings when I did the flaps, I didn't setup the flap system in the radio until after I bound to the radio and did my connecting rods... so I imagine you and FLTRI are right. I made it a point to set wing type when I setup the AR636, but when I centered my servos I don't think the radio was set to the proper wing type :)
I didn't set my flaps to go full travel in the flap menu however, there's usually enough wind here that I don't need full. (nice steady east wind is very common, thanks to the Columbia river gorge ;) ) so, as with pretty much all my planes that have flaps... I dial in the flap travel based on what the conditions are. (on the rare day when there's no wind, I'll usually adjust my endpoints.... but by default I only use about 50%/60% travel for max)
I ordered a set of replacement linkages.... will go over them again when that arrives ;) For now, boss said we're leaving early today to fly some RC... so I'm going to get ready to maiden!Comment
-
Thanks fellas. Looks like I will be placing my order.Comment
-
Nothing beats a P-38 sortie on your lunch break! :D
 My YouTube RC videos:
https://www.youtube.com/@toddbredaComment
-
Alpha was correct, just simple decals that I worked up in about 5 minutes.Originally posted by Aros.MotionRC View Post
And hooray for Callie Graphics!


 Pat
PatComment
-
Yeah, well, you've had lots of practice! :pOriginally posted by Alpha.MotionRC View PostPatComment


Comment