
.png)


Thanks! I am using the upper hull of my M4 for another tank project. I can't use anythings on it to transfer over to my M3. I guess I have to get for those lights from some other sources.
-
SoCal RC Tank Club Facebook Group
Largest active RC Tank club in Southern California
Gathering 1-2x monthly/All Ages & Experience levels welcome -
This is where I am so far. I put on the ML49 gearboxes. It isn't that high. I intend to put two boxes to hide the inside.
SoCal RC Tank Club Facebook Group
Largest active RC Tank club in Southern California
Gathering 1-2x monthly/All Ages & Experience levels welcomeComment
-
I’m sure there are other solutions for the gear issue, but ours is definitely the easiest!Originally posted by DavidN View PostThe more screws it takes to reassemble a tank, the more likely it is you left something out!Comment
-
Mato sells Sherman metal headlights & cages on eBay.The more screws it takes to reassemble a tank, the more likely it is you left something out!Comment
-
Thanks for the help on searching for my needed items!Originally posted by SoCalBobS View PostSoCal RC Tank Club Facebook Group
Largest active RC Tank club in Southern California
Gathering 1-2x monthly/All Ages & Experience levels welcomeComment
-
Originally posted by SoCalBobS View Post
Hello Bob! Headquarter informed us that your squadron needs additional support. Our recovering team had brought back tank #8 and repaired it. We will send you this tank as soon as we receive the front light set and some accessories from the supply department :-) Many thanks Bob for all your posts on this M3 project.
SoCal RC Tank Club Facebook Group
Largest active RC Tank club in Southern California
Gathering 1-2x monthly/All Ages & Experience levels welcomeComment
-
Bob, my order for the headlights and guards arrive today. They are kinda fragile. If it's alright with you, can you kindly post up a few closed up pictures of the headlights from your M3? Top and bottom please :-) Or give me a few hints in putting them on. I feel that I might break them in the process.Originally posted by SoCalBobS View PostSoCal RC Tank Club Facebook Group
Largest active RC Tank club in Southern California
Gathering 1-2x monthly/All Ages & Experience levels welcomeComment
-
Hi David, what you see is really all there is. I simply cut the plastic guards off the Sherman glacis and butt glued them with thick CA on the fenders after I installed the lights. For that, I drilled two small holes in the fender for the LED leads to fit through separately, stuck them through, bent the leads flush with the fender bottom side and globbed some CA to secure them. Coulda used any type glue there.The more screws it takes to reassemble a tank, the more likely it is you left something out!Comment
-
Thank you for letting know about making "2" holes for the 2 wires separately. I was concerned about that issue.SoCal RC Tank Club Facebook Group
Largest active RC Tank club in Southern California
Gathering 1-2x monthly/All Ages & Experience levels welcomeComment
-
The first light I put in, I put heat shrink tubing on one lead beforehand. That meant I had to drill one hole larger, to fit that lead through. On the next, I didn't bother. With the two holes keeping the leads apart, and gluing them on the underside, that was sufficient.
This was the first that I referenced. You can see the glue fillets. Not very noticeable. On the other side, with no tubing, it's even less apparent.
Here is that underside. Plenty of clearance. That's what Heng Long does. If you omit the tubing, it's even more flush.
The more screws it takes to reassemble a tank, the more likely it is you left something out!Comment
-
It is so nice to have you leading the way; less mess up work on my part. I had goofed up so many times on many projects, that the time it took to do the re-work was so wasteful. I will work on it this afternoon. Many thanks for the pics.SoCal RC Tank Club Facebook Group
Largest active RC Tank club in Southern California
Gathering 1-2x monthly/All Ages & Experience levels welcomeComment
-
The story of my love to the hobby. After all the work on the light set, I plugged everything in and I found out that on of the light bulbs burned out :*(. It's back to re-ordering on the other one.SoCal RC Tank Club Facebook Group
Largest active RC Tank club in Southern California
Gathering 1-2x monthly/All Ages & Experience levels welcomeComment
-
Leads not reversed? They won't light up if so. Maybe there is someone on this forum that could say what LED to order. I'm sure they are dirt cheap if we knew the right ones.The more screws it takes to reassemble a tank, the more likely it is you left something out!Comment
-
It still doesn't light up when I reverse the wires. I think so too that the LED bulb is cheap but to take it out of the headlight cover is the issue. I think it's glued permanently in there.SoCal RC Tank Club Facebook Group
Largest active RC Tank club in Southern California
Gathering 1-2x monthly/All Ages & Experience levels welcomeComment
-
TankZheng store on AliExpress sells the headlight housing for 99 cents, but shipping will sting.The more screws it takes to reassemble a tank, the more likely it is you left something out!Comment
-
Thanks, Toucan responded to my email and will send me a replacement from the US warehouse.SoCal RC Tank Club Facebook Group
Largest active RC Tank club in Southern California
Gathering 1-2x monthly/All Ages & Experience levels welcomeComment
-
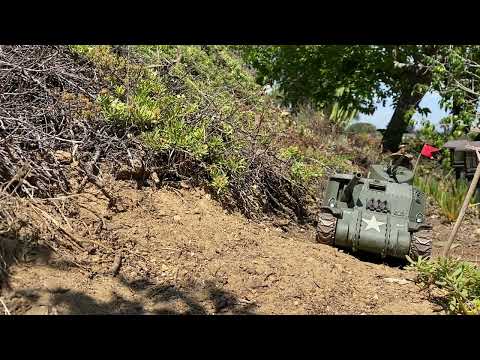
I finally received the replacement LED headlight for my M3 and some accessories. Time to enjoy the drive.
SoCal RC Tank Club Facebook Group
Largest active RC Tank club in Southern California
Gathering 1-2x monthly/All Ages & Experience levels welcomeComment
-
I finally added the missing r/c functions to my M3 Lee! There have been a lot of distracting projects in the last year, but I boiled them down to this one. I used a HL 6.1 board, implemented the servo operated elevation with some wire linkages from my r/c airplane bins. For traverse, I modified another servo to be a simple geared motor and plugged it into the "turret turning" circuit. It also uses a bunch of r/c plane linkages. The scanning turret is implemented with RC Geek's "Random Servo Motion Generator". It has two independent circuits, so I may activate the commander's cupola in the future. Or, I may make it IR capable by swapping out the cupola for a LegoDEI IR receiver. Haven't decided yet.
You don't want to look at the insides, it's "chewing gum & baling wire" technology, but it works!
 The more screws it takes to reassemble a tank, the more likely it is you left something out!
Comment
-
Great job! Well thought out.Comment
-
Ok, I opted for non-IR functions; the cupola motion is randomized independent of the turret. A muzzle flash light was inserted in the barrel.
 The more screws it takes to reassemble a tank, the more likely it is you left something out!
Comment


Comment