Callie Graphics

You must Sign-in or Register to post messages in the Hobby Squawk community
Registration is FREE and only takes a few moments

Register now

Announcement

Collapse
No announcement yet.

1/16 Tongde M24 Chaffee Modifications

Collapse
X
Collapse
First Prev Next Last
 
  • Filter
  • Time
  • Show
Clear All
new posts

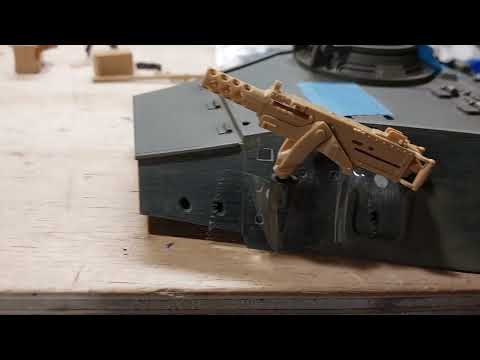
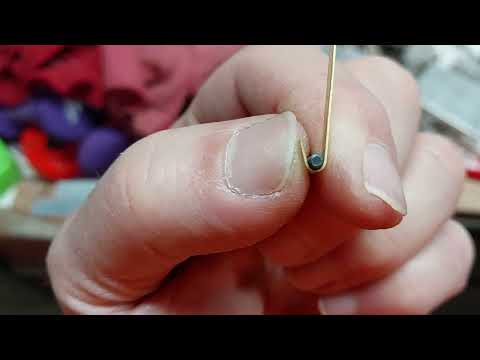
  • Then I decided to use the Tongde BMG stowage mount as a test to choose the correct location to attach it, and to check for the proper clearance between the side of the turret, the stowed 50cal ammo box, and the pistol port hatch. I center punched it and drilled a small hole to start with. Then I sanded the dome shaped top off so it was flat, and I opened up the hole to fit the gun mount yoke. I taped the part onto the turret roughly in the location it was to be attached.

    Click image for larger version  Name:	20260630_163718.jpg Views:	0 Size:	108.4 KB ID:	450269

    Then the M2 BMG was placed into the mount to check the clearance.

    Click image for larger version  Name:	20260630_163916.jpg Views:	0 Size:	74.1 KB ID:	450270

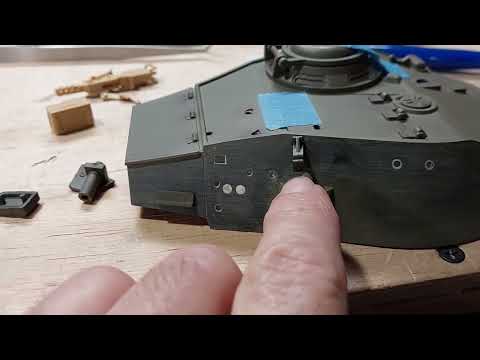
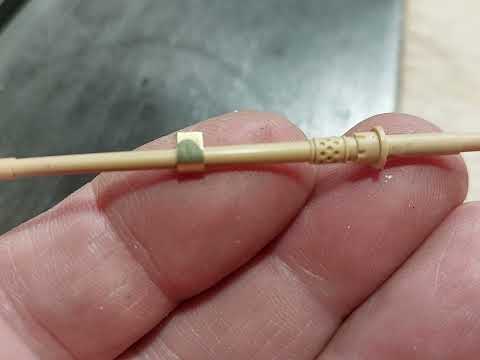
    An overhead image shows the Tongde rear M2 support bracket location is OK.

    Click image for larger version  Name:	20260630_163922.jpg Views:	0 Size:	97.9 KB ID:	450271

    Short Video

    Comment


    • After looking at the pictures, and knowing the location of the bracket that holds the back of the gun body is correct, I'll modify it to fit tomorrow. I'll also make the gun barrel brackets to decide the best mounting location so the M2 BMG stowage Mod will be finished.


      That's it for today!!!

      Comment


      • Warning, Warning, Will Robinson!!! Intruder ALERT!!!!!!!!!! There's an incoming off Topic!!!!! Warning!!! LOLLLLLLLLLLL!!!!!!!!!!!!!!!!!!!!!!!!!

        It's my build thread, and yes, here's an off topic post filled with scratch building. I have to get back and finish both of my Fletcher Class Destroyers before it's too late!!!!!!!!!!!

        Comment


        • OK, here's about a 16 minute long video showing a small glimpse of the 1/125th, and 1/96th scale Fletchers I'm building. The 1/125th is the DD555 USS Haggard that was Kamikazed on my birth day 15 years before I was born. The 1/96 scale Fletcher is the DD 473 USS Bennett that was built at the Boston Navy Yard where my Grand Father worked during WW-II as a ship fitter. Yes, the Bennett was also Kamikazed and survived the war as an AA upgraded Fletcher.

          Enjoy!!!

          Comment


          • I got a lot done today, but I don't have the time to post any updates. Tomorrow I should have something.

            Comment


            • OK Finally here's the turret mods small scratch built parts, and how I made them. First, I reviewed what I want to do as I looked at some images on my Laptop.


              OK, this is a sheet of .015 thousands thick brass sheet. I need to cut off a 1/8" wide strip to make the 50cal turret mounting brackets. I could've used sheers, but the strip would coil up as its cut. So, what I did to cut the strip off is just like cutting a sheet of dry wall, we measure where to make the cut, and we score it a few times with a utility knife, then we bent it on the score line; it breaks off, and then the paper on the back side is cut, and the piece is separated for use. The brass sheet was scored, and then I clamped it in a bench vise with soft jaws (aluminum angle) on the score line, and I bend it back with a small piece of wood, or a piece of aluminum. I only bend it back a small amount, then I bend it back and forth a couple times, and the strip is free of the sheet. Then sand the edge, and it's ready for use!!!
              Click image for larger version

Name:	20260701_123421.jpg
Views:	0
Size:	109.4 KB
ID:	450351


              Comment


              • WOW!!! My internet connection is slow today, this hasn't happened in a long time. I'll try to upload the next image that shows the piece separated from the brass sheet in the vise. OMG!!! I reviewed my saved images in my external HD, and what looked like a photo was actually a video that my cellphone recorded in the wrong orientation. I couldn't upload it as an image because it's a video.

                Comment


                • Finally, here's the video!!!

                  Comment


                  • Here's a video of how I make sanding blocks of various sizes and shapes.

                    Comment


                    • Let's continue to make the 50 BMG gun barrel mounting tabs.

                      Click image for larger version

Name:	20260701_124149.jpg
Views:	0
Size:	95.1 KB
ID:	450356

                      So, I took the strip and clamped it in the vise, and I rolled it over a drill bit shank to begin making the 1st mounting tab.

                      Click image for larger version

Name:	20260701_130533.jpg
Views:	0
Size:	87.2 KB
ID:	450357
                      Short video

                      Comment


                      • To finish bending the bracket, I open the vise a bit, and holding the drill bit against the partially bent part, I push it into the open vise to almost complete the U shaped bend.


                        Then take it out of the vise and finish the bend with a gentle squeeze.

                        Click image for larger version

Name:	20260701_130901.jpg
Views:	0
Size:	70.5 KB
ID:	450359

                        Comment


                        • Next, it's held in a small vise and it's cut off of the brass strip. Then I held it on the side of the vise, and rounded the short end of the bracket. After finishing the first bracket, I made the second one.

                          Click image for larger version

Name:	20260701_131556.jpg
Views:	0
Size:	125.2 KB
ID:	450361
                          Click image for larger version

Name:	20260701_131703.jpg
Views:	0
Size:	96.0 KB
ID:	450362

                          I used a drum sanding bit in the Dremel to round the corner of the bracket.

                          Click image for larger version

Name:	20260701_132041.jpg
Views:	0
Size:	126.9 KB
ID:	450363

                          Short video of the finished bracket.


                          Now as I mentioned, repeat, and now there's two!!!

                          Click image for larger version

Name:	20260701_133841.jpg
Views:	0
Size:	73.6 KB
ID:	450364
                          How sweet is that???

                          Comment


                          • Next, a made a bracket to hold the ammo can instead of using the Tongde part from the same brass sheet. Once again, score the sheet, separate the strip of brass, and sand the sharp edge. Score the strip to the desired length, and separate it with the vise technique. Then I filed a small radius on one of the soft jaws, clamp in the bench vise and bend it 90 degrees, and it's finished!!!

                            Here's a short video of the finished Ammo Can Bracket. I mentioned it's 3 inches on each side of the angle. It's actually 5 scale inches, 1/16 is equal to an inch in 1/16 scale.

                            Comment


                            • That's it for now, if I have time tonight, I'll add a few more updates of the turret mods. Next up is the 50cal gun barrel modifications.

                              Comment

                              Working...
                              X