You must Sign-in or Register to post messages in the Hobby Squawk community
Registration is FREE and only takes a few moments

Register now

Announcement

Collapse
No announcement yet.

Review and Discuss: 1/16 scale M41 Walker Bulldog from Heng Long

Collapse
X
Collapse
First Prev Next Last
 
  • Filter
  • Time
  • Show
Clear All
new posts

  • Review and Discuss: 1/16 scale M41 Walker Bulldog from Heng Long

    Heng Long 1/16 Scale "M41 Walker Bulldog"
    Click image for larger version  Name:	BulldogLED.jpg Views:	0 Size:	84.5 KB ID:	222509


    Introduction
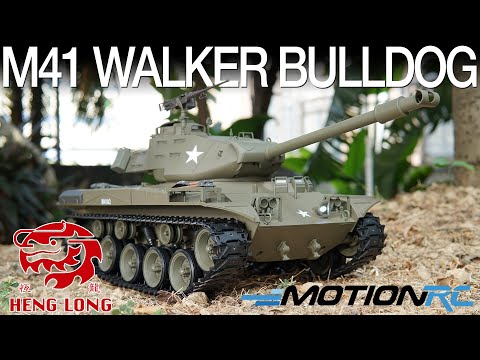
    The M41 Gun Tank, commonly called the Walker Bulldog by its developers and crews, was a Korean War-era American light tank. Mounting a powerful 76mm gun, the agile Walker Bulldog honors General Walton Walker, commander of the U.S. Eighth Army, who was killed in a jeep accident in Korea.

    My Personal Averaged Score for this tank: 82 out of 100

    Heng Long's Walker Bulldog is one its most beginner-friendly "Ready To Run" RTR tanks, and also one of its least accurate to scale. Read below to discover how I arrived at this averaged score, and let me know your own impressions of and experiences with this tank!
    As a visual companion to this written review, our Overview and Build Summary Video can be found *here*


    Functions:

    Featuring the latest TK6.0 MFCB (Multi-Function Control Board), the Bulldog is full of features:

    1) Proportional acceleration, steering, turret traverse, and gun elevation/depression
    2) Programmable radio settings for the amount of recoil, the sensitivity in turns, the overall sensitivity in acceleration, etc
    3) Smoke (On/Off)
    4) Volume (five settings including Off)
    5) Four different Sound Sets. Each Sound Set contains a unique engine start sound, idle sound, accelerating sound, traverse sound, elevate sound, machine gun, cannon, and shutdown sound.
    6) Track Recoil (Three settings from low, medium, and high) -- Low or Medium are the most realistic.
    7) Fires a 6mm plastic BB
    8) Fires an invisible IR signal to be used as part of Heng Long's Infrared Battle System to disable other tanks during simulated combat between up to 20 tanks at the same time

    Scale Fidelity:
    Heng Long's Bulldog is a passable representation of the real Walker Bulldog, but it is well known among Heng Long fans and scale enthusiasts as being out of proportion. Its width is the most visually out of proportion, although some modelers online have remedied this with modeling skills while some others have opted to ignore the flaws and adopted the model as a fun-to-run tank on its own merit.

    What's In the Box:

    As an RTR or "Ready To Run" RC model, everything is included in the box except six AA batteries for the radio transmitter. In areas where shipping liquids is restricted, the glycerin used for the "smoke effect" is absent, but can be found locally at hardware or convenience stores that sell glycerin oil.

    The radio, tank, cosmetic accessory parts, tank battery, tank battery charger, and plastic BBs, don't require any "assembly", other than installing the aforementioned "cosmetic accessory parts". A nicely printed manual is also included with clear diagrams for locating the cosmetic accessory parts, programming/adjusting the radio's settings, and bevy of warnings. The charger and battery are not shown here because they are being used off camera.
    Click image for larger version  Name:	DSC09549.JPG Views:	0 Size:	118.7 KB ID:	222511


    Initial Two Minute Function Test:

    Because the tank itself is functionally complete and it doesn't require the cosmetic accessory parts to run, I recommend testing your tank's basic functions immediately after unboxing the tank, before you install the cosmetic accessory parts. If there happens to be any problems, it is better to report them to Motion RC for warranty support before the tank has any cosmetic parts attached to it.

    To conduct this initial two minute test, insert six AA batteries in the radio and turn it on. Plug in the tank's included 2s battery and slide the tank's switch to On. The radio and tank are already "bound" to each other via 2.4Ghz signal, so simply press the Key button on the radio and your tank will activate. Move all the tank's controls in every direction to evaluate their function. Refer to the Manual for all controls. Note that the turret and cannon barrel will produce a "clacking" sound when they reach their maximum travel points. This sound is normal and is a warning for you to stop moving it in that direction. Importantly, DO NOT run the tank more than two minutes for this initial test, since it arrives with only a storage charge.

    Once satisfied that your tank is operating normally, plug the battery into the included wall charger. While it's charging, turn your attention to the installation of the "cosmetic accessory parts", covered in the Details section, below. Installing the cosmetic parts onto the exterior results in this:

    Click image for larger version  Name:	BulldogIncludes.jpg Views:	0 Size:	148.8 KB ID:	222513Click image for larger version  Name:	DSC09561.JPG Views:	0 Size:	70.9 KB ID:	222510
    Exterior Quality:
    The Bulldog is primarily composed of ABS plastic, and is painted evenly with a matte olive drab. The exhausts are painted metallic silver, and the plastic tracks on my Upgrade version is molded in very dark gray that looks almost black.

    Details:
    Several sprues of plastic parts are provided for the modeler to install on the tank. These all plug into pre-drilled holes, and are nearly "snap fit". A few of the parts were loose, so I bonded them with ABS glue. But otherwise, I prefer to keep the parts unglued so they're easy to remove or replace if needed in the future. This installation process can be completed in 30-60 minutes depending on your pace. The many handles along the turret side faces and the machine gun on its AA mount are some of the details that enhance the Bulldog's appearance.The lights look great, also:

    Click image for larger version  Name:	DSC09565.JPG Views:	0 Size:	73.7 KB ID:	222512

    Decals:
    Apply the Bulldog's decals, as desired, on a cleaned and dried surface, using the instruction manual's clear diagrams. These are simple adhesive vinyl decals. They are NOT water slide decals. After applying them, you may want to seal them in with a clear coat. I didn't, and the decals continue to hold well to the surface. I chose to not install some of the extra decals which were not historically accurate.

    By the time you're done detailing your tank with the parts sprues and decals, your tank's battery should be fully charged and you're ready for your first full run!
    Live Q&A every Tuesday and Friday at 9pm EST on my Twitch Livestream

    Live chat with me and other RC Nuts on my Discord

    Camp my Instagram @Alpha.Makes

  • #2
    Pre-Drive Checklist

    By the time you've finished detailing your Bulldog, the battery should be fully charged and you're now ready for your first full test run!

    Plug the battery back into the battery bay under the tank. I like how Heng Long designed the screw to always stay connected to the battery bay door, so it's impossible to lose that little screw. The 2s 1800mAh battery uses a Tamiya-style connector for main power, and also has a conventional three wire balance plug. I've found this to be convenient for checking the battery voltage with my battery voltage checker, just as I do with my larger airplane batteries. Heng Long's system will automatically shut down when the battery is depleted, although I prefer to use a small low voltage alarm to notify me before that happens or just keep an eye on my watch.
    Click image for larger version  Name:	DSC00734.JPG Views:	0 Size:	92.4 KB ID:	222552


    If you plan on battling your friends with the included IR (infrared) system, plug in the IR apple and locate its magnetic anchor spot on top of the turret within the raised ring shown below. Heng Long's magnets are concealed inside the turret and thus there isn't any unsightly mount visible from the outside of the turret. The IR apple is low profile, and reasonably sensitive in overcast conditions out to ~10-12 meters. The IR apple's gloss black finish stands out against the Bulldog's olive drab, so I plan to paint its mast eventually.

    Click image for larger version  Name:	DSC00737.JPG Views:	0 Size:	97.2 KB ID:	222551Click image for larger version  Name:	DSC00738.JPG Views:	0 Size:	52.3 KB ID:	222549
    The Bulldog's suspension arms and springs are easy to inspect and maintain. Ensure the suspension arms articulate smoothly and remove any present debris from the tracks.
    Click image for larger version  Name:	DSC00736.JPG Views:	0 Size:	100.8 KB ID:	222553


    Click image for larger version  Name:	1.jpg Views:	0 Size:	187.9 KB ID:	222544


    Running the tank:

    Driving Heng Long tanks is easy to learn. The right stick controls forward and reverse, and left and right travel of the tank treads. The left stick controls the turret's traverse (side to side) and elevation/depression (up/down) of the main gun. The trick is to synchronize your movements so that the tank moves realistically, and points the gun as the tank moves in a different direction. All Heng Long tank turrets can traverse 320 degrees, and the barrel elevates and depresses through a range of 20 degrees or so. When you hear a "clacking" sound, the movement has reached its maximum limit and you must stop pushing the stick in that direction. Perhaps in the future Heng Long will be able to implement a limit cutoff switch?

    Refer to the manual for how to fire the machine gun, the main gun sequence, load 6mm BBs, and conduct IR battles. The TK6 also allows the user to program a range of features by means of pressing down a combination of buttons and moving one or the two control sticks. The amount of recoil can be adjusted higher or lower, the top speed can be set to two limits, the sensitivity in forward turns and reverse turns, and other actions are programmable in mere seconds. The forward turning was too fast for my liking, more akin to an RC truck, so I reduced it down to turn more slowly and react to my inputs more sensitively like a real tank. RC Airplane pilots would recognize this feature as adding "Expo" or "Exponential". It's a neat feature that Heng Long has included in this latest generation of TK6 MFCB.

    The Upgrade version available from Motion RC does not use Zinc Alloy gears like Upgrade versions of years past. Rather, as of 11/2019, all of Motion RC's Upgrade version tanks include Steel gears, which are superior to the old Zinc Alloy gears in every way. While the remainder of the tank's running gear is ABS plastic, I prefer this Upgrade version because the steel gears in the gearbox are very durable, yet the plastic tracks keep the tank light and maneuverable. The "Professional" version upgrades the idler wheel, drive sprocket, and tracks to cast metal, which almost doubles the weight of the Bulldog and increases its cost. I recommend the Professional version for tankers who don't mind having a shorter drive time or having to buy a couple spare batteries. The durability and heft of the Pro version will appeal to those who want weight above all other considerations.
    Click image for larger version  Name:	bbkth4.jpg Views:	0 Size:	77.1 KB ID:	222546


    Good ground clearance, wide tracks, good suspension, and low ground pressure all combine to lend the Bulldog excellent driveability for an RC tank. Indoors, the sound is very loud, the LED headlight is bright, and the "exhaust effect" is easily visible. Outdoors, the sound is still readily audible and the LED is also visible in daylight, although the "exhaust effect" becomes difficult to see. This is just as well, since the real tanks weren't constantly venting smoke as if they were on fire, so I don't mind the reduced visible volume in daylight.

    Click image for larger version  Name:	2.jpg Views:	0 Size:	179.4 KB ID:	222545

    "Send It!" Firing the cannon

    Firing the machine gun by pressing the labeled button triggers a machine gun sound and a bright LED at the base of the coaxial mount located in the turret alongside the main cannon. Firing the main cannon is accomplished by holding down both the cannon button and the machine gun button, resulting in a cannon firing sound and a track recoil and a 6mm BB going flying 30 feet out of the tank. It's all synchronized very well, so that the overall effect is convincing. I prefer the lowest or the middle setting for track recoil, because the highest setting is too exaggerated and unrealistic in my opinion. I appreciate the need to push and hold two buttons to fire the main cannon, as this prevents accidental firing of the 6mm BB. The BBs don't hurt, but they are projectiles nonetheless, so all precaution should be taken for safety. I normally don't load any BBs, and after a hundred or so shots at the included target paper with the Bulldog to test the firing system's durability, I considered taping over over the BB loading hole inside the hatch so that there's no risk of any further BBs firing from the main cannon. I usually do this with most of my Heng Long tanks, but on the Bulldog I decided to use this as my primary BB shooting tank for backyard plinking, because it's such a good shooter. I wonder if this is because the barrel's length is optimal for the piston's stroke.
    Click image for larger version  Name:	DSC00742.JPG Views:	0 Size:	82.9 KB ID:	222550


    The most fun I've had with all these recent Heng Long tanks is engaging in IR Battles with other tanks equipped with the same TK6 MFCB. Whether a BB is loaded or not, firing the main cannon will always trigger the cannon sound and the track recoil, and will also always trigger the IR (infrared) emitter that's hidden in the mantlet, facing forward. This IR emitter sends an invisible beam that is detected by the IR mast that can register hits from any other TK6-equipped tank or Tamiya IR battle system equipped tank. The mast connects magnetically to the turret, and receives "hits" from other tanks. Registered hits result in the tank shuddering for a split second. After five hits, the tank plays back an "explosion and burning sound", then shuts down for five seconds, before powering back up automatically so you can resume battling your friends. A backyard brawl with four or five tanks is serious fun! Maneuvering and angling for a shot while driving for cover, all the while shouting taunts to your friends, becomes very competitive very quickly.

    As with all other Heng Long TK6 series tanks, I found the Bulldog's IR emitter's sensitivity to be acceptably consistent in overcast conditions out to ~10-15 meters. In optimum conditions, a hit can be registered out to 25 meters or more, but in my experience this was rare, and in local RC tank engagements, the range to target tends to be much shorter. The IR receiver ("apple") is also less consistent than the IR emitter. It should also be noted that IR technology is susceptible to decreased performance in direct sunlight, which is why IR Tank Battlers often use sunshades on the IR apple. IR receivers can also be masked by obstacles, even those on the turret. Additionally, it appears that turning the turret can create less than consistent results when registering hits, so it isn't a perfect science. Chalk it up to simulating real life misfires?

    Power and Handling

    In my opinion, all previous Heng Long MFCBs are obsolete as of mid-2019! Only the TK6 is worth the money, not only because it has many programmable features, but because it drives so smoothly compared to previous iterations. The Bulldog moves at a walking pace at full throttle on the High setting and about 25% slower on Low setting. Hold G and move the left stick up or down to select the High or Low setting, respectively. With the proportional steering controls, can really be slowed down for "creeping" maneuvers that look very scale. This is where the TK6 MFCB shines, in giving excellent proportional control to everything that moves on the tank. Older versions only cycled their cannon barrel up/down in a loop, but now with this TK6 version I can elevate or depress the gun at any time along its path, and I can do so quickly or slowly in proportion with my stick inputs.

    Upgrade path and "Wrenchability" --how easy is it to service, maintain, and upgrade this tank?:

    Speaking of the TK6 MFCB, I was pleased to see that it has several unused ports. There is a brake light port, and also turn signal ports. There is even a "Main Cannon Barrel LED" port, that flashes in sync with the cannon sound. If you were okay with running an LED into the barrel and cancelling the airsoft BB firing function, you could within minutes have a neat simulated "flash" at the tip of the barrel every time you fired the main gun.

    The Bulldog's running gear is easy to access, service, maintain, and upgrade, however its turret is narrower than other tanks such as the King Tiger, Abrams, Leopard 2A6, etc.

    As mentioned previously, my Bulldog is the "Upgrade" version, meaning its exterior components are all plastic, while the gears in the gearbox are steel. I find this to be a great balance between cost, driveability, and weight. The more expensive "Professional" version features metal tracks, idler wheel, and drive sprocket. The increased weight provides better durability in certain conditions, and of course it feels more tank-like (i.e. a brick), but the trade-off for this weight gain is lower drive time. For anyone operating the heavier Professional version, I recommend buying a spare battery. I like that the Bulldog's Professional version doesn't use metal road wheels, since those seem to be a waste of weight on a Light Tank that is intended for mobility.

    Things to watch out for:

    1) The plastic BBs included in all of Heng Long's tanks aren't the best. Their instruction manual recommends visually sorting the BBs and removing any BBs that are deformed, flat, broken, or oblong. I discarded about 10% of the Bulldog's included BBs.

    2) Don't flood the smoker. There is one smoker in the tank, with two exhaust tubes. Those tubes in fact function as both the exhaust for the smoke and the intake for the smoke oil, so it's imperative that you only put one drop in each of the tubes every hour of smoking. Less is more! If you overflow the tubes, the smoke can't exit, causing the smoker unit to clog and die.

    3) Read our "Do's And Don'ts of RC Tanking" article and see the manual for all relevant tips, tricks, and warnings that pertain to any RC tank. Most importantly, do not attempt to run the tank into obstacles larger, in 1/16 scale terms, than what the real tank was subjected to. These tanks are not scale crawler trucks, so don't expect them climb over rocks and boulders taller than the tank's ground clearance, which is typically around 1" from the underside of the hull. Also, do not attempt to drive in water or mud. In their stock form, RC tanks are not intended to be used in wet or muddy conditions. Extensive waterproofing and cleaning is just the start of upgrades required to make such operation repeatable without irreparable damage.
    Live Q&A every Tuesday and Friday at 9pm EST on my Twitch Livestream

    Live chat with me and other RC Nuts on my Discord

    Camp my Instagram @Alpha.Makes

    Comment


    • #3
      Click image for larger version

Name:	image_47745.jpg
Views:	4884
Size:	187.9 KB
ID:	222557
      CONCLUSION


      As with all Heng Long 1/16 tanks, I assess a rating for each of seven key areas. To be fair, my ratings are given in the context of the Walker Bulldog's own price point and intended audience, which is the entry level and mid-level RC tank enthusiast looking to get started in the $150-$250 RTR range. From that vantage point, here is how I rank the Heng Long 1/16 Scale "Walker Bulldog":


      Initial Quality: 91/100
      My Walker Bulldog arrived in perfect condition and was securely packaged in a foam enclosure. Like all Heng Long tanks, the Walker Bulldog is primarily constructed from ABS plastic. The "Upgrade" Version I have is mostly plastic externally, while internally the tank's metal gearboxes feature steel gears.

      The paint work from the factory was evenly applied in flat olive drab, although overspray covered the headlights and required a minute of scraping away the paint with a bamboo skewer.


      User-Friendliness and Transportability: 90/100
      The convenience of Heng Long's RTR package really makes it easy to get started in the world of RC tanks. In that sense, all of Heng Long's tanks excel in lowering the cost of entry into this segment of the hobby, and I think many scale enthusiasts would appreciate a scale tank as much as they would a scale airplane, car, truck, or boat. Heng Long's included radio does the job, without being overly flashy. I tend to prefer a cheaper overall package with this basic radio than one with super low latency and 1km range and hall effect sensored bearing gimbals. This isn't a jet flying at 100mph away from me at a thousand feet. While other manufacturers dominate the higher scale and higher featured market, the price is often prohibitive for someone starting out with their first tank to see if it's even something they're interested in.

      The Bulldog lacks an adjustable idler, but in all other areas, it excels as a beginner-friendly tank. High ground clearance, low center of gravity, wide tracks, easily accessible running gear, easy to transport, and overall excellent driving experience make this one of my top recommendations for new drivers who care less about scale accuracy and more about RC driveability.


      Mobility and Drive Experience 90/100
      I always enjoy driving Heng Long's Walker Bulldog. It's a Light Tank, and drives like one! In practice, the plastic tracks have enough bite over short grass and packed dirt surfaces, or loose gravel surfaces. However, owing to its speed, I could force the tank's tracks to sometimes slip on smooth surfaces like cement, tile, or wood flooring.

      Non-scale "Super spins" in sand can shed a track, but in scale maneuvering speeds, the plastic tracks functioned flawlessly. It's a tank, not a drift car!

      Tap the G and K buttons at the same time to switch between different sound sets. I preferred the second or third sound set (the fourth is a turbine sound set for the M1A2 Abrams --very non-scale!)

      Durability 83/100
      A high ground clearance allows the Walker Bulldog to clear obstacles that other 1/16 tanks cannot. After an hour of hard bashing, I did not experience any broken parts in the running gear, however I did choose to glue down the machine gun because it seemed to pop off when running at high speeds over gravel. The steel gears inside the gearboxes have proven very durable, far superior to the plastic gears and zinc alloy gears of Heng Long's previous generations of Bulldogs.

      On the ninth battery, I did crack a road wheel during a non-scale "jump" along a river bed. The wheel landed on a fist sized rock without support across the rest of the track, leading to all that energy being translated directly to one wheel. I repaired the crack with ABS glue, which welded the crack together.

      I have also seen more track wear on the plastic tracks when driving on gravel, compared to other plastic tracked-tanks that I drive mostly on sand or short grass.

      Customers wanting the added rigidity and durability of metal tracks and metal drive sprocket should consider purchasing the more expensive "Professional" version. Note the metal parts are easily identified by their lack of paint out of the box. The "Professional" edition, left, has the unpainted metal tracks and rear drive sprocket that are plastic on "Upgrade" edition, right:

      Click image for larger version  Name:	masterapro.jpg Views:	0 Size:	159.7 KB ID:	222558 Click image for larger version

Name:	master.jpg
Views:	0
Size:	0
ID:	222560

      Scale Fidelity 70/100
      Heng Long's Walker Bulldog was one of Heng Long's first RC tanks, developed at a time when the factory prioritized RC features over scale accuracy. I suspect that many people may not notice the Heng Long Walker Bulldog's errors in accuracy, and instead just see a neat looking Korean War-era tank. However, it should be stated, as scale observers will agree, that there are more accurate models in Heng Long's lineup than the Walker Bulldog.

      Click image for larger version  Name:	BulldogOmni.jpg Views:	0 Size:	153.1 KB ID:	222554Click image for larger version  Name:	DSC00744.JPG Views:	0 Size:	67.4 KB ID:	222555

      Ease of Maintenance and Upgrade Potential 84/100

      The Walker Bulldog is very easy to maintain, but its upgrade potential is limited to metal tracks, idler wheel, and drive sprocket. Aftermarket upgrades exist for frontline tanks such as the Abrams, T-90, King Tiger, Tiger I, Leopard 2A6, and others, but so far I have not seen much aftermarket support for the Walker Bulldog. Most of the upgraded and accurized RC Walker Bulldogs I have seen online are the result of individual modelers. Hats off to them!


      Overall Value (Cost, Size, Performance, Quality) 85/100

      For beginners, the Walker Bulldog offers a strong value, striking a balance between practical RC driveability and other features at an acceptable price. Compared to the other American non-modern tanks from Heng Long, the Walker Bulldog has a bigger gun and better suspension than the Sherman, and is more accurate in certain respects than the Pershing.

      My Personal Averaged Total Score for the Heng Long 1/16 Scale "Walker Bulldog": 82/100


      For a new RC tanker wanting a tank that is easy to drive and easy to maintain, Heng Long's 1/16 scale Walker Bulldog is worth considering. If you prefer an RC tank that is a high scale representation of the real M41 tank, look elsewhere or prepare to modify this one!
      Click image for larger version  Name:	DSC00740.JPG Views:	0 Size:	60.9 KB ID:	222559

      Live Q&A every Tuesday and Friday at 9pm EST on my Twitch Livestream

      Live chat with me and other RC Nuts on my Discord

      Camp my Instagram @Alpha.Makes

      Comment


      • #4
        The Forgotten War. Glad to see it represented here.

        Comment


        • #5
          I currently have an older model that runs on LI Ion batteries. Can I use LIPOs in it?

          Comment


          • #6
            Originally posted by Valkpilot View Post
            I currently have an older model that runs on LI Ion batteries. Can I use LIPOs in it?
            The old 5.3 and 5.2 version can handle up to 9.6v safely. So you would be fine with a 7.4v 2s Lipo.

            Comment


            • #7
              Just finished the Overview video of the M41 Walker Bulldog. For anyone who wants more info

              Comment


              • #8
                anyone know where I can find 2 cell packs with tamiya connectors? [ other than ones sold by motion rc]

                Comment


                • #9
                  I use Deans connectors in my crawlers so I just buy Deans to Tamiya adapters on Amazon or wherever to use them in my tanks and Tamiya vehicles.
                  Steve

                  Comment


                  • #10
                    Originally posted by Tank Killer57 View Post
                    anyone know where I can find 2 cell packs with tamiya connectors? [ other than ones sold by motion rc]
                    Welcome to Hobby Squawk Tank Killer57 There are too many options to list, but I just googled 2s Tamiya Lipos and got a ton of places. Hope that helps and thanks again for joining up. What Tanks do you own currently?

                    Comment


                    • #11
                      none. the M-41 would be my first.been flying planes.thank you.

                      Comment


                      • #12
                        I have surplus nicad 6 cells with tamiya connectors.can I use these?

                        Comment


                        • #13
                          Originally posted by Tank Killer57 View Post
                          I have surplus nicad 6 cells with tamiya connectors.can I use these?
                          No, you could burn out the electronics. You want to stick with 2S. I have 2 tanks right now and they come with one 1800mAh battery. I haven't had the need for an extra one yet though as they get about 20-25 minutes of drive time and charge pretty quick.

                          Comment


                          • #14
                            Originally posted by Tank Killer57 View Post
                            I have surplus nicad 6 cells with tamiya connectors.can I use these?
                            Tank Killer57 Assuming you're talking about standard NiCads with 1.2v per cell, then your 6 cell Nicad pack with have a total terminal voltage of 7.2v, which is below the maximum input voltage for the Heng Long TK6 tanks. However, I cannot vouch if the MFCB' voltage cutoff setting will turn off the tank at a safe voltage for the cell. It should, but that would be up to you to try since I have never used a NiCad in any of my Heng Long tanks because as James said the stock batteries do their job well enough and are very inexpensive to keep a couple spares nearby.
                            Live Q&A every Tuesday and Friday at 9pm EST on my Twitch Livestream

                            Live chat with me and other RC Nuts on my Discord

                            Camp my Instagram @Alpha.Makes

                            Comment


                            • #15
                              Originally posted by James View Post

                              No, you could burn out the electronics. You want to stick with 2S. I have 2 tanks right now and they come with one 1800mAh battery. I haven't had the need for an extra one yet though as they get about 20-25 minutes of drive time and charge pretty quick.
                              Actually you will not burn out the electronics with a 6 cell 7.2v NiCad. The 6.0 system is rated up to 12 volts which is clearly marked on them and noted in the operation manual. I run several of the 6.0 systems routinely at 9.6v 8 cell NiMH 5000 packs mated to upgraded 390 high amp draw motors with no ill effects on them (note: battery boxes have been removed to fit the larger batteries). 5000 mAh is about 45 min of running with mixed power usage. I would love to see the stock 1800 mAh battery with metal tracks and road wheels getting 20-25 minutes (with stock 380 motors) because I have never seen that run time with them in either the old 5.3 or 6.0 systems running outdoors.

                              The stock 7.4v Lipo batteries (which read a peak voltage on my charger at ~8.4v) that come with the 6.0 tanks are sub par. The capacity is far to low for anything beyond hard flat smooth surfaces. Running a stock tank with metal tracks and metal road wheels on loose dirt or rough terrain will drain them in well under 20 minutes and the tank will start to stall rather quickly during the process.

                              Not to say Lipos in tanks are bad just that like NiCad or NiMH they need higher capacity then 1800 mAh. As long as the user does not exceeded the max voltage rating of the 6.0 system. I don’t run Lipos in tanks due to their lack of resistance to harsh vibrations and heat. Most in the “tank hobby” prefer NiMH batteries for the added weight, resistance to vibration & heat, safety in rapid charging and storage.

                              The 6.0 system in my experience is forgiving with high voltage but not so forgiving with low voltage. Once the voltage drops down to ~5 volts the tank will start stalling and shutting down.

                              Comment


                              • #16
                                thanks for the advice

                                Comment


                                • #17
                                  what are the dimensions of the stock 2 cell?

                                  Comment


                                  • #18
                                    Hi everyone! My first post here.

                                    Got my bulldog from Motion RC a few days ago, and I wanted to leave here my impressions. I got the "professional" edition:

                                    The good:
                                    • Very nice quality in general. Good looking, pretty solid (and heavy) and lots of fun to drive!
                                    • Impressed with the metal tracks and gears. I opened it to check the interior and everything is metal from motor shaft to tracks.
                                    • The BB gun! Oh my this thing is powerful! It's hard to aim, but the range is much longer than expected.
                                    • Power, speed and ground clearance.
                                    • Possibility to change throttle to the left stick (as it should be!) and to trim the direction (I did not see this mentioned any other place here...)
                                    • Sound system is awesome. Maybe a bit too loud in the lowest setting.
                                    The bad:
                                    • Weight distribution is WAY off balance. VERY "tail" heavy. This affect the ability to climb obstacles.
                                    • Weight is also too much for the sock absorbers in the back. The springs in the back stay partially compressed, and tank is "tilted" when stationary.
                                    • Extra track pieces are plastic, not metal! Come on...
                                    • I don't see the IR LED working when firing. They are usually visible while using cameras, but I can't see anything with this guy. I will need to check with someone else the combat system.
                                    • The tail and front LEDs are just soldered to the wires without any insulation... if a metal piece enter the interior can easily cause a short circuit in these guys.
                                    Overall pretty happy with my purchase, but I think the "professional" upgrade to all metal is not well thought, causing the weight distribution and springs issues.

                                    Comment


                                    • #19
                                      Originally posted by Joaquin View Post
                                      Hi everyone! My first post here.

                                      Got my bulldog from Motion RC a few days ago, and I wanted to leave here my impressions. I got the "professional" edition:

                                      The good:
                                      • Very nice quality in general. Good looking, pretty solid (and heavy) and lots of fun to drive!
                                      • Impressed with the metal tracks and gears. I opened it to check the interior and everything is metal from motor shaft to tracks.
                                      • The BB gun! Oh my this thing is powerful! It's hard to aim, but the range is much longer than expected.
                                      • Power, speed and ground clearance.
                                      • Possibility to change throttle to the left stick (as it should be!) and to trim the direction (I did not see this mentioned any other place here...)
                                      • Sound system is awesome. Maybe a bit too loud in the lowest setting.
                                      The bad:
                                      • Weight distribution is WAY off balance. VERY "tail" heavy. This affect the ability to climb obstacles.
                                      • Weight is also too much for the sock absorbers in the back. The springs in the back stay partially compressed, and tank is "tilted" when stationary.
                                      • Extra track pieces are plastic, not metal! Come on...
                                      • I don't see the IR LED working when firing. They are usually visible while using cameras, but I can't see anything with this guy. I will need to check with someone else the combat system.
                                      • The tail and front LEDs are just soldered to the wires without any insulation... if a metal piece enter the interior can easily cause a short circuit in these guys.
                                      Overall pretty happy with my purchase, but I think the "professional" upgrade to all metal is not well thought, causing the weight distribution and springs issues.
                                      The M41 does have its flaws it’s one of HLs originals dating back more the a decade, but it is also one of the easiest tanks to modify and make into a true off road and IR battling monsters.

                                      The weight balance is easy to adjust by adding metal weights inside the forward hull. There are upgrades to the shocks that have heavier springs and will level out the rear.

                                      The M41 is able to utilize the M26 Pershing and Abrams sprockets. This opens the door for several track options that have much higher grip for use in rough terrain.

                                      If you cannot see the IR bulb lighting up on your phone camera when you fire the cannon, it is probably bad and can be replaced with reasonable ease.

                                      Don’t loose sleep over the internal wires they have never proven to be an issue with any of my four M41s and I run mine harder, faster and in more dirt then is sane.

                                      I have videos of one of my favorite M41s with many of the mods above on Instagram @fsttanks . Take a look I think you will be impressed at just how tough and capable the M41 can be.

                                      Below are two of my upgraded M41s. Both can outperform 99% of the tank that have ever run against them.
                                      Click image for larger version  Name:	504D1F9A-8181-47BF-955E-84AF1BBA2AB1.jpeg Views:	0 Size:	283.7 KB ID:	239798

                                      Comment


                                      • #20
                                        Thanks Rubicon99! Lots of good info in your answer.

                                        Yeah I'm not concerned about the weight & springs, I will add some at the front and replace the springs. But, well, it's a design fault.

                                        I'm more concerned with the IR LED not working, let's see how easy I can access that spot to replace it if needed...

                                        Comment

                                        Working...
                                        X