


Hi Alpha -
Thanks for getting back so quickly!
I'll likely take on the scaling effort after flying the AS350 "stock" a bit, so if you think you might have time in the near future to modify your STL files for screw-on bases, I can certainly wait a bit.
Also, I am very interested in adding the lights you have pictured in your photo, so if you have any recommendations for specific LED's and/or lighting controllers to use, it would be most appreciated.
RR
-
RR, I've got them sitting here awaiting input from the community, as far as attachment method. Currently the antennas and other external details are pinned, meaning the user would drill a hole, insert the part's two pins, then glue them from the inside with a blob of epoxy or thick CA. This is an easy way to install the details, but it's not as durable as a screw on attachment method. If people wanted the files now, I could post the pinned designs. If people wanted the screw-on design, I'd need to resize some of the part bases to accommodate a 1.2mm screw.Originally posted by Chief58D View PostLeave a comment:
-
Leave a comment:
-
I'm seriously considering adding this to my next order as part of my re-entry into electric helicopters -
and i would really like to scale this one up a bit!
Were the STL files for the 3DPUP parts Alpha mentioned ever made available?
Thanks!
RRLeave a comment:
-
Yes. On both my AS350 and B222, the tail servo needed adjustment. Note that I have flown the AS350 extensively (around 30 flights and approx 2 hours airtime), but I have not yet flown the B222 (although it is very near being able to maiden - probably tomorrow morning).Originally posted by wilbertwday View Post
To see whats going on with the tail servo, its important to remove the mechanics from the fuse - only then can you see whats going on. These are the steps I am using to setup the tail to get it into the ball park for a maiden flight:- Remove the mechanics from the fuselage. This requires removing one side of the tail mechanics (the tail shaft needs to come off).
- Once the mechanics are removed, re-assemble the tail mechanics.
- Adjust the belt tension by loosening the tail boom mount then re tightening while holding the boom such that the belt tension is "just right". Note that the belt will loosen up a little bit after the first few flights as it breaks in.
- Install the RX and FBL, and create a 6-channel model in the Tx with all trims and sub-trims zeroed out. Connect the FBL to the computer and follow the FBL setup procedure according to the mfg recommendations all the way up to the point of setting the tail zero position.
- Set the rudder zero point using the FBL software (i.e. this is where we "90" the servo horn). With the rudder stick centered on the Tx (with no trim), and rate mode selected on the gyro, adjust the zero point in the PC software so that the rudder servo horn is 90° to the linkage rod.
- Adjust the rudder servo mounting position on the tail boom. During this entire step, keep the Tx rudder stick centered and the software on the zero set page so that the servo arm is always at 90° to the linkage. Loosen the two servo mount screws so that the servo assembly (the servo and its two mounting arms) can easily slide forward and aft along the tail boom. Go find a sharp pencil - we need to determine the servo's range of motion and place it in the center of its range as follows:
- Find and mark the forward end of the tail servo mounting range. While watching the pitch slider on the tailshaft, slide the servo assembly forward until the tail pitch slider reaches its hard limit on the tailshaft (the farthest position from the tail blades). Using the pencil, scribe a line on the tailboom perpendicular to its axis using the aluminum tail mount as ruler guide.
- Find and mark the aft end of the tail servo mounting range. While watching the pitch slider on the tailshaft, slide the servo assembly rearwards until the tail pitch slider reaches its hard limit (the closest position to the tail blades). Using the pencil, scribe another line on the tailboom perpendicular to its axis using the aluminum tail mount as ruler guide.
- You should now have two clear lines on the tailboom showing the full mounting range of the tail servo. Using your calibrated eyeball and the pencil, place a third mark at the midpoint between the other two marks. Slide the servo assembly to this "center-of-range" position and tighten down the servo mount screws.
- Now that the servo is mounted in the center of its range, go into the FBL software and set the rudder limits so that you get maximum pitch slider travel without binding.
Done and done. Note that when the rudder stick is centered while in rate mode, the servo horn should be at 90° to the linkage and the tail pitch will have a bit of angle to counter the torque of the main rotor. It probably won't be perfect for flying in rate mode, but should work A-Ok while in heading hold (AVCS) mode. To get the rudder trimmed in rate mode is beyond the scope of this procedure (I'm still in the process of figuring out how to do this with the ZYX-S2 FBL unit.)
Hope this helps! :)Leave a comment:
-
450 Alpine Yellow
Hey ridgerunner, did you have any problem with your tail not been centered
I tried everything in the Gyro app still cannot get it centered a lot of left rudder very little right rudderLeave a comment:
-
Thanks for bringing that to my attention. I have updated the PDF accordingly on all RotorScale support pages. :Cool:Leave a comment:
-
Note that the downloadable manual on the MotionRC Rotorscale product page SUPPORT tab (Platinum25A40AV4.pdf) is for a newer version of the HW 40A ESC - it is NOT the correct manual for the ESC actually installed on the RS helis.
I have located a more up-to-date version of the Hobbywing ESC manual for the ESC that is installed on my Rotorscale 450s (this HW ESC is an older version of the Hobbywing Platinum series - it is NOT the V4, or the V3). See attached file: (HW-01-PL-101218.pdf)
EDIT: MotionRC has updated their support page download to the correct manual version. :Cool:Leave a comment:
-
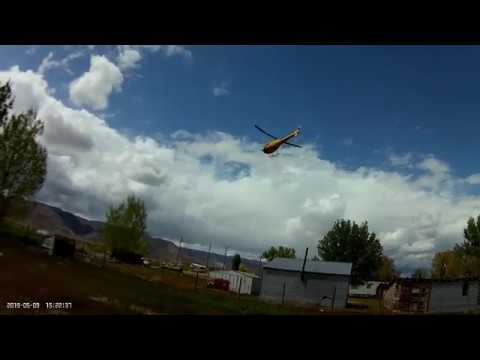
9 packs through my AS-350 so far today (I've lost track of the flight count, but have over an hour and a half airtime on the "odometer" timer in my Taranis). After a few more packs this evening, it will be time to move on and start focusing on setting up the 450 Airwolf!
Rotorscale AS 350 450 Heli - She's Flying Pretty Sweet!
Leave a comment:
-
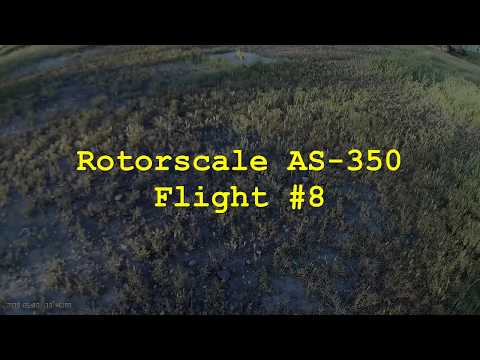
Flips, loops and rolls, oh my!
Rotorscale AS 350 450 Heli - Sunset Flight #8
Leave a comment:
-
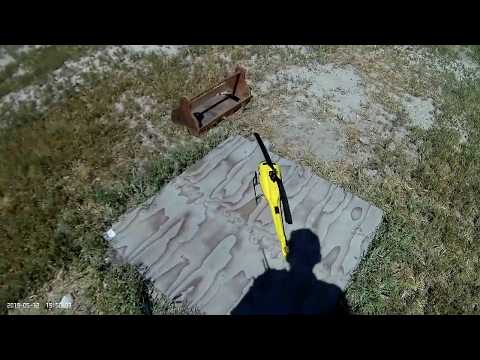
Maidened this morning!
Collective range: +/- 12°
Cyclic range: +/- 10°
Tx (HH) tail gain = +30 (as viewed in the SETUP->MONITOR page of the ZYX-Assisant software)
ZYX Assistant BASIC page values: All default.
Headspeed: unknown - (need to setup governor mode and measure)
1st Impression? She flys pretty dang good!
Heading out now for flight #2 but I thought I'd share the maiden:
Rotorscale AS 350 450 Heli Maiden

Edit: the above flight is quite boring - the following (third) one is quite a bit more interesting...
Rotorscale AS 350 450 Heli - Maiden-day Flight #3
Note that I did swap out the stock Emax AS3054 tail servo with a KST-DS215 and repositioned its mounting. I also disassembled and reassembled the airframe to ensure all metal-to-metal bolts had threadlock prior to maiden.
Edit #2 - I just noticed that the landing gear has cracked (I had one landing that was not quite grease factor 8 - but it was not that hard - it should have survived it). Need to beef that part up.Last edited by ridgerunner; May 9, 2019, 09:04 PM.Leave a comment:
-
I'll make sure we order some with our next order. Thank you for bringing this to our attention!Leave a comment:
-
So I've received my three Rotorscale 450s and have also tried to accumulate all the spares I want - (i.e. everything). However, there is one part that is eluding me:
The pushrod control linkage used to connect the rudder servo to the tail.
It is steel with a 1.3mm diameter with ball link connectors on each end and has a ball center to center length of approximately 297mm.
I've purchased pretty much every spare part available on the MotionRC spares page (except the fuselages). I thought the pushrod linkage would probably be included in the "RotorScale 450 Boom and Support Set", but alas, it is not included in that package (or any of the others).
I've scoured the internet trying to source this part (for the very similar Align Trex SEV2 or Trex Sport V1 mechanics), but I can't find it anywhere.
Help!Leave a comment:
-
Exciting day! More to come :) excellent packing as usual.Attached FilesLeave a comment:
-
-
Okay folks, the official RotorScale 450 Instruction Manual is now available on the support page of this model or click here for a direct link. Keep in mind this is a working document so check back regularly for any updated information that may be added. We thank you for your patience and understanding.Leave a comment:
-
Wow, these look incredible! It had been many years since I had flown a proper heli. I ordered the XK K124 from you guys to give it a go again, and I have been having a blast. I definitely fit into the target market... I love flying scale looking birds, but the choices have always been sparse when it came to helicopters. As I was writing this post I couldn't contain myself and pulled the trigger!Leave a comment:
-
Thanks, Delta Dart!
We're so grateful for the advisory role you've taken on with our helo development team and for sticking with this evolving project over the past 18 months. Partnering with people from our customer family is a privilege we don't ever want to take for granted.
Your AS-350 looks really good. I have the 3DPUPs I drafted for the AS350, although I'm curious if people would prefer a screw-in type mount, or a simpler peg/glue mount. For mods such as the LED mounts, screws are recommended, but before I convert all the smaller cosmetic parts to screw-in, I'm wondering if the peg/glue is preferable? If you're reading this and are interested in adding 3DPUPs to your RotorScale 450 helos, chime in with your preference.
Leave a comment:
Leave a comment: