You must Sign-in or Register to post messages in the Hobby Squawk community
Registration is FREE and only takes a few moments

Register now

Announcement

Collapse
No announcement yet.

Discussion Thread: Heng Long 1/16 Scale "Panther G" German WW2 Tank

Collapse
X
Collapse
First Prev Next Last
 
  • Filter
  • Time
  • Show
Clear All
new posts

  • Maverick can you take a few pictures and show us exactly what you think is going on? What part of the idler adjustment is worn? The plastic teeth that mesh with the metal adjustment?

    I installed driveshaft bearings when I upgraded my Panther a few months ago. I didn't yet have a detracking issue but since installing the bearings I notice less flex and don't expect any issues. My idler wheels are on the original stock settings.

    Comment


    • Originally posted by MrChef View Post
      Maverick can you take a few pictures and show us exactly what you think is going on? What part of the idler adjustment is worn? The plastic teeth that mesh with the metal adjustment?

      I installed driveshaft bearings when I upgraded my Panther a few months ago. I didn't yet have a detracking issue but since installing the bearings I notice less flex and don't expect any issues. My idler wheels are on the original stock settings.
      I think it is the plastic block that the idler axle screws into. When there is a little force on it the block flexes a tiny bit.

      The idler wheel is fine. In fact, I tried two different wheels with bearings and both were catching the track horns.
      Attached Files

      Comment


      • It's a real bummer that the one side catches on the idler. I love the model- especially crawling with the metal tracks. The problem became progressively worse over the past few weeks. I first tried tightening the track tension, then checked the wheels to see of they were pushing on the track. I swapped idlers and tracks, but the problem persists. If I shim the idler with two washers it lessens the problem, but not entirely. Something has deformed just enough that that the inside track horns catch the edge of the idler wheel.

        The metal tracks are a huge stress on the plastic hull, and I wonder if the plastic tension adjuster has lost its rigidity.

        Comment


        • Originally posted by MaverickTank View Post

          I think it is the plastic block that the idler axle screws into. When there is a little force on it the block flexes a tiny bit.

          The idler wheel is fine. In fact, I tried two different wheels with bearings and both were catching the track horns.
          Lets see if anyone else chimes in with any helpful information for you.

          Mine doesn't flex. I just took it apart and reassembled it 2 months ago so I know exactly what parts you are referring to. Mine has the tiniest bit of deflection when the idler wheel is attached under load with metal tracks but nothing that makes any sound or track guidehorns skipping or detracking. If you have driven your tank a good amount maybe there is wear on that part exacerbated from driveshaft flex distorting alignment.

          I've heard of track adjusters from Hennetec-


          But if you're going to go that route I'd also consider driveshaft bearings.

          Here is a link to someone discussing almost the same issue as you are describing over on RCU-
          RC Tanks - How To: Installing the Henntec tensioner in a Heng Long Jagdpanther. - Note: Click on any picture for a larger version. So I have a Heng Long Jagdpanther. I did a custom paint job on it and added photo-etched engine grill covers. This one was my second Jagdpanther and I got the metal upgrade version with

          Comment


          • Thanks for the feedback. Hopefully I won't have to do major surgery on the Panther. Washers take care of the straight-line problems good enough, but I like things to work properly.

            Comment


            • I've also had a problem with my HL Panther G throwing tracks (metal version) .
              I tried adding washers or shims and just when you think you've sorted it..click click & it's off again. What I ended up doing was I laid out both tracks on the kitchen floor, removed the idler wheels and just ran them along the tracks in my fingers. I found the some of the lugs (?) on each track were a tight fit in places no matter which idler I used, the idler just didnt want to fit in between them.
              Sooooo after a bit of head scratching I decided upon a plan.....plan A; bend the offending lugs out a bit...hmmmm, no, I chickened out when I realised the the lugs would probably just snap off rather than bend.........ok, lets go for plan B, there was'nt a plan B at the time, more head scratching was required..🤔.

              After a coffee plan B finally came into view ( well, it was desparation really 🤨 ) out came my trusty dremmel type thingy & with a small grinding wheel attached I carefully, very carefully ground a small angle around the circumference of the sides of each idler wheel, I could of used a full sized angle grinder to thin the whole wheel down a little but really didnt want to go down that route.
              After about 30 minutes, stopping several times to check the fit of the wheels on the tracks and a couple of more stops to apply plasters to my fingers where I'd slipped with the dremmel 😭 the idlers seemed a much better fit.The ground off area was so small as not to be too noticeable, maybe no more than 2-3 mm, once repainted nobody will ever know.

              After re-assembling everything it was off outside for a test run, a good 30 minute run through some rough bits of the garden & I'm a happy tanker again, no tracks were thrown, no clicking sounds heard, just good old fashioned rc tank fun like it should be.😁

              I should of taken some pictures really but hindsight is a wonderful thing.

              Comment


              • Originally posted by Ratrace View Post
                After re-assembling everything it was off outside for a test run, a good 30 minute run through some rough bits of the garden & I'm a happy tanker again, no tracks were thrown, no clicking sounds heard, just good old fashioned rc tank fun like it should be.😁

                I should of taken some pictures really but hindsight is a wonderful thing.
                Excellent to hear! Thank you for sharing your experience and solution.

                And yes, woulda been cool to see pics. Chalk that up for next time. It took alot of concentration for me to remember to document pictures with everything I do to my tanks. I'm not OCD.

                Glad you're back to tanking fun.

                Comment


                • Glad to hear a little bit of troubleshooting fixed your issues.

                  Comment


                  • Ratrace, I've done the same thing, also with a successful result. I've seen track teeth grab on more than one tank. Thumbs up. On a couple of large tanks - Challenger, Leopard - some of us have resorted to plastic tracks on metal wheels. They seem not to bind as easily.
                    The more screws it takes to reassemble a tank, the more likely it is you left something out!

                    Comment


                    • Originally posted by Ratrace View Post
                      I've also had a problem with my HL Panther G throwing tracks (metal version) .
                      I tried adding washers or shims and just when you think you've sorted it..click click & it's off again. What I ended up doing was I laid out both tracks on the kitchen floor, removed the idler wheels and just ran them along the tracks in my fingers. I found the some of the lugs (?) on each track were a tight fit in places no matter which idler I used, the idler just didnt want to fit in between them.
                      Sooooo after a bit of head scratching I decided upon a plan.....plan A; bend the offending lugs out a bit...hmmmm, no, I chickened out when I realised the the lugs would probably just snap off rather than bend.........ok, lets go for plan B, there was'nt a plan B at the time, more head scratching was required..🤔.

                      After a coffee plan B finally came into view ( well, it was desparation really 🤨 ) out came my trusty dremmel type thingy & with a small grinding wheel attached I carefully, very carefully ground a small angle around the circumference of the sides of each idler wheel, I could of used a full sized angle grinder to thin the whole wheel down a little but really didnt want to go down that route.
                      After about 30 minutes, stopping several times to check the fit of the wheels on the tracks and a couple of more stops to apply plasters to my fingers where I'd slipped with the dremmel 😭 the idlers seemed a much better fit.The ground off area was so small as not to be too noticeable, maybe no more than 2-3 mm, once repainted nobody will ever know.

                      After re-assembling everything it was off outside for a test run, a good 30 minute run through some rough bits of the garden & I'm a happy tanker again, no tracks were thrown, no clicking sounds heard, just good old fashioned rc tank fun like it should be.😁

                      I should of taken some pictures really but hindsight is a wonderful thing.
                      Thanks for the info!

                      I chickened out with sanding the idler wheels, and just took the sharp edge off. I will try your method of rolling them through the tracks and seeing where they catch. A bit more grinding with the Dremmel might do the trick, and if I mess it up, idlers aren't that expensive.

                      The first thing I tried was plastic tracks, but they grabbed the idlers too.

                      Comment


                      • Originally posted by MaverickTank View Post

                        I think it is the plastic block that the idler axle screws into. When there is a little force on it the block flexes a tiny bit.

                        The idler wheel is fine. In fact, I tried two different wheels with bearings and both were catching the track horns.
                        Is the block the idler screws into flexing where it attaches to the chassi, or where the idler screws in? Have you thought about using some 1.5mm aluminium plate bonded to the chassis and fixing the adjuster with a longer nut and bolt? This would spread the tension over a larger area over the chassis. Click image for larger version

Name:	EDDAE887-95B8-4092-B660-5F68458C7EB8.png
Views:	494
Size:	107.9 KB
ID:	391242
                        Excuse the highly technical drawing. Hopefully it will explain things better than my words.

                        Comment


                        • Originally posted by Meter Rat View Post

                          Is the block the idler screws into flexing where it attaches to the chassi, or where the idler screws in? Have you thought about using some 1.5mm aluminium plate bonded to the chassis and fixing the adjuster with a longer nut and bolt? This would spread the tension over a larger area over the chassis. Click image for larger version

Name:	EDDAE887-95B8-4092-B660-5F68458C7EB8.png
Views:	494
Size:	107.9 KB
ID:	391242
                          Excuse the highly technical drawing. Hopefully it will explain things better than my words.
                          Thanks for the drawing, it says a million words.

                          I have seen how others have done that, and how the aftermarket parts run a rod across the width of the tank. I'm going to try trimming the idler wheel first before I get into that kind of surgery. Good suggestion though.

                          Comment


                          • Originally posted by MrChef View Post
                            Looking really good Srudiocat12! I like the pigment work, exhaust rust and soot.


                            Just FYI the screens on the rear deck go on top of the grills to prevent any grenades or other such from getting tossed in and mucking up the works.

                            Click image for larger version

Name:	GdJ0vZq.jpg
Views:	788
Size:	119.3 KB
ID:	376349
                            I know this is an older thread but wondering what you used to do the Zimmerit on your Panther. Looks nice.

                            Comment


                            • Originally posted by Heirphoto View Post

                              I know this is an older thread but wondering what you used to do the Zimmerit on your Panther. Looks nice.
                              Just luck I checked back. That's a picture of a real Panther tank at the Australian Armor Museum.

                              Comment


                              • Originally posted by Heirphoto View Post
                                I know this is an older thread but wondering what you used to do the Zimmerit on your Panther. Looks nice.
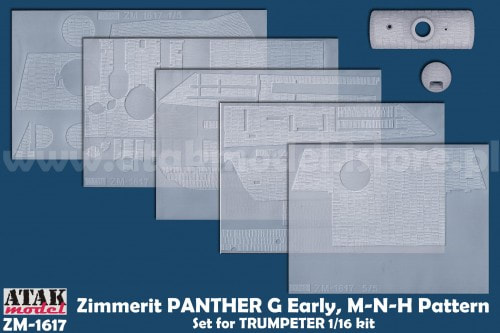
                                Forgebear Tanks are Taigens UK authorised distributor and supplier. All Taigen parts listed are genuine. We also stock 1:16 scale tanks and parts from various manufacturers, such as Atak, Heng Long, Voyager, Hooben, Aber, SOL, DKLM, Mato and Tamiya.


                                In the early day of 1/16 RC tank, the zimmerit kit used to be cheap and easy to get. It may have fell out of fashion in recent years.

                                Comment


                                • Hi all. Question from someone who has a panther G on the way from motion RC. I was so impressed with the king tiger I got I had to add this one to the collection. If I’m correct from reading through the posts, it seems the only issue people have had is Perhaps some teeth on the idler wheel need to be refined? Any input would be much appreciated. Here’s the other question I have if anyone could give some input. On my king tiger all of the wheels on the professional edition were unpainted. From what I’m reading on the panther, professional edition, the road wheels are plastic and painted? I have seen some beautiful paint jobs by people here and I’m Wondering when you are repainting the road wheels how do you mask off the black rubber outer lip of the road Wheel so well before painting?

                                  thanks for any input anyone has. Looking forward to adding this to my collection

                                  Comment


                                  • Originally posted by MrChef View Post
                                    Maverick can you take a few pictures and show us exactly what you think is going on? What part of the idler adjustment is worn? The plastic teeth that mesh with the metal adjustment?

                                    I installed driveshaft bearings when I upgraded my Panther a few months ago. I didn't yet have a detracking issue but since installing the bearings I notice less flex and don't expect any issues. My idler wheels are on the original stock settings.
                                    Could you let me know what bearings you installed on the driveshaft? And did you just add them on to the factory driveshaft and if so, any modification? Thank you

                                    Comment


                                    • I repaint the tires. I use a small brush, it's very easy. I use Tamiya's NATO Black, it's a charcoal'ish color.

                                      Click image for larger version

Name:	Panther G 06.jpg
Views:	332
Size:	266.2 KB
ID:	421864 Click image for larger version

Name:	211129 Panther G.jpg
Views:	357
Size:	57.6 KB
ID:	421865
                                      The more screws it takes to reassemble a tank, the more likely it is you left something out!

                                      Comment


                                      • Originally posted by SoCalBobS View Post
                                        I repaint the tires. I use a small brush, it's very easy. I use Tamiya's NATO Black, it's a charcoal'ish color.

                                        Click image for larger version

Name:	Panther G 06.jpg
Views:	332
Size:	266.2 KB
ID:	421864 Click image for larger version

Name:	211129 Panther G.jpg
Views:	357
Size:	57.6 KB
ID:	421865
                                        Ah ok I gotcha. Thanks . Looks great. And am I correct that the professional edition does come with plastic road wheels? Not metal?

                                        Comment


                                        • I saw on the comment section of a YouTube video about this tank. Somebody suggested adding a link so the track sits a little more realistic. Anyone done this? Does it affect the driving?

                                          Comment

                                          Working...
                                          X