


My Sherman with the LegoDEI IR Receiver. Mount is made from PVC tube and is attached to the tank with a magnet.
-
My Sherman with the LegoDEI IR Receiver. Mount is made from PVC tube and is attached to the tank with a magnet. -
Oh wow that is an absolute exorbitant amount. Yeah definitely cheaper to acquire any missing wires or plugs locally, I can provide a partial reimbursement for the trouble if you contact me on etsy.Leave a comment:
-
That was most probably mine. Yes, got stuck in Customs for abt 8 weeks (X-mas period delays), and had to pay close to 100 USD custom and handling fees. Understandably I didn't want to experience same with the missing plugs. Meanwhile I have had the chance to test the receivers, with which I am very satisfied. Just requested some more info as per my first post (#122), regarding the anti-tank mine and pillbox.Originally posted by LegoDEI View PostLeave a comment:
-
It depends on which variant is purchased, one has plugs and the other one does not, unless I made a mistake, which is also possible, in which case my apologies. I haven't shipped an order to Europe since December however, does it really take that long to get there?Originally posted by Dragonking24 View PostLeave a comment:
-
Well, my receivers came without the plugs. Had to purchase them on https://heng-long-panzer.de/en/RC-El...C-Electronics/. Didn't make a comment on Etsy, as having them sent from the US to Europe would cost me import taxes again...Originally posted by Rubicon99 View PostLeave a comment:
-
1. You have the LED plugged into the wrong slot. It be plugged into the headlights or tail lights slot.Originally posted by OKC_Jim View Post
2. It should not hurt using the three plug vs plugging directly into the MFU. Give it a try and if it work for you go with it. If not plug it directly into the IR receiver slot on the MFU.Leave a comment:
-
Hey Guys,
Wrapping up installing a LegoDEI HL 6.0 IR receiver in my HL Sherman and I have a few questions.
The IR receiver lights up while firing. Is this normal? I ask because I have regular LegoDEI IR receiver newly installed in my Clark TK40S equipped StuG and it does not light up while firing. So, am I missing something or is it normal for these two boards to have slightly different behaviors?
The next question concerns the wiring. My Sherman has 360 degree turret. Currently my IR receiver wires bypass the whole wiring harness and are ran directly to the MFU with 12" wires as suggested by Rubicon99 earlier in the thread. Inside the turret there is a medium sized board with a few things plugged into it. One of the plugs looks to be for stock HL IR receiver. Note I am NOT talking about the small board just below the hatch. I am talking about the board that the wires from there run to. Can I run my 3 plug wires to there instead of directly to the MFU?
Thanks, JimLeave a comment:
-
That all comes with the IR receiver. If for some reason it does not it’s all available on Amazon in small quantities. The wires are nothing special they only need to be rated to handle 3.5 volts. Basically you can reuse the factory wires if need. I have a few times and will again at some point.Originally posted by Sappo View PostLeave a comment:
-
I'm talking about the 5 pin plug to mount the receiver on my turret and the proper guage wire to extend the leads. I can only buy this in bulk rolls of about 200 metersLeave a comment:
-
It's probably in this thread but where is a good site to buy all the plugs and wires for the lego ir receiver. I have 5 tanks to modify, not 700 which is the minimum amount the local retailer will sell me.Leave a comment:
-
The pill box has two modes, one which flashes once when hit, and one mode which flashes the hit count up to five and then resets on the next shot.
To change modes you have to shoot it within a few seconds of turning it on.
I just got my tank mine and it was missing the jumpers so I have not been able to use it much yet.
From my understanding, the red LED should flash when it is hit and the return fire is triggered by the motion of the tank.
SteveLeave a comment:
-
Dear All, couldn't get a clear reply from Etsy, so hope this to be more responsive. Could I get some more info on Legodei's anti-tank mine and pillbox ? Tried it out today, and the pillbox lights up when shot, which is the purpose. I suppose it doesn't have any hit points, and just confirms when being hit ? Anything else I should know ? Regarding the anti-tank mine, I noticed the two-shot protocol; it does fire two consecutive times, picked up by the IR receiver on my tank. What is the interval supposed to be between shots, and can it be modified ? I tried to shoot it, but it didn't indicate a hit (fyi jumpers still in place as delivered). Finally, is something supposed to trigger the fire function of the anti-tank mine (a hit received, proximity, etc) ? Sry for the bunch of questions, but couldn't figure out the finer details of their function based on the info on the pictures. Thanks in advance.Leave a comment:
-
Thanks Quityourbitchen, but I'm not seeing what I THINK I need.Originally posted by quitcherbitchen View Post
I think I need something like this
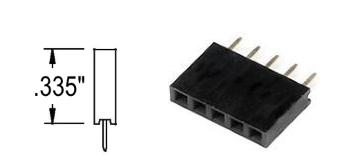
But with long pins like this
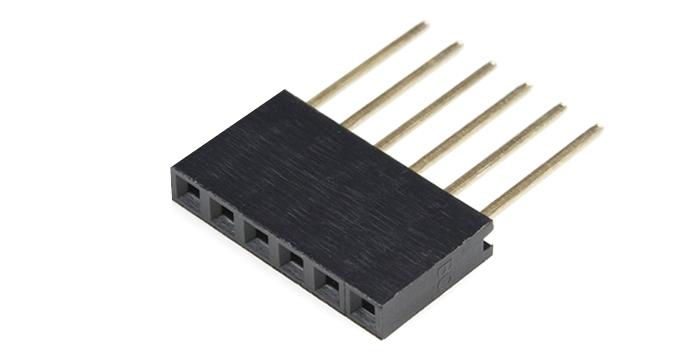
But that has 6 pins, not 5. I realize I could just not use the extra pin if the rest of it is the right size.Leave a comment:
-
Try Hansen Hobbies. Everything will cost around $11-15. Not sure about HL, but my clark boards can't actually hit themselves.Leave a comment:
-
I've been searching and seen a few that looked promising but I'm afraid I'll order a 100 (due to minimum order size or something) and then they won't be the right size or something. lolOriginally posted by Rubicon99 View Post
I was afraid of that. My best course of action is probably to wait until my stuff to upgrade my StuG shows up. I'm in the mood to work now. I was hoping there was something constructive I could be doing. lolOriginally posted by Rubicon99 View Post
Leave a comment:
-
I have seen some 5 pin male/female connectors that could be used as “extensions” to raise the height of the IR receiver. I don’t have a link to them but I am sure a Google or Amazon search will turn them up.Originally posted by OKC_Jim View Post
Not really a good way to test your HL tank without another to shoot at it with. You can try to “bounce” a shot off a mirror or white surface. These can sometimes cause hits on yourself with the HL systems.Leave a comment:
-
Thanks for your comments, Rubicon. Sounds like I was overthinking it and 'clean' air isn't as big a deal as I imagined it to be.Originally posted by Rubicon99 View Post
Another questions. Say I decide to mount it in the loader's hatch as shown by Beeg but would like the receiver a bit higher BUT I still want the plug hidden inside the hatch. Is there a simple way of making the rigid male plugs on the bottom of the IR receiver longer? Say that I wanted the plugs currently sticking out of the IR receiver to be 5/8" instead of 1/4" to buy me an extra 3/8" of height? Keeping in mind my goal it to not use flexible wires that I'll then have to figure out a way of making rigid.
Final question. I currently only have 1 IR capable tank. Stuff I ordered to convert my StuG was lost in the mail. My initial plan was to convert my StuG first and use the Sherman to 'shoot' at it. Then convert the Sherman using the StuG to shoot at it. But that is on hold until the package is recovered or resent. Besides another IR capable tank, what can I use to 'shoot' at my Sherman to check that it can be hit from all directions from at least 25' away?
Thanks.
Jim
Leave a comment:
Leave a comment: