Roban - World Class Scale Helicopters

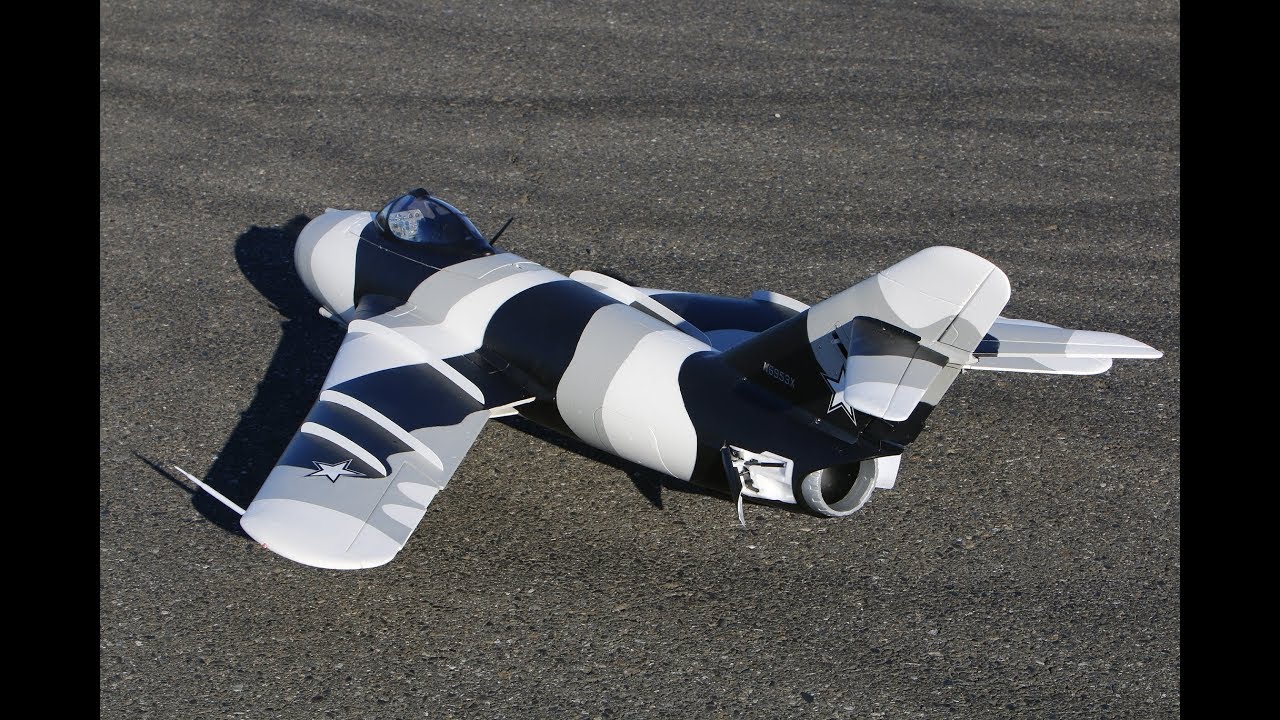
New Avios Mig 17 ?

Collapse
X
Collapse
First Prev Next Last
 
  • Time
  • Show
Clear All
new posts

  • themudduck
    replied
    Well I figured out how to get the actuator apart. I disassembled the unit to get the worm drive out and I could not get the end cap off.
    After struggling with it for several hours I finally got it off, its a simple press-on cap that was secured with Loctite.

    I really like this all-metal unit. It will be very easy to reattach the wires and reinstall it in the plane (the retract unit was not damaged)

    Click image for larger version

Name:	20190908_162842.jpg
Views:	662
Size:	46.3 KB
ID:	212963

    Leave a comment:


  • themudduck
    replied
    Was at the TORKS Ejets meet (near Columbus Ohio) this weekend and had a great time - and had to eat a big piece of humble pie after flying my MIG. They have a beautiful 800' paved runway and I could not stick the landing - even after 'splaining to everyone here about how I had the model dialed in last weekend. Well, not so much! Each time I came in I had the dreaded bounce - and I would power up to save it from the "sabre dance".... but I had several nasty "landings". It didn't get better in subsequent flights and on the last one bounced bounced bounced and ripped the nose gear out of the mount and one of the main gears completely out of the wing. No airframe damage but it was demoralizing. (I did manage to do just fine with several other planes at the event... but the MIG had to go back into the trailer. And now I'll have to do some repairs.)

    When the main gear came out it ripped the wires right out of the retract unit. The whole unit (retract and wheel and plastic cover) is intact.. I'd like to ask the group - do any of you have any insights regarding how to disassemble the metal actuator? I can't figure out how it comes apart.


    Click image for larger version  Name:	LG ooops.jpg Views:	0 Size:	80.1 KB ID:	212933

    Leave a comment:


  • John Bergsmith
    replied
    Just as an FYI, the Flex Innovations DS12 servos are direct replacements for what comes in the MIG. The DS-12’s are 12g metal gear digital servos. I’ve used them on a few projects and like them.

    https://www.flexinnovations.com/product-p/fpzds12.htm
    Attached Files

    Leave a comment:


  • JohnVH
    replied
    Originally posted by themudduck

    John, that was very cool!, your cameraman did a great job. But those lamp posts are freaking me out, don't you know that they will reach out and grab your plane? I guess a compact wingspan helps, but man! That's some good flying there man.
    Thanks!

    Leave a comment:


  • Evan D
    replied
    Remember that the retracts in this are not like Free Wing or FMS three wire retracts. They need their own separate controller.

    Leave a comment:


  • thisguy65
    replied
    Look in to getting fms or Freewing sequencer

    Leave a comment:


  • themudduck
    replied
    Originally posted by JohnVH
    Another fun video, takeoff fly by and landing compilation! Turned out pretty cool!

    John, that was very cool!, your cameraman did a great job. But those lamp posts are freaking me out, don't you know that they will reach out and grab your plane? I guess a compact wingspan helps, but man! That's some good flying there man.

    Leave a comment:


  • themudduck
    replied
    Originally posted by gooniac33

    The control board doesnt sequence. There is a sequencer under the battery tray that then plugs into a gear controller. I totallt removed my board and sequencer to eliminate failure points and it has been working well this far!
    You are correct of course, I meant that I plugged everything in to the board and let the model's electronics do the work (the actual sequencer is a separate part that is under the tray). So to refer back to the original question, I didn't need anything additional to make the retracts work.

    Of course now I am dealing with the issue that they don't always work all the time, which is a hassle. I put the gear down, fly the base leg then the final approach, and then I see... no gear!! So I have to abort and repeat, which doesn't always work out if your battery is at the redline. Fortunately I haven't conked out. But I came waaaay too close one time and ruined one of my 5000mah batteries. Which is why I am using 6250's now! I am going to definitely consider bypassing the thing completely like you said, Gooniac.

    Leave a comment:


  • gooniac33
    replied
    Originally posted by themudduck

    I can't help much with the question on the board (My PNP bird came with the board already installed) but I can tell you that everything plugs into a regular receiver and the board does the work of sequencing the gear. Although it seems to be finicky and so I cycle it each time I fly.

    The steering servo is mounted on a metal plate (shaped like a "C") that is attached to the strut, so yes, it does swing up and down with the gear. It works well, but that plate can be bent in a hard landing and then the steering will be off-center. That happened to me and it was very easy to straighten it out - but I wasn't very happy with how easily it bent. I noticed HK sells that plate as a spare part. So I ordered one!
    The control board doesnt sequence. There is a sequencer under the battery tray that then plugs into a gear controller. I totallt removed my board and sequencer to eliminate failure points and it has been working well this far!

    Leave a comment:


  • JohnVH
    replied
    Another fun video, takeoff fly by and landing compilation! Turned out pretty cool!
    Get yours here! https://bit.ly/2YrDjqC
    Battery i used: https://bit.ly/2OkiHRn
    Radio I use IX12: https://amzn.to/2ykFXUF

    Leave a comment:


  • Hardway
    replied
    Originally posted by Maxun
    This plane is amazing, Im a 3D giant scale pilot, and this is my second EDF, so I check the quality of the airplane, I'm a airline inspector with 40 years in my belt, so I know a few thinks.
    The plane construccion is second to none, the QC is terrible, founded one wire from esc to motor disconnected, a piece of wood that supposed to hold the esc, flying around no glue in the dobler, so my advise is remove the esc holder completely with the 2 screws and hot glue the wire to the foam to secure esc, if this wood piece get loosed and end up in you blades you will be sorry. Servo link, lots of complains of people burning servos, this links are not designed for rotation, this are not helicopters links, this are hard case and the ball will not move that easy, this is only for geometry, the correct way to install this links is tie nut and screw and then back up until the screw rotate free on the ball, then use silicone in the end of the treath, do not use loctite that will eat you plastic, they did use some cain of locktite on the gear door, and the door are getting destroy, you can see it the this treath. My planes are set up to the hi standard of the comercial airliners so I will recommend this airplane to anyone is a fantastic bird. 2 more inspector here will get the same airplane today after they saw it flight. We love it. And if someone do some 3D printing upgrade, please posted in thingiverse.com for all of us, that is where I post my.
    Avios Mig 17
    Extreme flight Extra 300 170CC 125"
    Extreme Flight Yak 100cc
    FX79
    Avios Tundra
    Avios C-130
    Skipper
    Bush Mule
    Volantex Ranger 2000 and 2400
    Nano Goblin
    Zohd Dart
    Zohd XL
    Dragonlink
    Futaba
    Taranis
    Jumper T16
    Crossfire
    R
    Frsky R9
    Drones DJI Mavic, phantoms and aspire
    Racing Drones, Betaflight, Inav, Arduplane
    Here is a source for 3D parts. Pat has them available.... ALSO!!! WELCOME to Hobby Squawk. Glad you are here! Jerry
    Small reminder : The MiG-17 cockpit set is still available! STL files if you can print it yourself, but also complete sets.
    Please contact me at
    pat.verlinden@telenet.be

    Leave a comment:


  • EDF_Lover
    replied
    I thought I’d “close the loop” on my posting about the landing gear control board. I just got a notification from Fedex International that the board will arrive tomorrow AM.

    Chronologically speaking, this is impressive. I ordered it from Hobby King yesterday morning (the warehouse is in Hong Kong for this part). I paid $16 for 3-9 day Fedex.*

    So, Hobby King must have jumped right on it. And, Fedex isn’t wasting any time either! So, “credit where credit is due!”

    * Yes, $16 to ship a $10 part. But, it’s not that much more than what I typically pay to ship something, and it makes the delivery time a lot more predictable from Asia. I’ll just pretend that the part costs $100. What a deal!

    Leave a comment:


  • EDF_Lover
    replied
    Thanks for the pictures!!!

    Leave a comment:


  • Maxun
    replied
    This plane is amazing, Im a 3D giant scale pilot, and this is my second EDF, so I check the quality of the airplane, I'm a airline inspector with 40 years in my belt, so I know a few thinks.
    The plane construccion is second to none, the QC is terrible, founded one wire from esc to motor disconnected, a piece of wood that supposed to hold the esc, flying around no glue in the dobler, so my advise is remove the esc holder completely with the 2 screws and hot glue the wire to the foam to secure esc, if this wood piece get loosed and end up in you blades you will be sorry. Servo link, lots of complains of people burning servos, this links are not designed for rotation, this are not helicopters links, this are hard case and the ball will not move that easy, this is only for geometry, the correct way to install this links is tie nut and screw and then back up until the screw rotate free on the ball, then use silicone in the end of the treath, do not use loctite that will eat you plastic, they did use some cain of locktite on the gear door, and the door are getting destroy, you can see it the this treath. My planes are set up to the hi standard of the comercial airliners so I will recommend this airplane to anyone is a fantastic bird. 2 more inspector here will get the same airplane today after they saw it flight. We love it. And if someone do some 3D printing upgrade, please posted in thingiverse.com for all of us, that is where I post my.
    Avios Mig 17
    Extreme flight Extra 300 170CC 125"
    Extreme Flight Yak 100cc
    FX79
    Avios Tundra
    Avios C-130
    Skipper
    Bush Mule
    Volantex Ranger 2000 and 2400
    Nano Goblin
    Zohd Dart
    Zohd XL
    Dragonlink
    Futaba
    Taranis
    Jumper T16
    Crossfire
    R
    Frsky R9
    Drones DJI Mavic, phantoms and aspire
    Racing Drones, Betaflight, Inav, Arduplane

    Leave a comment:


  • Maxun
    replied
    Originally posted by themudduck
    Hey guys,
    I did a bunch of flights today, trying to get the balance point sorted out. Earlier this summer I was using an older-style Admiral 5000 (short and fat) pushed all the way forward … and with my timer set at 3 minutes I found that I had a very small safety margin with the battery. So I switched to the longer RoaringTop 6250 and that solved two problems - first I was able to move the battery back about an inch to where the Velcro strap could reach it, and second it gave me enough juice so I could make 2 aborted landings after I reach my 3 minute timer.

    The battery is sitting very far forward, much further forward than what the battery tray seemed to be set up for. I balanced it per the manual, but I needed some up trim to fly level.
    I was still having trouble with the bounce, even after practicing it for the past few weeks. I am very pleased with the way the plane flies, but during landing if you accidentally smack the nose gear the model will bounce back into the air. I've been trying and trying but I still get this bounce. Last weekend I had a near disaster with a big bounce that ended with a "saber dance" but I managed to save it.

    So I was thinking maybe its nose heavy. Today I tried moving the 6250 battery backwards a little bit at a time, just to see how it would do.
    Well, I found that it really made a big difference. With the battery pushed back, the plane is much easier to land.

    Do this balance test: with the battery set back from the forward position, I found that if you tilt the model back on the gear it will just sit back and stay on the tail skid. if you just nudge the nose down, it will sit very lightly on the nose gear.
    So in other words, position the battery so that the model is just resting very slightly on the nose gear, but it will tilt back and stay if you lift it on purpose.

    You may think its tail heavy with it set up like this, but inverted flight testing proves that it is not tail heavy. When inverted it only needs the slightest touch of down elevator which means its basically neutral. It flies really well balanced like this (I don't need any up trim for level flight) and when its landing its really easy to hold the nose up (obviously) which solves the bounce problem. It does have a tendency to do "wheelies" when its taxing over bumps, but its not bad. Do not push the battery back to where it sits heavily on the tail, that's too far back. It needs to sit on the nose gear - just very lightly.

    Something else I found from testing is that the flaps do not affect the attitude of the plane much - originally I had a little down trim set with the flaps but I removed almost all of it. With full flaps set, the elevator is trimmed down maybe 1/32" (maybe 1.5mm). That is just enough to help the plane avoid ballooning.

    I hope it helps! Try flying this bird balanced like I suggest and see if you like the way it lands better!
    Rest the plane in a flap surface, install the battery and cockpit, the nose will go forward, open the cockpit move the battery back, and check as many times is required until the tail stay down with the nose up, then move the battery forward just enough for the nose will to touch the ground and you CG will be perfect. For a peace of mind after that move the battery foward just 10 mm then flight the plane should glide with 1/8 or 0 throttle and in landing flare should be ease. If the plane is imposible to flare in landing you are nose heavy, and will jump and jump in the of the runway do to the speed and ground effect, happy flying.

    Leave a comment:


  • themudduck
    replied
    I printed "Superhero's" 3D-printed tail nozzle that he designed for the MIG (you can find it here on Thingiverse) and installed it this evening after a quick paint job.
    It fit perfectly. Its very simple and looks great!

    The original foam nozzle pulled off easily.

    Click image for larger version  Name:	20190903_211051.jpg Views:	0 Size:	47.1 KB ID:	212477Click image for larger version  Name:	20190903_222736.jpg Views:	0 Size:	40.6 KB ID:	212478

    Leave a comment:


  • themudduck
    replied
    Originally posted by EDF_Lover
    That’s exactly what I needed to know! Thanks!

    Is there any chance you could post a picture of how the steering servo connects to the strut? I can imagine how to rig something but it would be great to see how Avioys did it.

    Thanks so much!
    Hey there lover ,


    Sure, here are a few shots. Its not easy to photograph this, since its a small space and the servo is mounted to the back side of the strut.
    But here you go.... the model is upside-down obviously, and the view is towards the tail.

    (In the first pic, the doors are disconnected)

    The black zip-ties that you can see lock down the retract to the floor and prevents the retract unit from being forced backwards in a hard landing.

    Click image for larger version  Name:	20190824_223252.jpg Views:	0 Size:	43.3 KB ID:	212473Click image for larger version  Name:	20190903_221800.jpg Views:	0 Size:	39.4 KB ID:	212474Click image for larger version  Name:	20190903_221851.jpg Views:	0 Size:	45.0 KB ID:	212475

    Leave a comment:


  • EDF_Lover
    replied
    That’s exactly what I needed to know! Thanks!

    Is there any chance you could post a picture of how the steering servo connects to the strut? I can imagine how to rig something but it would be great to see how Avioys did it.

    Thanks do much!

    Leave a comment:


  • themudduck
    replied
    Originally posted by EDF_Lover
    This is a little off-topic but I’m betting someone will be able to help me.

    My actual questions:

    Is there anything I need to know about connecting the special board to my receiver? I read something about these retracts perhaps needing a different voltage than usual. Do they just plug into a standard receiver and the board does the rest?

    And, it looks like the steering servo mounts to the strut and swings up and down with the gear. Is that right?
    I can't help much with the question on the board (My PNP bird came with the board already installed) but I can tell you that everything plugs into a regular receiver and the board does the work of sequencing the gear. Although it seems to be finicky and so I cycle it each time I fly.

    The steering servo is mounted on a metal plate (shaped like a "C") that is attached to the strut, so yes, it does swing up and down with the gear. It works well, but that plate can be bent in a hard landing and then the steering will be off-center. That happened to me and it was very easy to straighten it out - but I wasn't very happy with how easily it bent. I noticed HK sells that plate as a spare part. So I ordered one!

    Leave a comment:


  • Gilatrout
    replied
    Click image for larger version

Name:	IMG_20190902_092734.jpg
Views:	1001
Size:	105.7 KB
ID:	212433 Well, I'm annoyed. Was configuring the receiver, and when I plugged in battery... Nothing nada no beeps. It worked 5 min before, but no longer. I figure it is a bad ESC. At least it didn't happen in the air.

    Looks good.though...
    Motion RC carries the largest selection of electric and gas powered radio control (RC) planes, helicopters and accessories. Browse our massive collection today!

    Leave a comment:

Working...