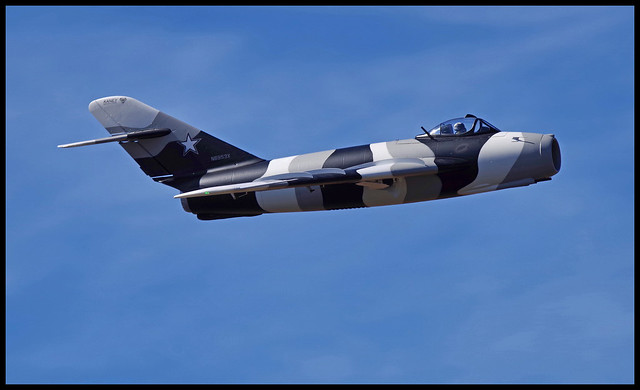
New Avios Mig 17 ?

Collapse
X
Collapse
First Prev Next Last
 
  • Time
  • Show
Clear All
new posts

  • t01ga
    replied
    Originally posted by patrick verlinden
    I designed a scale cockpit set for the Mig-17. If you're interested in the STL printfiles or a pre-printed set, contact me on pat.verlinden@telenet.be
    Awesome job. Email sent.

    Leave a comment:


  • Aussie1
    replied
    There are now a few of these jets flying around with turbines, here's a link to one with the new X45 turbine in it, a perfect choice!

    Leave a comment:


  • Scale Master
    replied
    Originally posted by patrick verlinden
    I designed a scale cockpit set for the Mig-17. If you're interested in the STL printfiles or a pre-printed set, contact me on pat.verlinden@telenet.be
    Looks awesome, email sent bud. My name is John

    Leave a comment:


  • Hardway
    replied
    Very cool!! Thanks! Email sent to you! Jerry

    Leave a comment:


  • patrick verlinden
    replied
    I designed a scale cockpit set for the Mig-17. If you're interested in the STL printfiles or a pre-printed set, contact me on pat.verlinden@telenet.be

    Leave a comment:


  • xviper
    replied
    With the kind of negativity and ignorance seen from those who object to hat cam vids, I've lost interest in posting vids in forums. I do them for my own records now. I play them on my PC at fullscreen and with some magnification and I can the "little blip" just fine. Pump it into a big screen TV and it's even better. With 4K cams now, you can blow those things up without losing too much.

    Leave a comment:


  • fredmdbud
    replied
    Originally posted by xviper
    Someone asked about flying this plane from grass. I flew mine today from my grass field. This is the same field that my F/A-18 and F-35 could NOT get off the ground. With the stock Mig-17, there was no problem. It took about 150 to 200 feet to lift off. Landings were uneventful and if anything, were much smoother (with no bounce) than from the smooth GeoTex runway. Sorry, no video due to some peoples' objection to hat cam vids on this forum.
    People can object to you hatcam video as much as they can to any of your other posts - they have the choice of viewing/reading them. If you want to share it, that's your call. If they call your video pointless, then so is their clicking to view it.

    Or just post a link to wherever else you post it (e.g. YouTube).

    Leave a comment:


  • RanGee
    replied
    Originally posted by t01ga
    Friday was the maiden day. It wasn’t the easiest maiden I had. Did require some R-AIL trim and some up ELE but then it was hands off. I have Y’d the airbrakes to flaps and I had no pitch change with 20mm take off flaps and 38mm (90%) landing flaps. I had 4 flights altogether and the plane slows down enough for smooth landings. I did ran out of runway on the maiden as it likes to float and roll. However knowing that previous landings were uneventful with hardly any head wind and some crosswind.
    I have flown with HRB 6000s and settled with CG at about an inch behind the airflow hole inside fuselage which allowed me to take back some of the ELE trim. I got 4 mins flight time on the last flight and I feel I can improve on that.
    I love the way it sounds and love its presence in the air so it is a keeper.
    I am waiting for my afterburner from Ran and pilot on the ready (needs painting).
    Nice pictures t01ga! The pilot looks great.

    Leave a comment:


  • t01ga
    replied
    Click image for larger version

Name:	EC368995-A8EE-486A-95DF-CA6FB861D3CE.jpeg
Views:	1300
Size:	59.3 KB
ID:	211390Click image for larger version

Name:	2F039287-335F-487E-B5DB-7CB673E34279.jpeg
Views:	1301
Size:	60.5 KB
ID:	211389Click image for larger version

Name:	B71FB07A-49F7-4AA9-8E1C-82E7A642A6B7.jpeg
Views:	1339
Size:	224.0 KB
ID:	211394Click image for larger version

Name:	89711A55-CEFD-4197-9822-32815E56A5C2.jpeg
Views:	1319
Size:	178.5 KB
ID:	211392Click image for larger version

Name:	ACC357E8-8AA7-4FE1-80BA-2B59678DD660.jpeg
Views:	1391
Size:	195.5 KB
ID:	211393Click image for larger version

Name:	41F91DB5-3AD3-4914-8A1A-9AF18097775E.jpeg
Views:	1219
Size:	136.9 KB
ID:	211391 Friday was the maiden day. It wasn’t the easiest maiden I had. Did require some R-AIL trim and some up ELE but then it was hands off. I have Y’d the airbrakes to flaps and I had no pitch change with 20mm take off flaps and 38mm (90%) landing flaps. I had 4 flights altogether and the plane slows down enough for smooth landings. I did ran out of runway on the maiden as it likes to float and roll. However knowing that previous landings were uneventful with hardly any head wind and some crosswind.
    I have flown with HRB 6000s and settled with CG at about an inch behind the airflow hole inside fuselage which allowed me to take back some of the ELE trim. I got 4 mins flight time on the last flight and I feel I can improve on that.
    I love the way it sounds and love its presence in the air so it is a keeper.
    I am waiting for my afterburner from Ran and pilot on the ready (needs painting).

    Leave a comment:


  • xviper
    replied
    Someone asked about flying this plane from grass. I flew mine today from my grass field. This is the same field that my F/A-18 and F-35 could NOT get off the ground. With the stock Mig-17, there was no problem. It took about 150 to 200 feet to lift off. Landings were uneventful and if anything, were much smoother (with no bounce) than from the smooth GeoTex runway. Sorry, no video due to some peoples' objection to hat cam vids on this forum.

    Leave a comment:


  • themudduck
    replied
    Hey guys, I had a couple of nice flights today with my MIG at a warbird meet. On the last flight I made a dumb mistake on the landing and bounced it. The "dreaded pogo bounce". It sprung into the air and wallowed nose-high - almost stopped and was going to drop out the air but I gave it full throttle and just managed not to crash - it was just enough to prevent a stall and the second "touch" was pretty hard as well, it slammed in pretty good. There was no structural damage but after inspection, I found one of the main gear doors had broken off the mount (so I am printing a new set of doors) and I found some pretty nasty damage on the nose gear retract unit. It had been forced backwards by the impact and broke the mount. The retract unit itself was undamaged. (wish we could get metal-case retracts for the FW Corsair!)

    If you look at your plane, you'll see that the nose retract unit is held onto four plastic posts by 4 metal screws. The force of the "landing" actually bent two of the screws, stripped another out, and broke one of the plastic posts off. Also, it bent the aluminum mount that the little steering servo is attached to. (HK offers a replacement steering servo mount in the spare parts list, I wonder why). I took the nose gear out, straightened the servo mount, epoxied the plastic post, and replaced the two bent screws. I used some Foam-tac on the threads to help with the stripped plastic. Then I did this neat trick, which I learned was useful on the FW A4 Skyhawk nose gear. I drilled some small holes and installed two small zip-ties like you can see in this picture. This secures the retract to the floor and prevents the gear from bending backwards in a hard landing (which I hope not to repeat)!!

    This is a very easy mod which will help avoid breaking the plastic nose gear mount.

    Here are two pics to show my work. I removed the nose gear doors to make it a bit easier to work in there.
    If you look closely hear you can see the epoxy under the front right screw, and you can see the back left screw looks different. I was amazed that the original screws were actually bent!

    Click image for larger version  Name:	20190824_221044.jpg Views:	0 Size:	43.4 KB ID:	211359Click image for larger version  Name:	20190824_223252.jpg Views:	0 Size:	43.3 KB ID:	211360

    Leave a comment:


  • Evan D
    replied
    I have the one from the FW 90mm T-45 in mine and like it.


    Originally posted by Gilatrout
    Has anyone found a decent pilot figure for the MiG?

    Leave a comment:


  • Gilatrout
    replied
    Has anyone found a decent pilot figure for the MiG?

    Leave a comment:


  • gooniac33
    replied
    Originally posted by Bajora
    Four flights on ours today! Nice flyer.

    Maxxed out the right trim on the roll axis on the maiden and she was still trying to roll to the left a little? Upon landing, examination revealed that the trailing edge of the left wing is higher then that of the right wing, when viewed from the rear ... studying both of them from the fuselage out to the ailerons. Not sure if it is the way that the wings index into their saddles in the fuselage or the wing(s) is/are warped? For now, used subtrim to get the ailerons set to where she will fly hands off.
    Looks really good! I wonder if the gear being stuck down had something to do with the trim? But mine did need quite a bit of trim as well. Not sure why...

    Leave a comment:


  • Quickstop
    replied
    Originally posted by Bajora
    Four flights on ours today! Nice flyer.

    Maxxed out the right trim on the roll axis on the maiden and she was still trying to roll to the left a little? Upon landing, examination revealed that the trailing edge of the left wing is higher then that of the right wing, when viewed from the rear ... studying both of them from the fuselage out to the ailerons. Not sure if it is the way that the wings index into their saddles in the fuselage or the wing(s) is/are warped? For now, used subtrim to get the ailerons set to where she will fly hands off.




    You need these (on the ailerons anyway)
    Attached Files

    Leave a comment:


  • xviper
    replied
    Originally posted by Bajora
    Maxxed out the right trim on the roll axis on the maiden and she was still trying to roll to the left a little?
    Yours is not the first one that someone has made this observation. I had to go take a look at my trim for this model and it shows that my AIL trim is one click to the left of neutral to fly hands off. To my great surprise and delight, I can't be more pleased and satisfied with this and the previous three Avios planes (Albatross, C-130 - 2nd edition and BushMule). Did I luck out?

    Leave a comment:


  • Bajora
    replied
    Four flights on ours today! Nice flyer.

    Maxxed out the right trim on the roll axis on the maiden and she was still trying to roll to the left a little? Upon landing, examination revealed that the trailing edge of the left wing is higher then that of the right wing, when viewed from the rear ... studying both of them from the fuselage out to the ailerons. Not sure if it is the way that the wings index into their saddles in the fuselage or the wing(s) is/are warped? For now, used subtrim to get the ailerons set to where she will fly hands off.


    Leave a comment:


  • Gilatrout
    replied
    Made some progress on my repaint. Spent the day working up 3d models for cockpit eye candy. It won't be scale, but it will look better. Tail feathers are done, I made my own water slide decals using a cricut vinyl cutter. Click image for larger version

Name:	IMG_20190822_162749.jpg
Views:	1109
Size:	172.9 KB
ID:	211201Click image for larger version

Name:	IMG_20190822_162749.jpg
Views:	1077
Size:	172.9 KB
ID:	211202

    Leave a comment:


  • RanGee
    replied
    Originally posted by themudduck
    I printed and installed the 3DP elevator servo covers that were posted on the thread a little ways back. Peeled off the original tape, and they fit perfectly without any trimming. I covered up the servo wire trench with a piece of scotch tape and painted. I'm happy with how they turned out!


    Click image for larger version

Name:	20190821_214609.jpg
Views:	1159
Size:	44.7 KB
ID:	211107Click image for larger version

Name:	20190821_214637.jpg
Views:	1243
Size:	41.6 KB
ID:	211108
    You are welcome ;)
    Looks very good!

    Leave a comment:


  • themudduck
    replied
    I printed and installed the 3DP elevator servo covers that were posted on the thread a little ways back. Peeled off the original tape, and they fit perfectly without any trimming. I covered up the servo wire trench with a piece of scotch tape and painted. I'm happy with how they turned out!


    Click image for larger version

Name:	20190821_214609.jpg
Views:	1159
Size:	44.7 KB
ID:	211107Click image for larger version

Name:	20190821_214637.jpg
Views:	1243
Size:	41.6 KB
ID:	211108

    Leave a comment:

Working...

