-
Thank you Alpha and thank you to the team at MRC for providing us with stunning models to enjoy! -
Rudderman98 You're right, working the '37 line DOES have its advantages, apparently! What a stunning representation of Kalula 101! Hats off to your fingers for six hours of decal application. Calllie outdoes herself again.Leave a comment:
-
Just completed mine. Maiden this Sunday....hopefully.
Working on the '37 line has it's advantages. :) Will be adding more details later. Roughly six hours of decal application.
Shout out to Callie for the great grafx.Attached FilesLeave a comment:
-
-
I saw this today and wanted to share the link. It's really impressive!
@kfc77454
Leave a comment:
-
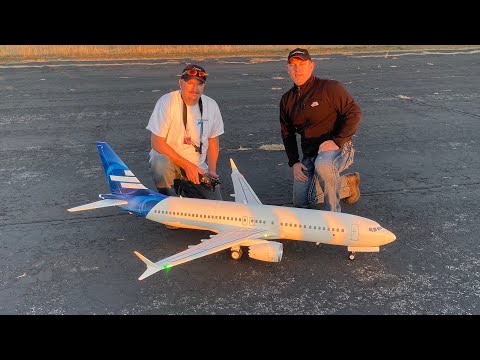
Sooooo just how long can you keep an AL37 up in the air on 11,000mah of 6S power?!
Jeremy Solt and I decided to try, and needless to say, we were both impressed.
This is the full, uncut video.
Leave a comment:
-
The AL37 is beginning to show her "flight time" age. Several chord-wise, foam cell boundary separation stress cracks are beginning to show up on the topside of the wings in the region behind the engine nacelle attach point. Some go back past mid-wing. This is not unexpected with over 1000 flights on the airframe (including some acrobatics <loops, snap rolls, spins, etc>.).
As an experiment (vs just filling the stress cracks with filler), I used some Bondic UV-cured Liquid Plastic with the following process after deciding this is a cleaner approach than trying another glue type because the liquid plastic can be smoothed with a card and excess wiped away before you cure it:- The standard Bondic liquid plastic's dispenser is a very small needle....perfect for applying a tiny amount of liquid plastic into the cell boundary cracks.
- Then I used a playing card to remove any excess liquid plastic...and to smooth the surface of the liquid (nothing left pooching up).
- UV light shining on the thin layer of liquid plastic cures it almost instantly.
- Lightly rubbed a cloth slightly dampened with alcohol over the area to remove any uncured liquid plastic (if there was any).
- I then lightly sanded the surface with a very fine grit sandpaper
- Applied paint
Bondic can be purchased from a variety of retailers. It is expensive, but I have found it has multiple applications in the world of RC modeling...especially great for VERY fast field repairs. There are other brands of UV-cured liquid plastic, but I only have experience with Bondic, and I love the tiny needle applicator.
-GGLeave a comment:
-
THANK YOU! One simple line in the instruction sheet could have prevented the halt. Thanks again!Originally posted by mshagg View Post
Leave a comment:
-
Anywhere you want. Either a free port in the rx (probably ideal) or in the multi function box. All of the red wires in the plane share a common power rail.Leave a comment:
-
HELP! Where does the BEC plug into? The instructions and diagram completely omit it and I found the lead loose up by the cockpit. Need to know so I can power up, bind, and lower gear to continue assembly.Leave a comment:
-
Gents -
I am almost done assembling my AL37 and I have a few questions.
I used blue painters tape to mask the belly so I could paint it and when I removed the tape it took along some of the paint with it. What color can I use or buy to fix the damaged area?
I also noticed the winglets don't fit flush with the ends of the wing? is this normal? They seem off even though I slid them on with pretty good force.
Any insight is appreciated
Attached FilesLeave a comment:
-
-
Yes the AL37 would look cool on my slopes, but I think that I will be setting up a hot wire because the AL37 is just way too small, Airliner models need to be in scale with the other PSS ( power scale slope) gliders on the hill, so if a P 51 has a 37 foot span and a B737 has as much as 147 foot span and the PSS Mustang has 72 inches of wing, then an airliner PSS glider should have a span somewhere in the neighborhood of 20 to 24 feet. Well, not to worry because I am not quite so Anal enough to go that far into the true scale world. But an Rc airliner of my own design ( with a nicely styled fuselage kinda like a Connie) with a 16 foot span would be just oh so cool, and would look right in the air with all the other PSS gliders, Ya know, the DeHavilland Comet could be made to look really nice.......Leave a comment:
-
Steve Corbin Welcome to Hobby Squawk, Steve! Our AL37 is only available as a PNP (Plug-'n-Play), with everything pre-installed except the pilot's provided receiver and flight battery. We don't sell a KIT version of this aircraft. Perhaps tally up the main foam parts in the Spare Parts tab to see what it would cost you to piece one together a la carte, plus your own extra modeling effort to bring it all together for your slopes:
https://www.motionrc.com/products/fr...pare-parts-tab
I will say though that this bird would do well on a slope, in addition to being very unique compared to the models usually out there!Leave a comment:
-
I found this site today and have been enjoying reading some forums.I would like to have a jet airliner style model for flying on the many Slope sites near me. In fact I would have to drive a healthy distance if I wanted to fly off a runway in a field.
Are the airframe components for the AL37 available without all of the stuff needed for powered flight? While flaps would be appreciated I would have no use for landing gear, and engine nacelles must allow minimal resistance to airflow.
I looked at the Freewing site and I must say that a AL37 motorized plane would be a hoot to have I simply have no place to fly one even if I could afford to buy it, so a glider version is the only way I can enjoy the looks of an airliner model plane. I have some Chinese foamy motor gliders and a couple Hobie Hawks but I have always thought that the jet airliners look graceful, and the original Lear Jet has been a long time favorite.Leave a comment:
-
There is nothing special about hooking this plane's leads to any receiver. If you have everything plugged into the blue box and then use the pre-connected leads from the blue box to the RX, it's very straight forward. The only thing I can think of that you may have done is to designate the incorrect aircraft type (wing type) in your TX. It should be "1 AIL, 1 flap, normal tail". If you are using the blue box as it came and you are telling the TX that you have 2 AIL and 2 ELE, it won't work.Originally posted by Belgenland View Post
If you are by-passing the blue box for the primary control surfaces, then it's still the same "wing type" but you must "Y" the 2 ailerons together and "Y" the 2 elevators together, so you have only one plug for each for the RX, unless you really want to have separate ELE and AIL channels.Leave a comment:
-
Im using a 9030 had no issues, I connected it as per instructions , Maybe is how your radio is set up?Originally posted by Belgenland View PostLeave a comment:
-
Hi
I'm Philippe from Belgium. I'm finishing a Brussels airlines livery and I'll post pictures in the appropriate section.
I'm experiencing troubles connecting the blue box on a Spektrum AR9030T receiver... It looks like channels are not linking properly when connecting ail to ail, rudder to rudder etc...
If someone flying her using a Spektrum rx/tx...could you please advise if any specific setup is required?
Thank you
PhilAttached FilesLeave a comment:
-
-
Did you like the new toy? I had some stuff here at home I had to take care off, Marks suggested we go a couple of times next week weather permitting !!!Originally posted by Hugh Wiedman View PostLeave a comment:

.png)
You must Sign-in or Register to post messages in the Hobby Squawk community
Registration is FREE and only takes a few moments

 Amazing!


 And you missed the kielbasa as well, but more for us!
Leave a comment: