


Address any covering issues:
Seal any loose edges or tighten loose covering using a covering iron with a protective sock. Note: This is a self adhesive covering, not iron on. With patterns and designs printed on the covering, overheating or shrinking will distort the design. Testing showed that the best temp is between ~200 - 210 deg F.
Wings: The way Black Horse designed the aileron servo installation is worth noting. The servo and arm are completely hidden inside the wing.
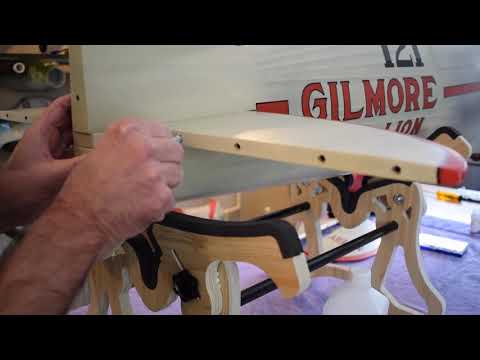
Trim the covering from the aileron pushrod opening. I chose to install the aileron control horns before hinging the ailerons. It just makes the process easier than trying to handle the entire wing.
What the instructions don’t say is that the aileron horns set into a pocket in the ailerons. The shape can be seen through the covering. Trim the covering from the pockets.
Set the horns in the pocket and mark the screw locations. Now drill a small pilot hole for each screw. Screw the screws in and remove. It appears that the screw just go into balsa, but there is ply underneath. After removing the screws, harden each hole with thin CA. After it cures, fasten the control horn to each aileron.
Hinging: (See video for visual reference. The video was made using the elevators, but the same method applies)
The hinges that Black Horse supplys are of good quality. They are a heavy duty design with larger diameter than other hinges of this type, providing more surface area to secure the hinges in the pockets.
On this model, it is best to install the hinges on the fixed surface first. Prepare the hinges ahead of time.
Check to see that the hinges move reasonably free. Lightly lubricate the knuckles of each hinge with a light grease or oil that is safe for plastic. Be sure to keep it only on the knuckle and not the hinge barrels. The lube will help keep the epoxy from locking up the hinge.
15 min epoxy was used here as it gives sufficient work time and doesn’t take excessive time to set. Install each hinge into the fixed surface. Ensure that the hinge rotates 90 degrees to the centerline. Make sure all hinges stay aligned while the epoxy sets. If any are misaligned, it will cause the surface to bind. Once the installed hinges have set, the aileron can be installed. It is helpful to tape the trailing edges flush while it sets. After the set time, remove the tape and gently flex the aileron. It may be a little stiff at first. Free it up by moving the surface up and down. Then re-tape to fully cure. Repeat periodically as needed.
-
Test Equip/set-up used:
Servo extensions? 2 ea. 12”-13” & 2 ea. 4”-6”
Spinner?
Radio gear: Spektrum DX9, Admiral LM0040 10 Channel DSMX receiver with diversity antenna, Admiral LM0037 Sat receiver with diversity antenna
Servos: Tower Pro MG946R Metal Gear High Torque servos. (already had on hand)
Motor: DualSky GA6000.9 160kv
ESC: HobbyWing 160A HV
BEC: ZTW 18A BEC / UBEC
Prop: Sail 26 x 10
Misc.:
Batteries: 3S 3300mAh Lipo (receiver), 2x 6000 - 7000mah 6S lipos in series for 12S
Assembly Steps:
Prep transmitter, receiver, and servos.
I connected each servo up to the servo tester and auto cycled each for about five minutes. They all tested fine with no sign of problems. After cycling, I set each servo to its center and slipped the servo arm on each that will be used.
While the servos are cycling, it’s a good time to do the basic programing of the transmitter. Decide how many channels you’ll use. On this aircraft, I planned to put each aileron and each half of the elevator on its own separate channel. Programed the transmitter accordingly.
I powered the receiver with a UBEC and bound it to the transmitter. At this point I put a piece of tape on each servo and label it with the control surface it will operate. Now, each servo can be plugged into their respective receiver channels.
At this point, subtrim can be used to center each servo arm to 90 degrees.
Tip: Using a builder’s square on the side of the servo case, sight through the servo arm holes until they line up with the edge of the square.
If you know the orientation of each servo, you can even set norm or reverse for each servo and then re-bind. The control system is ready to go and just refine as needed.
Leave a comment:
-
I haven't flown any electric aircraft for competition yet.To fly a full scale routine with time to spare for loitering between other aircraft pilots and maneuvers or other emergencies I like to have a minimum 8 minute flight time. Sometimes the aircraft design makes this hard to achieve with electric models where as gas models tend to fly longer with less weight.Originally posted by Twowingtj View Post
I'm curious to see your build and learn of your flight experiences/opinion of the bird.
Leave a comment:
-
WrightBrosRC mine is electric powered as well. The Black Horse Gilmore is designed well for both electric and gas power. I'll be posting more details on the build shortly.Leave a comment:
-
Thx! You know the saying... bigger flies better!Originally posted by Alpha View PostLeave a comment:
-
Congrats on your win and thanks for your purchase! This bird is larger than the previous version you flew. From your trophy photo, it appears yours was Black Horse's .46 size bird (1470mm wingspan), while this one on this thread that you just ordered is the 60cc size bird (2350mm wingspan).Originally posted by WrightBrosRC View PostLeave a comment:
-
I just ordered mine today. I had a previous Blackhorse version of this I flew at 2016 scale masters. I think it was a slightly smaller scale? It flew great! I'm very excited to get this one! My first was gas but I'm considering electric on this one.Leave a comment:
-
Looks good, Twowingtj, keep us updated on your progress! The Gilmore Red Lion Racer 121 is such a slick looking aircraft to me. I believe the original aircraft can be seen at Patterson AFB according to Google:
Leave a comment:
-
This is a build and review for the 92.5” wingspan, 60cc Gilmore Red Lion by Back Horse Model and distributed by Motion RC. We’ll cover the unboxing, build, and initial flight.
Unboxing:
Packaging: The plane comes double boxed. All components boxed separately inside. All parts are wrapped in plastic and or bubble wrap.
Condition: Some lifting of covering at overlap seam on fuselage. No major wrinkles in covering. No damage from packing or shipping.
Initial Impression: The first thing you notice is the size. The front of the fuselage is about 14” in diameter and the cowl is about 15” at the blisters.
Next is the covering. It has a matt finish and has printed details that give the impression of rivets and panel lines. The plane is weathered to replicate a period racer that has run several full throttle heats around the pylons. The exhaust and oil accumulation is believable. A closer look shows minute details that resemble what you would see if the plane was covered in fabric. I understand that Black Horse uses a multi-layered printing process to achieve this.
It has a nicely done 3d instrument panel. All control surfaces are pre-drilled for “hinge point” type hinges. Hardware appears to be good quality and is individually bagged by construction step.
The major airframe components seem to be well constructed using quality adhesives and materials. I saw no areas that needed re-gluing or modifications. The attention to detail in the construction practices is worth noting. The balsa sheeting in the nose and wing fillet areas, with its many compound curves is quite well done. The formers have been scalloped where the stringers pass through. This is a technique used by skilled builders and rarely seen on ARFs. Those that have done finishing know that “prep work is everything”. The prep work on this model is done better than many I’ve seen.
What’s in the box: All major airframe components, landing gear(main and tail), wheels, cowl, dummy motor, pilot, pushrods, hinges, mount templates for DLE 55cc and 61cc gas motors, gas engine mount spacers and mount bolts. Fuel tank. Electric motor adapter with spacers and bolts, aluminum wing tube, a CG checking toolkit, additional decals, 46 page instruction manual, and a spare piece of covering for repairs if needed.
Leave a comment:
-
Official Black Horse 2350mm Gilmore Red Lion
Gilmore 2350mm (92.5") Wingspan from Black Horse - Balsa Wood ARF - BHM1003-001
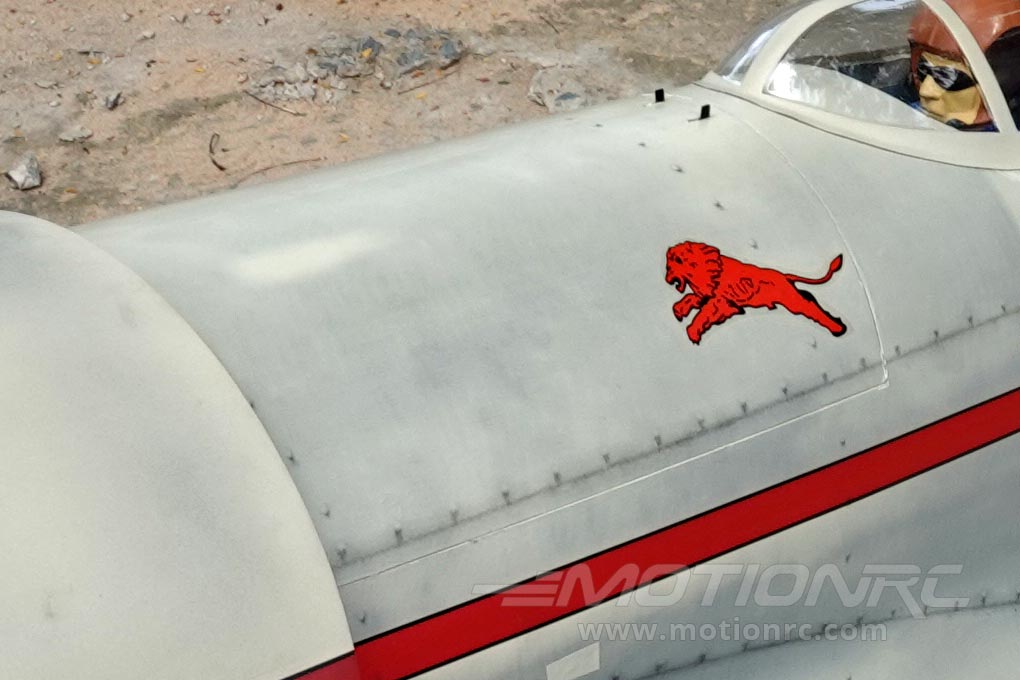
Roscoe Turner was the preeminent aerial showman of the 1930s, and perhaps of all time. From 1929 to 1930, Turner set numerous cross-country speed records and won many air races. To raise publicity while he was flying for the Gilmore Oil Company in the early 1930s, Turner adopted a lion cub and flew with him until he became too large. A lion’s head was the logo for the Gilmore Oil Company, and Turner named the cub Gilmore. Turner retired from air racing in 1939, but continued to be involved in aviation until his death, which, unlike for so many early aviators, was from natural causes.
The model is scaled to approximately 1:5 and attention was paid to a true to original appearance and best flight characteristics. The model can be operated using an electric power system or with an internal combustion engine about 60cc displacement.
Classic Racing Livery
The racing scheme is a tip of the cap to the golden era when barnstorming was a house-hold term.Factory Weathered Printing
The printing on this model has a realistic weathering complete with rivet and panel line detail that elevates the model to a whole new level of scale appeal. The "faded" weathering is subtle and accentuates the fully sheeted areas and the ribbed areas of the fuselage nicely, flowing with the contours of each shape. Because this weathering is silk-screen printed onto every model, it always matches, in case you needed to buy a spare wing after a crash.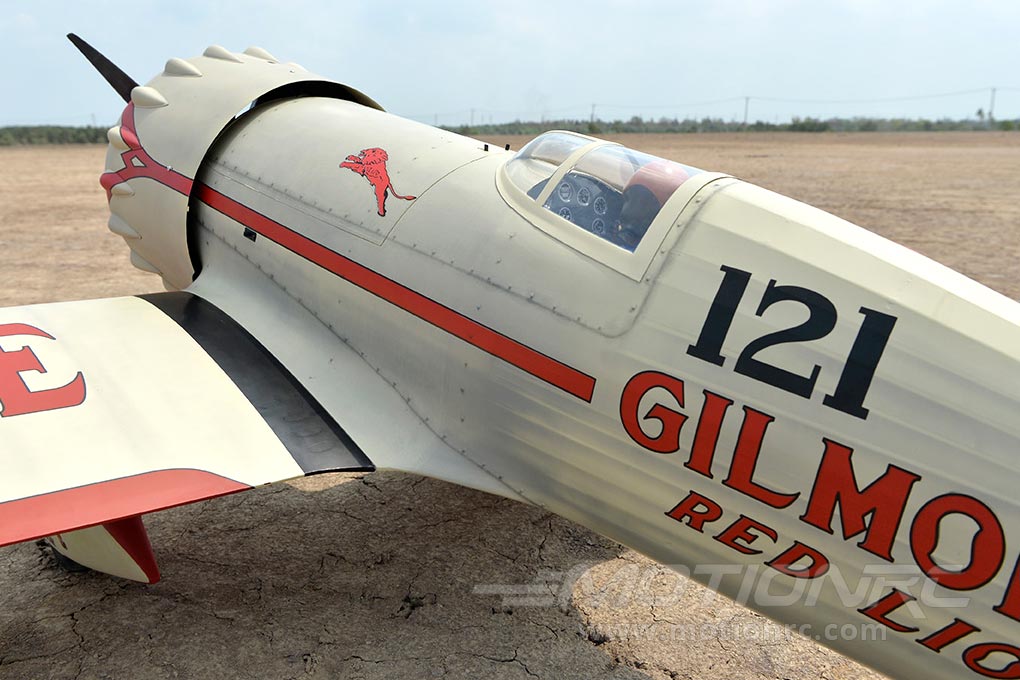
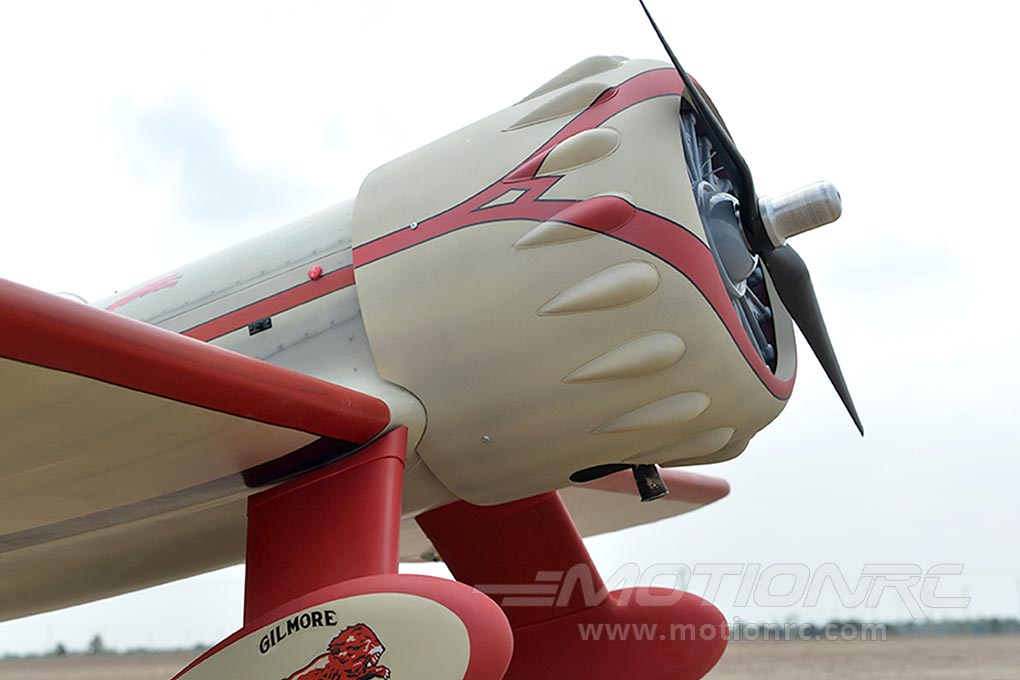
Fiberglass Molded Cowl
Exceptional quality fiberglass molded cowl really adds to the realism and scale appeal. Very subtle shading and meticulous pin-striping really accentuates the classic lines of this aircraft.Gas or Electric Power for this ~1/3 scale Racer!
You can choose between gas or electric to power your model depending on your preference. The huge frontal area makes installations of either powerplants very easy.
Large Electronics Hatch
There is ample room for your various electronics, batteries, gyros or anything you desire to complete your electrical system. The Gilmore Red Lion has a cavernous fuselage, so space is not a concern!FEATURES:Scale Racing Canopy
The canopy has the scale outline and look of the original from the 1930's. Even the pilot looks like he's reaching for the finish line!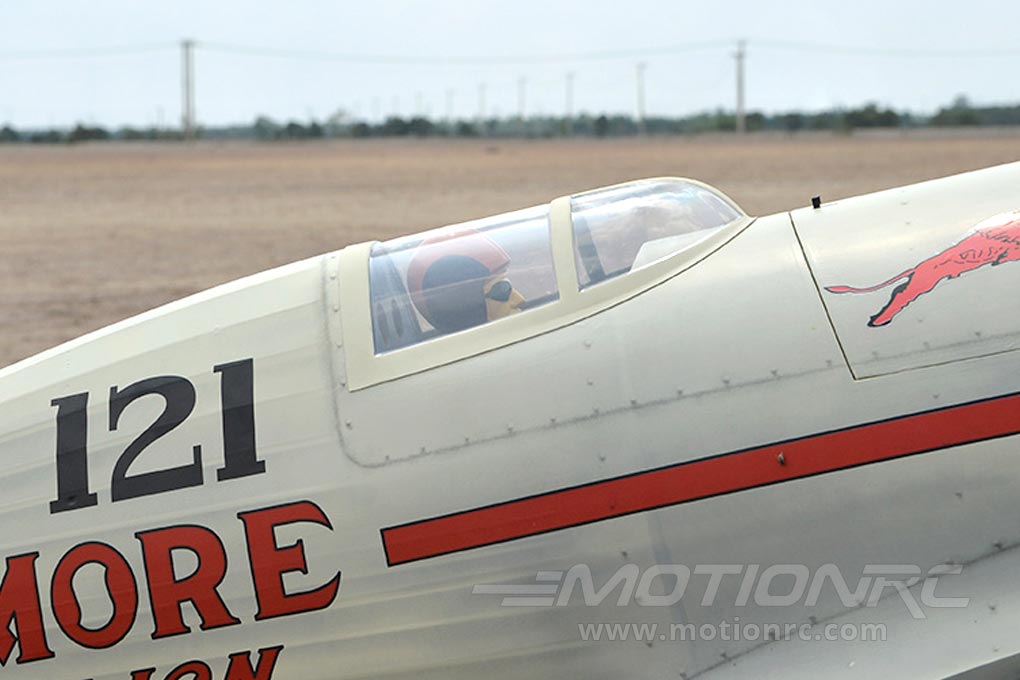
- High level of prefabrication right out of the box
- ~1/3.4 scale
- Lightweight, strong, laser cut balsa and plywood construction
- Classic racing scheme with subtle pre-printed shading
- Panel lines and details printed directly onto the pre-applied, high quality covering
- Aerofoiled tail surfaces
- Recessed hinges on all control surfaces
- Pre-drilled hinge mounting holes
- Heavy-duty pin hinges on all control surfaces
- Large easy access fuel tank/battery/servo access hatches with sprung loaded latches
- Painted and detailed cockpit, pilot and interior included
- Fiberglass control horns with ball link connector
- comprehensive control and fitting accessories included
- Two-piece, plug-in wings simplify transportation and assembly
- Fiberglass cowl and glass reinforced landing gear covers/pants
- Mounts for both electric and gas power options included
Leave a comment: