


Still not done but been trying to knock it out...
-
Comment
-
No, it’s still not loading the whole page. I can’t access my account or any of the plane pages.Originally posted by James View PostComment
-
-
Snake looks awesome ! ...Comment
-
liveries are lookin great! One great thing about airliners is the amount of variety.
Question, is the 3350g weight listed on the product page for the airframe without the battery, or with?Comment
-
For those of you getting graphics from Callie, does the tail decal fit well or is there a lot of work trying to get it to fit.? How do the edges work out on the tail and for those of you painting the plane is there any problem with the paint going on smooth or is there a reaction. I was going to use the rattle can rust-oleum paint from Home Depot. Thanks for any info.Comment
-
If you mist the spray paint on (aka light coats) it will be smooth (and thin). If you go thick, or spray too close, the accelerant (that's mixed with and pushes out the paint) can cause excessive gatoring effect. I learned this back in 2009? when I got my first epo type plane- a L-39 from tower hobbies. Since then, there have been times I continue to re-learn about this gatoring effect.Originally posted by hellcat716 View Post You typically wouldn't get this effect when airbrushing unless perhaps if you airbrush with a can of propellant.
If spray bombing; take your time, knowing light, thin, misty, or indirect spray works best. Unfortunately, with epo- light coats can mean easy to lift up as well, so whatever you use to mask, use low tacky tape. It's frustrating to have that perfect sheen, only to pull up bits here and there when you "carefully" pull off the masking.
My 2¢Comment
-
Hey guys, I stickied a new thread to the top of theBusiness Jets, Commercial Jets, Commercial Propeller Airplanes forum here. I am looking for all the pilots who will be doing custom liveries to at least share 1 picture that looks just like this (same angle, nose left, side profile) as we want to do something fun with them. I can see it already got buried in this thread so I just made a separate one to share only 1 picture in this exact style:
Link to thread here:
Comment
-
Here's mine. Oh wait, that's the real thing. Okay, well that's what it will look like when I get mine in a few months. Minus the airfield and good weather. My YouTube RC videos:
https://www.youtube.com/@toddbredaComment
-
Hey Snake! your Mango Airlines theme is looking good. Can't wait for the finished pics.
Quick question? did you paint the fuselage or is it vinyl wrapped?Comment
-
All set.Comment
-
MW, She is impressive, I must say...er...write. Very cool, indeed. Best, LBOriginally posted by Mwhite1911 View Post"I am having an extraordinary ordinary life."~Lucky B*st*rd~
"You just need the will to do what the other guy wouldn't."~Keyser Soze~
AMA#116446Comment
-
Thanks. Small mess up on the lettering on the left side. Thought I had to put on the letters individually. Not the case though.Comment
-
Mine is just leaving the US should be here in a couple days,Was wondering can you paint the foam with a fine brush?Comment
-
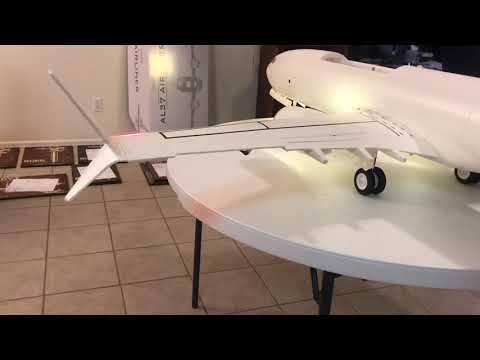
Here is the video of the setup of my new AL37 from Motion R/C and my current overall thoughts.
I bypassed the blue box for the ailerons so I could utilize two aileron channels instead of one. This will allow me to program Aileron Diff if it is needed after I start doing trim flights. This also allows me to setup a Butterfly Setup in the Futaba 16SZ Transmitter. This is where both ailerons go up and the flaps go full down. When I advance the throttle the surfaces will go back to neutral. I also still have aileron control if needed. This will allow for a much steeper / slower approach.
For flaps I have found going in the second hole on the horn side on the outer flaps allows you to match all four flaps evenly throughout the whole motion. All flight controls are maxed out to their max.
I ran each throttle into different channels so I can run differential thrust. This mix is turned on and off using a switch. I plan to have this function disabled on the first few flights, but do plan on using it to try some cool stuff with the aircraft.
The build was really easy besides hooking the wings up. Was a little confused how they wanted me to let the gear down prior to installing the wings, but was able to make it happen. I wish they went with a three piece wing design where the Motor pods were apart of the middle section and the outer wings could be removed. This would make it a lot easier to assemble at the field as this is the first EDF I will own that I need to take the wings off to transport. Not too big of a deal, but a wish list item on a future upgrade to this model.
The overall quality is amazing. Motion really nailed it on this one. I did learn though you shouldn't use painters tape on the stock painted model as the white will peel. Other than that I am very impressed with the quality vs the size of the airframe. I plan on adding decals later on.
Maiden flight tomorrow. I cant wait to fly this bird!
Video of the Flight Controls Setup
Comment
-
Just got back from the Flying field and here are my initial thoughts on the new AL37. Videos below show slow take off. Differential Thrust Flat Spin, Crow / Butterfly Approach to landings.- Winglets: The first few flights today the winds were up to as high as 15 mph and a direct crosswind. I did two flights in this wind with the Winglets and a few flights without and found the plane lands a lot better and flies a lot better without the winglets on a windy day. The wind finally calmed down later in the day and I tried the winglets again and it flew a lot better in calm winds.
- Take Offs are easy and only need about half throttle with take off flaps. You can perform a very scale like take off using very little throttle. Video shows below.
- With very little wind the plane flies amazing in the air, but on a bumpy windy day she does gets bounced around. Like I said above I suggest taking the winglets off during windy flight days.
- Landings are awesome and like the promotion videos have shown you can really grease in a landing. On Crosswind days however you need to work the rudder and ailerons on the final flare or else you will get a wing tip drag and or side load the aircraft. I highly suggest using very little flaps during these conditions. I actually found overall the plane lands better around half flaps.
- CG can be moved further back. Mine felt nose heavy the whole flight, but I was running a 6000 mah 6s pack vs the recommended 5000 mah pack.
- Flight time was decent considering the size and two EDFs running, but it won't get 10 minutes like they advertise on their website it seems like. I want to do a few more endurance runs to verify this. With about quarter to half throttle to keep the plane flying and flying straight lines throughout the flight the plane only flew for about 6.5 minutes with the battery down to 23%. Doing normal touch n gos the batteries were down to 25% after 4.5 minutes of flight time. This was all done with a 6s 6000 mah pack. Not terrible at all, but was hoping for that extra minute. Want to try other packs to see if I get the same results.
- I tested the Differential Thrust (video below) she works well and gets into a nice flat spin. She also recovers very easily! Once I get more comfortable I will do different types of spins with this bird for sure.
- I tested the Crow / Butterfly. (video below) This works great for those that might not have the room to make a flat approach to landing. I would suggest adding this so you can make steeper approaches and be able to slow the plane down. I plan to experiment with the settings to see if I can get it even better.
- Overall performance of this plane is great! She has very good vertical, can easily do loops and rolls and she has a very good speed range. The best part about the plane is you can hold full up elevator and be at idle and she won't try to wing over on you if you have the CG right.The plane easily fits into a Toyota RAV4 I found. When I take my truck and trailer to the field, I am going to have to figure out a way to transport it. Assembling the plane at the field is not terrible, but I think if they went to a three piece wing setup it would have made that process a lot easier. The Horizontal stab is wider than the Center wing out to the EDFs. I am sure Motion / Freewing didn't go this route as it might have made the price higher, but would have made it easier to assemble at the field.
Video. For some reason Youtube cut down the quality.

Comment
-
Thanks so much garlandk! This James from the Facebook account. Great info.Originally posted by garlandk View Post
Video looks great, when you upload any HD video to Youtube, Youtube will go live with the video before it is done processing the full HD. So when you watch it within the first 1-5minutes depending on length you may get it at 144p, 240p, 360p, 720p etc until the full HD processes. When we upload video to our Youtube channel, we upload them in private first and wait 10 or so minutes until the HD processes before making them public.
Just a tip and again, thanks for info and it looked like a fun day at the field!Comment
-
Howdy...Thought you might be interested in my first impressions of the AL37. I received the pre-order last Sunday 11/30/19 as promised (MRC customer service is excellent). Freewing/MRC knocked this one outa the park. The workmanship/finish is beautiful. The instruction booklet is easy enough to follow, and I did not find any errors. The control board had a wire connected to it (single split to double) which is not used. Took a bit of thinking to determine it was unnecessary and could be removed. The 3 power wires going to each engine are sealed in heat shrink tubing (grouped at the connector ends). It was necessary to remove the large heat shrink tubing and slide the wires down the wing channel individually rather than as a group of 3. The build was straight forward, and all the parts aligned/fit perfectly.
The throttle channel required reversing, as seems to be typical. Other channels are either normal or reverse as needed to obtain the desired control movement. (Futaba T6J gear).
IMPORTANT NOTE #1: I lost a couple of EDFs due to loss of receiver/transmitter handshake. I've never lost this connection on my PROP PLANES (low current ESCs) Speaking to a Ham radio guy, he suggested installing RF chokes on all the wires going to and coming from the high current ESCs to minimize any common mode interference (which apparently is common to ESCs and gets worse as the current increases). I ordered a variety pack of RF chokes from Amazon and selected the size that fit around the 3 wires (inputs/outputs) on each ESC (plenty of room in this bird's belly cavity). I also installed a torroid (donut) choke on the throttle wire between the receiver and ESCs. The receiver is therefore totally RF isolated from any RF noise coming from the ESCs. I had previous experience with the Freewing F-4 Phantom II regarding this arrangement. I lost one F-4, but after installing the RF chokes in bird #2, I have flown hundreds of flights without any loss of control...period. EDF drivers should consider this Ham's recommendations. It seems to add a measure of bullet proofing to your radio system. The chokes add very little weight, and, who knows....might prevent the loss of a bird. Regardless, it doesn't hurt anything to use them. On one flight, I got the AL37 WAY TO FAR away, and it responded perfectly. So, I am convinced and will continue to use RF chokes on EDFs.
Now...to the flying. I had completed a scale drawing analysis and determined that the bird "should" fit in the bed of my Titan pickup. It won't fit with the winglets on, but it has room to spare in the bed without them...inches of clearance on every side (see photo). My pickup bed is about 75 inches long by 62 inches wide. I use ramekin cups to secure the wheels along with mini bungee cords. The ramekins are secured to the bed with RTV Silicon Rubber...making them removable. It is a tight fit, but it does fit!
The maiden flight was with book settings. There was an initial slight left turn tendency which was easily corrected with a few right aileron/rudder clicks. The elevator needed a few clicks of up. I am using the Admiral Carbon 5100 mah battery located per the book instructions (135 mm aft of the tray front edge as I recall). After about 30 flights, I've determined that it will fly inverted better with the battery further aft. But, with the "book" position of the battery, it will loop, stall cleanly, spin (recovers rapidly), snap roll perfectly, and...with lots of power and speed...fly inverted "OK" with lots of forward stick. (Does anyone know where I can purchase about 200 miniature barf bags?) So, I've decided to leave the battery position per the book. The landings are soooo simple with this CG, but a click or two of power seems to work the best...helps to hold the nose up as you flare out. I've made power off landings, and that works too, but it requires a bit more speed on final to ensure you can get the nose up.
IMPORTANT NOTE #2 On one of my first approaches, I applied too much aileron to counter a gust and got into a PIO roll situation (my speed was a bit fast). Therefore, I suggest setting your aileron EXPO to 30% or maybe even 50% (still experimenting) to reduce this TWITCHY roll behavior. You might want to do the same on the rudder because I almost scraped a winglet when I applied rudder to straighten a take-off roll and ended up driving down a wing. I'm using 1/2 flaps at take off and full flaps on landing.
The bird is FAST and has tons of power. It is considerably faster than my Freewing F-4 Phamtom II. I ended up cruising around at 20% to 30% power most of the time. Apply full power, and you'll be yankin' and bankin' to keep it close enough.
The 5100 mah battery ends up with 40% charge after a 4 minute flight...mostly crusing, but also with a few loops and/or fast passes. This leaves enough charge for an emergency go around. Also, LiPos will last a lot longer if you don't drain them too low. Leaving 30% to 40% of charge will extend the life of your LiPOs a lot. Without any acro or fast passes, a 4 min, 30 sec flight is a good target and your batteries will love you for this.
The aerodynamically clean design allows the bird to glide without power a LONG, LONG, LONG way. I have no doubt that with half flaps in the summer, it'll thermal soar well.
Overall opinion:
Awesome workmanship, paint/finish, quality and design. I'm looking forward to many more flights with this AL37. Thanks for your time.
P.S. The plywood shelf is where I place other birds.
Attached FilesComment
-
-
Work in Progress.
Flight Deck Upgrade - Pimp My MAX
2 SilkAir Captains in Command !
Attached FilesComment
-


Comment