-
I sprayed mine with house paint, valspar from Lowes, I sanded it down lightly to remove the injection nubs. Vic did mostly the same but he hand brushes the paint. It's amazing how well his planes look. -
Great scheme! I'm considering that one or the desert scheme... decisions, decisions.Leave a comment:
-
Wow this looks awesome vduniec!Originally posted by vduniec View PostLeave a comment:
-
Evan D and vduniec,
Did you guys strip the original paint before repainting? Just curious if you did anything to help the paint adhere. I have discovered the hard way that even blue painter's tape will take the original paint off the OV-10, and I have not had much luck getting paint to stick well to EPO-type foam. If you actually want to strip the paint, which I did for the glue area of the sponsons, duct tape seems to work pretty well.
I'd like to repaint the wing white. VMO-2 apparently re-painted their wings white in Vietnam after discovering that the jets they were trying to control could not see the OV-10s against the trees with overall green.
- - DaveLeave a comment:
-
I will try three different things to get more power in a plane before paying for new motors and or ESC's. One that can make a small difference is to set timing up by using a programming card. Next is to change out props. As mentioned before, three bladed props are usually on planes for looks, and they do look good, but they are inefficient. In this case I went with the APC 10x8 two blade, they don't make this size in reverse pitch so not counter rotating, but it really makes no difference in the way it flies, and very easy to swap two wires on the one motor. In this case it made quite a big difference in speed and pull, cost $22 for props and two 2" spinners, so a cheap improvment.Originally posted by Rcfiddy1 View Post
I am happy with the prop improvement but the next step, which I may do later, is simply to go to 5 cell lipo's. I've done this on many planes, but I always look at stock ESC's first to see if they can handle the extra load. In the case with the OV-10, I don't think they can since they are small 30A and are unlabeled, probably just good for 2-4S. I do have some 50A ESC's I bought a while back that are good up to 6S ($11 each) that I may use, and hope that the motors will hold up, which they usually do. Going to a 5 cell will increase RPM on a typical motor by about 2500 (depending on kv), making a huge difference.Leave a comment:
-
Still not completely done but very close. I'm especially proud of the FM whip antennas added to the tail booms. On the actual aircraft, they stand up straight when the plane is stationary but in flight, they bend due to the air flow. I was trying to think of a material that would have those qualities, yet still be durable enough to survive the everyday bumps and dings my planes usually endure. The solution is cheap and easy. I took two bristles from a nylon broom we have. Perfect! They even bend in flight. The humps at the antenna bases are 3D printed. I'll upload them to Thingiverse in the next few days.
Once again, Thank you Motion RC for another great plane!
Leave a comment:
-
Hey, I tried the yellow Admiral 2500's (previously I used the black Admiral 3600's - the two 2500's weigh 1lb 5 oz (total) and the two 3600's weigh 1lb 11oz (total).Originally posted by Evan D View Post
The 3600's are a few years old. Motion is selling 4000's now that are about the same weight as the 3600's.
Anyway it balanced about 1/3 back from the LE, using my fingers (my final balance check is in the air)
I've been using the heavier batteries, and obviously the balance point would have been even more nose-heavy, but I was happy with the way it handled before. I just think it flew better with the lighter batteries, but I have to say that it really wasn't a lot different.Leave a comment:
-
Mud, what’s the weight of the batteries you used and where did you balance it? Congrats on trying something different and it working!Leave a comment:
-
A few posts back I mentioned I was going to try using a pair of 4-cell 2500's. There was some concern because they are lighter than the 3600's and perhaps there would be a balance issue.
RONWC mentioned that he didn't have a problem with the smaller packs. My report: I tried them today and had good results. No issue with the balance, and the model performed well during two flights.
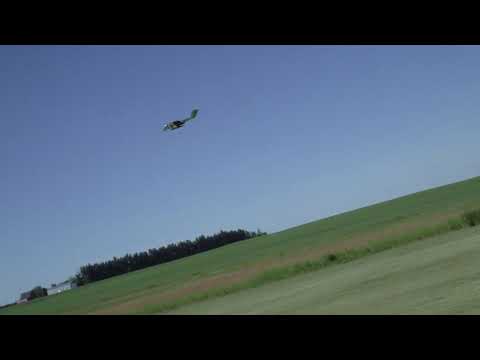
So here's a picture of them installed, you can see they are not pushed all the way forward, they are about an inch back from the front of the battery compartment.
During the first flight I tested the balance and found that the model was actually still a bit nose heavy (it needed a LOT of down elevator when inverted) So I could probably push these 2500 packs even further back, but it was ok.
I got about 6 minutes with the 2500's and had about 35% left. (I can go for at least 10 with the larger packs)
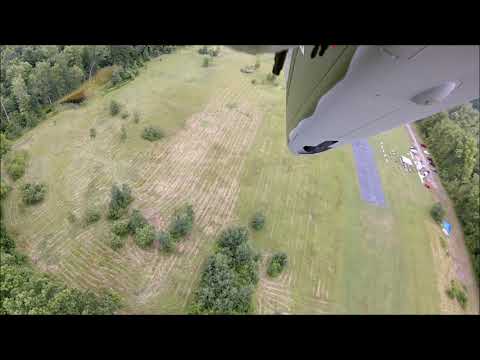
And here is a video I took on the second test flight. (camera is mounted on the left ordnance pod)
On this second flight I did some loops and rolls and then a touch-n-go.... and then I realized that my touch-n-go was without the right main gear - it wasn't down! I tried cycling it several times with no luck - so I landed on two gears right on the edge of the runway (carefully, slowly, with flaps) and just let it run to the right into the grass. No damage at all, it was perfect. So.... a good day, I was happy with the way the model performed. I need to permanently eliminate this connection problem with the main gear...
Leave a comment:
-
Thats may not be an accurate test. The problem My blue box did not happen unless it is in flight with the vibrations effecting it. On the bench the malfuntion does not appear.Leave a comment:
-
Does anyone know if there is a way to verify the blue box is working properly after a crash? I'm going to bypass as much as I can this time around but was wondering.Leave a comment:
-
Here's the video of this mornings flight (WARNING - hat cam video) ...................................
This flight began with the gyro OFF till about 2/3 to the end. The thing that's more evident in the video is the slight wing rock, which is associated with the tail wag. Once I flipped the gyro ON, the wing rock and the tail wag was gone for the last 1/3 or so of the video.
The 5-blade Scimitar props made a significant improvement in pull for this plane. Loops could be done from level flight without falling out at the top. However, I did notice (audibly) that from about 9 o'clock to 12 o'clock in the loop, the motors couldn't keep to max revs. Those props really put some drag on the motors. Nevertheless, they pulled the plane through the loop very well (this is at 3500 feet elevation). For now, I'm satisfied with the mod but in time, I'll search for motors that can crank those props to full revs and keep them there throughout all maneuvers. In level flight, those props do give the plane some significantly more hustle. I much prefer the looks of the Scimitar props and they add that extra dimension to the sound. Upon landing, as much as I could poke a finger into the nacelle intakes, the motors did not seem hot.
Leave a comment:
-
I may have to consider adding one. If there's wind I have wag, no wind no wag.Leave a comment:


You must Sign-in or Register to post messages in the Hobby Squawk community
Registration is FREE and only takes a few moments

Leave a comment: