


Yeah it is, I'm almost surprised it isnt a 120mm or something like that, im kinda scared to see how big the wing surface area is.:Scared:LOL
-
-
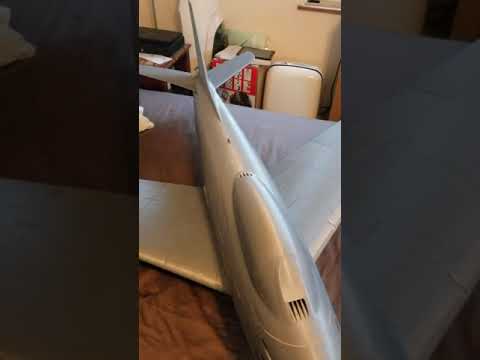
Have all the electronics installed in the fuselage including fan esc and all servos programmed all those in, have the airbrakes on one of the side sliders separate from the flaps. One thing i was surprised with was the fan being aluminum, i had thought it to be plastic. None the less im very happy with how it installed and sounds in this bird. All functions checked out, and the fuselage is 98% ready. Just need the nose gear retract and thats being fedexed from china, god help them if they loose another package of mine.... only thing i had to do to get the fan to fit well was cut the mount tab a bit between the 3rd and second hole. Otherwise it slips right in. The fan I'm using is the Freewing 12 blade 90mm for 6s. By the time the retracts come in i should be 100% ready to fly. Im printing the left and right section 6 parts right now, and that leaves 7-10. With 9 and 10 being on the same file. Then its just ailerons and flaps. So looking forward to getting her airborne. :Cool: and yes, all those electronic parts minus the gear came from our friends at Motion.Comment
-
Heres some of the install doneComment
-
RMBTX, Can't wait to restart mine. Great work. Best, LB"I am having an extraordinary ordinary life."~Lucky B*st*rd~
"Find satisfaction in the process rather than an outcome."~Anonymous~
AMA#116446Comment
-
Im hoping to have her flight ready this coming weekend. However we are expecting rough weather. Luckly after those 2 days of the rough stuff, the weekend turned out very nice so we got some much needed flying in:Cool:Comment
-
Everything is hooked up and operationalComment
-
Can't wait to see the maiden mate. Looks awesome!
WoodcockComment
-
Hoping for this Sunday, if the weather holds we're good to go:)Comment
-
All done, programmed ready to fly!Comment
-
I’ve been trying to print the MiG 15 on my Ender 3 Pro with A Cura and Hatchbox PLA but can’t find any settings profiles that will work good :Confused:Comment
-
Looking forward to the maiden report Rifleman!Comment
-
Using Ender 3, not the Pro, with a glass bed and some of the recommended 3D printed bits for filament guide, cable chains, fan cover and knobs n the Z axis and extruder.
(the only really important change from stock out of box is the glass bed)
Well, its not the Mig, but I printed a flying wing from thingiverse using Inland PLA (which I find works well but others say is useless)
All settings in Cura:
I pushed temp up to 215C, 60C first layer for print bed, then 50C. 0.8 layer height, slowed it down to 30 printing speed, told it the line width is .5 with a .4 nozzle, to push more PLA out and get really good layer adhesion with the thin layers printed hot. Fan speed recommended in the Thingiverse instructions is ZERO I had issues with that and went to 30.
Some parts wanted 1 top/bottom layer at 0.12mm layer height and I used 2 at .08mm
Ailerons for the model failed and needed 3 top/bottom layers to make them work. Pretty stiff ailerons at 3 layers + 20% Tri-hex (triangles and hexagons) infill.
Canopy failed due to an issue with feeding filament. Got some dirt in the nozzle. And hasn't been retried yet. I have the printer doing a 36 hr print of a dice tower for tabletop RPG at the moment.
You can see some blue n wing to fuselage joints. That's tape that got stuck with the CA. It will buff ff with a rag dampened with acetone.
******
Experiment printing a couple of the catapult gliders and other small aircraft off of Thingiverse. When you can get the eagle to fly well while looking like its wings flap you have the printer set up right.
Attached FilesFF gliders and rubber power since 1966, CL 1970-1990, RC since 1975.
current planes from 1/2 oz to 22 lbsComment
-
-
Video that when you fly that one! I bet she will scoot along pretty quickly!:Cool:
Comment
-
I suspect the recommended motor is marginal for the hand launch. Its a little heavier than the average balsa or foam model the same size.
I found that colored electric tape applying thin CA around the edges makes good hinges. I hung the plane by the control horns for a day (with the battery in the plane) to test how they are holding.FF gliders and rubber power since 1966, CL 1970-1990, RC since 1975.
current planes from 1/2 oz to 22 lbsComment
-
HI guys
Does anyone have some files for cura 4.0 or simplified3d for an ender3 printer? My settings got erased somehow if anyone can help that would be great this would be for the 3d lab's files like the pt-17 or 1600 Corsair. ThanksComment
-
If you print them out i use the settings in S3D just increase the flow multiplier, and drop the speed down to around 50% most of their settings they have are pretty spot on. Only other important thing is just have your build area set correctly. Just keep in mind you really need to make sure the corsair is perfect with the folding wing joints. You dont want any weak spots on that one.Comment
-
Uninstall Cura, reinstall, the default Ender 3 profiles will be restored.Originally posted by bradl4648 View Post
#1 change from default, do not use 0.10 layer height or other default layer heights. Use 0.8, 0.12, 0.16 or 0.20. Assuming using the normal 0.4 mm nozzle. 0.12 prints faster than 0.10 and looks better.FF gliders and rubber power since 1966, CL 1970-1990, RC since 1975.
current planes from 1/2 oz to 22 lbsComment
-
I think i may try my hand at designing one of these 3d printed planes now that i have a good idea on how its done. Im wanting to do a swing wing though, ive narrowed it down to the F111 and the B1B. If i do the F111 im thinking make it an 70mm twin or a single 90mm. The way this F86 sounds im really tempted to just go with a single fan design. The B1B would be twin 80mm. Time to get on fusion:Silly:Comment
-
Having designed my A330, I somewhat wished that I started with a smaller design for my first 3d printed plane. I've easily burned close to $300 worth of filament for just test prints. Not sure how the aardvark or bone would scale up with those engine sizes, but my airframe having a 2006mm wingspan takes close to 450hrs to print.
Having 2 other scratchbuilds under my belt, the scariest part is the maiden flight, and that is when you are testing an unknown CG and throws, and hoping that you have done your math right. I have a second airframe already being printed as a spare because it takes such a long time to print.
My next plane (and maybe it should have been the first) will be a YAK-17 for a 70mm fan.Comment


Comment