You must Sign-in or Register to post messages in the Hobby Squawk community
Registration is FREE and only takes a few moments

Register now

Announcement

Collapse
No announcement yet.

Official Freewing 90mm F-4 Phantom II Thread

Collapse
X
Collapse
First Prev Next Last
 
  • Filter
  • Time
  • Show
Clear All
new posts

  • GliderGuy
    replied
    Originally posted by Coconut View Post
    Thanks for the response, GliderGuy and pullupnow. You guys response has been the best response I've gotten on this topic, especially your links GliderGuy.
    What do you use to cut the rods to the length you need?
    I used a Dremel tool with a cutting disc attachment. Cuts it like a hot knife cuts butter. Eye protection recommended.

    By the way…the stock elevator servo is fine, but I did have one fail after TONS of flights. So I moved up to a more $$$ servo. (Repaired and still flying, but I did not want to risk a repeat crash!)

    -GG

    Leave a comment:


  • Elbee
    commented on 's reply
    Acknowledged and Agreed, Sir.

  • Coconut
    replied
    Thanks for the response, GliderGuy and pullupnow. You guys response has been the best response I've gotten on this topic, especially your links GliderGuy.
    What do you use to cut the rods to the length you need?

    Leave a comment:


  • pullupnow
    replied
    Originally posted by Elbee View Post

    PN, glad to read you invested in another Phantom. Great livery choice and nicely done, Bravo Zulu, Sir. Best, LB
    Thank you Sir! "you can't NOT have a Phantom" :)

    Leave a comment:


  • pullupnow
    replied
    Originally posted by Coconut View Post
    Pullupnow, what servo and linkages did you use? I want this plane so bad. But, I want to upgrade the elevator however the right way is.
    I put in a Hitec D625MW 440 threaded rod and dubro ball links. I flew my previous F4 with the stock set up for years and hundreds of flights, but the upgraded setup is noticeably smoother to fly as well as the increased strength. There has to be dozens of servo options that will work. pretty simple mod especially if you do it during initial assembly.

    Leave a comment:


  • GliderGuy
    replied
    Originally posted by Coconut View Post
    Pullupnow, what servo and linkages did you use? I want this plane so bad. But, I want to upgrade the elevator however the right way is.
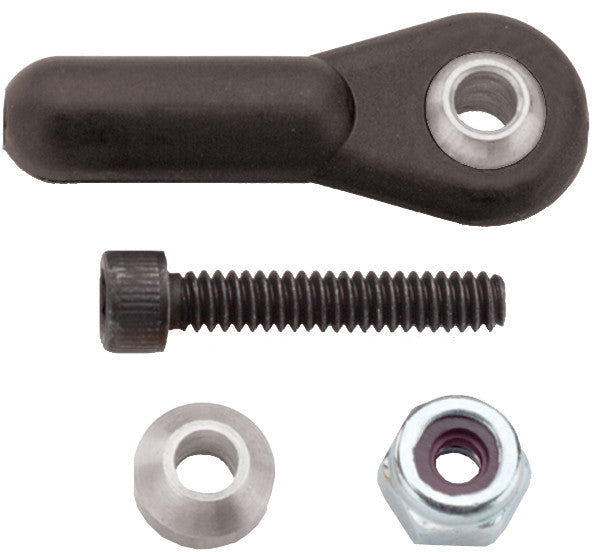
    I’ve had good luck with the HV-69, 4-40 threaded rod and heavy-duty Du-Bro linkages. Smaller dimension case, so some plywood supports are needed.

    https://www.mksservosusa.com/product...3&cat=5&page=1

    Using (have used) this servo in: MiG-29, P-38, F-4
    Note: No reverse option available, so with MiG-29 one must internally re-wire to reverse or use an external servo reverser.

    Smooth friction-free operation provides solutions to many applications. These high quality ball links feature burnished, nickel plated brass balls for smooth operation. Complete with socket head cap screw, brass shim and nylon insert lock nut. Weight: #899 - 3.5grams/each assembly #2262- 3.5grams/each assembly #2266 -


    https://www.motionrc.com/products/du...SABEgKdWPD_BwE

    https://www.motionrc.com/products/du...-1248838163437


    -GG

    Leave a comment:


  • Coconut
    replied
    Pullupnow, what servo and linkages did you use? I want this plane so bad. But, I want to upgrade the elevator however the right way is.

    Leave a comment:


  • Elbee
    replied
    Originally posted by pullupnow View Post
    My replacement F-4... after a failed low speed demonstration with the original. Came all grey as advertised. Upgraded elevator servo and linkage. perfect flyer as expected.
    PN, glad to read you invested in another Phantom. Great livery choice and nicely done, Bravo Zulu, Sir. Best, LB

    Leave a comment:


  • pullupnow
    replied
    My replacement F-4... after a failed low speed demonstration with the original. Came all grey as advertised. Upgraded elevator servo and linkage. perfect flyer as expected. Click image for larger version

Name:	f4 new 1.jpg
Views:	683
Size:	277.0 KB
ID:	366173Click image for larger version

Name:	f4 new 2.jpg
Views:	664
Size:	321.1 KB
ID:	366174

    Leave a comment:


  • Evan D
    replied
    That’s not how I read the web page. I read it as coming as it sounds you got it. It does say new for the scheme though.

    Leave a comment:


  • spec450
    replied
    I just got my ghost grey 8S phantom in the mail. Showed up with the tail blue and all decals applied already. Wasn’t this airplane supposed to show up Grey and you do all the paint work and decals yourself??

    Leave a comment:


  • Matt Mathias
    replied
    Hello phantom drivers. Does anyone on here have the .stl files for any of the 3D printed parts for the F4 or any motion rc airplane? They are not on thiniverse. The ladders, cockpit, afterburnners ect. I AM NOT wanting them to make and sell, just for my private use.
    Thanks
    Mattmathias743@gmail.com

    Leave a comment:


  • Radar-Guy
    replied
    Originally posted by vduniec View Post
    Those look great! Have you flown it yet? How did you address ensuring that they're at the same angle to each other? I was nervous I wouldn't be able to do a good job on that so I kept mine a "Hard-wing" version. Technically inaccurate but the plane is at least still in one piece.
    Thanks.
    Not yet, the F-4F is on back burner, still fiddling with the drag chute assembly. But I don’t expect surprises from the slats. I mounted them with slow setting glue and the proven Eyeball Mk.1.

    Leave a comment:


  • vduniec
    replied
    Originally posted by jthenry8 View Post

    Also, did you create the Standard ARM and AN/ALQ-184 pod? I am trying to pull together everything I would need to build a "G" variant, and these pieces would really help.
    Here's the link for the Standard missile:

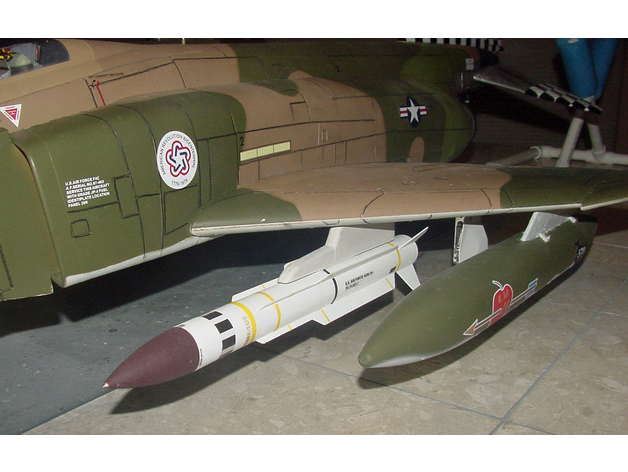
    This is a 1/11.5 scale AGM-78 Standard ARM missile. It I scaled for the Freewing F-4 Phantom. I downloaded a two piece version and a four piece version. Both will assemble into the same missile. The four piece version can be printed with only a 150mm height printer. The longest piece of the two piece missile is 260mm tall. When I test printed the four piece missile with one piece at a time it took 12:19 minutes to print. There is a slot for using the Freewing F-16 male weapons attachment hardware. The final painted missile ended up weighing 99 grams.


    I added the ALQ-119(slightly different from the ALQ-184):

    1/10th scale ECM Pod specifically made for the Freewing A-10 Thunderbolt II. Body has a slot to fit attachment hardware: https://www.motionrc.com/products/freewing-f-16c-90mm-weapons-attachment-hardware. There is a variant of the bodies "w support" which help prevent wobble of the parts during printing. They are fairly tall and skinny so the nozzle may cause the parts to wiggle as it lays down the upper layers.


    I don't recall if I had to resize it for the F-4.

    There is an ALQ-184 on Cults3D, but it's 1/72 scale and I don't know how well it will scale up so much to the fit the FW F-4.

    Leave a comment:


  • vduniec
    replied
    Those look great! Have you flown it yet? How did you address ensuring that they're at the same angle to each other? I was nervous I wouldn't be able to do a good job on that so I kept mine a "Hard-wing" version. Technically inaccurate but the plane is at least still in one piece.
    Thanks.

    Originally posted by Radar-Guy View Post

    Also, make sure to add the outer wing slats then!

    Click image for larger version

Name:	120F7D71-74B0-4740-9AB7-44BEADA9AD58.jpg
Views:	497
Size:	123.3 KB
ID:	363215Click image for larger version

Name:	EAF2E73D-6E6C-4229-9FE3-DFF46EF7C1F3.jpg
Views:	474
Size:	65.0 KB
ID:	363216Click image for larger version

Name:	FEFE4ADC-1154-48D6-AA45-67C088160F8F.jpg
Views:	475
Size:	78.3 KB
ID:	363217

    Leave a comment:


  • vduniec
    replied
    Originally posted by jthenry8 View Post

    I want to build a G variant, but the "E" nose variant looks a little bit off - too thick? Has anyone else noticed this? Is it because the base of the nose from the kit to round and a difficult transition? Thoughts? Please don't think this is a criticism of the work of those who developed the E nose - it is not. Those who developed that mod are amazing craftsman. Just trying to understand the build and the dimensions affecting the nose adaptation. Humbly submitted.
    I obtained the 3D files from Thingiverse. I printed out both the "E" and "F" versions. The "E" didn't look right to me so I went with the "F" version. Dirty_Dee is a great 3D designer and had the "G" version up on Cults3D.com a while ago but I don't see it there anymore. Maybe you can reach out to him to inquire about the "G."

    Leave a comment:


  • Radar-Guy
    replied
    Originally posted by spook View Post
    Awesome job! Is this nose printed or hand made with wood or foam?
    Thanks! The entire nose section is printed (ASA filament) and reinforced with carbon tow.

    Click image for larger version  Name:	IMG_4233.jpg Views:	0 Size:	96.2 KB ID:	363300

    Leave a comment:


  • spook
    replied
    Originally posted by Radar-Guy View Post

    Yes, I did. These are JHH pilot busts raised with some balsa. The GIB deserves his view of the outside world.

    Regarding the printed ‚long nose‘ conversions. After some trials and looking at ‚good‘ drawings‘, I decided to make another design starting right in front of the wind screen including the different air scoops.

    Click image for larger version

Name:	909B2A28-3C8D-4B30-8C2B-BFE37F9D5AA1.jpg
Views:	499
Size:	138.0 KB
ID:	363224
    Click image for larger version

Name:	1ECD62CC-1A74-4607-91A2-CE224005EF4D.jpg
Views:	482
Size:	68.7 KB
ID:	363225
    Click image for larger version

Name:	825B9813-60C0-469F-99C7-72FA1EDC5670.jpg
Views:	490
Size:	56.9 KB
ID:	363226
    Click image for larger version

Name:	67DBEB30-C786-4A4B-8C76-77D5DFDC4B48.jpg
Views:	470
Size:	91.3 KB
ID:	363227


    Awesome job! Is this nose printed or hand made with wood or foam?

    Leave a comment:


  • heisteff
    replied
    Originally posted by jthenry8 View Post

    Looks absolutely fantastic. Is that the RC Geek "E" conversion kit?
    hi, no it´s the F-nose posted on thingivers

    Leave a comment:


  • Elbee
    replied
    Radar-Guy That's just beautiful work, Sir. Outstanding. Best, LB

    Leave a comment:

Working...
X