


Originally posted by f4u ausie
View Post
-
Welcome to the 8S club!!!🤙 Told you you'd love it. I believe this model is made for 8S. Even more stable when it's a bit heavier, also found it flies/lands better balanced a bit further back at 200mm where I believe my 6S was better at 194mm. Couldn't believe how much better it is on 8S. Changed my FW 90mm F16 to 8S also, a sizable enhancement all around, but the F4 showed the biggest improvement. -
Excellent News, f4u aussie!! Looks like you have a great combo there using 8S. I think if I buy another F4 someday, I'd start it out at 8S power. Mine does ok right now, got lots of flights on it with 6S, but I'm intrigued to see what it could do with 8S power, especially up here at 5000' MSL!Originally posted by f4u ausie View Post
Good job!
DavegeeLeave a comment:
-
8s done and dusted,,, wow like a new plane,, think the xtra 300 grams makes it more locked in.. take off speed reached way quicker,, flys well at 50 or 60 percent throttle,,, awsome value up grade,, i think its an 8s plane..... for sure. Flap mix is out now so cg must b a bit different,, 4.5 minuts mixed at 3.75 per cell did glue in little foam blocks to stop battery wobbly wobbly with 1 strap
Leave a comment:
-
15 flights now ,, awsome but the good news,, got 2(so far hrb 6000 4s ) 8s woohoo.. take out the 6s put in the 8.... just early backyard testing,, so far very surprised,, by calculation the 6 s 1835 kv spins faster than 1350 8s,, by 1000 odd rpm,,,, but the low torque. Like a big block chevy.. compared to small block... 4 and a half minuts and 378 per cell woohoo.. just gota work out cg and find that 8s battery strap.. im excited all over again
Leave a comment:
-
Got 3 flights today. F4 had been laid up all winter . Great to get her out again.Leave a comment:
-
2 more flights thismorn here,, easter monday... slowing it down just a little bit more(but not stall slow) getin better. So got 330 minuts at 375 per cell.. it mayb boring.,,, but just one mor time, looks absolutely awsome flying by... just luv the swoopy shape
Leave a comment:
-
Thanks Hugh . I'm ordering the F4 today. The SMC's sound like the winning combination.Leave a comment:
-
Jimmy, I suggest you try 2 SMC HiV 4S 60C 5900's. And forget the C rating other brands put on their packs, if it's 25% of what they state that's more like it, but not so with the Flight Packs of SMC. I'm using the SMC HiV 8S 5900 in my new 8S F4 Jolly Rodgers and converted 8S F4 Blue Angel (previously on 6S), as well as on my converted 8S F16, yielding flight times on the F4 of 5-6 minutes (not interested in speed, although it has it, but more on performance and flight time). The SMC 5900 series (8S/6S/4S) is an outstanding battery line with both high actual C and slightly lower weight. I'm using the HiV 5900 series in almost everything I fly now including the Mig, Corsair (10 minute flight time) and Spitfire (13 minute flight time). I've tried many different brands including HRB's, Admirals, SpektrumOriginally posted by 427jimmy View Post , Roaring Top, etc. and as far as I'm concerned, the SMC's (HiV & Regular) are now the "Gold Standard" for price/weight/actual C. You can check out the independent testing done by MCSGuy at RC Groups (to see the real C) or click on the connection from SMC's website (SMC Racing). The 5900 HiV 8S weighs 940 gr, or 2 4S weighs about 970 gr, cost about the same for 1 8S or 2 4S. Many chargers do not charge to the full 4.35 per cell (where I'm charging to), and instead if they charge HiV they may only go to 4.3 per cell, but that's still good. At 4.2 per cell the 5900 is a 5100 mah battery. Their cheaper and "regular" line are also unbeatable. I know I sound like a SMC Groupie, but after going through hundreds of different batteries (and money
  for batteries) I'm now completely taken in by SMC. And Danny has THE BEST customer service I've experienced. Had one pack with a single cell eventually after 7 months exhibit an IR of 7 -where most of his packs have IR's of cells in the <1 to 2 range, and I sent him a photo of the pack along with my Progressive chargers IR indications and he sent me a new one!!!
SMC also makes the 5300 and 6200 series which have an even higher actual C but weigh a bit more. For me, the 5900 series is the perfect marriage of weight/actual C/high capacity as my F4's now virtually jump off our grass runway with the 5900 (and my 2 6S F18's and 6S A-10 do as well). You definitely will not go back to any other pack once your aircrafts have dined on "The Breakfast of Champions". Cut my battery inventory down from 120 batteries of different brands and mah, down to 8 6S HiV 5900's, 8 6S HiV 4400's (3D planes), 4 8S HiV 5900's and 3 8S HiV 4400's (all for the 8S Eurofighter).
The other thing I noticed on the 8S F4 was that it flew and landed much better balanced at around 200mm back, where the manual states 190mm if I'm not mistaken. On 6S, I could only go back to maximum of 194mm, still somewhat nose heavy, to keep away from any stalls while turning (no cheater holes in the F4), but on landing and approach, it always had a tendency to nose down a bit at slow speed. At 200mm, it seems to be more neutrally balanced and landing is so much smoother, allowing to easily keep the nose up slightly at slower speeds when landing. That may just be me, but don't be afraid to balance the F4 slightly further back than you may think. And this is coming from someone who has ALL of my EDF's balanced at least 20-40mm further back than manual, with the only exception being the 6S F4 I had to keep around manual CG or pay the price.
Leave a comment:
-
"I have only 6s hrb 6000 50c." That's what I use f4u....3min 30 sec roll out to touchdown with varied power. I stuck a big analogue servo in the rear and never had a problem....must get back out now the weather is improving.Leave a comment:
-
I have only 6s hrb 6000 50c.. value 4 me at this stage,, till i step up..3 minuts on the knocker at 3.8 per cell.. im sure there is better stuff where u r,, someone will chime in.. im still useing stock elev servo(for now hi teck coming) but the glue joint came loose after 2 flightsNow epoxy in place.. and strengthened pushrod.. post pics when u get it,, dont fget check all elev partsLeave a comment:
-
I'm just about to pull the trigger on this one. I can only charge up to 6S with my setup so it looks like a pair of 4S for me. Can you guys recommend some 4S Lipo's for me
Brand, mah and C rating? I'm not looking for ultimate performance. Better handling and flight times are the biggest concerns.
Thanks much. Anything else you would like to add before hand, please feel free.Leave a comment:
-
Another couple flights thismorning.. public holiday here(yeea) got flap mix correct now (finally) no pitch change...... feeling very comfy with it now.. low fast flyby is reall cool.. lands slower with full flaps... luvin it
Leave a comment:
-
You do a wonderful job painting and detailing all your airplanes, Hugh. I look forward to seeing them in pictures and flying shots and videos. You are a consummate artist with great painting skills and I don't blame you at all for a little "Hugh artistry" that is part of the overall look and signature of your stable of aircraft. Carry On, my man!Originally posted by Hugh Wiedman View Post
Cheers
DavegeeLeave a comment:
-
Thanks Dave, just can't help a "few embellishments", that way if there's another in the air, I can pick mine out pronto!Originally posted by davegee View Post Although the F4 Blue Angel is a little closer to scheme, but I did use a slightly different blue angel blue because I thought the "real" one was a bit too dark and like usual, wanted mine to "Pop". 
Leave a comment:
-
Yes I did change the ESC, but the original ESC that came in the 6S F4 was the 130 amp ESC. I also had put the 6S 12 blade 4068-1835 Kv inrunner in both F4's some time ago, although I believe that fan is no longer made. Was happy with that original setup for years but when I decided to get another F4 to do the Jolly Rodgers scheme, I went for the 8S version for kicks. After I flew that, I was so impressed with it that I had to upgrade the older F4 to 8S as well and at the same time decided to also upgrade my old F16 (same setup as the 6S F4) so I bought 2 of the 8S 4075-1350 Kv 12 blades (same as in the 8S Eurofighter and 8S F4) when they came back in stock several weeks ago. Their stock lasted less than one week so I'm glad I hit the buy button as soon as they got available. I guess the original 130 amp ESC that came in the 6S version would have still worked, but I went ahead and ordered 2 new ESC's with the 8S fans to be safe, and to have thrust reverse, which of course I never use since I'm on grass.Originally posted by f4u ausie View Post Those are the new 120 amp reversing ESC's.
In regards to the battery, yes it is a single 8S pack. SMC made several HiV 8S packs when customers requested them. In the Eurofighter I use the SMC 8S HiV 4400 pack weighing 780 gr. In both F4's and the F16, I now use the new SMC 8S HiV 5900 pack weighing 943 gr. He also has those HiV mah packs in 4S, so you can use 2 of them, but it saves a little weight with one 8S (about 35gr) plus you don't need a connector or y cable for the batteries which saves space and hassle and is a lot easier to charge a single battery as opposed to 2. But then you need a charger capable of charging to 4.35 v per cell and one that can charge 8S, so nothing is simple anymore.
All I can say about the F4 on 8S (assuming you can get the right battery pack that is both high in REAL C and still somewhat light in weight), is that once you fly an 8S F4, you won't ever go back to 6S. I feel that the 8S F4 (and 8S F16) are among THE best flying EDF's I have. And I'm not into speed and rarely use full throttle, except on take-off. 5-6 minute flight time on an EDF is Nirvana. Yes my friend, I am in Love!
Leave a comment:
-
Absolutely awesome pics. Hugh.. did u change the esc.. or still the 120 amp.. and sound's like the 8s is a single one. Not 2 4s
Leave a comment:
-
After completing and maidening my F4 8S "Jolly Rodgers", I was so impressed with the way it flew that I upgraded another of my older F4's to 8S, the Blue Angel version. This airframe was meant for 8S!!! Although I felt the 6S with the big 12 blade inrunner flew great, I couldn't believe how much better it flies on 8S, with 5-6 minutes of flight time (no kidding). The battery bay accommodates the new SMC 8S HiV 5900 pack with ease, with tons of extra room to move where ever needed. The 6S seemed to fly best balanced around 192-194mm, no much further back than manual. However, on 8S, for me at least the real sweet spot is 200-202mm back. Takes off grass in a flash and lands super smooth getting it's nose up just right for landing. Upgraded the F16 with 8s also, another perfect match.
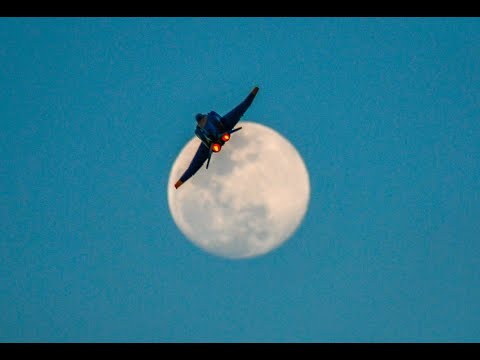
So here's a few photos of the F4 Blue Angle in the attached video (stills only) which also include the F16, F18, F4 Jolly Rodgers, 8S Eurofighter and the Extreme Flight/Aces High FW 190 "Red Tulip". The Blue Angel photos start around :36 in, and the F4 Jolly Rodgers around 4:15 in.
Leave a comment:
 Best, LB


Leave a comment: