You must Sign-in or Register to post messages in the Hobby Squawk community
Registration is FREE and only takes a few moments

Register now

Announcement

Collapse
No announcement yet.

Freewing Su-35 Twin 70mm 12 blade

Collapse
X
Collapse
First Prev Next Last
 
  • Filter
  • Time
  • Show
Clear All
new posts

  • Freewing Su-35 Twin 70mm 12 blade

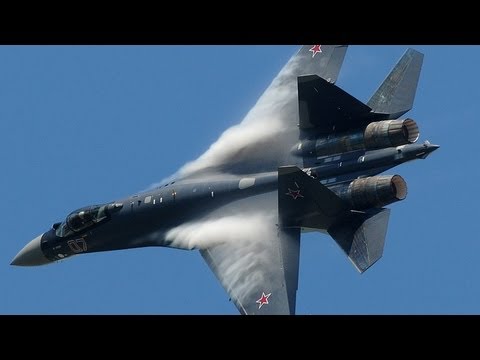
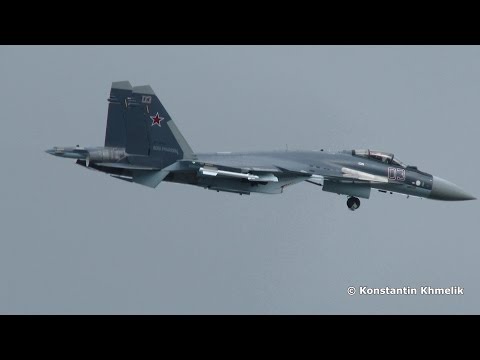
    Just pulled the trigger on a gray Su-35. Since I cannot seem to find the official thread on this one, I would appreciate any insights, experience, or advice anyone might have concerning this ( the 12 bladed) bird.

    She will be flying off a grass runway with her stable mate the L-39. I plan on using my existing 6S 5000 packs (Admiral and Turnigy HD) with a FrSky X8R receiver.

    Also, if anyone has done lights on her, I am particularly interested in which LED lights and lenses exactly I that I would need to order. <Salute>

    Meridian Aeromodelers, Meridian MS

  • #2
    Here's a VERY long thread over at RCG:

    Tom

    Comment


    • #3
      Thanks. I generally try to avoid RCG though for my own reasons.

      And after 15 minutes of reading backwards through over 1600 pages, I remember why I don't like RCG. Nothing but dribble and arguments. Some good stuff is surely interspersed in there somewhere. But I can't take RCG, the environment, nor the ads. This is a MUCH better forum even if there is less content.

      I guess when my Cy-35 gets here, I will just figure it out. I want her to fly scale maneuvers like these..


      In the video you see the flaperons up as spoilers for the flat spins, much like 3D fliers do with their prop birds.

      But I also want to add some lights and other scale bits. Hopefully she can handle our rough field.
      The Me-262 was more than powerful enough for anything our field could throw at it. I am sure the Su-35 is the same.
      Meridian Aeromodelers, Meridian MS

      Comment


      • #4
        I too, try as much as I can to avoid RC Groups. It seems that a lot of people there are brain dead and even perfectly reasonable and decent people go brain dead very quickly (sad to say, myself included).
        I also have this plane on the way in desert camo (PNP). It's sitting in customs at the moment. I hope to see it in a few days. I had one of the original early models of this plane years ago and it was quite lacking in some areas. The first one was power. The current version promises to be much more powerful as it has the same power system as my "yellow 7" ME 262 and that plane really hauls. (I've never seen an EDF do a wheelie before and ME is quite remarkable at just how easily it can wheelie on take off.) I am actually hoping that it has enough power to hover briefly and at the very least do high alpha passes at very slow speeds. I'm acting as a guinea pig for a friend who was about to buy the SebArt Mig-29 (like mine) but those have been discontinued. I saw the specs on the new version SU-35 and with its thrust vectoring, it might do what the Mig-29 does. If need be, I can remove the retracts to lighten it up a bit and fly it on a 4000mah battery for more weigh reduction. I'm going to make the tail cone much shorter so it doesn't hit the ground when coming in for a high alpha landings. My friend is hoping to belly land his if he gets one. Our bumpy grass field can be quite hard on retracts if you don't grease every landing.
        I will be putting in a HobbyEagle A3 stabilizier to help with high alpha work just like my Mig. My recollection of the retracts from my first edition one was that they were a bit weak, so I'm going see if I can re-enforce them as best I can. That one also had Dean's connectors, which on the second flight got so hot, they melted and fused together, shorting out the connection. That one came down like a rock - gone. This new one has EC5s, which I believe will not have that same problem. I also remember that the foam was quite soft and scratched and dented easily just from handling it. I will be covering mine with "Mod Podge" (from Michael's). I've done this with other planes and it has helped immensely in this regard.

        Comment


        • #5
          The mod podge idea sounds good. I might try a good clear coat spray instead. I know my A-4 was a lot tougher after the gloss paint job.

          The gyro sounds good. The plan is 16 channels so I can split the flaps, elevators, and rudders and still do thrust vectoring. I think mixing a "toe-in" on the rudders with elevator will help get the nose up on takeoff. Flaps will help too I am sure.
          I wonder if the flaps would cause a nose down moment in this bird? I suspect they would.

          We will just have to wait and see on the gear. I like scale. But I will modify or replace the gear if I have to. Hopefully this version is better than the earlier ones. Who knows?

          As for the Deans, yeah I can see that happening. I will be using XT90 connectors. I used XT90's with the FMS 90mm Fan/YEP 150 ESC with no problems. The XT90's never even got warm, even under full power. I am sure that this bird will be fine with them.
          Meridian Aeromodelers, Meridian MS

          Comment


          • #6
            Originally posted by seaviper View Post
            I wonder if the flaps would cause a nose down moment in this bird? I suspect they would.

            We will just have to wait and see on the gear. I like scale. But I will modify or replace the gear if I have to. Hopefully this version is better than the earlier ones. Who knows?
            I have smaller, pusher props of the same plane. One is a foamboard plane and the other is a little HobbyKing foamie. Both of these act in a similar way in terms of how the ailerons work. The ailerons are so far back, that they can act like elevators. In fact, the little foamie has the ailerons and the elevators tied together - both go up and both go down and the plane loops on a dime. I suspect that even if I didn't use elevators on these planes, the ailerons alone would act like elevons. So, yes, I would also suspect that "down" on both ailerons on this plane would produce a nose down response.
            If the main gear don't look like they can take it, I'll swap in some trailing link struts, although I think I'll be able to land this fairly slowly and softly in a high alpha attitude.

            Comment


            • #7
              If you look at the full scale doing the flat spins, the flaperons are both in the up position. I suspect this is to help hold the nose up, just like you said. Mine will definitely be doing the same. Splitting out all the individual controls including throttles, rudders, nose wheel steering, gyro sense, etc will end up eating up 15 of 16 channel outputs. That's a lot of channels. But the programming will be fun.

              I will also have battery voltage, RPM, esc temp, battery temp, altitude, and pitot airspeed sensors (FrSky sensors) which can be programmed in the mix. Those sensors allow for programming things which might happen at certain airspeeds and altitudes. This is essentially automatic flight mode switching. My old T-28 had all these sensors onboard. So I know they work reliably. And I can get all kinds of warnings from low rpm to high temp and low voltage. The possibilities are pretty amazing. I am sure this bird will provide a lot of bang for the buck.

              Well anyway, this will be a fun bird to experiment with. Haven't been this excited about a foam jet in a long time.

              I can't wait to get started on mine and to see what others do or have done to theirs. Keep us posted xviper. I should have something to show in a week or so when mine gets here.

              You know I never considered this jet in the past because of the whiny fan sound and the thrust vectoring. Honestly I was not aware until recently that the full scale has thrust vectoring. After watching some videos of the full scale, and seeing this model in the twin 70mm size, I had to have one. Especially so now that the power is 12 bladed fans.
              Meridian Aeromodelers, Meridian MS

              Comment


              • #8
                I am using this lighting system from Hobby King

                Click image for larger version

Name:	Screenshot from 2018-09-09 12-23-41.png
Views:	3298
Size:	186.0 KB
ID:	150811
                [ATTACH]n150812[/ATTACH]

                What are the chances that they would use the Suhkoi as the example?
                Meridian Aeromodelers, Meridian MS

                Comment


                • #9
                  I'm keeping mine as simple as I can. I'll add flaperons if the plane appears to benefit from it. I plan to use a stabilizer to help with the high alpha and possible hovering scenarios. Splitting too many control surfaces makes adding a simple stabilizer nearly impossible.
                  I have all kinds of lights that have been removed from old dead planes but I fly only in the mornings so they won't be all that visible anyway. Also keeps things simpler for me. I may add a high intensity LED set to the nose strut as a landing light but that's about it.

                  Comment


                  • #10
                    This video shows the control surfaces very clearly in some of those post stall maneuvers. Amazing

                    Meridian Aeromodelers, Meridian MS

                    Comment


                    • #11
                      If you are going to fly off grass with the stock landing gear, you'd better stock up on replacement landing gear struts. wheels, axles, etc.

                      Comment


                      • #12
                        fred, did you do flaperons on yours? If so, did you need much elevator compensation for them?
                        Meridian Aeromodelers, Meridian MS

                        Comment


                        • #13
                          Mine arrived today. I really like the look and feel of it. The gear seem to be pretty darn rugged at first glance. Everything came intact. There were a couple magnets loose on the hatch and a reversed Knapo decal on the tail..!@#$% I guess I will just wait and see if anyone at the field notices.

                          She is not small.

                          Question...should I use epoxy or foam tac on this EPS foam?

                          Click image for larger version  Name:	20180913_165923.jpg Views:	3 Size:	109.9 KB ID:	151517Click image for larger version  Name:	20180913_164800.jpg Views:	2 Size:	100.4 KB ID:	151518Click image for larger version  Name:	20180913_165858.jpg Views:	2 Size:	86.5 KB ID:	151519
                          Meridian Aeromodelers, Meridian MS

                          Comment


                          • #14
                            Originally posted by seaviper View Post
                            Mine arrived today. I really like the look and feel of it. The gear seem to be pretty darn rugged at first glance. Everything came intact. There were a couple magnets loose on the hatch and a reversed Knapo decal on the tail..!@#$% I guess I will just wait and see if anyone at the field notices.

                            She is not small.

                            Question...should I use epoxy or foam tac on this EPS foam?

                            Click image for larger version Name:	20180913_165923.jpg Views:	3 Size:	109.9 KB ID:	151517Click image for larger version Name:	20180913_164800.jpg Views:	2 Size:	100.4 KB ID:	151518Click image for larger version Name:	20180913_165858.jpg Views:	2 Size:	86.5 KB ID:	151519
                            If memory serves me correctly, I seem to recall that my first gen one had the same backwards decal so nothing has changed.
                            You can't go wrong with FoamTac. I use it on all kinds of foam.
                            Mine has been stuck in customs for 8 days now. :Angry:

                            Comment


                            • #15
                              And the answer is.....just use epoxy. I had a couple of loose rudder hinges. Re-did them with foam tac and now I have two rudders on order. Also melted a hole in each wingtip pod when installing my lights. Luckily, its on the back so I can patch it with some EPO foam and epoxy.

                              It will take a week for my rudders to get here. So I cut out the hinges, put in some EPO blocks with epoxy, and rehinged with the original style hinges. Now I just got to make them look pretty again.
                              Meridian Aeromodelers, Meridian MS

                              Comment


                              • #16
                                Yesterday I got the pitot installed, fixed all the parts that got MELTED by the foam tac, and installed the lights in the wingtip pods and rudder. Sensor suite all works well.

                                It all started with a loose lower hinge on both rudders. Added a little foam tac. It ate a 10mm hole in the foam on each. This was not readily apparent as the foam has a skin which hid the problem. Also, while the rudders were drying, I added a drop in the wing tip pods where the LED's are mounted. Again it ate the foam but not with any signs of a problem on the outside. When I noticed the rudders were looser than before, I found the issue. Then I pulled the LED's from the pods and found an even bigger area eaten away on each. The solution was to cut out blocks of foam and replace with more foam and epoxy. All is well now. moving on...
                                Attached Files
                                Meridian Aeromodelers, Meridian MS

                                Comment


                                • #17
                                  Wait! FoamTac melted the plane's foam? I've been using FoamTac for years and it's never melted any type of foam I've had come across my hobby table. Are you sure you were using this FoamTac?
                                  At Motion RC we carry the largest selection of electric and gas powered radio control (RC) planes, boats, buggies, cars, helicopters, tanks, trucks, and much more. We also offer a huge selection of lipo batteries, chargers, ESCs, gas engines, motors, radios, and servos. Shop our lowest prices with free shipping.


                                  Or were you using the glue that was included in the kit? That's not FoamTac.

                                  Comment


                                  • #18
                                    Here are some shots of howI ran the wires in the wing and the tools used. Trench is 5mm deep made by one pass with knife, then two passes with file. I put a strobe on the top hatch. I know it's not scale, but I did it. Also below is a shot of the airspeed sensor mounted in the nose wheel bay.

                                    Yes, I believe it is Foam Tac, purchased from MRC in the tubes. Epoxy works fine. The thing is, this foam has a hard skin. You won't see the damage until you inspect it or the part falls off. I all but ruined both vertical stabs and the wingtip pods. It's only due to perseverance, luck, and a handful of marginal modeling skills that I brought her back.

                                    And the glue in the kit is epoxy.
                                    Attached Files
                                    Meridian Aeromodelers, Meridian MS

                                    Comment


                                    • #19
                                      That IS FoamTac for sure. Very surprised it did that. Will have to watch out. Mine is still in customs, so I don't know what glue comes with it. Now, I know.

                                      Comment


                                      • #20
                                        Originally posted by xviper View Post
                                        That IS FoamTac for sure. Very surprised it did that. Will have to watch out. Mine is still in customs, so I don't know what glue comes with it. Now, I know.
                                        Foam-Tac is not EPS friendly...use Bob Smith Foam-Cure, great stuff.
                                        TiredIron Aviation
                                        Tired Iron Military Vehicles

                                        Comment

                                        Working...
                                        X