You must Sign-in or Register to post messages in the Hobby Squawk community
Registration is FREE and only takes a few moments

Register now

Announcement

Collapse
No announcement yet.

Official FlightLine F4U-1A Corsair 1600mm (63") Wingspan

Collapse
X
Collapse
First Prev Next Last
 
  • Filter
  • Time
  • Show
Clear All
new posts

  • Grossman56

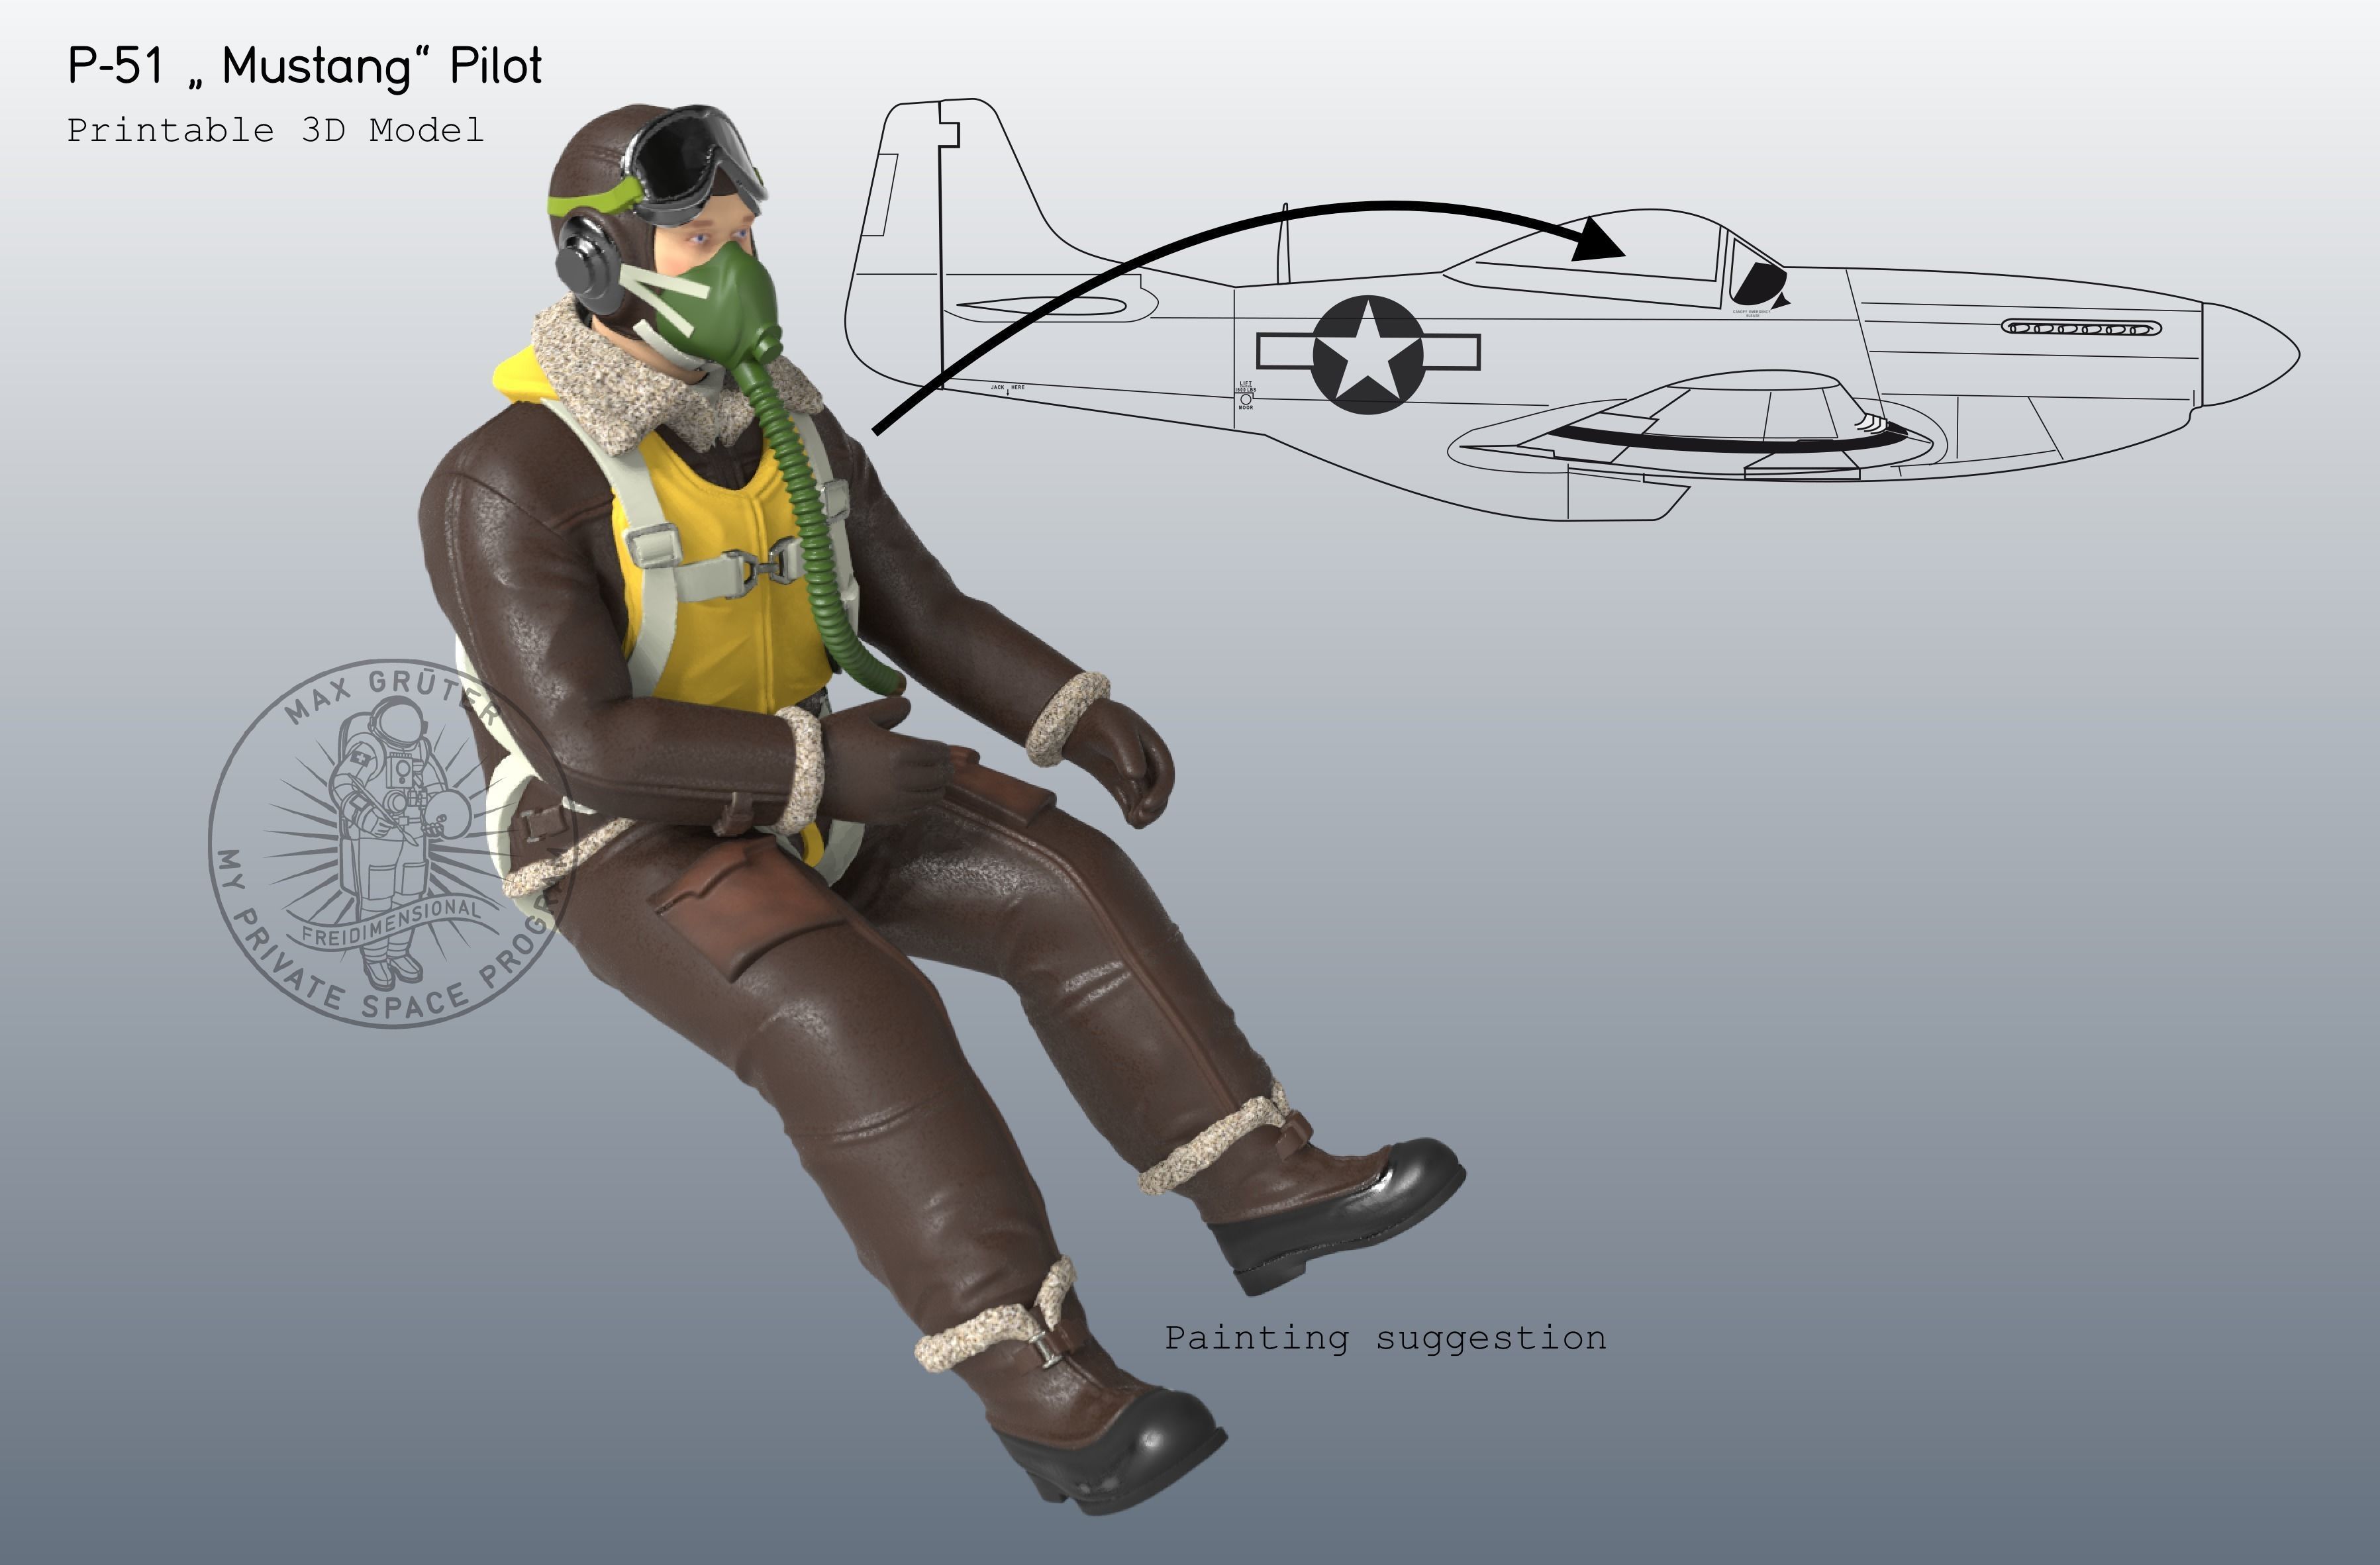
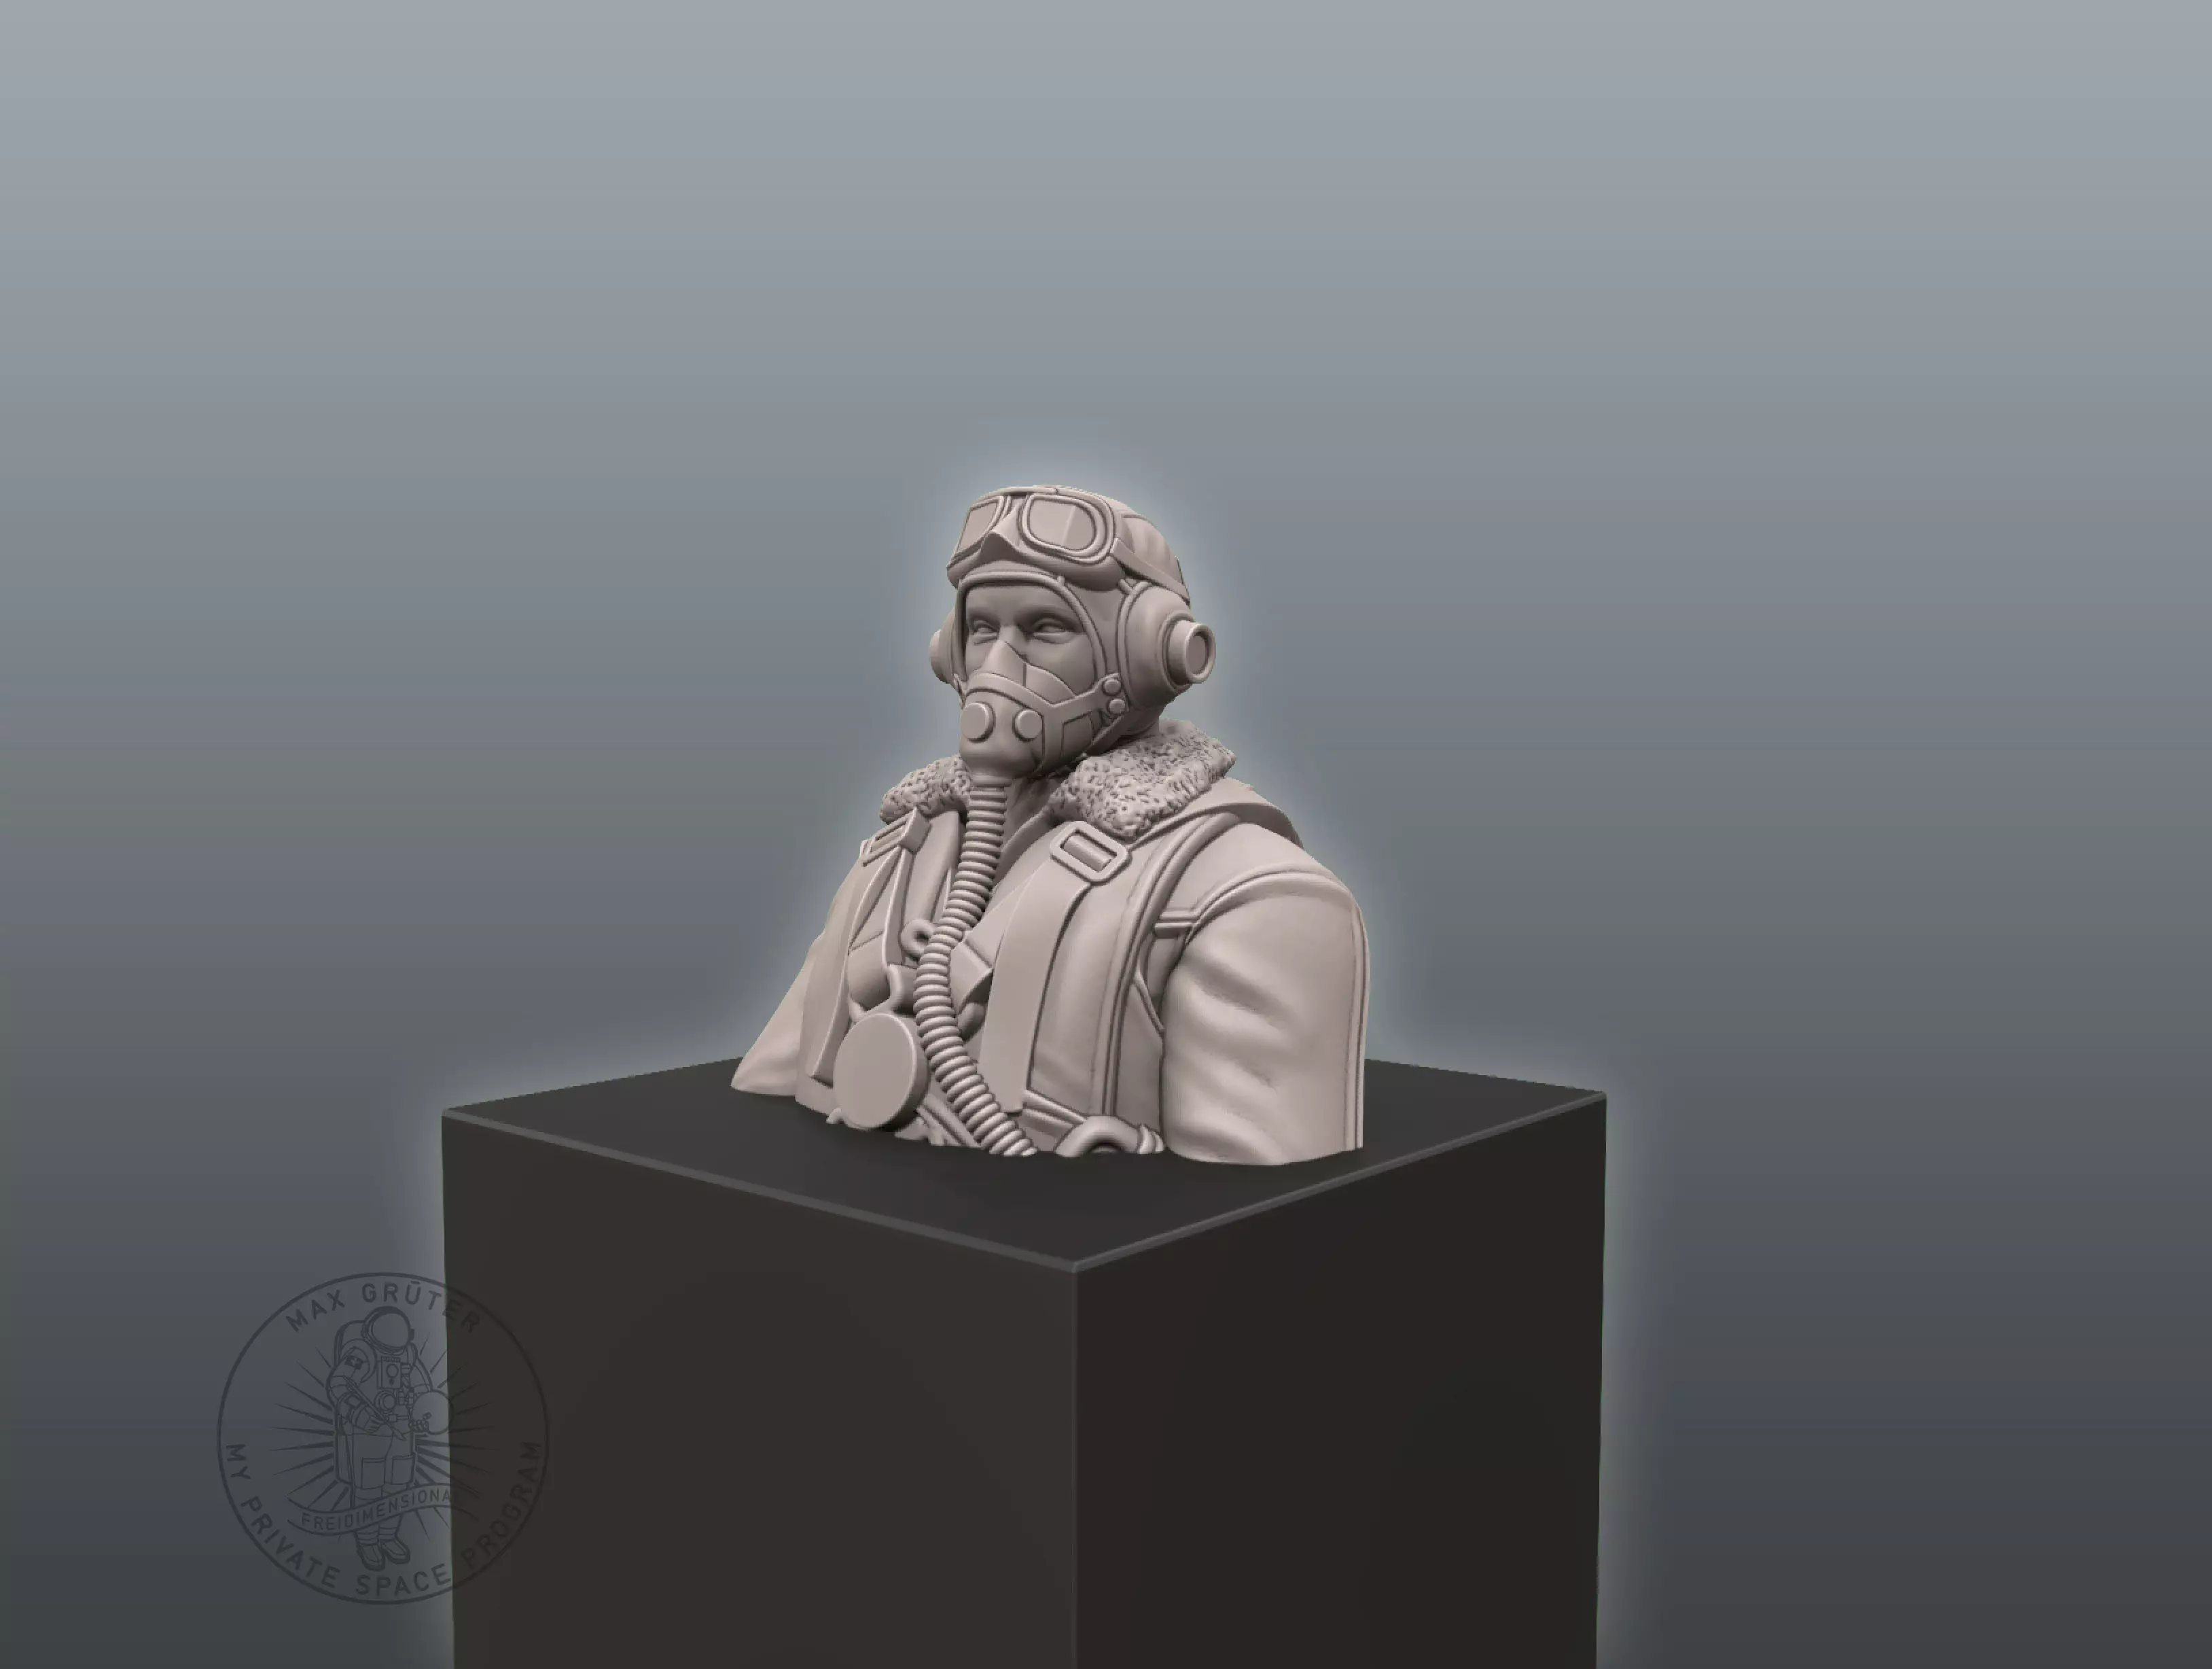
    2 more beautiful models b Max Greuter,

    The guy is genus.

    I had asked him about doing a commission for a Modern Navy Jet Pilot about 3 years ago and he wrote back that he is simply too busy with his real job.

    Geez, imagine that, in any event, we are/were fortunate to have him and his work available to us.

    Best, LB

    "I am having an extraordinary ordinary life."
    ~Lucky B*st*rd~

    "You just need the will to do what the other guy wouldn't."
    ~Keyser Soze~

    AMA#116446

    Comment


    • Originally posted by Grossman56 View Post
      Checked the Spitfire and it would require some floor surgery. For that, I leave it up to Elbee to guide us

      BTW, are you thinking of replacing the pilots in your Mustangs or P 47's!

      Model available for download in Stereolithography format. Visit CGTrader and browse more than 1 million 3D models, including 3D print and real-time assets


      or you could just go like this

      Model available for download in OBJ format. Visit CGTrader and browse more than 1 million 3D models, including 3D print and real-time assets


      Grossman56
      (Dangerous Dan)
      Hi Dan: I would like to put the P-51 pilot in my other airplanes, but I don't like the heavy leather clothing he is wearing. Planes like the P-47 and P-51 had adequate heating at altitude that even in wintern they are seldom wearing more than the minimum clothing. This looks like what a bomber pilot would wear. So, I would have to take a pass on this one if I needed a full body pilot. If it was more accurate clothing to what I want to see, I might pull the trigger on it, bot probably not this one right now.

      I'll look at my Spitfire to see how I would assess it. I haven't had the cockpit canopy off for years to take a close look in there. I'd like at least a bust of the Grueter RAF pilot, that would be cool.

      Davegee

      Comment


      • I did some digging through the spitfire thread to see what Elbee did way back when. Ended up using the AOI pilot and the Motion R/C 3D printed pieces, which they removed from the website for some reason. Now, if Elbee still has the files, maybe we can get him to forward them.
        I was thinking that the bust would be the easiest way to go, better looking pilot than the AOI. I've seen where guys have modified the fuse so that the door opens up. If I were to go the full pilot route, then making the door open would make sense, but then you have to have a sliding canopy. Easier just to do the bust mods and still visually pleasing with minimum cutting.
        BTW, Elbee's cockpit green is deadly and so is the strap connector!

        Grossman56
        (Dangerous Dan)
        Team Gross!

        Comment


        • Golly dang it warms my heart to see so many folks put their talent and time into this worthy model and aircraft. Good on all of you!
          My YouTube RC videos:
          https://www.youtube.com/@toddbreda

          Comment


          • Originally posted by Grossman56 View Post
            I did some digging through the spitfire thread to see what Elbee did way back when. Ended up using the AOI pilot and the Motion R/C 3D printed pieces, which they removed from the website for some reason. Now, if Elbee still has the files, maybe we can get him to forward them.
            I was thinking that the bust would be the easiest way to go, better looking pilot than the AOI. I've seen where guys have modified the fuse so that the door opens up. If I were to go the full pilot route, then making the door open would make sense, but then you have to have a sliding canopy. Easier just to do the bust mods and still visually pleasing with minimum cutting.
            BTW, Elbee's cockpit green is deadly and so is the strap connector!

            Grossman56
            (Dangerous Dan)
            I agree, Dan. My Spittie is now approaching 8 years old. A little "weather beaten" but looks like a fighter!. I'd like to do the cockpit mod and I'm all for using the Grueter bust for our pilots. They would look and fit the best, I think, once I get them in the proper scale to print, which shouldn't be a problem. If you want to order the Grueter files, I'll be happy to print up a pilot for you, and do one for me, too, while I'm about it. Once we have the files,we can print as many as we need for this or any future projects using RAF pilots. The pilot of mine, Witold "Lanny" Lanowski was a Polish pilot, a fearsome fighter, and eventually came over to the 56th FG to fly P-47s until the end of the war.

            Cheers

            Davegee

            Comment


            • You two are having too much fun. Great to see fixing up hanger birds. Make a fiberglass door and sliding canopy, come on guys What's the Problem? Experiment!

              Comment


              • Davegee,

                I spoke with the industrial arts teacher Sunday at our indoor fly. You need to send me a hub with inst. on what you need modified and the class will be happy to design a new hub. He said they would measure everything and add modifications. We would have the STL for future needs.

                Best Regards, Rex

                Comment


                • Originally posted by jetfool View Post
                  Davegee,

                  I spoke with the industrial arts teacher Sunday at our indoor fly. You need to send me a hub with inst. on what you need modified and the class will be happy to design a new hub. He said they would measure everything and add modifications. We would have the STL for future needs.

                  Best Regards, Rex
                  Sounds great, Rex! Can you PM me your mailing address? I'll send a complete hub, inner and outer parts, a Robart tire and instructions as to what the problem is. Should be an interesting project for the kids. If possible, once we have a solution, I'd like to have or buy the STL as I will probably have to print out several of these in the future, assuming we are able to address the problem with these wheels/tires combination. I'll report back to the kids the success or failure of this new design this spring, or whenever weather is good enough in these parts to do some testing of the hypothesis.

                  Thanks so much!

                  Davegee

                  Comment


                  • Picked up some paint and materials today and got at it again. Did the aging on the prop, it looks wicked!
                    Click image for larger version

Name:	20250113_124202.jpg
Views:	258
Size:	161.9 KB
ID:	418035
                    Started in on the motor upgrading (painting) as well.

                    Click image for larger version

Name:	20250113_130136.jpg
Views:	261
Size:	53.3 KB
ID:	418036
                    Have to dig up some wire and start on a harness as well. I'll use this pic to try and photo copy a rear set of cylinders.

                    BTW, I watched some vids on resin printers. HOLY CR*P!! it looks like something out of Star Trek where they create the Borg!
                    Just too bazaar!!

                    Grossman56
                    (Dangerous Dan)


                    Team Gross!

                    Comment


                    • Originally posted by Grossman56 View Post
                      Picked up some paint and materials today and got at it again. Did the aging on the prop, it looks wicked!
                      Click image for larger version  Name:	20250113_124202.jpg Views:	0 Size:	161.9 KB ID:	418035
                      Started in on the motor upgrading (painting) as well.

                      Click image for larger version  Name:	20250113_130136.jpg Views:	0 Size:	53.3 KB ID:	418036
                      Have to dig up some wire and start on a harness as well. I'll use this pic to try and photo copy a rear set of cylinders.

                      BTW, I watched some vids on resin printers. HOLY CR*P!! it looks like something out of Star Trek where they create the Borg!
                      Just too bazaar!!

                      Grossman56
                      (Dangerous Dan)

                      Danger,

                      Your detail work is simply great and quite realistic.

                      As for resin printers, don't over look the versatility of FDM Additive Manufacturing aka filament printers

                      Yes, Resin Prints are outstanding and the parts look top notch, but the material is inherently brittle, read, non-structural.

                      I could not have done the all of the mods to my Corsair with resin printed parts.

                      Detail parts, yes, such as the pilot's head and side panel skins, IP, but not the cowl flaps or sliding canopy parts, strut covers, etc.

                      Additionally, resin parts can be heavier if the parts have mass, like a pilot body.

                      There is realistic limit to thickness of the outer shell, typically 2mm, so depending the size, the weight penalties can be prohibitive.

                      There is place for both in this hobby, IMHO, and filament printing is cleaner and more cost-effective.

                      I did just receive a resin printer from Santa on Christmas morning and I am looking forward to printing some detail parts for my Desert Warrior B-25C.

                      I will post pictures when I get there, currently waiting on Amazon to deliver a new surge protector power strip (tomorrow).

                      Reviews will be welcome.

                      Best, LB
                      "I am having an extraordinary ordinary life."
                      ~Lucky B*st*rd~

                      "You just need the will to do what the other guy wouldn't."
                      ~Keyser Soze~

                      AMA#116446

                      Comment


                      • Thanks Elbee, just took your advice and downloaded the Prussa slicing program. Give me something to learn, keep the old geriatric brain functioning. As for the slicer, I was quite surprised at how reasonable the price was. Now to convince 'She who exceeds my rank' to think in the same vein
                        Meanwhile, I'm feeding Dave all the STL's. Just purchased to pilot bust for us and sent the file you forwarded to me for the Spitty cockpit. This sure has put new joy in modeling for me.
                        This might sound crazy, but is it possible to create an STL file for the wiring harness for the Corsair? Seems to my that would be on everyone's list.

                        Grossman56
                        (Dangerous Dan)
                        Team Gross!

                        Comment


                        • Originally posted by Grossman56 View Post
                          Picked up some paint and materials today and got at it again. Did the aging on the prop, it looks wicked!
                          Click image for larger version

Name:	20250113_124202.jpg
Views:	258
Size:	161.9 KB
ID:	418035
                          Started in on the motor upgrading (painting) as well.

                          Click image for larger version

Name:	20250113_130136.jpg
Views:	261
Size:	53.3 KB
ID:	418036
                          Have to dig up some wire and start on a harness as well. I'll use this pic to try and photo copy a rear set of cylinders.

                          BTW, I watched some vids on resin printers. HOLY CR*P!! it looks like something out of Star Trek where they create the Borg!
                          Just too bazaar!!

                          Grossman56
                          (Dangerous Dan)

                          Good work on that prop! It looks like something that was exposed to the elements in the Pacific Theater for a while!

                          Resin printing is a definite consideration for 3D printing. Elbee has one, and I have several friends who have them, too. I think I'll get one in time. You can get some extremely smooth prints for certain work. As Elbee said above, it has some drawbacks for modelers like brittleness and weight.

                          Cheers

                          Davegee

                          Comment


                          • Originally posted by Grossman56 View Post
                            ...This might sound crazy, but is it possible to create an STL file for the wiring harness for the Corsair? Seems to my that would be on everyone's list.Grossman56(Dangerous Dan)
                            DG,

                            I purchased STLs for a P&W 2800 engine, don't remember where, but I will look if you want.

                            In the 1:1 the way I understand the plug wiring is inside the ring and exits for each cylinder.

                            Point is I used bent aluminum wire and shrink tubing to simulate the wiring harness.

                            See pics.

                            Best, LB

                            Click image for larger version  Name:	IMG_0663.jpg Views:	0 Size:	112.3 KB ID:	418044 Click image for larger version  Name:	IMG_0672.jpg Views:	0 Size:	118.5 KB ID:	418045
                            "I am having an extraordinary ordinary life."
                            ~Lucky B*st*rd~

                            "You just need the will to do what the other guy wouldn't."
                            ~Keyser Soze~

                            AMA#116446

                            Comment


                            • Looks Great!
                              Did you photo copy the back cylinders or was that a 3D print as well?

                              At any rate, the result is very realistic.

                              Grossman56 (Dangerous Dan)
                              Team Gross!

                              Comment


                              • Grossman56

                                photocopying the back row is a stoke of genius, but no, I printed 3 separate parts: a thin back section, center section and front section.

                                Glued those together with thin CA.

                                I painted parts as needed for assembly and then added the plug wire detail.

                                The tricky part was cutting back the foam to accommodate the depth of the P&W Model.

                                I had to cut back the motor mount and design a stiffener to reinforce the mount to the foam.

                                This had to stay square to the world while not change the thrust angles built into the OEM design.

                                This might have been over-kill as they say, but for me, I was in uncharted lands and wanted all to be solid.

                                In the end, it all worked out and was worth the effort, I think.

                                Best, LB


                                "I am having an extraordinary ordinary life."
                                ~Lucky B*st*rd~

                                "You just need the will to do what the other guy wouldn't."
                                ~Keyser Soze~

                                AMA#116446

                                Comment


                                • I recall, the work you put in is almost as difficult as restoring the real thing!
                                  Dave came up with the idea of taking a picture adjusting it to size (which was very simple in Adobe Elements) and cocking the picture one cylinder over and gluing it in. Once in position, a bit of carving on the paper, which ends up looking like an inner tube, and there's your back row of cylinders.
                                  Reassembled the old girl to see how 'salty' she looked. A couple of palm trees in the back and she's good.
                                  Click image for larger version

Name:	20250113_152635.jpg
Views:	259
Size:	101.5 KB
ID:	418055 Click image for larger version

Name:	20250113_152647.jpg
Views:	239
Size:	109.9 KB
ID:	418056 Click image for larger version

Name:	20250113_152659.jpg
Views:	240
Size:	116.2 KB
ID:	418057

                                  My salty marine!

                                  Grossman56
                                  (Dangerous Dan)
                                  Team Gross!

                                  Comment


                                  • PWR2800Pix.zip


                                    Grossman56


                                    Some reference pix for your P&W R2800 painting.

                                    Best, LB
                                    "I am having an extraordinary ordinary life."
                                    ~Lucky B*st*rd~

                                    "You just need the will to do what the other guy wouldn't."
                                    ~Keyser Soze~

                                    AMA#116446

                                    Comment


                                    • Wow, looks fantastic.

                                      Comment


                                      • Originally posted by Elbee View Post
                                        Grossman56

                                        photocopying the back row is a stoke of genius, but no, I printed 3 separate parts: a thin back section, center section and front section.

                                        Glued those together with thin CA.

                                        I painted parts as needed for assembly and then added the plug wire detail.

                                        The tricky part was cutting back the foam to accommodate the depth of the P&W Model.

                                        I had to cut back the motor mount and design a stiffener to reinforce the mount to the foam.

                                        This had to stay square to the world while not change the thrust angles built into the OEM design.

                                        This might have been over-kill as they say, but for me, I was in uncharted lands and wanted all to be solid.

                                        In the end, it all worked out and was worth the effort, I think.

                                        Best, LB


                                        I have been using the technique of photo copying the OEM cylinders for many years and then cut to fit paper copies in the gaps to give the impression of cylinders behind and in between the front row of 9 cylinders. Regarding the wiring harness for this engine, there were several different types and colors of them around the crankcase, but in all instances, at each point where a sparkplug wire comes out of the harness, it is paired with another wire that goes over the top of the cylinder and attaches to the other sparkplug (made to look like that for these models) on the back of each cylinder head. Ends up being a lot of wires but it looks pretty cool, even for a foamie. That's just my take on how I do them. Ignition wires varied from black to silver to gold, and probably others, too. Here is what I did with my FMS P-47D Penrod and Sam. The Corsair, Hellcat, and P-47 all used the same R2800 P&W engine, so they are all pretty similar.

                                        Click image for larger version

Name:	IMG_1735.jpg
Views:	273
Size:	109.1 KB
ID:	418073 Click image for larger version

Name:	IMG_1733.jpg
Views:	263
Size:	117.7 KB
ID:	418074

                                        Comment


                                        • Davegee,

                                          That is what I will try to do when I get to detailing the engine. Yours look real.

                                          Best Regards, Rex

                                          Comment

                                          Working...
                                          X