It's a beautiful engine, no doubt, but I vote cowl on.
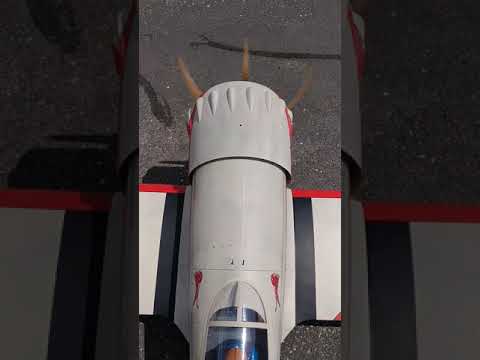
Meanwhile, I'd love a look under the hood to see battery/receiver/tank layout and know how you balanced the plane to offset the weight of that machine.
Since resolving the issue with installing the cowl, the next focus was getting the engine mounted. After exploring the various options(modify engine box or rebuild new engine box) and talking with Adrian at CH-Ignitions, the decision was made to modify the mounting plate on the UMS 5 75cc engine. The modification was successfully completed and the engine installed.
Can someone please check and share the distance from the front of the cowl to the cowl ring with the cowl installed? The cowl that came with my kit has what appears to be only one small dimple unlike the three as indicated in the manual. I wish to be certain this is the correct location for the mounting screws. See below picture.
With the cowl positioned as per the single small dimple, it would appear that I will need to move the engine forward about 1.5 inches for the prop to clear the front of the cowl. Has anyone modified their cowl any by cutting out a bit by the leading edge of the wings?
Such a cool plane! We all tend to forget the wonderful Golden Age airplanes, great to see they're being modeled!
Grossman56
I agree completely Gman! Most modes of transportation from that time period have that "looks like it's going fast sitting still" look. Trains, cars, boats, and planes all had that iconic streamline look.
Black Horse did a nice job producing the Wedell-Williams Model 44 in the Red Lion skin. So many models of this plane look clunky. This one is a pleasure to look at in the air and on the ground.
DaleD The cowl is a bit tricky. As I mentioned in post #31, it goes on much easier if the front edge of the cowl mount ring, is sanded slightly rounded vs square. Then put the cowl on at an angle starting with the top. Slide it well past the ring at the top and work it down carefully from there. The gap in the ring at the bottom will allow it to distort a bit and slide onto the ring.
That engine is going to look great inside the cowl.
I Happy to report that I FINALLY started the build on my Gilmore. My situation may have been just a tad different from yours. I ordered the kit from Motion RC and a UMS 5 75 from CH Ignitions, both were sent to my home in Florida. Arrangements were made for a friend to take the engine and other small bits and a courier to transport the kit to Kingston, Jamaica. Don’t ask why I didn’t ship directly to Jamaica, just know it’s all about cost avoidance.
Anyway, I’ve been busy building away since Friday evening. Must say thanks to all those who have built and shared their experience here. You’ve been of tremendous help.
Progress to date:-
Landing Gear(main and tail) and wheels installed
Ailerons, control horns, push rods and servos installed
Horizontal stabiliser, elevators, control horns, pushrods and servos installed
Rudder, control horn, push rod and servo installed.
So far I’ve come across two challenges:-
The cowl will not slip over the cowl ring. Did you guys experience the same issue? How was it addressed? I’m thinking to sand the ring until the cowl slides over.
The UMS 5 75 mounting template does not line up on the engine box without interfacing with the RHS lower tab. I’m thinking I may need to modify the engine box or build a new one.
Some of us have begun to see some splitting at the seam in the wheel pants. Luckily, my split had just begun for about 2" at the aft end of one wheel opening.
Unlike the typical butt joint fiberglass wheel pants, these have a slight overlap joint. While it's a good idea, it appears that the adhesive may not be up to the task.
To repair and prevent further cracking, the following method was used.
I took some 2" self-adhesive drywall mesh tape, cut about 6" lengths and cut those to 1" wide strips. This material was chosen because #1 it was on hand, and #2 because it is strong, light, and sticks by itself.
It was then stuck down over the entire seam area. Then some 30 minute epoxy was mixed and brushed on using disposable acid brushes. Should do the trick.
Mounting the Dualsky GA6000.9 motor, painting the false radial engine, and mounting the cowl is what's in this next episode of my 92" Black Horse Gilmore ARF from MotionRC. Enjoy!
"Pratt & Whitney supplied the powerplants, Wasp Jr. engines with 985 cubic inches of displacement. The factory beefed up and supercharged the engines with high-compression pistons and individual stacks for less back pressure. In 1932, the manufacturer rated them as follows: 525 horsepower at 2,200 revolutions per minute and 550 horsepower at 2,300 RPM when racing." - Wedell-Williams Air Service page 34
"The engine cowl for the Model 44s was a NACA-type provided by Hill Aircraft Streamliners. The full pressure cowl created a venturi effect at the trailing edge for the exhaust to exit the stacks. Turner's cowl tapered slightly more inward at the trailing edge than the other two. " - Wedell-Williams Air Service page 35
Did you mount the wheel pants and they didn't hold up? Or some other reason you're going commando?
The wheel pants cracked and split on my very first landing on paved runway. I took them off. In the process of repairing then to go back on. Just haven't gotten that far. It fly's a-ok without them 😉
Yes i've been getting out flying as much as possible! I love my Gilmore. It's actually on a trailer with some friends right now heading to a flyin that i'll be making my way to tomorrow if all goes well. That plane gets so much love from people at my club. It's just fantastic.
I had this same concern with the wing connections when I first got mine. I can say now after have 30+ flights on the Gilmore that the U connector from the wing and bolt tension system works just fine. I believe they could of had a better design, but I have not seen any problems with it to date.
WOW!!!!
30+ Flights means someone is enjoying their Gilmore.
I was wondering just this morning how things appear to have gone quiet and that it maybe an indication of more flying than building.
Please feel free to wet our appetites with pictures or flight videos.
I had this same concern with the wing connections when I first got mine. I can say now after have 30+ flights on the Gilmore that the U connector from the wing and bolt tension system works just fine. I believe they could of had a better design, but I have not seen any problems with it to date.
Leave a comment: