No, this and most electric planes have a built in BEC, battery elimination circuit that powers the receiver. A few don't trust their electronics and do a separate BEC or battery but it adds complexity.
The thing that threw me was not seeing a BEC lead to plug into the RX. The guys here helped me understand that the built-in BEC (built in to the ESC that is) powers the RX through the throttle lead that connects to the RX.
The separate pigtail off the battery lead/connector is a separate source for auxiliary stuff you might add. Note: Do not connect this pigtail to the RX.
No, this and most electric planes have a built in BEC, battery elimination circuit that powers the receiver. A few don't trust their electronics and do a separate BEC or battery but it adds complexity.
Thanks for the detailed reply! I may do something similar to what you did, start with a clean silver canvas as you did, but a with different scheme. Initially, I was hesitant to buy a brand new $600 plane then repaint it. I've done quite a bit of model painting, so I should be fine. I've used the blue tape and done very well with it. I have to say, doing your very own scheme is a lot of fun and when done right, quite rewarding.
You did an amazing job with the paint. I zoomed in, the edges all looks nice and clean. Question: Do you use blue painters' tape for the edges or something else? No issues with pull up the original paint? How many coats of the silver did you need to cover the green and black original paint?
Thank you very much!
I did use the blue painter's tape for this model. I've used frog tape and other types, but I keep coming back to the good ol' blue. Now, that's not to say it won't peel up paint or bleed. All tapes I've used over the years do that to one degree or another. There's hobby trim tape out there (like 12mm wide or something) that is probably the best non-bleed or peel, but I tend to run out and use the blue painter's tape. One technique I use is I always put the sticky side on my pants or shirt a couple times before applying. This helps with less paint pull. The good news, I don't recall any original stock paint pulling up. It was the white and black invasion stripes I painted that was problematic. A bit on the yellow I used for the nose but nothing major. The silver I used for the base did pretty good not peeling too, but even when it would peel a little, there was still enough silver on the coat that I didn't need to touch it up.
Speaking of, I almost always expect to do detail touch ups, especially after using multiple different paints like this one (silver, yellow, olive drab, white and black). To me, it's just part of the process. Luckily, painting new liveries on RC model aircraft is probably the one rare time I have patience, lol.
I use paper towels to mask off the large areas you don't want overspray. Always works great. Some use newspaper, but I've always used paper towels with great success.
Beautiful job with the repaint, Aros! When I finish my present Hairless Joe project, I'm clearing the tables to pick up one of these new P-51 models!!
Glad your flights are going well. Seems to be a pretty standard remark from others that this is a great new flying airplane!
Cheers
Davegee
Thanks Dave! Means a lot coming from you. Yes, she's definitely as advertised. Really a tremendous flyer and like some have said, even the landings make you look good!
finally got one to load I don’t know what the issue was
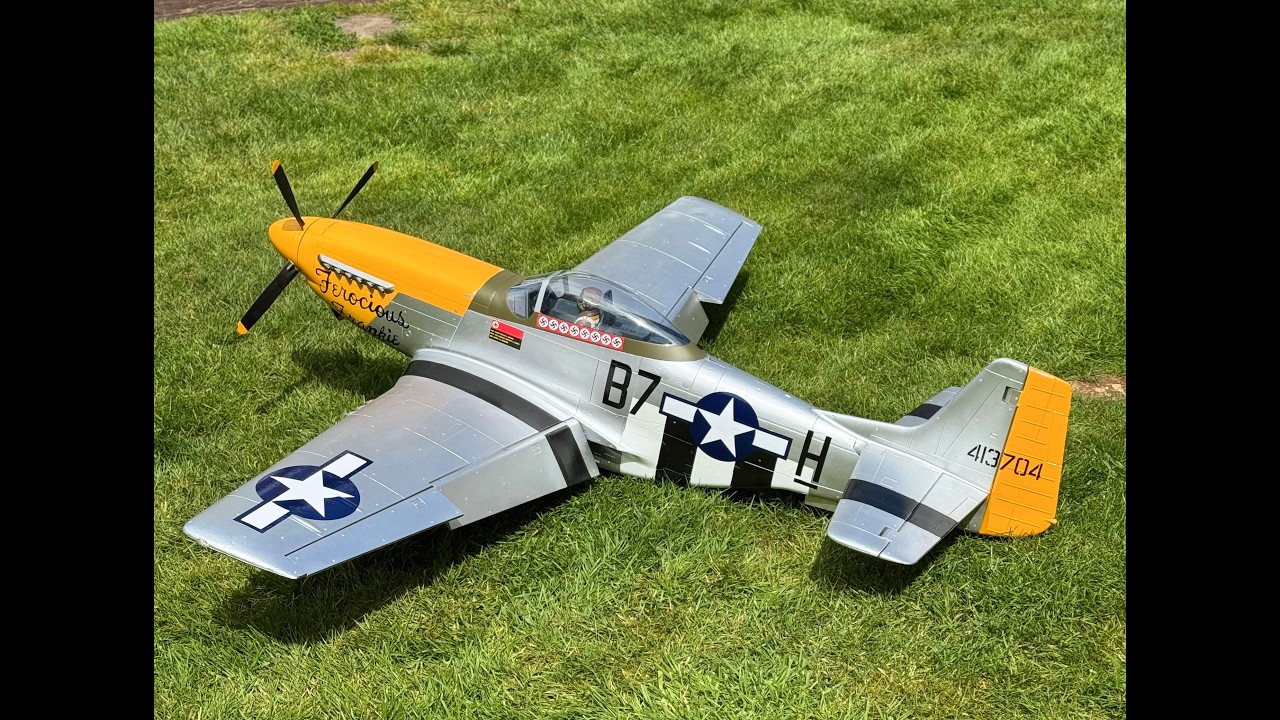
I added invasion stripes to the top of the wing and yellow to the tail. I was having some issues with it silhouetting at a distance in a high wing over. This helped tremendously and although I know it’s not correct to scale for Frenesi, I like it!
You did an amazing job with the paint. I zoomed in, the edges all looks nice and clean. Question: Do you use blue painters' tape for the edges or something else? No issues with pull up the original paint? How many coats of the silver did you need to cover the green and black original paint?
Took her out for her second sortie. This time I tried the grass field adjacent to the airport runway. Flew fantastic. Now that she's trimmed, just no bad habits to speak of. Flies great, lands great, looks great...What's not to love?
After the flight, Callie's decals were waiting for me in my mailbox so I made no short order of slappin' them on. I think she turned out great! I'm very pleased overall. Now that the trimming and jitters are out of the way, now I can really let loose with her moving forward. Apologize for the low quality video. My fiancé was filming on her phone which doesn't have the best video quality.
Beautiful job with the repaint, Aros! When I finish my present Hairless Joe project, I'm clearing the tables to pick up one of these new P-51 models!!
Glad your flights are going well. Seems to be a pretty standard remark from others that this is a great new flying airplane!
finally got one to load I don’t know what the issue was
I added invasion stripes to the top of the wing and yellow to the tail. I was having some issues with it silhouetting at a distance in a high wing over. This helped tremendously and although I know it’s not correct to scale for Frenesi, I like it!
Took her out for her second sortie. This time I tried the grass field adjacent to the airport runway. Flew fantastic. Now that she's trimmed, just no bad habits to speak of. Flies great, lands great, looks great...What's not to love?
After the flight, Callie's decals were waiting for me in my mailbox so I made no short order of slappin' them on. I think she turned out great! I'm very pleased overall. Now that the trimming and jitters are out of the way, now I can really let loose with her moving forward. Apologize for the low quality video. My fiancé was filming on her phone which doesn't have the best video quality.
Dan,
What radio did you end up with? I have always used Futaba but looking at the Spectrum 8e. Most of our members are using this now and I like a lot of the features. Still using my 7c Futaba after 14 yr and never a problem.
Best Regards, Rex
I bought a Spectrum NX 8+ which has 20 channels, great little radio and more channels than I'll ever use!
In the manual, page 54, top left is the atennae reference.






Leave a comment: