You must Sign-in or Register to post messages in the Hobby Squawk community
Registration is FREE and only takes a few moments

Register now

Announcement

Collapse
No announcement yet.

Official Freewing 70mm Twin Me 262 Thread

Collapse
X
Collapse
First Prev Next Last
 
  • Filter
  • Time
  • Show
Clear All
new posts

  • here is my cockpit makeover using the dynam canopy. thinks fit just right ( thought the pilot is smallish.... small he is though ) I think they put a huge pilot in to fill the oversized trainer canopy, the seat I don't get either. All in all she is a really beautiful and well built plane, the canopy fix seemed to be low hanging fruit to me as a MFG fix
    rc flyin addict

    Comment


    • Well Freewing makes some good stuff. They capture the overall look and feel pretty good. They fly great.

      I really think the Freewing 262 is a great model.
      Meridian Aeromodelers, Meridian MS

      Comment


      • Originally posted by mr.frankenjet View Post
        here is my cockpit makeover using the dynam canopy. thinks fit just right ( thought the pilot is smallish.... small he is though ) I think they put a huge pilot in to fill the oversized trainer canopy, the seat I don't get either. All in all she is a really beautiful and well built plane, the canopy fix seemed to be low hanging fruit to me as a MFG fix
        Really nice job, like it I do, yessss! Which Dynam canopy did you use, and did you make the interior from scratch or did you get that from a different model?
        Marc flies FW & FL: AL37, MiG-29, T45,F4, A4, A10, F104 70 and 90, P38, Dauntless SBD, Corsair, B17, B24, B26 & P61, Lipp.P19, ME262, Komets, Vampire, SeaVixen, FMS Tigercat, FOX Glider & Radian XL.

        Rabid Models foamies, including my 8' B17 & 9' B36... and my Mud Ducks! www.rabidmodels.com

        Comment


        • Originally posted by themudduck View Post

          Really nice job, like it I do, yessss! Which Dynam canopy did you use, and did you make the interior from scratch or did you get that from a different model?
          Thanks, I was really happy with the results, the dynam canopy here

          At Motion RC we carry the largest selection of electric and gas powered radio control (RC) planes, boats, buggies, cars, helicopters, tanks, trucks, and much more. We also offer a huge selection of lipo batteries, chargers, ESCs, gas engines, motors, radios, and servos. Shop our lowest prices with free shipping.


          It has no "skirt" so you have to make a turtle back deck and canopy surround. It was allot of work, not sure I would do it again but if you like to mess with this kind of thing it's fun. The interior is mostly there, I pulled the pieces out and painted them. Added wires and gauge backs to the dash, a floor and fabricated the seat, coffee straws for the rear "rails". I used allot of the thermoform plastic for the surround , I think if I where to do it again I'd likely use all balsa because it was easier to shape and fill. hard to cut her up but once I got started there was no turning back :o)


          Attached Files
          rc flyin addict

          Comment


          • OK, well that's some real modeling there! You did such a good job that at first I was thinking you had used aftermarket parts, I didn't realize that most of that was fashioned "from scratch" by you. I know how much time that can take! It sure turned out nice.
            Marc flies FW & FL: AL37, MiG-29, T45,F4, A4, A10, F104 70 and 90, P38, Dauntless SBD, Corsair, B17, B24, B26 & P61, Lipp.P19, ME262, Komets, Vampire, SeaVixen, FMS Tigercat, FOX Glider & Radian XL.

            Rabid Models foamies, including my 8' B17 & 9' B36... and my Mud Ducks! www.rabidmodels.com

            Comment


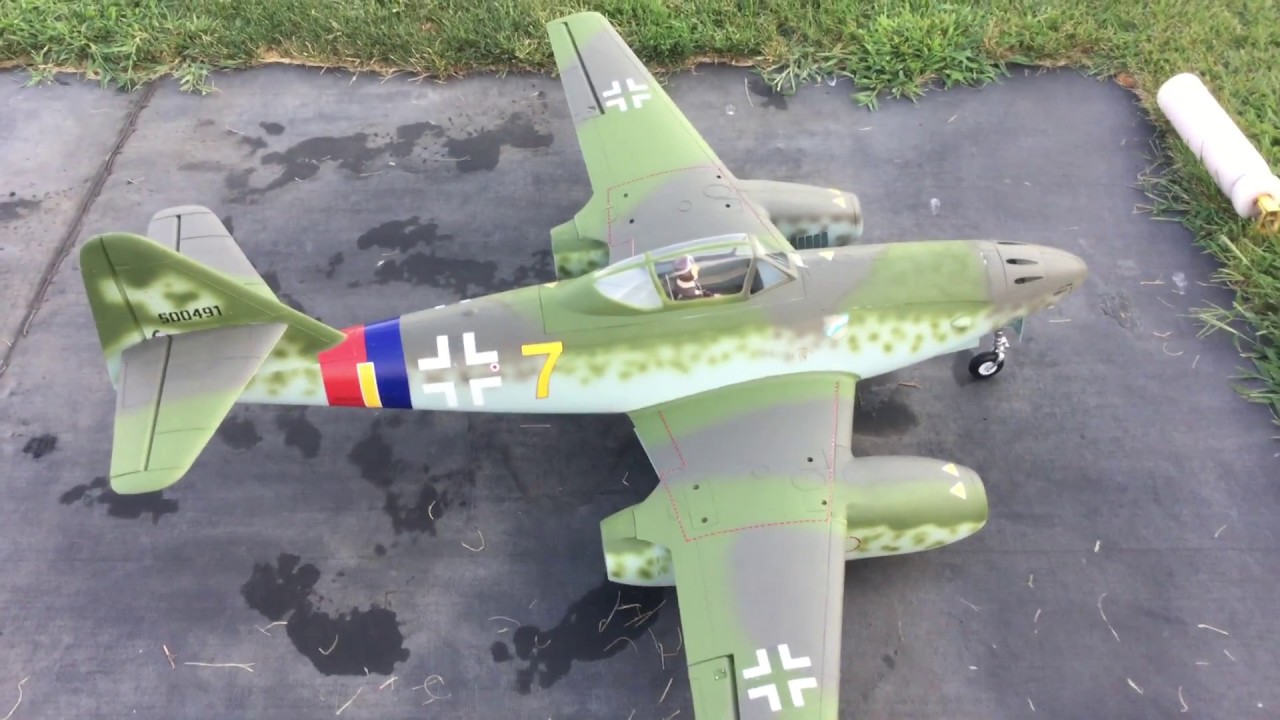
            • TKS, I waited so long for this plane and someone posted a similar mod I just had to do it, such a beautiful airframe.
              I did recently reach out to Keith at parkflyerplastics to see if he would make one but sounds like demand might be too low for him to take it on. Maybe if he gets allot of calls for it, it would make for an EZ redo if the thermoformed canopy was available. Looking forward to some better weather, hopefully fall will bring better conditions.
              rc flyin addict

              Comment


              • Mine is ready to maiden tomorrow, there were no control throw recommendations in the manual. What are you guys using?

                Comment


                • Brandon Moon posted these, it's what I started with. Limit ele on this one, too much ele and bad thinks can happen. Good luck and happy landings
                  Here is a good point to start with...I recommend using low rates first. Here are your awaited and requested "Nuclear Launch Codes"

                  The throws for the surfaces:
                  Ailerons - H: 7/8" L: 5/8" as measured at the ROOT of the aileron (inboard edge) 30% expo on both rates.
                  Elevator - H: 3/4" L: 1/2" as measured at the fin 30% expo on both rates.
                  Rudder - H: 1" L: 3/4" - 30% expo on both rates (or No expo if desired?)
                  rc flyin addict

                  Comment


                  • I checked my rates that I guessed at against Brandon’s numbers and it was almost a perfect match. :)

                    Comment


                    • Did anyone glue their wings halves together? I haven’t yet, trying to decide if I want too or not.

                      Comment


                      • Originally posted by dkalwishky View Post
                        Mine is ready to maiden tomorrow, there were no control throw recommendations in the manual. What are you guys using?
                        Did yours have the warped wings where the flaps don't close flush with the TE? I'm still undecided about this one as I've already got a couple other planes with split flaps that don't close nicely. Always wanted one but the Dynam offering just didn't look like a quality product. This one looked to be a better product but ................. that post about the nose snapping off when landing on grass is also a little concerning.

                        Comment


                        • Originally posted by xviper View Post
                          Did yours have the warped wings where the flaps don't close flush with the TE? I'm still undecided about this one as I've already got a couple other planes with split flaps that don't close nicely. Always wanted one but the Dynam offering just didn't look like a quality product. This one looked to be a better product but ................. that post about the nose snapping off when landing on grass is also a little concerning.
                          I think the Freewing 262 looks a LOT better than the Dynam product. And this new one is even better with the new camo and motors.
                          Mine's due to arrive today so I will post what the wing looks like.... the older one's flaps fit perfectly.

                          When I flew the older one the first time two years ago, the nose broke off on my first landing. (partially because the model was nose heavy) It was a clean break in the foam which was easy to fix. After I installed CF in the nose on each side, the repaired model was fine for dozens of flights. When I put the new one together I'll post a few pictures. I don't remember exactly where I put the rods.
                          Marc flies FW & FL: AL37, MiG-29, T45,F4, A4, A10, F104 70 and 90, P38, Dauntless SBD, Corsair, B17, B24, B26 & P61, Lipp.P19, ME262, Komets, Vampire, SeaVixen, FMS Tigercat, FOX Glider & Radian XL.

                          Rabid Models foamies, including my 8' B17 & 9' B36... and my Mud Ducks! www.rabidmodels.com

                          Comment


                          • Originally posted by xviper View Post
                            Did yours have the warped wings where the flaps don't close flush with the TE? I'm still undecided about this one as I've already got a couple other planes with split flaps that don't close nicely. Always wanted one but the Dynam offering just didn't look like a quality product. This one looked to be a better product but ................. that post about the nose snapping off when landing on grass is also a little concerning.
                            One of the inboard flaps had a small warp to it. 30 seconds of massaging it with my fingers fixed it and they all close tightly.

                            Comment


                            • Originally posted by themudduck View Post
                              After I installed CF in the nose on each side, the repaired model was fine for dozens of flights. When I put the new one together I'll post a few pictures. I don't remember exactly where I put the rods.
                              Please do, I'd like to add CF rods to mine.

                              Comment


                              • Originally posted by dkalwishky View Post

                                One of the inboard flaps had a small warp to it. 30 seconds of massaging it with my fingers fixed it and they all close tightly.
                                Good to know. I think I'll pull the pin on this one and just add braces to the nose section.

                                Comment


                                • Man this plane is well done, the new paint scheme looks great and there's nothing like the way FW packages their planes!
                                  Here's a pic of the left wing on mine, right out of the box.


                                  Yes you can see that there is a mild warp on the TE. Its not bad (unless you take a real close-up look from this angle, which makes it look as bad as possible!) and most of it is the flap. I am sure with a little massaging it will be pretty simple to gently bend it into shape like dkalwishky mentioned.

                                  Or perhaps this winter I'll cut the flaps out and make them "full" flaps instead of split flaps. We'll see.

                                  Click image for larger version  Name:	wing.jpg Views:	1 Size:	76.7 KB ID:	145655
                                  Marc flies FW & FL: AL37, MiG-29, T45,F4, A4, A10, F104 70 and 90, P38, Dauntless SBD, Corsair, B17, B24, B26 & P61, Lipp.P19, ME262, Komets, Vampire, SeaVixen, FMS Tigercat, FOX Glider & Radian XL.

                                  Rabid Models foamies, including my 8' B17 & 9' B36... and my Mud Ducks! www.rabidmodels.com

                                  Comment


                                  • Oh yeah that looks very very goood!

                                    Comment


                                    • Originally posted by themudduck View Post
                                      Man this plane is well done, the new paint scheme looks great and there's nothing like the way FW packages their planes!
                                      Here's a pic of the left wing on mine, right out of the box.


                                      Yes you can see that there is a mild warp on the TE. Its not bad (unless you take a real close-up look from this angle, which makes it look as bad as possible!) and most of it is the flap. I am sure with a little massaging it will be pretty simple to gently bend it into shape like dkalwishky mentioned.

                                      Or perhaps this winter I'll cut the flaps out and make them "full" flaps instead of split flaps. We'll see.

                                      Click image for larger version Name:	wing.jpg Views:	1 Size:	76.7 KB ID:	145655
                                      That isn't bad at all, looks about like mine was and it flies nice and straight, I'm sure yours will to.

                                      Comment


                                      • This is the new paint scheme on the Freewing ME-262 and tonight was the maiden flight.

                                        Two things I didn't care for with this plane are the way the servo cables come from the wing to the fuselage where the receiver is and the screws that are used to hold the fuse to the wing, they are self taping screws and not bolts. Hopefully assembling and disassembling the plane over time won't strip the screws mounts.

                                        I am using a cable bundle with MPX connectors so I only have one cable to plug in between the wings and fuselage, this allows me to deal with one cable instead of four and will make assembly / disassembly much easier. I'm using the same setup on the 1600mm Spitfire and it works really well.

                                        When I assembled the plane tonight the gear was up, once together I dropped it, the nose gear came down but the mains did not. I retracted the gear and dropped it and then all three came down so I didn't think much of it.

                                        I'm using the new style Admiral 6S 5000mAh battery all the way forward. The takeoff was smooth and quick, the plane flew really well with the books low rates, minimal trim was needed although I think I was nose heavy as when I went inverted it took almost full down elevator to keep the nose level. I also noticed in turns that I needed a bit more up elevator than I think should have been needed which further leads me to believe the plane is on the nose heavy side. Rolls and turns were nice and smooth, this is a really nice flying plane..

                                        During one of the passes I noticed that the mains did not retract, I tried cycling them a couple of times but to no avail. Once on the ground I tried them and the mains would to budge. I'll get the plane on the work bench and check it out to see what's going on. They worked up and down several times a few days ago when I got the plane first assembled.

                                        Landing was really easy with this plane, there were no surprises but I felt as if I didn't have enough elevator for landing so I kept the speed up and elected to land in the grass since it would help slow the plane down once on the ground. The video blurred out while on final then corrected itself once I was down.

                                        This is a solid flying plane and I cannot wait to get more flights on this over the next week. I remember a flight video where Pilot Ryan said he started with the battery all the way forward but then ended up moving the battery back 1/2" so that's what I'm going to do next time.
                                         

                                        Comment


                                        • Originally posted by dkalwishky View Post
                                          I'm using the new style Admiral 6S 5000mAh battery all the way forward.

                                          I think I was nose heavy as when I went inverted it took almost full down elevator to keep the nose level. I also noticed in turns that I needed a bit more up elevator than I think should have been needed which further leads me to believe the plane is on the nose heavy side.

                                          I remember a flight video where Pilot Ryan said he started with the battery all the way forward but then ended up moving the battery back 1/2" so that's what I'm going to do next time.
                                          These observations leads me to take note of something that has me scratching my head a bit. On the RC Castle site, they are selling the V.1 of this plane and by all counts, the only difference between it and the V.2 is the paint scheme. The V.1's posted recommended battery is a 6s, 3700mah. Yet, the V.2's posted recommended battery is a 6s, 5000mah. If nothing else on the plane has changed, then one would deduce that the placement of the bigger battery should be somewhat aft of where the smaller battery would go. Even at 1/2" back from the "all the way forward" position, this still seems like it's too far forward. Could it be that the recommended CG is wrong?

                                          Comment

                                          Working...
                                          X