Callie Graphics

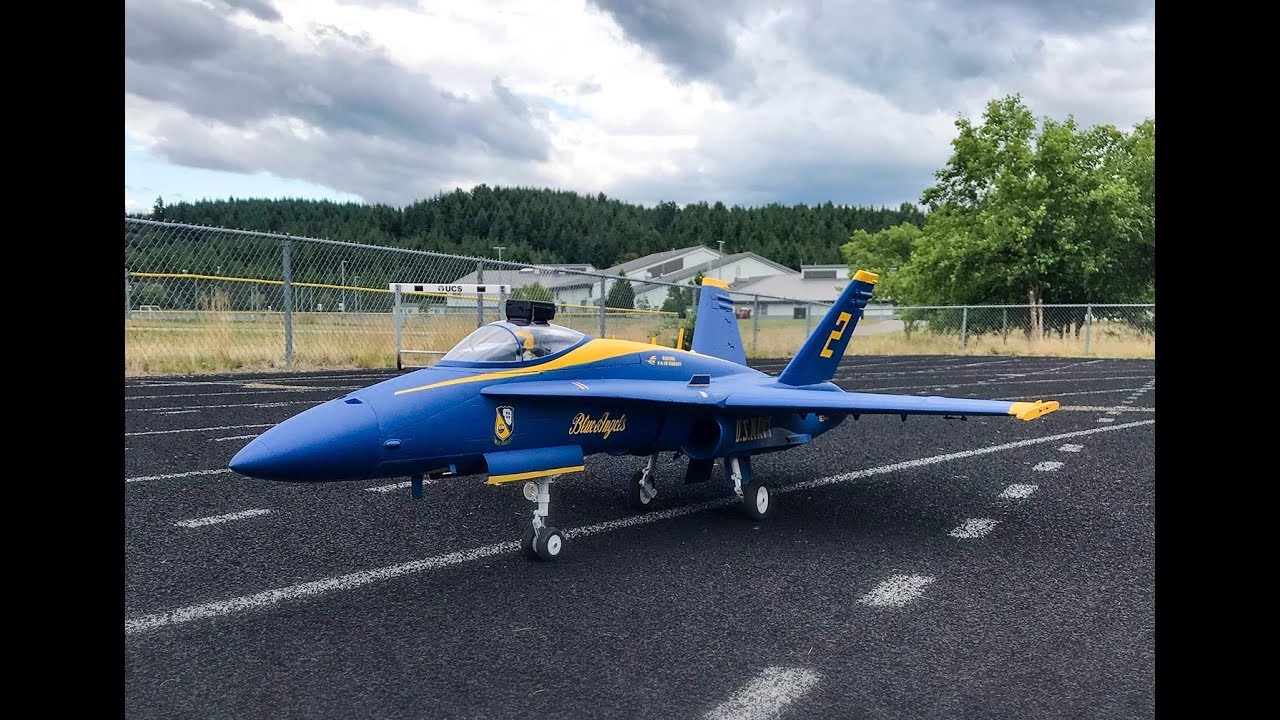
Official Freewing F/A-18C Hornet 90mm EDF Thread

Collapse
X
Collapse
First Prev Next Last
 
  • Time
  • Show
Clear All
new posts
  • Carlbrainiac
    Member

    • May 2019
    • 242
    • Send PM

    #2261
    Quick question for those who have already done the jolly Roger's scheme. Where are there some decent photos of the scheme to get correct placement of decals. Also the black anti glare around the cock pit and down the nose. In terms of how far the point goes to the rear this seems to vary from almost stopping behind the canopy to some points finishing as far back as the vertical stabilizers. Anyone know the official position this should be. Ideally if someone with the scheme all done to correct geeky level could just post a shot of the top of the plane that would be ace. Still a while before my grey pnp arrives but wanna get it right when it eventually arrives.

    Also got my F16 Pylon & ordinance set ordered now that I got an email to say they're back in stock ready to be shipped with the model when it arrives. To be as correct as possible what parts of the F16 kit should I use and which parts should I discard.?

    Comment

    • Aros
      Lead Adminstrator / Warbirdaholic

      • May 2013
      • 8205
      • Astoria, OR
      • Send PM

      #2262
      Guys, be sure you don't miss the Technical Service Bulletin (TSB) we stickied to the top of the Military Jets forum. You can find the thread here.
      My YouTube RC videos:
      https://www.youtube.com/@toddbreda

      Comment

      • Racer686
        Member

        • Jan 2016
        • 31
        • Send PM

        #2263
        Well, Part one is complete. The custom paint job with Callie Graphics. First let me say that this was my first paint job ever and had never touched an airbrush. I decided to go with the CF-18 Canada 150 Demonstration scheme. In 2017, Canada turned 150 yrs old and I was lucky enough to see this livery at 2 different Airshows that summer and it really grabbed me.

        I sealed the jet with Eze-Kote, then airbrushed the complete jet with Tamiya acrylics, painstakingly applied the graphics (not one single stitch of paint stripped in the process) . Many of these graphics are so thin and easily deformable while others like the large red leaf spanning the fuse and wings gave me an ulcer just thinking about applying. Finally, I covered it all with Eze-Kote again.

        I have installed a Jet Fan 90mm with HET 1680 motor that runs 8s. I replaced the Elevator servos with Hitec HS 5085MGs, Blue box is only running the gear and lights, with all other surfaces direct to the receiver.

        Part two is hooking up all the surfaces and dialing them in.

        P.S. A real loud shout out to Callie for her graphics. They are amazing and even a noob like myself can make them shine as they should.
        ​ ​ ​ Click image for larger version

Name:	IMG_0200.jpeg
Views:	1246
Size:	117.6 KB
ID:	206695Click image for larger version

Name:	IMG_0203.jpeg
Views:	1242
Size:	92.4 KB
ID:	206696Click image for larger version

Name:	IMG_0210.jpeg
Views:	1248
Size:	115.3 KB
ID:	206697Click image for larger version

Name:	IMG_0206.jpeg
Views:	1241
Size:	79.1 KB
ID:	206698Click image for larger version

Name:	IMG_0205.jpeg
Views:	1213
Size:	110.0 KB
ID:	206699Click image for larger version

Name:	IMG_0201.jpeg
Views:	1218
Size:	124.6 KB
ID:	206700Click image for larger version

Name:	IMG_0202.jpeg
Views:	1187
Size:	103.8 KB
ID:	206701Click image for larger version

Name:	IMG_0207.jpeg
Views:	1261
Size:	129.2 KB
ID:	206702Click image for larger version

Name:	IMG_0208.jpeg
Views:	1236
Size:	136.9 KB
ID:	206703Click image for larger version

Name:	IMG_0209.jpeg
Views:	1202
Size:	131.8 KB
ID:	206704Click image for larger version

Name:	IMG_0204.jpeg
Views:	1233
Size:	66.1 KB
ID:	206705 ​ ​ ​ ​ ​ ​ ​ ​
        Last edited by Racer686; Jul 18, 2019, 07:58 PM. Reason: Try to get photos to show

        Comment

        • Aros
          Lead Adminstrator / Warbirdaholic

          • May 2013
          • 8205
          • Astoria, OR
          • Send PM

          #2264
          Broken links for the images my friend...
          My YouTube RC videos:
          https://www.youtube.com/@toddbreda

          Comment

          • tengarang
            Banned

            • Apr 2016
            • 382
            • Yay Area, California, USA
            • Send PM

            #2265
            Originally posted by janmb

            I agree that this would be an ideal setup, but it does require both BECs to deliver more or less the exact same voltage. Otherwise, once the capacitor is filled (which under normal circumstances it will be), you will be back to square one in terms of current creeping from one BEC to the other (which needless to say is bad)
            that 3000uf cap will charge up with in a few sub milli seconds upon connection about the resistive/capacitive path.

            the output voltages of both BEC's could be verified with a multimeter beforehand, if in doubt (actually not a bad idea) and normally around 5V, to the RX no matter what load is the output shouldn't change. the castle creations cc 10A bec output can be programmed via usb programmer and some other brands come with 5V, 5.5V or 6V jumpers just make sure both are matching.

            There is also another method, one can build a diode OR circuit and essentially eliminate the very unlikely possibility of current leakage issues from one bec to another.

            Comment

            • janmb
              Slow and low

              • Jan 2018
              • 729
              • Send PM

              #2266
              Originally posted by tengarang

              that 3000uf cap will charge up with in a few sub milli seconds upon connection about the resistive/capacitive path.

              the output voltages of both BEC's could be verified with a multimeter beforehand, if in doubt (actually not a bad idea) and normally around 5V, to the RX no matter what load is the output shouldn't change. the castle creations cc 10A bec output can be programmed via usb programmer and some other brands come with 5V, 5.5V or 6V jumpers just make sure both are matching.

              There is also another method, one can build a diode OR circuit and essentially eliminate the very unlikely possibility of current leakage issues from one bec to another.
              Yes, a diode would be safer.

              My point is simply that people cannot assume two BECs delivering the same voltage. And a capacitor doesn't negate that problem.

              Personally I do use programmed BECs, but even so I would not trust them to be equal enough for there not to be any unwanted current at all.

              If you want a redundant power supply, there are far better ways of going about that, such as a balancing BEC, a PowerBox, or an Emcotec DPSI (or any of the other 10 or so suitable gadgets specifically designed for that purpose)
              Freewing A-10 turbine conversion: http://fb.me/FreewingA10TurbineConversion

              Comment

              • Racer686
                Member

                • Jan 2016
                • 31
                • Send PM

                #2267
                Originally posted by Aros
                Broken links for the images my friend...
                Still? Cuz I see them in the post now.

                Comment

                • janmb
                  Slow and low

                  • Jan 2018
                  • 729
                  • Send PM

                  #2268
                  Originally posted by Racer686

                  Still? Cuz I see them in the post now.
                  Yeah, still broken links here.

                  They work fine over on RCG though.
                  Freewing A-10 turbine conversion: http://fb.me/FreewingA10TurbineConversion

                  Comment

                  • Aros
                    Lead Adminstrator / Warbirdaholic

                    • May 2013
                    • 8205
                    • Astoria, OR
                    • Send PM

                    #2269
                    Yep still.
                    My YouTube RC videos:
                    https://www.youtube.com/@toddbreda

                    Comment

                    • Racer686
                      Member

                      • Jan 2016
                      • 31
                      • Send PM

                      #2270
                      Originally posted by Aros
                      Yep still.
                      I tried a second time. Do you upload attachments, then pick the size-thumbnail,small, med, large etc to get them to show?

                      Sorry guys, i"ve never shared any pix on Hobbysquawk before.

                      P.S. I see the pix when I scroll through the posts on the page AND I also see dead people!

                      Comment

                      • Aros
                        Lead Adminstrator / Warbirdaholic

                        • May 2013
                        • 8205
                        • Astoria, OR
                        • Send PM

                        #2271
                        Can see them now...Looks good! Nicely done!

                        Took mine out tonight before the next round of rain came in. Flight was decent but the landing stunk. Bit of a cross but not too bad. The problem was the unmowed, unmaintained grass...Coupled with a badly placed divet and it spun around pretty violently. Broke the nose gear trailing strut (just that plastic brace piece, thankfully not the nose strut/gear itself) and snapped one of the pylons. Other than that she survived unscathed. I guess I am not aloud to have a model pristine for more than two minutes.


                        Here's the video...

                        My YouTube RC videos:
                        https://www.youtube.com/@toddbreda

                        Comment

                        • tengarang
                          Banned

                          • Apr 2016
                          • 382
                          • Yay Area, California, USA
                          • Send PM

                          #2272
                          Originally posted by janmb

                          Yes, a diode would be safer.

                          My point is simply that people cannot assume two BECs delivering the same voltage. And a capacitor doesn't negate that problem.

                          Personally I do use programmed BECs, but even so I would not trust them to be equal enough for there not to be any unwanted current at all.

                          If you want a redundant power supply, there are far better ways of going about that, such as a balancing BEC, a PowerBox, or an Emcotec DPSI (or any of the other 10 or so suitable gadgets specifically designed for that purpose)
                          Far better ways are available, depending on how far one wants to go. There is only so much bang for the buck of the desired scope one wishes to reach, in this case, we are simply talking about two buck regulators. add a cap and your good with two working/matching buck regulators.... done, and at virtually no risk for the count. This way real estate and weight aren't really additional factors in its own simplicity. even a diode OR circuit in my opinion is overkill

                          Comment

                          • RanGee
                            Ducted FUN!

                            • Aug 2017
                            • 64
                            • Send PM

                            #2273
                            Originally posted by Racer686
                            Well, Part one is complete. The custom paint job with Callie Graphics. First let me say that this was my first paint job ever and had never touched an airbrush. I decided to go with the CF-18 Canada 150 Demonstration scheme. In 2017, Canada turned 150 yrs old and I was lucky enough to see this livery at 2 different Airshows that summer and it really grabbed me.

                            I sealed the jet with Eze-Kote, then airbrushed the complete jet with Tamiya acrylics, painstakingly applied the graphics (not one single stitch of paint stripped in the process) . Many of these graphics are so thin and easily deformable while others like the large red leaf spanning the fuse and wings gave me an ulcer just thinking about applying. Finally, I covered it all with Eze-Kote again.

                            I have installed a Jet Fan 90mm with HET 1680 motor that runs 8s. I replaced the Elevator servos with Hitec HS 5085MGs, Blue box is only running the gear and lights, with all other surfaces direct to the receiver.

                            Part two is hooking up all the surfaces and dialing them in.

                            P.S. A real loud shout out to Callie for her graphics. They are amazing and even a noob like myself can make them shine as they should.
                            ​ ​ ​ Click image for larger version

Name:	IMG_0200.jpeg
Views:	1246
Size:	117.6 KB
ID:	206695Click image for larger version

Name:	IMG_0203.jpeg
Views:	1242
Size:	92.4 KB
ID:	206696Click image for larger version

Name:	IMG_0210.jpeg
Views:	1248
Size:	115.3 KB
ID:	206697Click image for larger version

Name:	IMG_0206.jpeg
Views:	1241
Size:	79.1 KB
ID:	206698Click image for larger version

Name:	IMG_0205.jpeg
Views:	1213
Size:	110.0 KB
ID:	206699Click image for larger version

Name:	IMG_0201.jpeg
Views:	1218
Size:	124.6 KB
ID:	206700Click image for larger version

Name:	IMG_0202.jpeg
Views:	1187
Size:	103.8 KB
ID:	206701Click image for larger version

Name:	IMG_0207.jpeg
Views:	1261
Size:	129.2 KB
ID:	206702Click image for larger version

Name:	IMG_0208.jpeg
Views:	1236
Size:	136.9 KB
ID:	206703Click image for larger version

Name:	IMG_0209.jpeg
Views:	1202
Size:	131.8 KB
ID:	206704Click image for larger version

Name:	IMG_0204.jpeg
Views:	1233
Size:	66.1 KB
ID:	206705 ​ ​ ​ ​ ​ ​ ​ ​

                            Awesome work Racer686!!

                            Comment

                            • DCORSAIR
                              My R/C addiction started in 1984

                              • Jan 2017
                              • 1918
                              • Selma, Ca.
                              • Send PM

                              #2274
                              Originally posted by Aros
                              Can see them now...Looks good! Nicely done!

                              Took mine out tonight before the next round of rain came in. Flight was decent but the landing stunk. Bit of a cross but not too bad. The problem was the unmowed, unmaintained grass...Coupled with a badly placed divet and it spun around pretty violently. Broke the nose gear trailing strut (just that plastic brace piece, thankfully not the nose strut/gear itself) and snapped one of the pylons. Other than that she survived unscathed. I guess I am not aloud to have a model pristine for more than two minutes.


                              Here's the video...

                              I feel for you, just got my grey one all put together and almost ready for it's maiden flight this weekend and, I forgot that I didn't put the wing screws in yet, well you know what happens when you pick one of these jets up by the wing but without the wing screws installed, aaaaaaahhhhh, yes I dropped my brand spanking new grey one, big dent in the wing, dents in the fuselage on top of course where my big fat fingers tried to catch it, oh well, not prestine anymore..................

                              Comment

                              • vduniec
                                Hobby Squawk Pilot

                                • May 2016
                                • 314
                                • Send PM

                                #2275
                                That is really nice work on the weathering. Can you share your technique? I’m not fully happy with any of the methods I’ve tried thus far.

                                Originally posted by EA-6B Geek
                                Glad you guys aren't being OCD about Hornets, and with that here's my first attempt at weathering a foam jet. Tried to keep it subtle. I need to get some better sidewinders, stole these from the F-4. Gotta get out and fly it again soon!


                                Click image for larger version

Name:	image.jpg
Views:	1967
Size:	129.7 KB
ID:	206637Click image for larger version

Name:	image.jpg
Views:	1915
Size:	289.7 KB
ID:	206636

                                Comment

                                • gooniac33
                                  The Original Gooniac

                                  • Jun 2016
                                  • 1047
                                  • Send PM

                                  #2276
                                  Originally posted by Racer686
                                  Well, Part one is complete. The custom paint job with Callie Graphics. First let me say that this was my first paint job ever and had never touched an airbrush. I decided to go with the CF-18 Canada 150 Demonstration scheme. In 2017, Canada turned 150 yrs old and I was lucky enough to see this livery at 2 different Airshows that summer and it really grabbed me.

                                  I sealed the jet with Eze-Kote, then airbrushed the complete jet with Tamiya acrylics, painstakingly applied the graphics (not one single stitch of paint stripped in the process) . Many of these graphics are so thin and easily deformable while others like the large red leaf spanning the fuse and wings gave me an ulcer just thinking about applying. Finally, I covered it all with Eze-Kote again.

                                  I have installed a Jet Fan 90mm with HET 1680 motor that runs 8s. I replaced the Elevator servos with Hitec HS 5085MGs, Blue box is only running the gear and lights, with all other surfaces direct to the receiver.

                                  Part two is hooking up all the surfaces and dialing them in.

                                  P.S. A real loud shout out to Callie for her graphics. They are amazing and even a noob like myself can make them shine as they should.
                                  ​ ​ ​
                                  That looks amazing!! I know I sent you a burner for the F-35... would be great to see the tail of this one lit up as well!
                                  Check me out on youtube at https://www.youtube.com/user/gooniac33
                                  I am an RC addict and innovator that loves to share my knowledge with those that need help. Ask me anything via PM if you need help! Check out my Website here https://www.gooniac33.me/

                                  Comment

                                  • mavdriver
                                    Hobby Squawk Student Pilot

                                    • Dec 2016
                                    • 38
                                    • Hesperia , California
                                    • Send PM

                                    #2277
                                    Like gooniac i`m also trying to decide witch version i want grey or blue what to do ?

                                    Comment

                                    • uscanuck1xa
                                      Member

                                      • Jan 2018
                                      • 100
                                      • Memphis, TN
                                      • Send PM

                                      #2278
                                      Originally posted by Racer686
                                      Well, Part one is complete. The custom paint job with Callie Graphics. First let me say that this was my first paint job ever and had never touched an airbrush. I decided to go with the CF-18 Canada 150 Demonstration scheme. In 2017, Canada turned 150 yrs old and I was lucky enough to see this livery at 2 different Airshows that summer and it really grabbed me.

                                      I sealed the jet with Eze-Kote, then airbrushed the complete jet with Tamiya acrylics, painstakingly applied the graphics (not one single stitch of paint stripped in the process) . Many of these graphics are so thin and easily deformable while others like the large red leaf spanning the fuse and wings gave me an ulcer just thinking about applying. Finally, I covered it all with Eze-Kote again.

                                      I have installed a Jet Fan 90mm with HET 1680 motor that runs 8s. I replaced the Elevator servos with Hitec HS 5085MGs, Blue box is only running the gear and lights, with all other surfaces direct to the receiver.

                                      Part two is hooking up all the surfaces and dialing them in.

                                      P.S. A real loud shout out to Callie for her graphics. They are amazing and even a noob like myself can make them shine as they should.
                                      ​ ​ ​ Click image for larger version

Name:	IMG_0200.jpeg
Views:	1246
Size:	117.6 KB
ID:	206695Click image for larger version

Name:	IMG_0203.jpeg
Views:	1242
Size:	92.4 KB
ID:	206696Click image for larger version

Name:	IMG_0210.jpeg
Views:	1248
Size:	115.3 KB
ID:	206697Click image for larger version

Name:	IMG_0206.jpeg
Views:	1241
Size:	79.1 KB
ID:	206698Click image for larger version

Name:	IMG_0205.jpeg
Views:	1213
Size:	110.0 KB
ID:	206699Click image for larger version

Name:	IMG_0201.jpeg
Views:	1218
Size:	124.6 KB
ID:	206700Click image for larger version

Name:	IMG_0202.jpeg
Views:	1187
Size:	103.8 KB
ID:	206701Click image for larger version

Name:	IMG_0207.jpeg
Views:	1261
Size:	129.2 KB
ID:	206702Click image for larger version

Name:	IMG_0208.jpeg
Views:	1236
Size:	136.9 KB
ID:	206703Click image for larger version

Name:	IMG_0209.jpeg
Views:	1202
Size:	131.8 KB
ID:	206704Click image for larger version

Name:	IMG_0204.jpeg
Views:	1233
Size:	66.1 KB
ID:	206705 ​ ​ ​ ​ ​ ​ ​ ​
                                      Your paint job looks incredible. This is one of my favorite schemes and the one I've planned on using for this model. If you are a stickler for accuracy you may want to consider changing the roundels to the post 1965 version which has the modern maple leaf shape. Generally, I've seen it the other way where RC companies produce a Canadian model they put the modern roundel on an older plane. (i.e the Durafly Vampire). I tend to model Canadian planes so this tends to jump out at me. See below for the genereal evolution of the RCAF Roundel.

                                      Click image for larger version

Name:	84-roundel-evolution.jpg
Views:	1011
Size:	22.5 KB
ID:	206742
                                      Attached Files

                                      Comment

                                      • Imladris18
                                        Member

                                        • May 2013
                                        • 21
                                        • Send PM

                                        #2279
                                        Originally posted by EA-6B Geek
                                        Glad you guys aren't being OCD about Hornets, and with that here's my first attempt at weathering a foam jet. Tried to keep it subtle. I need to get some better sidewinders, stole these from the F-4. Gotta get out and fly it again soon!


                                        Click image for larger version  Name:	image.jpg Views:	114 Size:	129.7 KB ID:	206637Click image for larger version  Name:	image.jpg Views:	122 Size:	289.7 KB ID:	206636
                                        Well, some of us are lol. VMFA-232 used to have A models, so you're good in my book

                                        I just think it's mildly amusing, for instance, the lengths some people will go to add scale details to a paint scheme that was never even used on the variant of the model it's going on. But that's just me personally. Different things are important to different people.

                                        I need to attempt weathering one of these days to squeeze a little bit more realism out of these models. You did a really great job.

                                        Comment

                                        • Elbee
                                          Be humble...be approachable...and be credible.

                                          • Feb 2018
                                          • 4820
                                          • Wichita, Kansas
                                          • Send PM

                                          #2280
                                          I build to what I see and remember. I have seen the Blues several times, and always thought the F/A-18 was a great looking airframe, though I never really differentiated between models with the exception of Legacy vs Super Hornets vs Growlers. When I build my "C" it will be as I see it in my mind's eye and include features that are relevant to that criteria. If adding Sidewinders to a naked wing tip, or mounting wing/center-line fuel tanks presents the model better than without on this airframe to you, then why not, IMHO, even though the actual might not ever carry these. To each their own I think and a bit-o-personalizing makes our models our own and I like that. Nothing more fun than adding or removing items to or from an airframe to give a different look. Bravo Zulu to those who take a OEM kit and make it look better or more realistic even at the expense of complete authenticity. This is a hobby after all and not a cheap one. Do things that give you the 'old warm and fuzzy' when someone compliments your work, add details no one might ever see just because you know its there, add a bit-o-whimsy or patriotism with no regard to realism if that is what makes you smile. Life's too short...I'm just sayin'. Best, LB
                                          "I am having an extraordinary ordinary life."
                                          ~Lucky B*st*rd~

                                          "Find satisfaction in the process rather than an outcome."
                                          ~Anonymous~

                                          AMA#116446

                                          Comment

                                          Working...