Callie Graphics

Official Black Horse 2350mm Gilmore Red Lion

Collapse
X
Collapse
First Prev Next Last
 
  • Time
  • Show
Clear All
new posts
  • RCBobP
    Member

    • Feb 2017
    • 89
    • Send PM

    #361
    Got myself a custom pilot.

    Attached Files

    Comment

    • DaleD
      Member

      • May 2020
      • 57
      • Send PM

      #362
      Originally posted by RCBobP
      Got myself a custom pilot.
      Pretty Kool! Share the link please.

      Thanks

      DaleD

      Comment

      • RCBobP
        Member

        • Feb 2017
        • 89
        • Send PM

        #363
        I had the original figure from Slimline Products. www.slimlineproducts.com/product-p/7011.htm I have several of their pilot heads. I have a vendor I use for my business that does some 3D printing, and he was able to take the figure I had and enlarge it to look more appropriate in the cockpit. I don't know if Slimline is still around, as I've seen various threads on other websites to that effect. I hope I'm wrong.

        Comment

        • RCBobP
          Member

          • Feb 2017
          • 89
          • Send PM

          #364
          Next question - going to install the horizontal stab. I removed the covering, and see this piece of wood at the tail end of the fuselage. Do I remove this piece to slide the stab in, or does this piece stay in. The dimension of the stab indicates that this piece of wood should be removed, but I don't like cutting out anything unless I'm 110% sure.

          Thanks.

          Comment

          • Twowingtj
            If It Flys, I'll Try It

            • Dec 2016
            • 1907
            • Southerntier, NY
            • Send PM

            #365
            RCBobP The slot for the horizontal stab should be open at the tail, so the stab slides in from the rear.

            Click image for larger version

Name:	Lion Tail_1.jpg
Views:	924
Size:	85.1 KB
ID:	314639

            Comment

            • RCBobP
              Member

              • Feb 2017
              • 89
              • Send PM

              #366
              Thanks. I did see that photo on other posts, but there was no mention of cutting out the wood. As I said I always want to confirm before I do real damage!

              Comment

              • chines123
                Member

                • May 2021
                • 7
                • Send PM

                #367
                What is everyone's thought on the friction connection (bolts) to hold the wings on? Seems like the aluminum U shape bar that slides into the fuse is a bad idea. Has anyone modified that yet? Had a few of the Top Gun guys in my club show real concern with it. Seems like an easy fix. Might come up with something this week and post pictures later.

                Comment

                • Twowingtj
                  If It Flys, I'll Try It

                  • Dec 2016
                  • 1907
                  • Southerntier, NY
                  • Send PM

                  #368
                  As long as the two bolts are tightened down, it would be difficult to try to pull a wing loose. The big wing tube keep the wing pretty rigid, so it shouldn't move against the mount hardware.

                  Comment

                  • RCBobP
                    Member

                    • Feb 2017
                    • 89
                    • Send PM

                    #369
                    You could solder a piece of metal across the tips of the opening, which would keep the wings from sliding out. But then you'd have to remove the bolts every time, and they are not easily accessible. I might replace the washer with a bonded washer, so that when I tighten the bolt the rubber o-ring will compress. That would take out some of the risk of the bolts vibrating loose.

                    Comment

                    • 406PIlot
                      Member

                      • Nov 2020
                      • 381
                      • Billings, MT
                      • Send PM

                      #370
                      I had this same concern with the wing connections when I first got mine. I can say now after have 30+ flights on the Gilmore that the U connector from the wing and bolt tension system works just fine. I believe they could of had a better design, but I have not seen any problems with it to date.

                      Comment

                      • DaleD
                        Member

                        • May 2020
                        • 57
                        • Send PM

                        #371
                        Originally posted by 406PIlot
                        I had this same concern with the wing connections when I first got mine. I can say now after have 30+ flights on the Gilmore that the U connector from the wing and bolt tension system works just fine. I believe they could of had a better design, but I have not seen any problems with it to date.
                        WOW!!!!
                        30+ Flights means someone is enjoying their Gilmore.

                        I was wondering just this morning how things appear to have gone quiet and that it maybe an indication of more flying than building.

                        Please feel free to wet our appetites with pictures or flight videos.

                        DaleD

                        Comment

                        • 406PIlot
                          Member

                          • Nov 2020
                          • 381
                          • Billings, MT
                          • Send PM

                          #372
                          Yes i've been getting out flying as much as possible! I love my Gilmore. It's actually on a trailer with some friends right now heading to a flyin that i'll be making my way to tomorrow if all goes well. That plane gets so much love from people at my club. It's just fantastic.


                          Click image for larger version

Name:	image_72488.jpg
Views:	847
Size:	235.3 KB
ID:	316036


                          Click image for larger version  Name:	IMG_20210527_152410299.jpg Views:	0 Size:	215.7 KB ID:	316037

                          Comment

                          • Twowingtj
                            If It Flys, I'll Try It

                            • Dec 2016
                            • 1907
                            • Southerntier, NY
                            • Send PM

                            #373
                            Gilmore air time, that's what it all about. Have fun at the fly in.

                            Comment

                            • RCBobP
                              Member

                              • Feb 2017
                              • 89
                              • Send PM

                              #374
                              Did you mount the wheel pants and they didn't hold up? Or some other reason you're going commando?

                              Comment

                              • 406PIlot
                                Member

                                • Nov 2020
                                • 381
                                • Billings, MT
                                • Send PM

                                #375
                                Originally posted by RCBobP
                                Did you mount the wheel pants and they didn't hold up? Or some other reason you're going commando?
                                The wheel pants cracked and split on my very first landing on paved runway. I took them off. In the process of repairing then to go back on. Just haven't gotten that far. It fly's a-ok without them 😉

                                Comment

                                • djmoose
                                  Member

                                  • May 2020
                                  • 150
                                  • Cleveland, OH
                                  • Send PM

                                  #376
                                  Took some time off...back at it!
                                  Click image for larger version  Name:	gilmore_radial.PNG Views:	0 Size:	572.0 KB ID:	316307

                                  Comment

                                  • Twowingtj
                                    If It Flys, I'll Try It

                                    • Dec 2016
                                    • 1907
                                    • Southerntier, NY
                                    • Send PM

                                    #377
                                    djmoose Good to see you back at it. Dummy engine looks good.

                                    Comment

                                    • djmoose
                                      Member

                                      • May 2020
                                      • 150
                                      • Cleveland, OH
                                      • Send PM

                                      #378
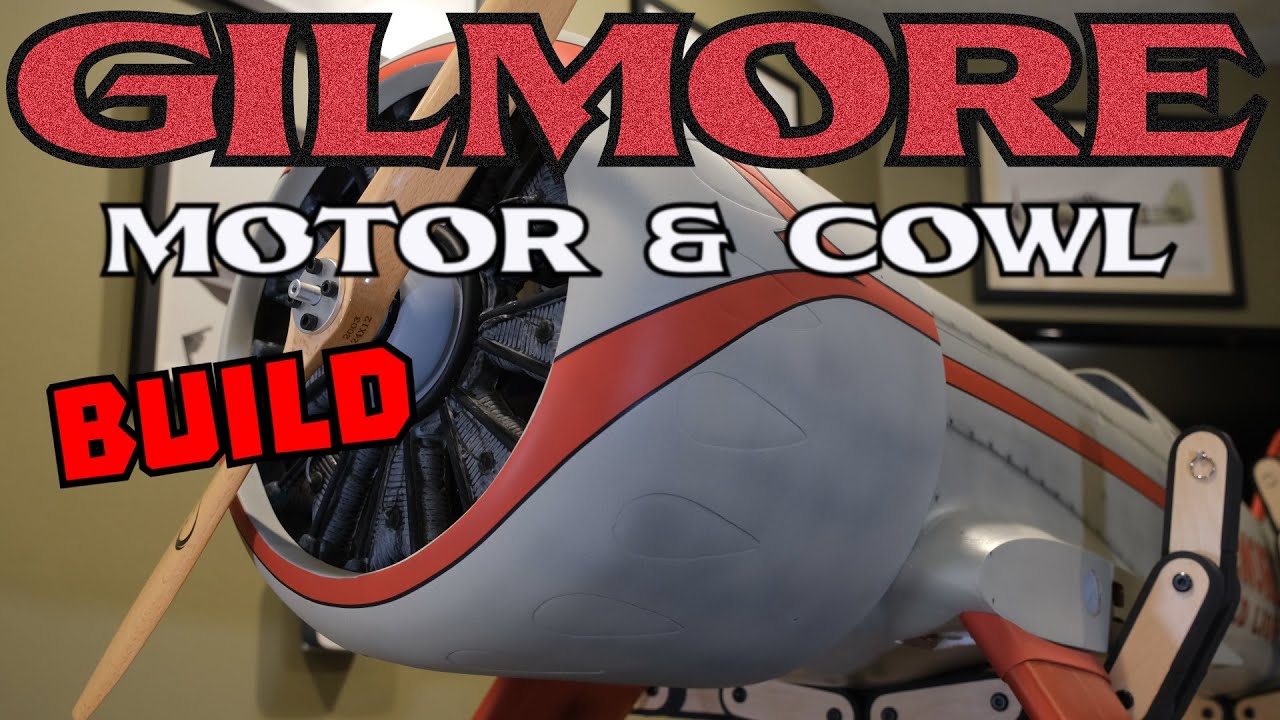
                                      Mounting the Dualsky GA6000.9 motor, painting the false radial engine, and mounting the cowl is what's in this next episode of my 92" Black Horse Gilmore ARF from MotionRC. Enjoy!


                                      "Pratt & Whitney supplied the powerplants, Wasp Jr. engines with 985 cubic inches of displacement. The factory beefed up and supercharged the engines with high-compression pistons and individual stacks for less back pressure. In 1932, the manufacturer rated them as follows: 525 horsepower at 2,200 revolutions per minute and 550 horsepower at 2,300 RPM when racing." - Wedell-Williams Air Service page 34

                                      "The engine cowl for the Model 44s was a NACA-type provided by Hill Aircraft Streamliners. The full pressure cowl created a venturi effect at the trailing edge for the exhaust to exit the stacks. Turner's cowl tapered slightly more inward at the trailing edge than the other two. " - Wedell-Williams Air Service page 35

                                      Click image for larger version

Name:	snap4.jpg
Views:	812
Size:	73.6 KB
ID:	316405Click image for larger version

Name:	snap2.jpg
Views:	765
Size:	90.5 KB
ID:	316406Click image for larger version

Name:	snap1.jpg
Views:	738
Size:	69.6 KB
ID:	316407Click image for larger version

Name:	snap5.jpg
Views:	746
Size:	87.0 KB
ID:	316409Click image for larger version

Name:	snap3.jpg
Views:	731
Size:	111.3 KB
ID:	316410Click image for larger version

Name:	snap6.jpg
Views:	739
Size:	74.5 KB
ID:	316408

                                      Comment

                                      • Twowingtj
                                        If It Flys, I'll Try It

                                        • Dec 2016
                                        • 1907
                                        • Southerntier, NY
                                        • Send PM

                                        #379
                                        Some of us have begun to see some splitting at the seam in the wheel pants. Luckily, my split had just begun for about 2" at the aft end of one wheel opening.

                                        Unlike the typical butt joint fiberglass wheel pants, these have a slight overlap joint. While it's a good idea, it appears that the adhesive may not be up to the task.

                                        To repair and prevent further cracking, the following method was used.
                                        I took some 2" self-adhesive drywall mesh tape, cut about 6" lengths and cut those to 1" wide strips. This material was chosen because #1 it was on hand, and #2 because it is strong, light, and sticks by itself.

                                        It was then stuck down over the entire seam area. Then some 30 minute epoxy was mixed and brushed on using disposable acid brushes. Should do the trick.

                                        Click image for larger version  Name:	WPFix1.jpg Views:	0 Size:	63.7 KB ID:	317516Click image for larger version  Name:	WPFix2.jpg Views:	0 Size:	123.6 KB ID:	317517

                                        Comment

                                        • DaleD
                                          Member

                                          • May 2020
                                          • 57
                                          • Send PM

                                          #380
                                          Originally posted by Twowingtj
                                          Some of us have begun to see some splitting at the seam in the wheel pants. Luckily, my split had just begun for about 2" at the aft end of one wheel opening.

                                          Unlike the typical butt joint fiberglass wheel pants, these have a slight overlap joint. While it's a good idea, it appears that the adhesive may not be up to the task.

                                          To repair and prevent further cracking, the following method was used.
                                          I took some 2" self-adhesive drywall mesh tape, cut about 6" lengths and cut those to 1" wide strips. This material was chosen because #1 it was on hand, and #2 because it is strong, light, and sticks by itself.

                                          It was then stuck down over the entire seam area. Then some 30 minute epoxy was mixed and brushed on using disposable acid brushes. Should do the trick.

                                          Click image for larger version Name:	WPFix1.jpg Views:	0 Size:	63.7 KB ID:	317516Click image for larger version Name:	WPFix2.jpg Views:	0 Size:	123.6 KB ID:	317517
                                          Thanks for the heads up and repair tip.

                                          DaleD

                                          Comment

                                          Working...