


MIB66 , if you havent already, make sure your cg is 65mm or less. Some are flying at 55mm ,60 mm,65mm. It seems that no one flying beyond 65mm(i'm 60mm and love the way it flys). The plane is a widowmaker if tail heavy. Also give it 2-3 mm up elevator(i gave mine 1mm and had to give it most of my available trim. I ended up at 3mm. Really sucks to have to madly click trim on a maiden. Go easy on the elevator on take off to keep it from leaping into the air. Full flaps and bring it under a little power and its very easy to land. If I come in to fast it has a tendency to bounce. Hope this helps.
-
Still flying P.15, avanti(#2), mig 21, yak 130 70mm(#2), f35, f9f panther, a10 64mm, F8 crusader/ PA ultimate amr /HK skipper, durafly dh vampire, p 51,spit mk24, corsair, flybeam/ BH f86 50mm, deltawing 50mm/ HH su 26 mm,umx pitts,umx sbach, blade nano cp s,blade 450x, inductrix 200, inductrix pro, umx yak 54,umx f27 fpv/ electrifly 4s L39/ flyzone beaver/ volantix asw 28, /dynam B26
RIP.. roc hobby waco,strega #2(you will be missed), Fw 90mm eurofighter. -
That and you can run an 1/8" shim in the back of the tail so you won't have to use up the trim and the elevator flies more flatComment
-
Working on my B-26. The inner flaps on mine do not work. I plugged the outer ones directly into my receiver and they work. Unfortunately they used some kind of glue to keep all the y connections together and I cannot pin down the problem. Any suggestions on how to get the connectors apart without destroying them?Comment
-
I ended up having to cut them out and replacing them on mine. Not a fan of the glueComment
-
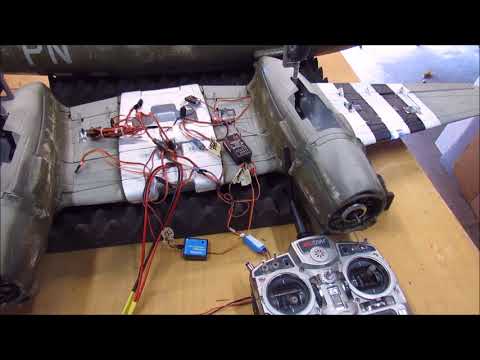
The first pic shows the nav. and L.Ls on and gear extended. I can turn the L.L.s off and on with the Aux. 2 switch. Still trying to get it to happen automatically. The second has just the wiring needed to get the lights to work. Will post again as soon as I figure out the problem.Originally posted by Bigrc2 View PostComment
-
Mix aux 2 with gear after you reverse aux 2. Freewing retracts work opposite everyone else, hence their sequencer works opposite what your trying to do.
i had same setup except futaba.Comment
-
Thanks, Ryan, will do. First job in the am. When it works, I try to shoot a short vid. In the meanwhile, here's one more pic calling out the various wiring.Originally posted by Ryan@Motion/ryramZ View PostComment
-
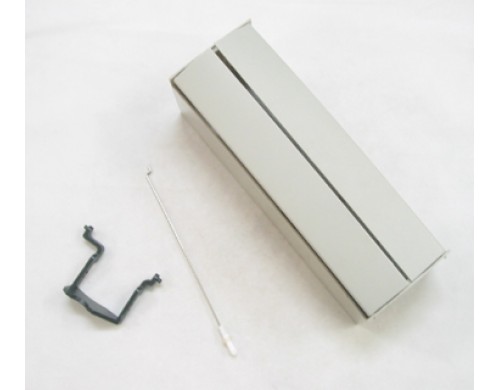
Would not the front landing gear assembly of the FMS 1400 T28 work as a bomb bay door assembly?
Comment
-
I did exactly that very thing with that very same assembly on my 1450mm FMS B-25 and it works great!!!Brandon MoonComment
-
Bob has used those before. Too small. The ordinance barely fits through.Don't just fly--WREAK HAVOC!!!Comment
-
Adam is right. My first FMS B-25 had this as a bomb bay set-up. It really is too small - at least for my bombs of choice "Adam Bomb".Originally posted by quitcherbitchen View Post
BobComment
-
It is a video I shot showing the gear up and the landing light out and the gear extended and the landing light onComment
-
I will have to copy this, Brent.:)
BobComment
-
Good luck Bob. Hope the diagrams and vid helped. Any problems just let me know. One additional thing, you'll need to add a "y" to connect the nose gear retract to the mains.
BrentComment
-
Will do, Brent! I am still hoping to get down there on the 16th.Originally posted by Bigrc2 View Post
BobComment
-
It would be great if you could. If the turnout is any where as good as the last event, it should be terrific!Originally posted by borntoolate View PostComment
-
Well after many more hours of extra work the JM-1 ( formerly B-26) is finally done. When the temps out here go down about 20 degrees I'll take it out and maiden it. I have never had so many things to correct on a foam plane before. Out of the box this plane was a nightmare with ill fitting panels, cowlings and hatches. Had to replace those drag slick tires, both rudder and elevator servos.
I used mineral spirits and absorbent paper towels to take the paint off. I just wet the towel, wipe it on the surface and let it set about 30 seconds then go back over the area and wipe the paint off. It takes it down to white foam. After removing all the paint I wiped the area down with rubbing alcohol (70%). The cleaned surfaces were then primed with Fusion Colormaster white flat primer. Final color was Cadmium Yellow Light Hue in a spray can. Ordered from Dick Blicks Art supply.
Prior to the planes arrival I had already decided on the Marine JM-1 so I had Callie Graphics do up a set of decals for me. She is in process of doing up some Curtis Electric prop decals. The JM-1 was used as an airborne target tug.
Removed to fuselage gun blisters, top gun turret, rear guns, and the dome just behind the cockpit.
Taking down the raised ill fitting seams will leave some fuzzies. They can be removed with some real fine sandpaper.Comment
-
Looking forward to some pics :Cool:Originally posted by Mike O. View Post
Oh.......and welcome to the Squawk
In case you would like a Navy look. ;)
Warbird Charlie
HSD Skyraider FlightLine OV-10 FMS 1400: P-40B, P-51, F4U, F6F, T-28, P-40E, Pitts, 1700 F4U & F7F, FOX glider Freewing A-6, T-33, P-51 Dynam ME-262, Waco TF Giant P-47; ESM F7F-3 LX PBJ-1 EFL CZ T-28, C-150, 1500 P-51 & FW-190Comment
-
Thought about the JM-2 version but I can see the bloody plane better in yellow. I'm hoping that the quality of the P-61 Dynam is planning to release will be of a better quality than this B-26. I hate swearing at the project being built...................Comment


Comment