


Nice write up, vdanger! Beautiful paint scheme. Waiting for mine to arrive. Since they say it’s a “scale” version of the Avanti S, I was wondering if it too would benefit from a 3D printed front strut support brace?
-
-
I concur vdanger! Congratulations!
One thing I noticed during construction was that the tail part that gets glued on is not perfectly aligned with the main wing saddle all by itself. Just gluing and sliding it in doesn't guarantee that the horizontal stab and main wing are aligned.
Personally, I bolt on the wings and the horizontal stab before gluing that tail on. That way I can visually align the horizontal stab to the wing while the glue sets. It works for me. Zero trim since day one.
Today I did some flight testing. I flew with drop tanks for the first time. I also flew with and without the auxiliary air intake covered. It did fly with the aux inlet covered. And it went fast too. But, takeoff was labored. Acceleration was just not what I wanted even with the light weight Admiral 5000. To compare, I flew a second flight without the cover but with a heavier Turnigy HD 5000. The difference was immediately apparent. There was much more acceleration and responsiveness with the inlet open. The sound was better too.
Result: I am taking Alpha's advice and leaving the inlet uncovered. I will just get a spare impeller, which I should have anyway.
I have film of both takeoffs in comparison. I will upload that when able.
The drop tanks had a negligible effect. They might have slowed her down a little. I probably will not fly with them.Meridian Aeromodelers, Meridian MSComment
-
Finally installing the cockpit.Comment
-
Thanks for the tips, seaviper!Comment
-
Thanks for the report seaviper. I’ll put a stainless steel 304 mesh screen to help with debris ingestion as I fly off an old landfill.Comment
-
-
Great reports, Vdanger and Seaviper, thanks for sharing! I think I'm going to put your picture on The Wall here at the factory. Keep the videos and other experiences coming, everyone.
It's nice to see the cockpit set out in the wild, too!Live Q&A every Tuesday and Friday at 9pm EST on my Twitch Livestream
Live chat with me and other RC Nuts on my Discord
Camp my Instagram @Alpha.MakesComment
-
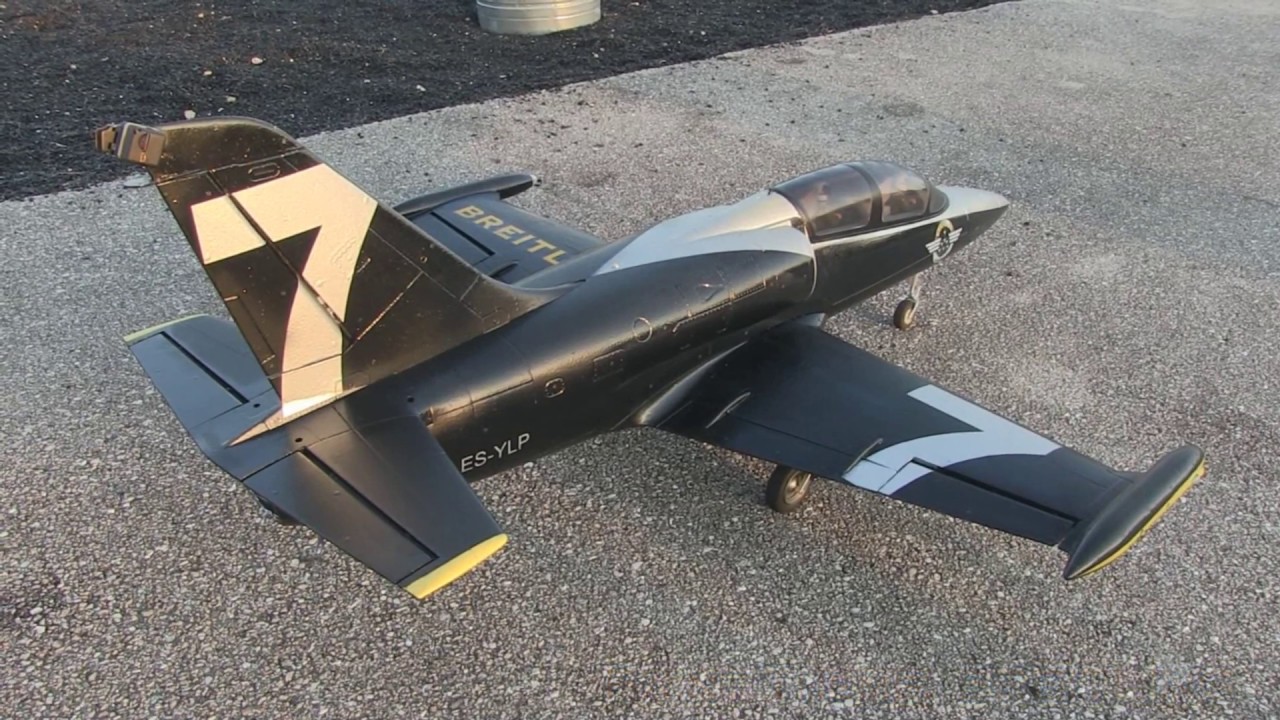
Morning flight with my baby BreitlingComment
-
Adding these here for the 3DPUP detailing crowd. My website guys are on their weekend so it will be a couple days before we can put these on the website.
These are .STL files I drew up that depict the small fin antennas on the L-39. There are about six on the fuselage at various locations. The file prints in about 2 minutes at 0.2mm resolution.
Also included is the dorsal aerial as seen in my reference photos from flying-wing.com.
The antennas can be seen along the upper fuselage. A T-45 dorsal LED lens works well, also, for those interested. Included is also the "Canopy Handle" for each of the canopies. The file is included but I haven't installed it yet on this pictured L-39.
Attached FilesLive Q&A every Tuesday and Friday at 9pm EST on my Twitch Livestream
Live chat with me and other RC Nuts on my Discord
Camp my Instagram @Alpha.MakesComment
-
-
Man I have to get a printer!
Here is the video showing takeoff and acceleration performance testing of the Freewing 80mm L-39 with the auxiliary intake covered and uncovered.
Flight 1 Intake Covered: Admiral 6S 5000 732g
Flight 2 Intake Open: Turnigy HD 6S 5000 838g
Conditions: day old cut grass, light and variable wind,temp mid 70's F
Result: The aircraft took off in about the same distance with the cover on as with the cover off. However, takeoff speed was low and acceleration was unacceptable with the cover on.
Actually, right after wheels up on flight 1, I almost bailed out and landed because she just wasn't getting out of her own way with that cover in place. I did force myself to do one pass while trying to keep my speed up.
I was surprised that the effect of the cover was as noticeable as it was. As per Alpha's advice, I will not be using the cover. But it was fun testing anyway.
Camera: Mrs. Seaviper ("Quilty")
 Meridian Aeromodelers, Meridian MS
Comment
-
Got 4 more flights on mine this morning with no issues so far, a friend of mine wanted to see it fly before he bought one, I sold him on it for sure. Here it is with the Yak 130, you talk about two totally different flyers, one is a flying brick and the other a feather weight......LOLComment
-
Anyone else break the LG doors? I had 2 great flights today and when I went to put plane in car I noticed both doors cracked off at exactly the same spots at the bottom screw hole. Its wierd because none of my landings were hard and no bounce. I fly off geotex runway and wondering if the fabric caught the doors. Im in fusion360 now getting ready to print a set of doors.Comment
-
One of my main gear doors cracked off after landing in tough grass just before the runway. The front door was not damaged but unfortunately the hinge holders in the fuselage. Not going to buy a whole fuse for an operational gear door.Comment
-
I had that happen on my old Stinger 90. The screw was simply too tight and the vibration caused the plastic around the screw to crack and let loose. After replacement, I put that screw on very loosely and used FoamTac on the screw thread so it wouldn't back out. It never was a problem after that.Comment
-
Just checked my doors.. we fly off a rough surface and no problems yet. But they look pretty thin. Wouldn't take much to break them off. If mine break, I will probably just leave the off.Meridian Aeromodelers, Meridian MSComment
-
Primed and ready for paint.
Comment
-
Not to toot my own horn, but that's a perfect comparison between Overdone and Done Right. The 90mm Yak-130 wasn't my project, and it shows compared to my L-39. Yak is still a fun flyer on 8s, though.
RCJetDude, what livery did you decide on? Are you doing an opening cockpit, too?
Live Q&A every Tuesday and Friday at 9pm EST on my Twitch Livestream
Live chat with me and other RC Nuts on my Discord
Camp my Instagram @Alpha.MakesComment
-
Going with the Black Diamonds and keeping it simple for the moment.
Comment


Comment